How to Add the Spin the Wheel Feature to Your WordPress Website

There is no end to the ways websites use to engage their visitors and keep them coming for more, even more so to convert a casual visitor into a paying registered user. Basically, user experience is key. If your visitors feel engaged, if they feel like more than simple recipients of your content – valued as it is – they will appreciate the experience more.
Adding interactive features (such as interactive images, for instance) to your website is a great way of engaging your users. Gamifying the experience is just another step in the same direction: not only is your website interactive, it’s fun! But a game can have a utility for your visitors other than simply being fun. You can use a feature such as a spinning wheel of fortune to offer your visitors special deals in an interactive setting: if you offer a discount as a prize, for instance, it will feel like value gained, instead of value lost.
Setting up a spin the wheel feature is what this tutorial is all about. But before we get down to the brass tacks of the how to, let us discuss the spin the wheel feature in broader terms.
A spin the wheel, or wheel of fortune, is a simulated game of chance. A website’s visitor can click it and win a prize. What separates this particular feature from a random number generator, which you could also use for the same effect, is the gamification of random generated results: the visitors get a feeling of interactivity with the animated wheel, instead of just looking at a number popping up on their screen.
This also lends more credibility to your game of chance – your visitors will perceive an animated wheel as something less likely to be “rigged” than just a randomly generated number (such as a lottery ticket) even though, mathematically, they are the same. If it looks like a physical wheel, it will also feel more natural to the users.
Simply put, a spin the wheel feature can improve the impression your visitors have of your website – your website’s UX. How does it do that?
Firstly, it is a fun, interactive feature. It gives your visitors something to do on your website, rather than simply browsing or reading. This leads to more engagement and more time spent on your website overall.
Secondly, they offer you a chance to gain more paying users by offering them special deals or discounts. Typically, an unpaying user will need some persuasion before deciding to spend any money on your products or your content, however deserving they may be. You can use a wheel of fortune feature to offer free samples of a new product, free issues of a magazine, a free period of subscription to a service, or a discount, or indeed any other prize which comes to mind.
Importantly, you control the odds: though all slices of an animated wheel may appear equally wide, the actual likelihood of any outcome is up to you. Use this feature wisely, though: if “no prize” or “better luck next time” results appear more often than could be reasonably expected, you risk angering and alienating your visitors with what is supposed to be a fun feature designed to bring more traffic and more paying customers your way.
Thirdly, they are a great way of gathering data about your users. In order to avoid scamming, such as people spinning multiple times until they get the prize they like, you will need your visitors to register by filling out a form. This way, you can learn a great deal about where your users are from, what sort of content or products they are interested in, what kinds of deals they are most likely to accept, and so on. You can also get your hands on their email addresses, which you can use – with their prior consent, we feel it shouldn’t really be said – for direct email marketing.
Useful though they might be, wheels of fortune are perhaps not suitable for all imaginable websites. In some cases, spinning wheels might send entirely the wrong message. We have a hard time seeing them as a big hit with bank or loan company websites, or those of law firms and medical practices, or indeed any business which depend on projecting an image of solidity and soundness – no room for leaving things to chance there.
Conversely, this feature is workable for virtually any store willing to offer a discount or a special deal to a number of website visitors, and the same goes for subscription services, periodicals, and similar.
So, if you feel your website may benefit from a spin the wheel feature, read on. We will explain how to install one step by step.
Qode Themes: Top Picks
View Collection


We will be using a plugin, WP Optin Wheel, to add our spin the wheel feature. In order to use this plugin, you will need a Mailchimp account and an API key, which is free, and simple to obtain, as you will shortly see.
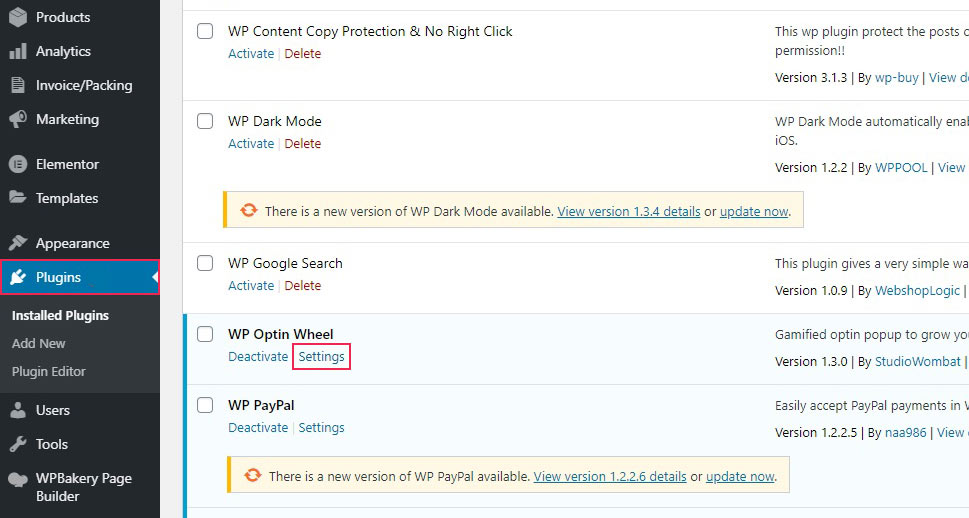
Once you have installed and activated the plugin, you will need to configure it. Navigate to Installed Plugins on your WordPress dashboard, find the WP Optin Wheel plugin on the list, and click on Settings.
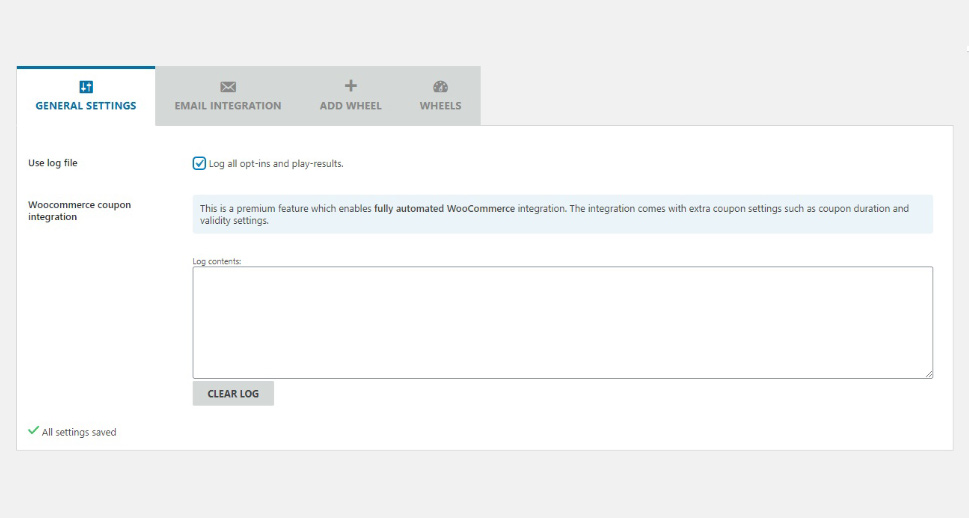
In the General Settings tab, check Use log file to log all users and the results of their spins. You can also see that the plugin supports WooCommerce coupon integration, but not in the free version we are using.
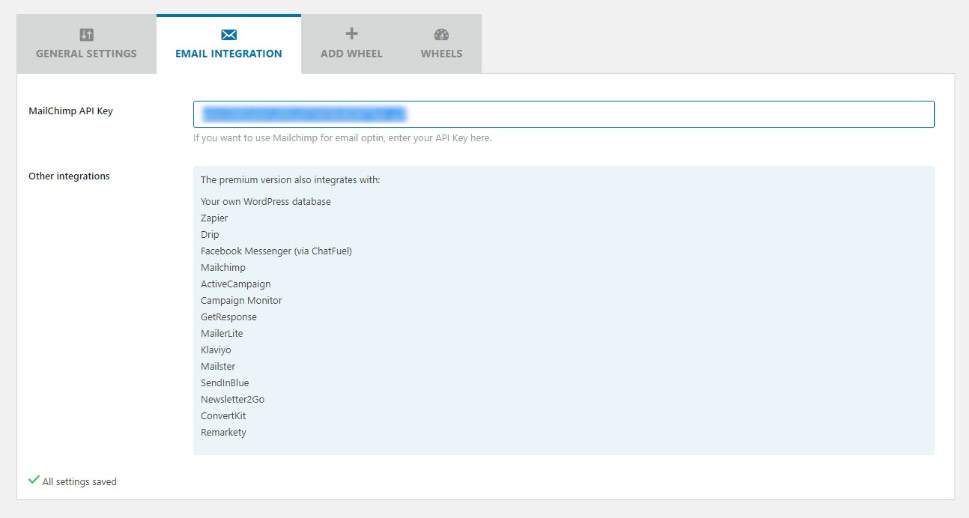
In the Email Integration tab, you can integrate your wheels with Mailchimp in the free version, and other email and messaging services and your own WordPress database with the premium version. You need a Mailchimp API Key in order to use the plugin.
You can get one for free by signing up to Mailchimp. Once you have submitted a valid email address, selected a user name and a password, and clicked Sign Up, a confirmation email will be sent to the submitted address.

You will then need to activate your account by following the link from the email. Simply click I’m Not A Robot.

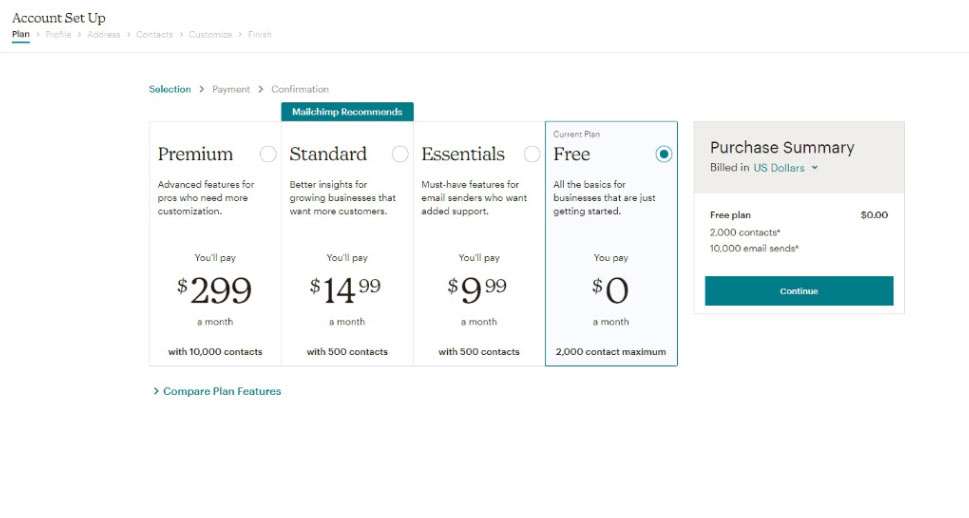
Next, you need to choose your pricing plan. We will create a Free plan for this demonstration.
You will need to fully configure your profile. Simply fill out all the forms with your current and valid data.

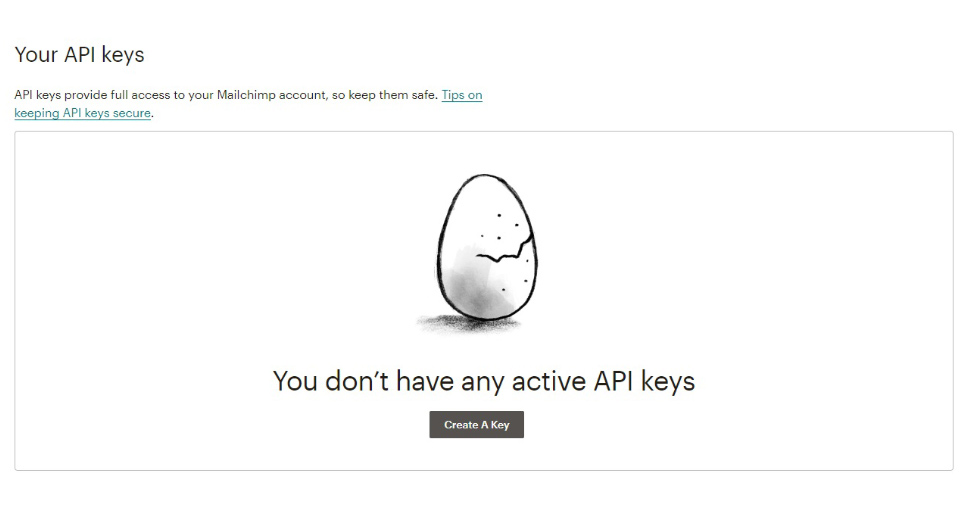
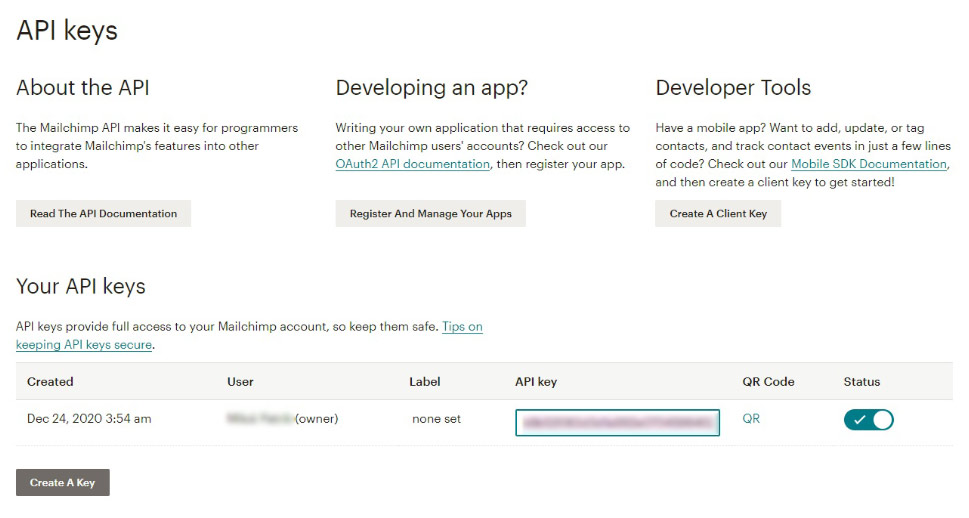
Next, while logged on, go to your API Keys screen. There you will need to click the Create A Key button.
You will have then generated a key. Simply copy it.
Going back to your plugin configuration screen, paste the API key into the field in the Email Integration tab.
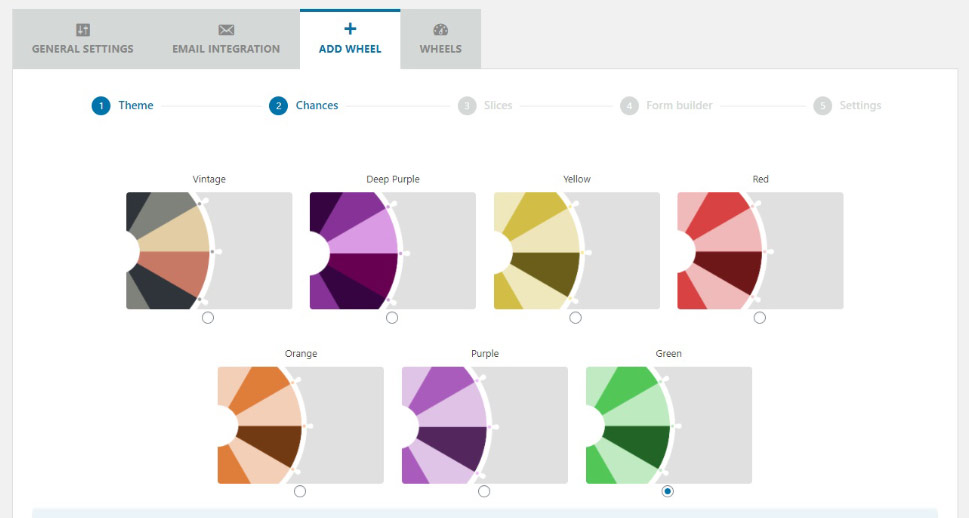
To create a wheel, you, unsurprisingly, need the Add Wheel tab. There, you will need to select a theme first.
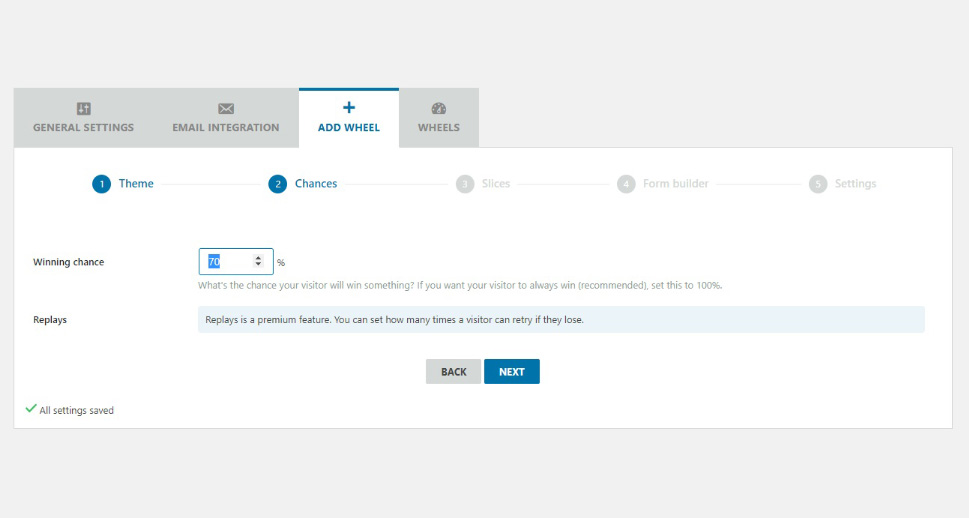
Next, there is the win percentage. You can set it up as high or as low as you like, or leave it at the default value of 70%.
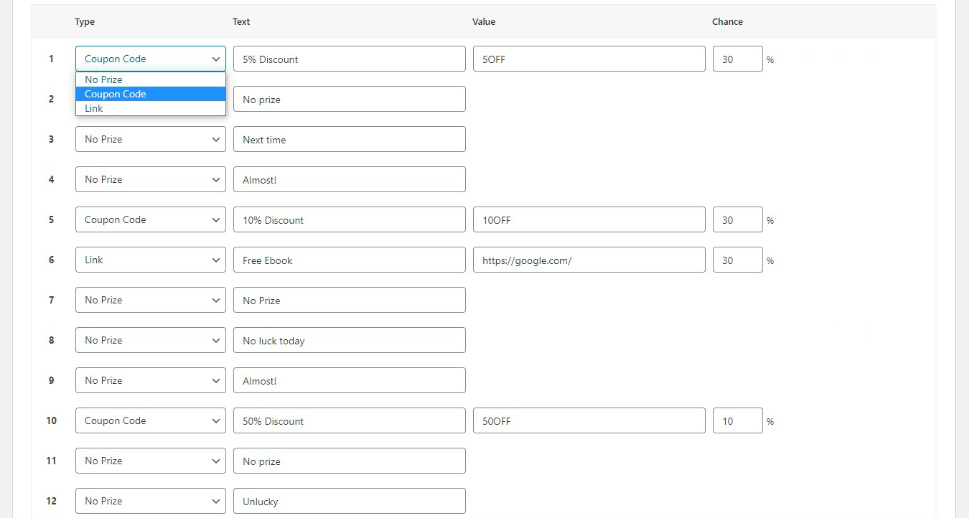
Your wheel will have 12 slices, each of which can be a No Prize, Coupon Code, or Link slice. If you have anything less than 100% in your Winning chance field on the previous screen, that will be the likelihood a winning result (Coupon Code or Link) will be granted. The difference up to 100% will mean the wheel will stop on a No Prize field.
You can also customize the exact Text of each slice, and the Value and Chance of each winning slice, making sure the win chance totals 100%. As you can see, while the slices appear to the user to have the same width, the actual likelihood of your dishing out too many discounts or more coupons than it pays to redeem is negligible: you control the odds.
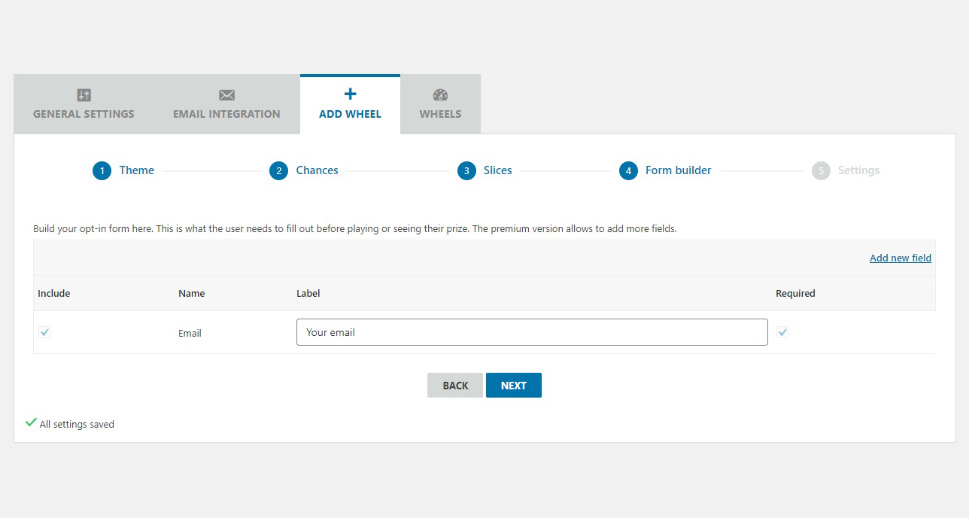
Next up is the form. This form serves two purposes: to make sure nobody spins the wheel more than once, and to gather your visitor data in the log. This can be as simple as an email field, or as complex as you like it. Just bear in mind that visitors tend to be put off by forms which take a long time to fill out.
Finally, you will arrive at the settings screen. This is subdivided into several sections.
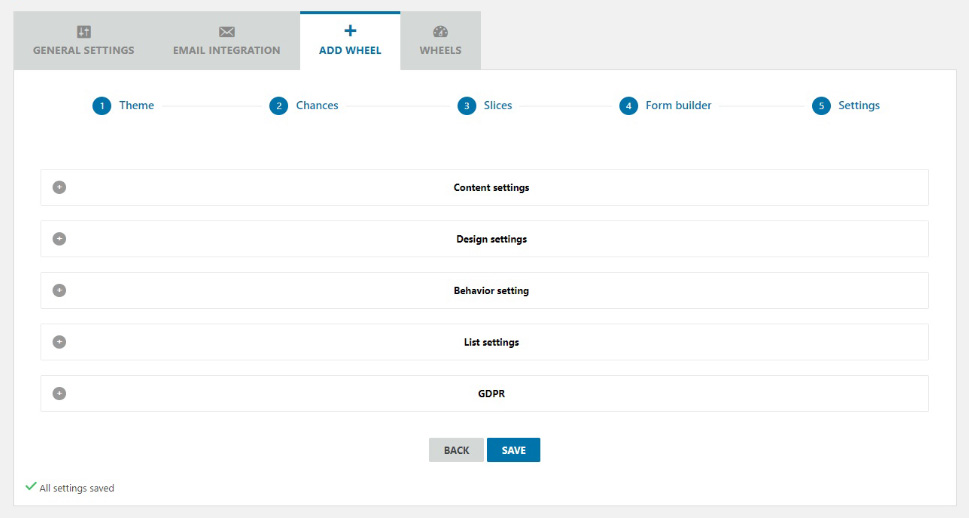
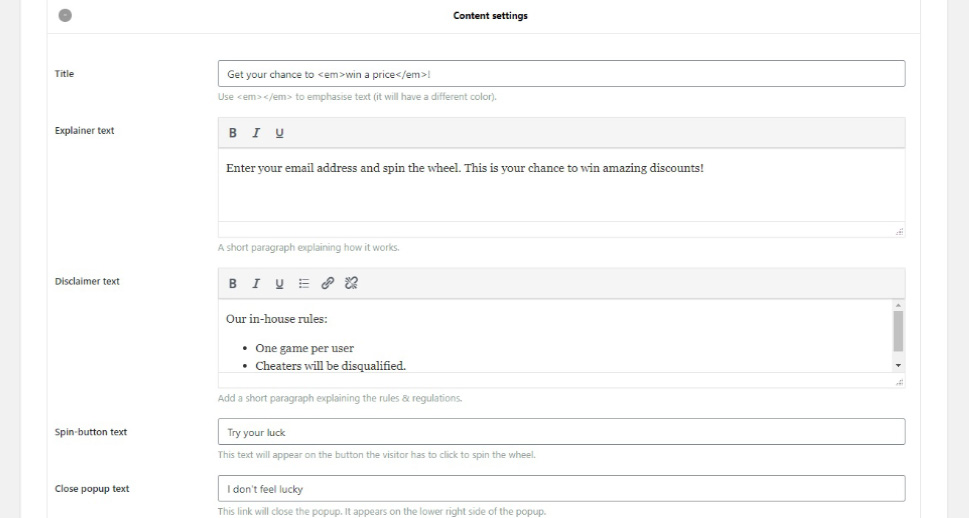
In the Content settings section, you can configure the text which your visitors see, apart from the text on the slices: title, disclaimers, button text, winning text, and so on.
In the Design settings you can select the Background pattern for your wheel, with most options reserved for the premium version of the plugin, while the Behavior settings section governs when the wheel appears and reappears once a user has spun it.
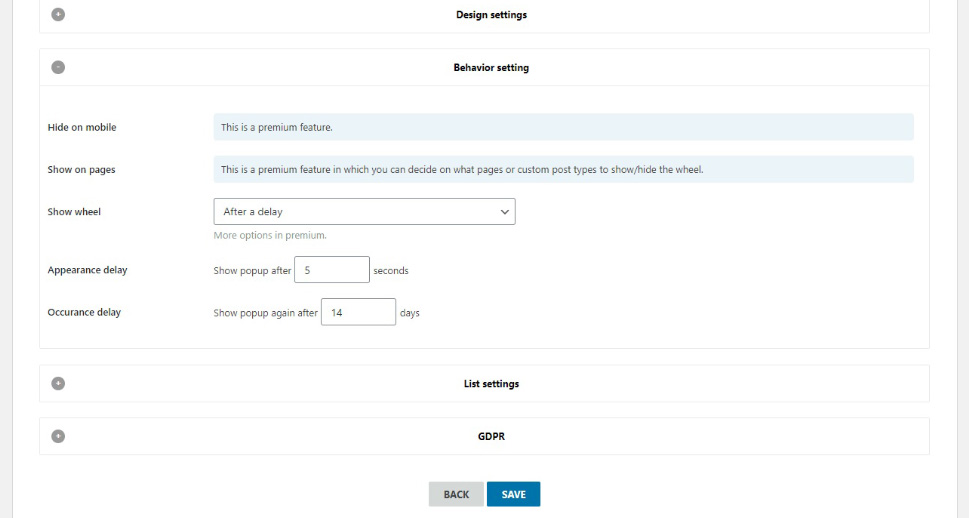
The List settings are used to subscribe the users who choose to submit their addresses to a mailing list, while GDPR settings govern checkbox rules, if there are any. You then need to SAVE your wheel.
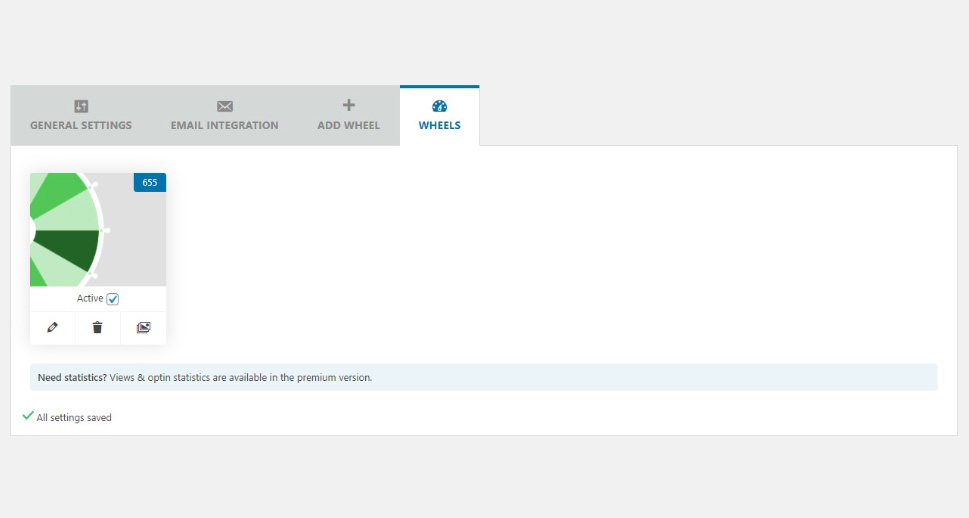
If you take a look at the Wheels tab, you will find that the wheel we have generated is active. We can edit it, delete it, or duplicate it.
The wheel will now appear as soon as a visitor reaches your website, just as you have configured it. They will then need to submit their email address, and click the Try Your Luck button. They can remove the pop-up by clicking the I don‘t feel lucky link below.

With some luck, they will win a prize. They can follow the link you supplied, or claim a coupon code you have configured. If they don‘t, well, there‘s always next time.
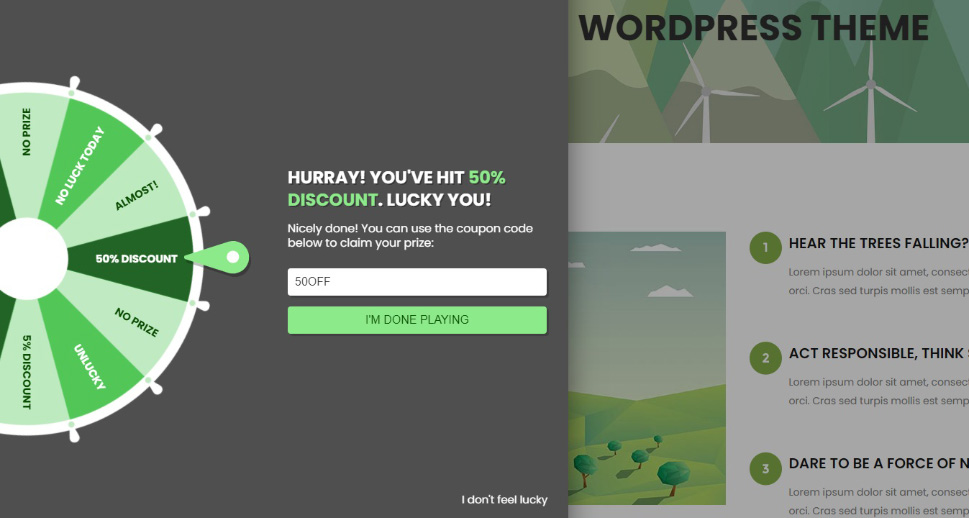
Once they click the I‘m Done Playing button, the pop-up will be removed and they will be free to browse your website.
In Conclusion
As we have shown, it is very easy to install a spinning wheel feature on your WordPress website, and it is a powerful conversion and data gathering tool when used properly. So, if you feel your website can benefit from this interactive feature, go on and install it. It takes next to no time at all and needn’t cost you anything – apart from what you are willing to spend on the prizes.
