How to Add a Frame Around Slides in Slider Revolution

This article is part of our ongoing series of Slider Revolution tutorials. You can find all the articles from this series in our Comprehensive Slider Revolution Guide.
The usage of picture frames (or borders) on slides is not uncommon in the design world. They can be used to create visual balance and unity, to draw the user’s eye to key parts of an image, or even simply as a decorative element. Whether you are using frames for a practical reason or just to create a certain stylistic impression, you should know how to add them to your slides. So, today, we’re going to show you how to manually add a frame to Slider Revolution.
There are a few ways this can be done, so let’s dive right in and check them out.
Creating a Frame via Row Settings
If you plan on creating a solid, monochromatic frame, perhaps the easiest way to do so is by adding a border to your slider’s row.
When you add a slider to your page, you usually have to place it inside a row. As long as your slider is the only shortcode or piece of content in that row, you can easily create a frame for it through the row’s settings. This can look really impressive. Just check out the passepartout slider on our Yvette theme.
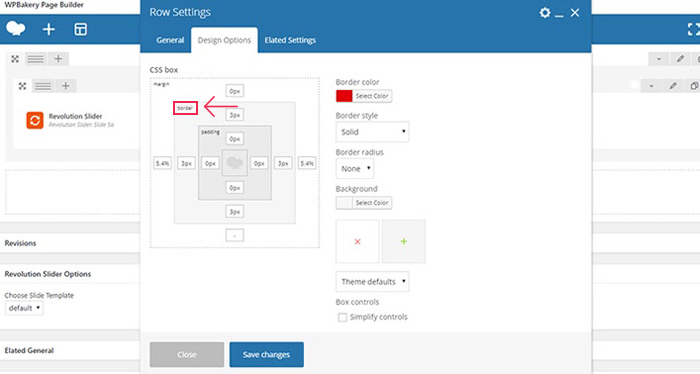
If you are using Yvette, or any of our premium WordPress themes, you can easily add a frame around your slider through the row settings. There, in the Design Options tab, you will see all the available border settings. The CSS box lets you set a width for each border separately, while the options to the side allow you to modify the color and style of your border.
How to Add a Frame as a .png File in Slider Revolution
If you would like to create a more elaborate frame, something that isn’t just a solid block of color, then you will have to add it as a separate layer in Slider Revolution. However, this isn’t quite as simple as it may seem. In fact, there are a few pitfalls you want to avoid.
For example, if you download a frame that’s a single transparent .png file and then just add it as a new layer into your slider, you risk two things happening. Firstly, the slider will recognize the frame layer as an entire new image that’s covering all the other layers in your slider. This means that any buttons, links, or other elements that are below the slider layer, won’t be clickable and won’t work. Secondly, since your slider will be viewed across all sorts of screen sizes, you risk your frame not being visible, or appearing skewed, due to it having different proportions from the device it’s being viewed on.
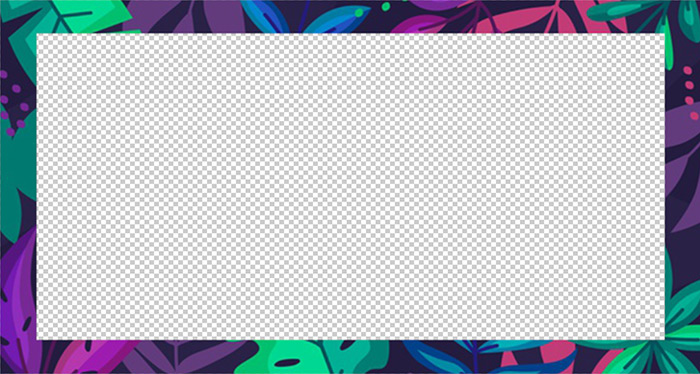
Luckily, there’s a solution for this. Instead of importing your frame as a single .png file with a transparent center, all you have to do is cut it up into 4 separate files: one for the frame’s top border, one for the bottom border, one for the left and one for the right. Just make sure that you use the proportions for your main stage (the largest dimensions your slider will be displayed at) when splitting your frame into four parts.
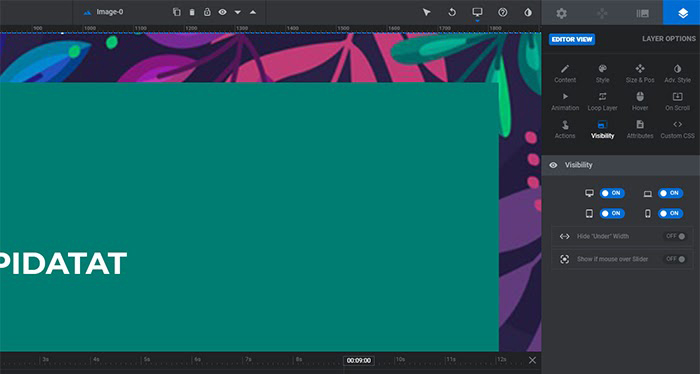
Then, you can import the four sides of the frame as separate layers and place them around your slide. If you have more than one slide in your slider, you can set these four layers to be static layers, so you don’t have to add them for each slide separately.
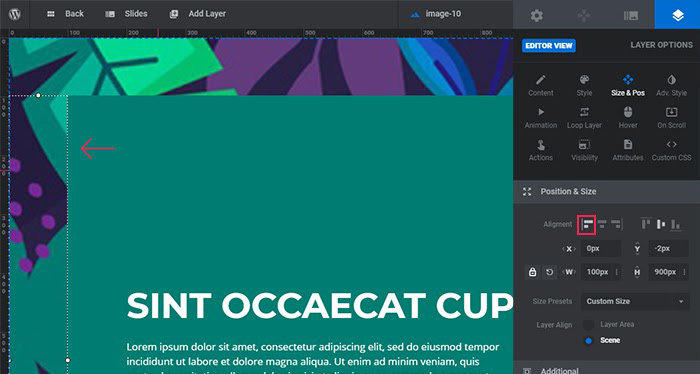
The most important thing you need to take care of is setting the correct alignment for each side of the frame. Make sure the top border of your frame has its alignment set to “top”, the right border to “right”, etc.
This way, you’ll make sure that each side of the frame is always placed correctly and stuck to the correct side of the screen.


How to Add a Frame to Your Image in Photoshop
There’s one more way you can add a frame to your slides in Slider Revolution, and that’s by making it a part of your actual image. To do this, you’ll need some basic photoshop skills, but it’s actually really simple.
First, open the image you’d like to add a frame to.

Then open the transparent .png file that contains your frame image. Go to Select > All (or press CTRL + A on your keyboard), and copy the frame.
Now go back to your original image and paste the frame inside it. It will be added as a new layer.

If you need to adjust the frame’s size to make it fit the edges of your image, just go to Edit > Transform > Scale and you’ll be able to drag and drop it to the required size. Once you’re done, just save your new image and import it into Slider Revolution.
In Conclusion
Frames can be a great visual tool, wherever they’re used. But it’s especially important to know how to add them to such a prominent part of your site as your slider. With these three separate methods of adding frames to Slider Revolution in your toolbox, you can create beautiful borders for your slides and be certain that they’ll always display perfectly across all devices and screen sizes.
