How to Move Your Website from WordPress.com to WordPress.org
When it comes to building your first website, WordPress.com can be a good place to give it a go. You can sample it for free, enjoy the benefits of automatic maintenance, and even give your site a personal touch thanks to the limited theme support and customization options. But soon enough, you’ll notice that “limited” is a word that pops up regularly when looking at the options that WordPress.com offers.
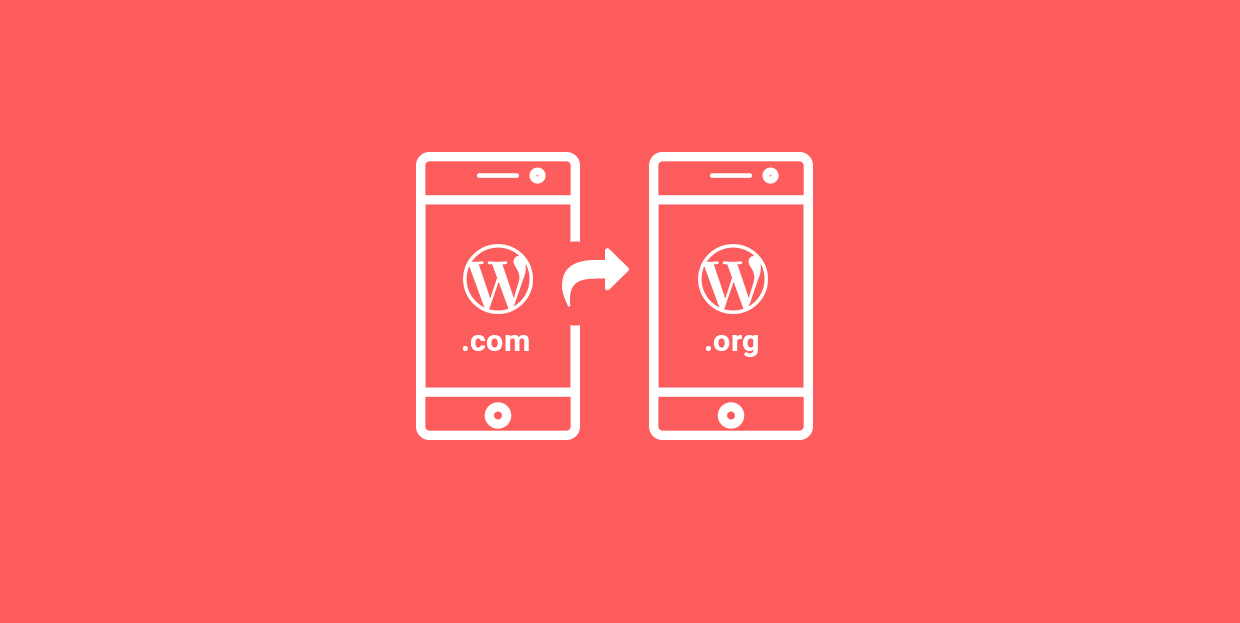
When you look into it a bit, the difference between WordPress.com and WordPress.org is the difference between having very limited control over your website and being completely in charge of it. In a sense, when you make the move from WordPress.com to WordPress.org, you’re going through a rite of passage — it means your website is taking off.
And if that’s where things are at, here’s how you can move your website from WordPress.com to the .org version. You’ll see how to:

Let’s start the whole moving process by setting up the destination — your new WordPress.org site. You should make it all nice and cozy for the content that will call it home, whether you’re moving it from your old website or planning to create it in the future. If you’re creating your new website from the ground up, you’ll need to walk through these three steps.
1. Pick a Host for Your Website
WordPress.com might not give you a lot of storage space in its free plan, but it still handles the hosting for you. When you decide to create a .org website, you’ll be in charge of finding a new host for the site.
The things that will matter for the site include the uptime, load times, managed WordPress hosting, pricing, and storage. Some of the top hosts for WordPress websites include:
No matter which host you choose, make sure to research them thoroughly and see what their customers have to say about them. If you can get opinions from customers who used them for WordPress hosting, even better. Pick a plan that suits you and spend some time coming up with a good web address — you’ll need to get a domain name before your new website can go online.
2. Set Up WordPress
The process for setting up WordPress will depend to a large extent on the type of service your site’s host offers. With some hosts, all it takes to install WordPress is to click a few buttons. With others, installing WordPress requires a series of steps. Whatever method you use for it, installing and setting up WordPress for your new site shouldn’t be difficult or too time-consuming.
3. Pick a WordPress Theme
One of the main reasons why WordPress.org is such a great solution for a website is its customizability. There are limitless options for changing the appearance of your website, the elements it employs and the way it employs them.
To prevent you from getting lost in all those options, and to make customizing your website easier, you might consider installing a WordPress theme (sometimes also referred to as a “template”) — a collection of visuals and functionalities that can significantly improve your site. The ability to use WordPress themes is one of the main reasons for moving to self-hosted WordPress, that’s how big of a difference they can make for your website.
There are great multipurpose themes you can use to jumpstart your website’s look and turn it into something people will grow to recognize. Plus, themes often come with useful plugins that can help expand your expression.
The good folks over at WordPress.com know that people can sometimes outgrow their services. They don’t mind it in the slightest, which is why they’ve made it super easy to export your content in a format that a WordPress.org website can easily ingest.
To get the file containing your content, head over to the dashboard of your WordPress.com site, and in the “Tools” options find the “Export” item and click on it. You’ll get the option to export all of your files, or to pick by type — post, page, or feedback, and then further narrow down by author, date, and status.
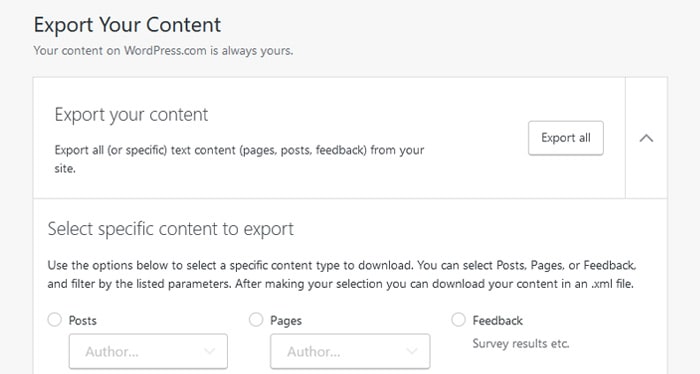
You can either click on the “Export All” button and download all of your content, or select the content you want to download and click on the “Export Selected Content” button. Either way, you’ll end up with a .zip file with the folder with a WXR document that contains the content from your WordPress.com website.
Qode WordPress Themes: Top Picks
View Collection


Because WXR is just the type of document WordPress likes to use, you’ll have no trouble with importing the file. The whole process is seamless and very quick — and it happens with minimal input from you.
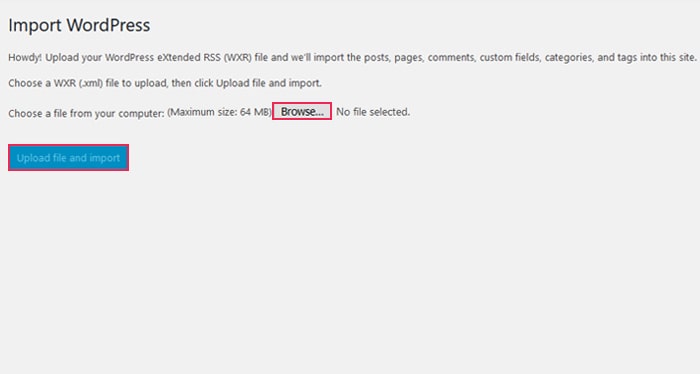
Your part in the process is to go to your new website’s dashboard, and in the “Tools” options find the “Import” item and click on it. You’ll see all the possible sources WordPress.org can import files from, with “WordPress” being the final item on the list.
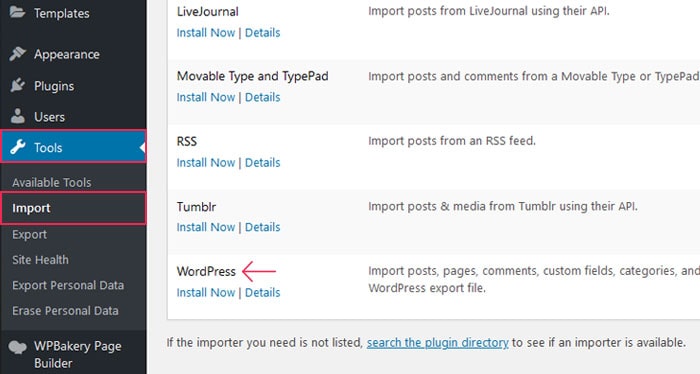
If the WordPress importer isn’t installed yet, click on the “Install Now” button. Next, click on “Run Importer,” and select the WXR file using the built-in “browse” option, and click on the “Upload File and Import” button.
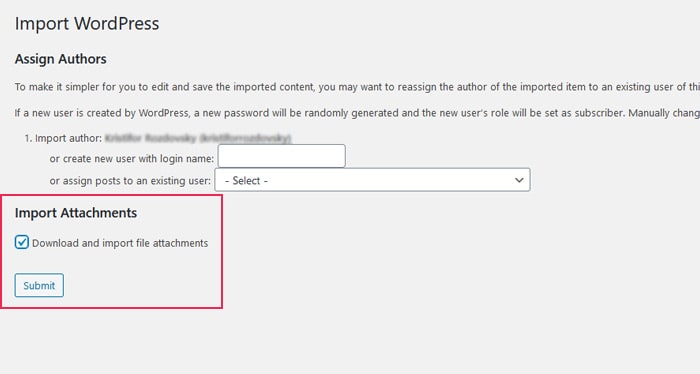
You’ll be prompted to a page where you can assign the authorship of the content to your author name on the new website, and where you can choose to download and import file attachments. Those are your image files, so make sure you check that box!
With that, your content should be uploaded on your new site. It’s a “should” because sometimes things go a different way. Errors while uploading the images are quite common, so it’s entirely possible that your posts and pages arrived without them. If that’s the case, you can use the Auto Upload Images plugin to fetch the photos and update the content for you.
With your content in place and all the eye candy and illustrations where they need to be, most of your work is done. The two things that are left are not necessary, but they can be very important. If your WordPress.com website has been around for long enough to get a couple of noticeable pieces of content and a following, you’ll need a way to transfer those to your new website.
Create 301 Redirects
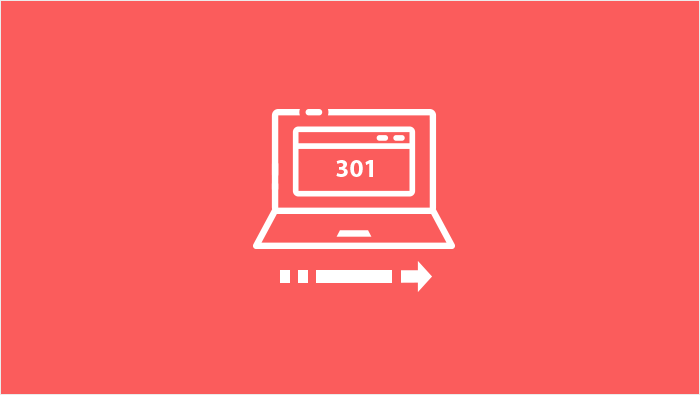
The role of 301 redirects is to redirect visitors from one page to another one. They are effectively siphoning the visitors from your former website to the new one, allowing you to move posts, pages, and whole websites with minimal loss of traffic.
How do you create 301 redirects? There are two different ways to do it. The easier one is to get one of the many 301 redirect plugins such as Redirection or Simple 301 Redirects. The more difficult way to do it would be to edit the .htaccess file, which is in and of itself tricky business. Maybe stick to the plugins for this one.
Import Followers from Your Old Website

One neat thing you can do with WordPress.com is to have people subscribe to your website via email or the WP.com Reader. It can be incredibly rewarding to manage to grow many subscribers, and it would be a waste of effort if you were to lose them all when moving to a self-hosted website.
The way you take care of this is by installing the Jetpack plugin on your WordPress.org site. This plugin, which comes in both free and paid version, does a lot of useful things for your website. One of them is moving your subscribers from the WordPress.com website to the self-managed one. Jetpack’s subscription migration tool lets you do that with a couple of clicks.
Let’s Wrap It Up!
When you’ve outgrown your WordPress.com website, switching to a self-hosted WordPress solution is the natural next step. The self-hosted site will be familiar to anyone who’s used to a .com website, with the major difference being the abundance of options and choices regarding appearance, behavior, and functionalities you get with a WordPress.org site.
