How to Preload Links in WordPress

Speed is among the topmost UX factors that determine how popular your website will be with your visitors. There is a number of things you can do to speed up your WordPress website – including its mobile version. These general best practices are something every WordPress site owner should observe in order to provide good user experience and guarantee plenty of traffic and low bounce rates. But there are some perhaps lesser known and applied techniques you can apply, and preloading links is one of them.
In this article, we’re explaining why you may want to have your WordPress preload links on your pages, and show you how to set it all up (it’s not at all hard!).
Qode Themes: Top Picks
View Collection


The term “preloading” means, obviously, loading in the background, before the content is served to the visitor. It basically means getting the resources ready before the time they are actually needed, so the whole process runs faster. It is a technique particularly used by browsers, that are taught to predict the resource (a page, most commonly) that a user might want to access, and preloading it in the background, so that it opens and loads faster.
Link preloading, in particular, means that the browser will identify the links on your page and get them ready for the visitor in case he or she decides to click on them. The links are loaded before the visitor interacts with them, and as a result, the linked resource is served much faster.
Preloading is not to be confused with prefetching. In preloading, you are telling the browser that the user will most likely click on a resource link to access that resource. Because of the high probability of need, the browser will prioritize the preloading of the resource (the linked page).
Prefetching, on the other hand, signals to the browser that a resource might be needed, and it gives it a lower priority. This is usually the case for resources on the next page, not the current page the visitor is viewing.
It’s important to understand that preloading links will not make your page loading speed faster. This will depend on other speed optimization factors, but link preloading will still be very beneficial to the overall UX of your website.
The entire experience of your website includes things that happen on your pages, the quality of your navigation, the overall accessibility of your site, and many other site-specific factors. However, it also includes things that lead visitors to your pages, and that lead away from them. How fast a linked page will load will, in your visitor’s mind, fall into the same experience as how fast your own pages will load. Obviously, you will therefore want to optimize that too, and that’s precisely what link preloading is for. And that’s for external links. For internal ones, it’s even clearer – you want your entire website to load fast and if you preload your internal links, your internal pages will load faster, too.
With a better overall UX, your website will also have higher traffic and your SEO score will be higher.
That being said, bear in mind that it’s not a good idea to just set all links to preload without any criteria or fine-tuning. Specifically, if you set all your links to preload, it may cause an opposite effect and even crash your server. You may want to exclude certain pages, such as login, and if you’re running an online shop, your cart and checkout pages, too.
Let’s find out how to properly set up link preloading so that you get to reap maximum benefit from this simple technique.
As it’s usually the case with WordPress, the simplest solutions involve using our fave little helpers – plugins. For this purpose, we’ll be using Flying Pages, a handy little plugin that uses a piece of JS code to preload links. It waits until the browser is idle and then detects all links in the viewport, as well as those hovered upon, and then preloads them. This way, Flying Pages makes sure link preloading doesn’t cause any server issues or crash it.
Start by installing the plugin. Go to Plugins>Add New and then type “Flying Pages” in the search box. Once you find it, click on Install and then on Activate.
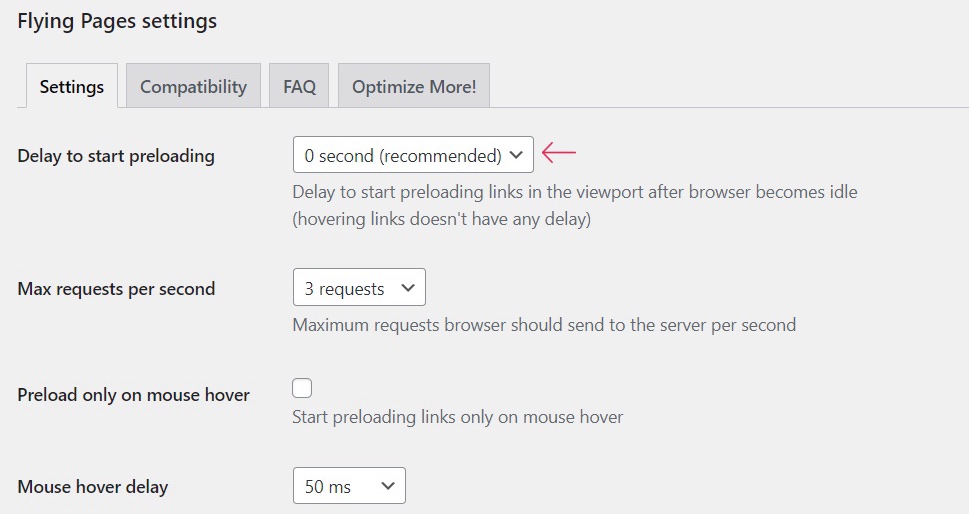
Once you’ve got that set up, go to Settings>Flying Pages to configure the plugin.
The first option here is to set the delay before the plugin starts preloading links regardless of the hover. You can set any value you want here – we’ll leave it at zero, meaning no delay.
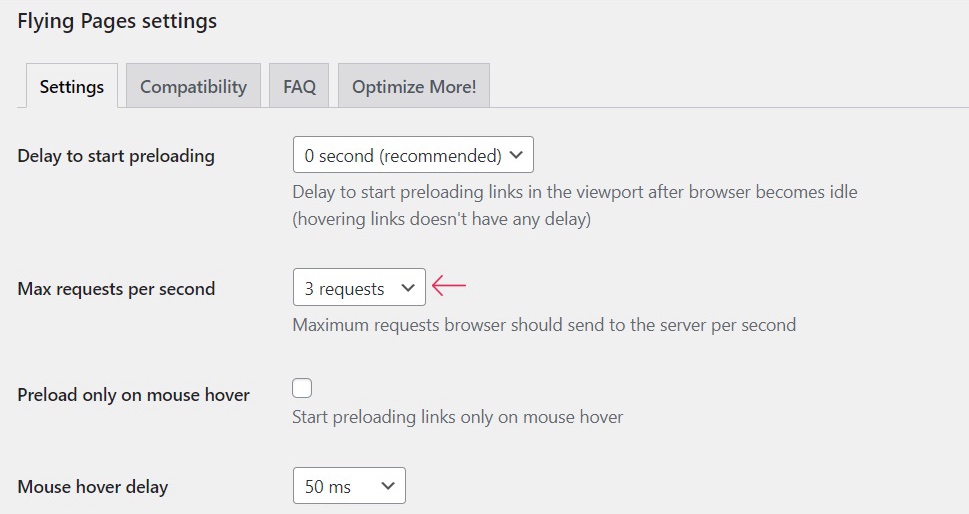
Your next option is to set “Max requests per second”. Again, set a value you like but note that lower values will be lighter on your server. Three is the recommended value and we’ll leave it at that.
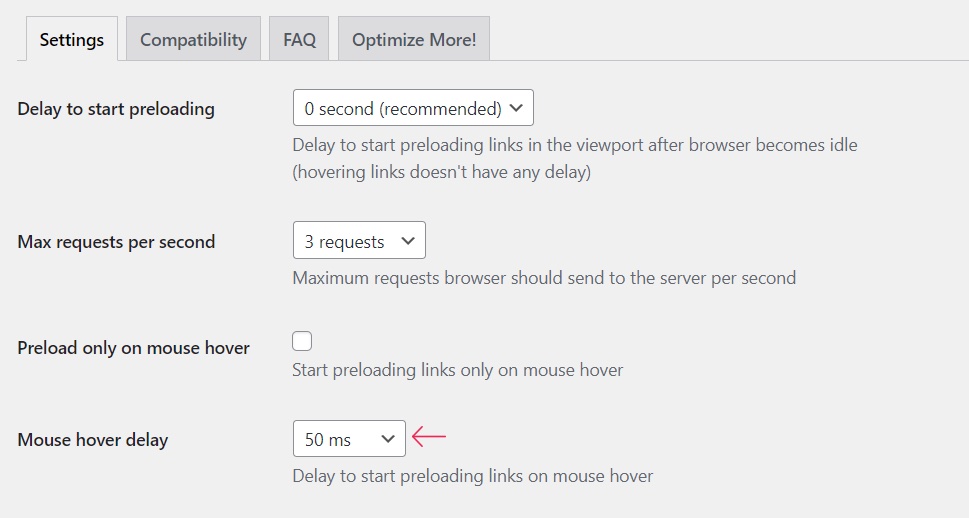
Next, you may want to check the box that says “Preload only on mouse hover.” This is pretty self-explanatory: when enabled, this option preloads only those links that the user hovers over with their mouse, showing intent to navigate to them. If you want to preload all links in the viewport, leave the box unchecked.
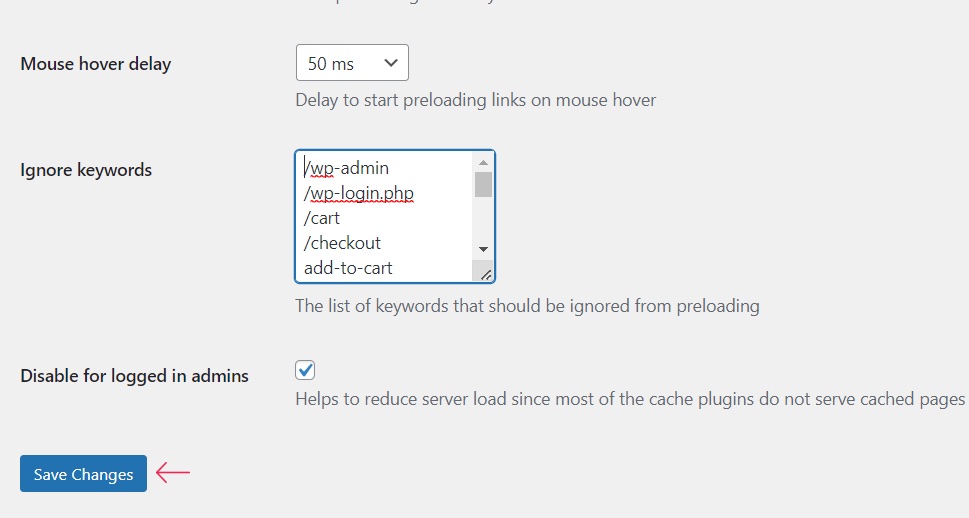
Here you can also set the duration of mouse hover delay – the time that passes from the moment a user hovers over a link, until it starts preloading. We will set it to 50ms.
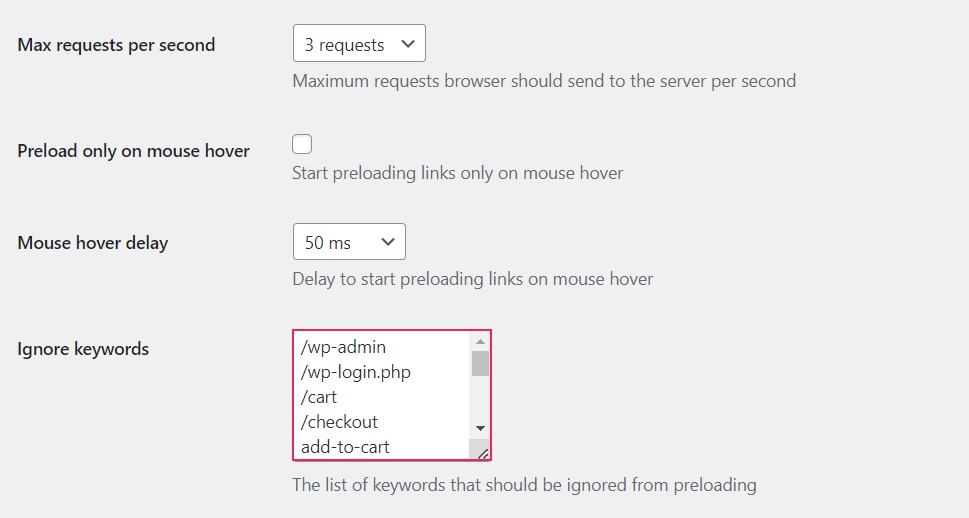
The next option is a handy one – it allows you to create a list of URL keywords and formats that will not be preloaded. The default list includes your login page, checkout, cart, as well as some common image formats. To these, you can add any other keywords you want to exclude from preloading.
Important note: if you’re running an affiliate program or using an affiliate plugin, then make sure to add affiliate prefixes (such as /go/ or /refer/) to the “Ignore keywords” list, otherwise your affiliate link tracking may not work.
Finally, you may want to check the box saying “Disable for logged-in admins” to help reduce server load.
Once you’ve gone through the options, click on Save Changes.
And that’s literally all there is to it. Once configured, the Flying Pages plugin will take care of link preloading for you. You can always go back to the settings and change the options that don’t work for you.
Wrapping It Up
Thanks to Flying Pages, even complete WordPress beginners can set up link preloading on their website or blog. Note, however, that link preloading won’t show any improvement in your page speed tests. As we said earlier, link preloading only improves the overall experience of your website by making link clicking faster, not your actual page loading speed.
