How to Install a WordPress Child Theme

WordPress has become the world’s most popular CMS (Content Management System) for many reasons. One of them is that it grants its users the ability to customize almost any aspect of a website according to their wishes. Customization can be carried out with plugins, but for more extensive modifications, using a WordPress child theme is the better option.
In this article, we will explain the advantages of using a child theme, and cover several different ways how to install a child theme in WordPress:
What are WordPress child themes and why use them?
A WordPress child theme is a theme that inherits the stylization and the functionality of its parent theme. With a child theme, you can perform various kinds of modifications, ranging from small CSS tweaks to overriding existing parent theme functionalities or adding new ones. Implementing changes using a child theme relies on your previous coding experience and the desired look of the website.
Any modifications you add to a child theme won’t be overridden by parent theme updates. Normally, if you were to add the same modifications in the files of your (parent) theme, such as the functions.php file, for example, they will all be lost. All theme files get overridden during updates (please note, this has no bearing on the database). As such, using child themes is one of the recommended and safe ways of adding custom code to your website. There are, also, a few more reasons why you should use a WordPress child theme, but the ones we mentioned are the most common reasons for users to create a child theme.
As an added benefit, child themes are very lightweight, as they usually only contain a couple of files. Thus, they will not slow your website’s performance, not as much as some plugins.
How to install a WordPress child theme
Now that the advantages of using a WordPress child theme are a bit clearer, let us explain how you can install it on your website. We are assuming that you have already created your child theme by this point, either manually or using a plugin, and are ready to start installing it.
Child themes can’t properly function without their parent theme. If you were to upload a child theme without its parent installed, you will see a notification during the installation process similar to the one below.

Also, when navigating to the Themes section of your admin dashboard, you will see a notification that the installed child theme is broken.

You shouldn’t worry, though, as these error notices will disappear after you install the parent theme, and the child theme will work properly. The order in which you install them isn’t really important, as long both themes are installed. However, the most common scenario involves installing the child theme after the parent theme has already been installed on the website, so we will proceed with that assumption for this tutorial.
We will cover three different methods of installing a child theme: the upload method, via FTP, and using cPanel. With that being said, let us proceed.
To install a child theme via your admin dashboard first log in to it using your WordPress admin credentials. Then navigate to Appearance > Themes, and click on the Add New button near the top of your screen.

On the following screen, click on the Upload Theme button.

Then you will be able to upload a .zip of your child theme. If you haven’t zipped the folder of the child theme you wish to upload, make sure to do so now. Next, click on the Choose File button, which will open a file dialog window. Within that file dialog, select the .zip of your child theme and press the Install Now button, afterward.

You will need to wait for a bit until the child theme is installed. During the installation process, you will see a notification that a parent theme is required for the child to work. After verifying that the parent theme exists, the child theme will be successfully installed.
Afterward, you can opt to see a live preview, activate the theme, or return to the Themes page, where you will be able to see all the themes that are installed on your website. From here, you can safely start customizing your new child theme.

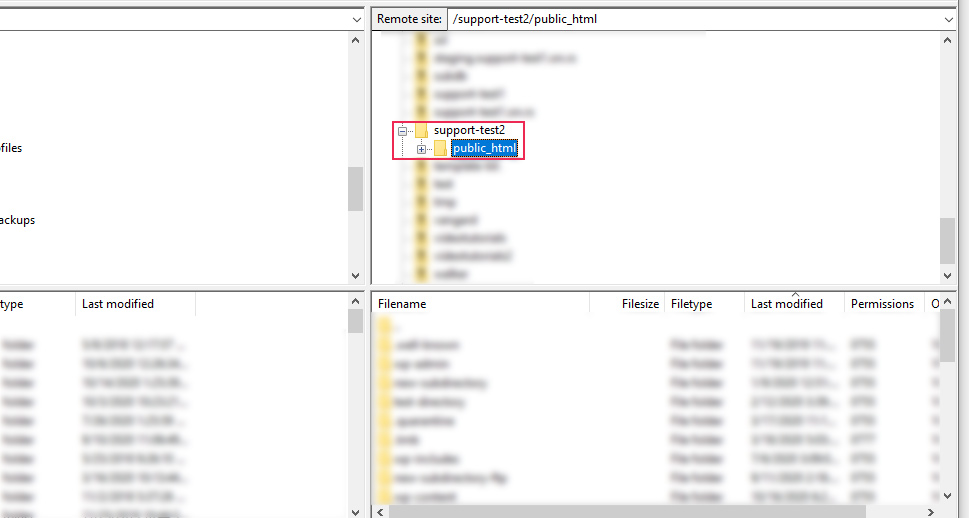
Installing a child theme via FTP requires you to have an FTP client and the knowledge of how to use FTP. If you need to, brush up on your knowledge, then log in to your server using your FTP credentials. After that, navigate to the root WordPress directory, often called public_html.

Navigate to /wp-content/themes, where you will see the folders of all your currently uploaded themes.

From the left side of your FTP client, which represents the file and folder structure found on your computer, locate the unzipped folder of the child theme you wish to upload. Right-click on the folder and press the Upload button.

The upload process should be over quickly, as the child theme usually doesn’t contain a lot of files. You will be able to monitor what files were uploaded in the top section of your FTP client. When the upload is done, you will see the folder of your child theme in the /wp-content/themes/ directory on the right.

Afterward, you can log in to your admin dashboard and preview or activate the uploaded child theme within the Appearance > Themes section. From there on, you can start your customization work.
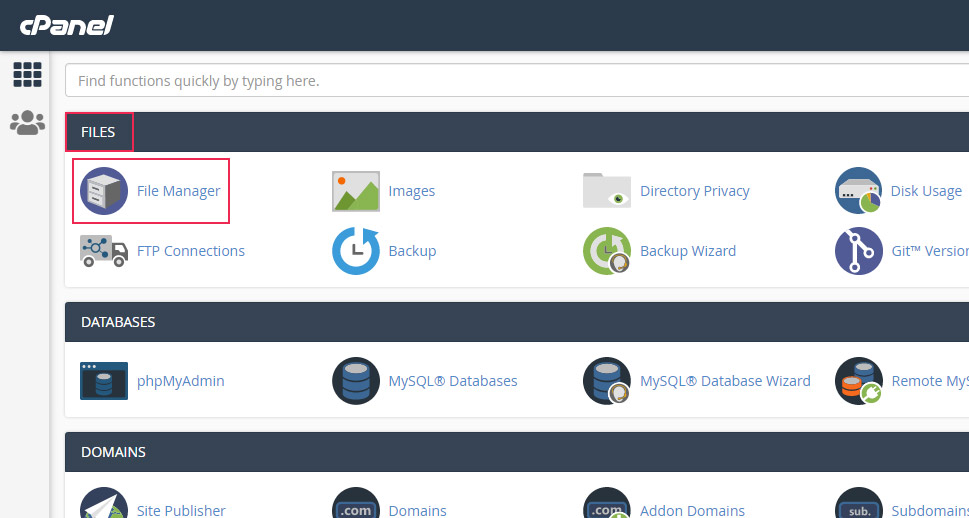
To use this method, you need to have access to cPanel. To start, log in to cPanel using your credentials and click on the File Manager option, located in the Files section near the top.

Find your website in the list on the left and navigate to its root WordPress directory, often called public_html.

Then, navigate to /wp-content/themes and press the Upload button from the option bar at the top.

This will open a new tab, called File Upload. Clicking on the Select File button will open a file dialog where you should select the .zip file of the child theme you wish to install. If you haven’t zipped the folder of your child theme, make sure to do so now and then proceed as mentioned above. The upload process should take only a couple of seconds.

Afterward, return to the previous tab, with a view of the /wp-content/themes/ directory of your website. Locate the .zip file you just uploaded, right-click on it, and select the Extract option.

As with most folder actions within the File Manager, you will be prompted to confirm your choice. Do so by pressing the Extract File(s) button in the popup window that appears. Following that, you will see the extraction results, i.e. which folder was extracted as well as its content. Press the Close button once you’ve reviewed the results.

The child theme folder will now appear unzipped next to the folder of the parent theme. To finish this installation process, delete the .zip file as it is no longer necessary. You can do so by right-clicking on it and selecting the Delete option from the menu that appears.

Similarly, press the Confirm button to confirm your action, i.e. to delete that .zip file.

Afterward, you can log in to your admin dashboard and navigate to the Appearance > Themes section, to preview or activate the child theme and start with your customization work.
Final Thoughts
WordPress child themes offer a chance of nearly endless website customizations that won’t be lost after parent theme updates. The number and variety of changes you choose to add depends on your website design, as well as your coding knowledge. To start developing your tailor-made site, first, pick your preferred method on how to install a child theme in WordPress from the three different ones we’ve offered in this article. Then simply follow the instructions we’ve given and you will be sure to successfully install your child theme in a matter of minutes. Don’t forget that using a child theme requires the installation of the appropriate parent theme, so make sure to install the parent theme, as well. After that, the sky is your limit.


