How to Add Taxonomies to a Custom Post Type in WordPress

Most WordPress users have heard and worked with categories and tags, but might not be familiar with WordPress taxonomies, as a more general term. However, since you create various types of content while working with a WordPress website, those taxonomies often come in handy as a means of backend data classification, as well as a means of organizing your website to better suit visitors. Thus, knowing how to manage and add taxonomies to custom post types can be essential for any WordPress webmaster, while being useful overall for any intermediate or advanced WordPress user.
With that in mind, we have created this article, explaining more about taxonomies in general, including how to add them to a custom post type in WordPress. Since categories and tags are so well-known, in this article, we will focus more on explaining how to add a custom taxonomy to a custom post type, as a more suited way of classification and organization. Having said that, let us begin. Here’s what we’ll be talking about:
Qode Themes: Top Picks
View Collection


As mentioned before, WordPress taxonomies serve to classify and organize website content. The two well-known taxonomies – categories and tags – are available in WordPress by default, but WordPress users often decide to use new ones that better suit the niche their website’s content belongs to. In that case, custom taxonomies are often preceded by the creation of specific custom post types to which they best correlate.
For example, if you are running a tour website, you might need to add destinations, book stores and movie websites require relevant genre taxonomies, music-related websites often need to add artists and record labels, real estate companies need to include specific amenities, while many other niches require category-like taxonomies. In general, these category-like taxonomies (meaning hierarchical) serve to group posts based on a given property, while tag-like taxonomies (meaning non-hierarchical) are used to describe all the properties a specific post has.
Therefore, both types of taxonomies are used on WordPress websites almost equally, as they efficiently organize the content, making it easy for visitors to navigate through and find the desired (custom) post quickly. That way, the visitor’s experience is greatly improved, as they don’t need to waste time needlessly searching for specific content, which will greatly influence the decision whether or not they would leave the website.
Furthermore, by adding relevant WordPress taxonomies, the content of your website will be better structured, making it more SEO optimized and easily indexable.
Having explained why you need custom post types with corresponding taxonomies, let us explore how you can create both a custom post type and taxonomy and add the taxonomy to that custom post type. As this an advanced subject, we will only go over the plugin method in this article. More precisely, we will be showcasing the CPT UI plugin, as one of the most well-known and easy-to-use plugins for creating and managing custom post types and taxonomies.
That being said, before delving into the how-tos of this article, we must mention that we envisioned this article only as an introduction to the topic, making it accessible to a wide array of WordPress users. However, since we have already covered the topic of custom post types and custom taxonomies in-depth in a separate article, we strongly suggest reading it after reading this article. It will help you broaden the knowledge gained by reading this one, especially on the “behind the scenes” coding that goes into creating a custom post type and taxonomy. Having said that, let us begin.
Registering a Custom Post Type
One of the few requirements for adding taxonomies to a WordPress website is having at least one post type to which it will be assigned. And, while you can always assign your taxonomy to one of the default post types (e.g. post or page), creating a specific custom post type is often more suitable. The same will be done in this article, where we will first explain how you can add a custom post type using the CPT UI plugin, to which we will later add a custom taxonomy.
After installing and activating the plugin, navigate to the CPT UI > Add/Edit Post Types section. By default, you will only see a single tab called Add New Post Type there, unless you have already created or imported a custom post type using this plugin. So, to create a new custom post type, you only need to fill out the options found in this section. They are divided into three separate sections: Basic settings, Additional labels, and Settings. You will also see helpful explanations next to each of the options that will help you better understand the purpose of each one.

Nevertheless, we will explain the process of creating a custom post type thoroughly below. For this article, as an example, we have decided to create a custom post type called project with a corresponding custom taxonomy called project category that will be assigned to it. Let us begin.
First, we have added the post type slug, singular and plural label, as the three required options that need to be filled out. Then, while we can create the post type at this point by clicking the “Add Post Type” button, we choose not to. We decided to go over the remaining options, so that we can change some of the default values they take according to our needs.
Specifically, we chose to auto-populate the remaining labels based on the singular and plural labels we already inserted. This was done by clicking the “Populate additional labels based on chosen labels” link.

Having done that, all the additional labels except the post type description have been created. Then, we had the choice of whether to insert a post type description, even though it won’t be shown on the website’s frontend unless specified otherwise using code. For this article, we choose to insert a dummy description.

Afterward, we proceed to the Settings section, which represents the main part of the custom post type creation process. In this section, you can set up all the options and features a custom post type can have, much of those being advanced options. Nevertheless, thanks to the descriptions left next to each option, most WordPress users should have no issues understanding what the options are and how to set them properly. And, for those curious, we advise consulting the documentation for the register_post_type() function, which is the underlying function whose parameters are being set within this section.

Having done that, let us go over the options we used for our example custom post type. Since for most of the options we used default values, we will only highlight the ones that we choose to alter or fill out. First of all, we have set the “Has Archive” option to true but decided not to include a custom slug that would form the URL of the project archive page. By doing so, we have made it so that our custom post type would have an archive, which would use the default URL, i.e. website-url/project instead of some custom permalink ending.

Following that, we have set the menu position to 10 and chosen the dashicons-portfolio icon as the one associated with our custom post type side menu section. The reason for the former is that we wanted the custom post type menu section to come after the Media section, as well as after the custom post type sections belonging to the Lekker theme we were using. As for the icon, we thought it best not to use the default posts icon, and the portfolio one seemed the most fitting in our case.

Finally, we decided to allow all possible post type features instead of the default three: title, editor and featured image. As for the custom features option, we didn’t use it in this example, as it is reserved as means of interaction with a very niche set of plugins and/or themes. Additionally, we also chose not to assign any of the existing taxonomies to our new custom post type, preferring to do so using the subsequent sections. Then, to finish the process of creating a custom post type, we clicked the “Add Post Type” button at the bottom.


While we have concluded the first part of our example, there are still some things worth mentioning.
Firstly, as seen on the screenshot above, while you are registering the custom post type, you will see a list of available taxonomies which you can assign to your custom post type. Therefore, this is the first instance in which you can add a taxonomy to a custom post type, regardless of whether it is a default or custom taxonomy. The two default WordPress taxonomies – categories and tags – will be shown alongside a WP Core label so that you don’t confuse them with a custom taxonomy that might share a label or one of its parts.
After that, you will see all the custom taxonomies enabled by the plugins on your website. In our case, those were the taxonomies that are part of the Lekker theme, as well as the ones that come with the WooCommerce plugin we also had installed on the website. The reason why we choose not to use this option is simply due to not having created a custom taxonomy that is fit to be added to our custom post type yet. However, you are free to assign any of your existing taxonomies to your custom post type at this point, should you decide to do so.
Additionally, we will describe what was achieved after creating the project post type in the manner described above. Of course, this includes creating a menu section called My Projects in the desired location with the desired menu icon next to it.

And, if we wanted to create a project single item by navigating to My Projects > Add new, we could do so using all the features we enabled previously.


That said, let us explain how you can register a custom taxonomy, which is the step before adding it to this custom post type.
Registering a Custom Taxonomy
To register a custom taxonomy with the CPT UI plugin, navigate to the CPT UI > Add/Edit Taxonomies section. Having done that, you should only see a single tab called “Add New Taxonomy”, unless you have already created or imported a taxonomy using this plugin. But, assuming that you haven’t, you should know that creating a custom taxonomy only requires you to fill out the options found in this tab, and click the “Add Taxonomy” button. The options are once again divided into the same three sections and are properly explained by corresponding descriptions.

Nevertheless, we will go over the process of creating a custom taxonomy using the example we prepared for this article that involves a custom taxonomy we called project category. Let us begin.
First, we added the taxonomy slug, the two mandatory labels, and auto-populated the remaining labels by clicking the “Populate additional labels based on the chosen labels” link. Then, we needed to add the taxonomy to an existing post type. Of course, this is the second time at which we could correlate a given post type and taxonomy. And, even though it was optional in the previous step, it is necessary to associate a custom taxonomy with a given custom post type (or a set of custom post types) from the list at this point.
The list that will be presented to you will contain all the publicly available post types, regardless of whether they are default post types or custom ones. What publicly available means is that the public argument of the register_post_type() function is set to true, either in code or through the CPT UI interface, for the custom post types registered with this plugin. Similar to the previous section, you will see a list of default post types that contain the WP Core label, followed by the post types created by your plugins or theme. In our case, this included post types created using the Elementor and WooCommerce plugins present on our test website.
That being said, we added the project category taxonomy to our previously created project post type and proceeded below to fill out the remaining options before registering the taxonomy completely.

Similar to the previous step, after auto-populating the labels, we can add the taxonomy description, should we decide to use it in code later.

Then, after adding a simple description, we proceed to the Settings section, where all the important options are. Once again, most of these options are properly explained, but should you wish to know more, we advise consulting the documentation for the register_taxonomy() function. It is, in fact, this function whose arguments are being set using the Settings section.
That being said, let’s explore the options we used for our example. Since most were using the default values, we will cover only those we purposefully altered while registering the project category taxonomy. As it is only natural to have project categories and subcategories, we made our custom taxonomy hierarchical, allowing for such a parent-child relationship.

And, apart from that, we enabled the remaining two options shown on the screenshot below simply out of convenience. The first creates a taxonomy admin column that appears on the list of all post items to which this taxonomy is added. This admin column serves to make the filtering of those post type items easier, while in the corresponding menu section. In our particular case, it means that, while positioned within the My Projects > All Projects section, we could filter our projects based on the project category that is assigned to them, using the Project Categories admin column that we added.

The second option is self-explanatory and allows us to assign project categories to specific projects or in bulk using the quick/bulk edit panel.

After choosing all the options we needed, we clicked the “Add Taxonomy” button to register our custom project category taxonomy.

As a result of the options we chose, it was added to the My Projects menu section. Then, by navigating to My Projects > Project Categories, we can inspect existing project category items and add new ones.


Editing the Custom Post Type/Taxonomy Options and Adding the Taxonomy to a Custom Post Type
It is important to know that, even if you register a custom post type and taxonomy in a manner described in the first two subsections of this section, you can still change the options you selected, if you need to. That way, you don’t have to feel pressured to fill out all the options without fully understanding their purpose. Instead, you can fill out only the required set of options and register a custom post type or taxonomy first.
Then, after thoroughly inspecting the options using the corresponding documentation links we supplied, you can edit the custom post type or taxonomy and set the remaining options accordingly. Of course, in the case you have already set all the corresponding options according to your needs both for a custom post type and taxonomy, and don’t feel that you need to edit anything, then you can simply disregard this section of the article and proceed to the following one.
To edit the properties of a registered post type, navigate to the CPT UI > Add/Edit Post Types section. As long as you have registered at least one custom post type, you will see all the four tabs the CPT UI plugin offers. Then, select your custom post type from the dropdown menu at the top and alter the options as you see fit.
Most importantly, should you decide to unassign an existing taxonomy from a custom post type and/or assign a new one, you can also do it in this tab, as long as you have selected the correct custom post type to edit. Then, by navigating to the bottom of the Settings subsection, you can proceed to adjust which of the existing taxonomies will be added to your custom post type. Finally, to finish your editing process, don’t forget to click the “Save Post Type” button.


Similarly, if you want to edit the properties of any custom taxonomy registered with the CPT UI plugin, navigate to the CPT UI > Add/Edit Taxonomies section, select the Edit Taxonomies tab, as well as the correct custom taxonomy whose properties you wish to edit.
Most importantly, should you decide to change the custom post type or set of custom post types to which your custom taxonomy is added, you should do so using the Attach to Post Type option, found in the Basic settings subsection. Then, having done the necessary edits, don’t forget to click the “Save Taxonomy” button.


Assigning Taxonomy Items to Custom Posts
The last remaining steps in this tutorial are about creating a custom post and custom taxonomy item, and assigning the latter to the former. Luckily, all of this can be performed on the custom post editing screen.
Therefore, to assign a taxonomy item to a corresponding post item, you only need to create a new custom post item or edit an existing one and find the corresponding taxonomy meta box. In the case of default taxonomies tied to a blog post, these meta boxes would be called Categories and Tags, respectively.

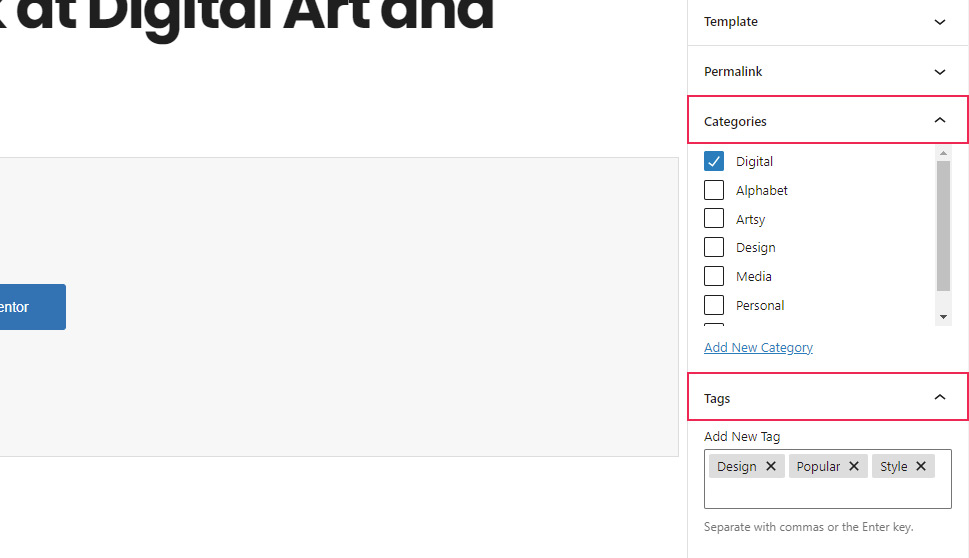
Of course, in the case of custom posts and custom taxonomies, the names of those meta boxes vary based on the labels you used in the registration process we talked about above.
For our “project” custom post type with the “project category” as the added custom taxonomy, it meant opening an existing project item (or creating a new one) and finding the Project Categories meta box. There, we could tick the checkbox next to existing project category items previously created, followed by a click on the “Update” button, to save the edit we made.

On the other hand, if we haven’t created any project categories previously or wanted to create new ones, we could still do so using the options found in the same meta box. More precisely, after clicking on the “Add new Project Category” link, a set of options should appear below the link. With them, we could specify the name of the new project category item, and its corresponding parent category item, since we have made the project category taxonomy hierarchical while registering it. Then, by clicking the “Add new Project Category” button found below, followed by the “Update” button, we would successfully create that taxonomy item and assign it to a given project item, i.e. custom post.

Needless to say, we could have also used the My Projects > Project Categories > Add new Project Category section to add a new category before assigning it in the manner described in the first part of this section. In which case we would also add a project category name, a parent project category, if needed, and click the “Add new Project Category” button found below.

While we have already covered the main topic of this article, we felt that there are still some things that need to be said before concluding it. For this reason, we have created this last section explaining some things you should consider while and after adding a taxonomy to a custom post type.
Firstly, if when adding a custom taxonomy to a custom post type, multiple taxonomies share a common label, it is important to know how you can discern which exact custom taxonomy you are adding to a given post type. As an example, we have purposefully included a screenshot showcasing four custom taxonomies all sharing the same “Categories” label.
To establish what those categories are exactly, we only need to investigate the previous list of taxonomies using the developer tools of our current browser. As such, we will right-click on one of the “Categories” labels and click on the “Inspect” link that appears afterward.

This will open the browser’s developer tools, placing us within the Elements tab and exactly on the HTML element we right-clicked on. In our case, it was the <label> HTML element. Then, we can figure out what that category is by either inspecting its “for” attribute or the “value” attribute of the input HMTL element that is shown before it. Looking at the screenshot below, we can see that the first category was a taxonomy called clients category, whose slug is clients-category.

Repeating the same steps for the remaining labels, we were able to figure out that the corresponding custom taxonomies were the clients, portfolio, team, and testimonials category, respectively.

And, while we decided not to assign any of those taxonomies to our project custom post type, we thought it best to share how such a situation can be resolved, should a similar one occur on your end.
That being said, this concludes our overview on the registering process of custom post type and taxonomies and how to assign later to the former using the CPT UI plugin. However, we must mention that there are still a lot of things which need to be done to display the custom post types and their taxonomies on your website. This includes creating a specific custom post type single page, archive page, and custom taxonomy archive page and to configure its design in an intuitive manner that favors the most WordPress users.
Sadly, as these things require considerable coding knowledge, they are often part of premium WordPress plugins. But, should any intermediate or advanced WordPress user decide to delve into the coding aspect of these topics, we strongly suggest reading the series of articles on the movie custom post type and movie genre custom taxonomy we created. Of course, we are referring to the aforementioned article on the creation of custom post types and taxonomies, as well as on subsequent articles on the creation of custom post archives and custom taxonomy archives. With that final note, we conclude the article.
Final Thoughts
In this article, we talked about all the steps required to add a taxonomy to a custom post type in WordPress. While most of our article revolved around a custom post type and custom taxonomy we specifically created, we made sure to carefully outline all the necessary steps, so that you can successfully add any taxonomy to any available post type, should you decide to do so. To reiterate, this meant registering the post type and taxonomy, in the case they are custom, making the correlation between the two, as well as creating post items and taxonomy terms and assigning them so that they abide by the established correlation.
While this may seem overwhelmingly difficult by using code alone, we have covered the process using the CPT UI plugin, making it significantly easier to understand. Thus, we are certain you will have no issues adding any taxonomies to your custom post types by following the advice we outlined. Finally, we advise bookmarking this article for future use, should you need the reminder the next time you are managing your custom posts and/or taxonomies.
