How to Add Post Rating to Your WordPress Website

Whether you lead a blog on your own or you have people that post articles for you, adding a post rating system in WordPress is always a good idea. Almost every modern online platform, community, and forum out there strives to encourage users to engage in different discussions by incorporating some kind of rating system. And you can easily do the same on your WordPress-powered website or blog by using one of the many available post rating plugins.
By giving the ability to visitors to rate your posts, pages, or any specific segments of your site, you can easily increase the overall user engagement and create a sense of community around your brand. Plus, pages or posts with high ratings can only give more value to your content. In turn, this can even inspire more users to comment on your blog posts, which can only help you gain more credibility in your niche.
So, without further ado, let’s see how you can add a post rating system on your WordPress site. We will show you how to do this using the help of a handy WordPress plugin called Yasr. It comes with some great features that allow you to fully customize your ratings, so make sure to read on.
Adding a Post Rating System in WordPress With a Plugin
Out of many available star rating plugins (and those that allow you to add any kind of rating system in general), we found that the Yasr (Yet Another Stars Rating) plugin is an excellent choice for adding a post rating system to your WordPress site. It is free to use and has a powerful interface with plenty of flexible options that allow you to customize your ratings from multiple aspects (including auto insert options, positioning, and styling).
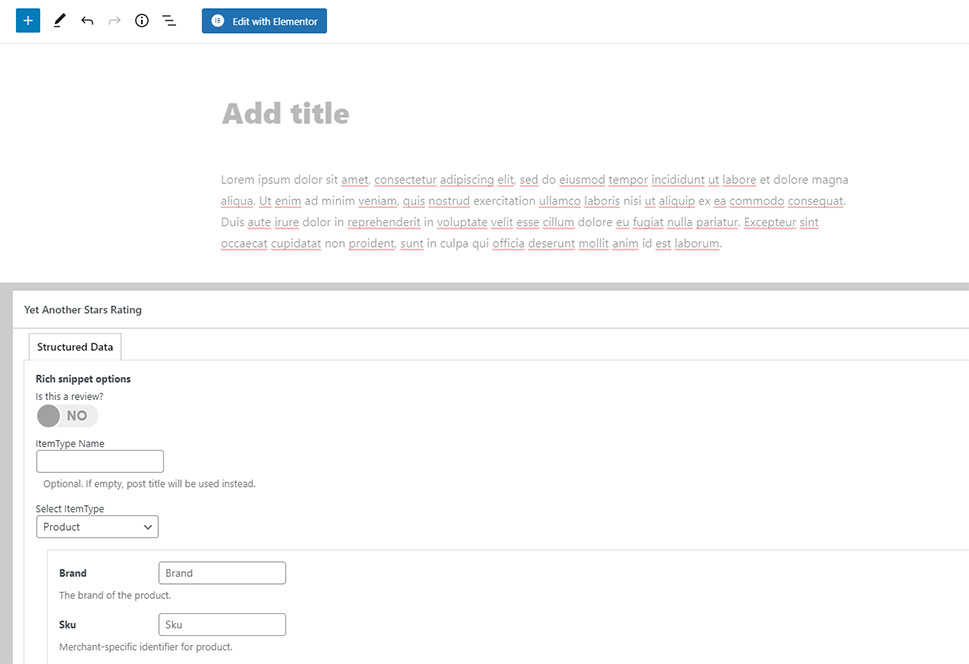
The plugin is SEO-friendly out of the box and comes with Schema support, allowing you to add Schema to your page and select its default type (a product, a book, a recipe, and so on). Also, you will get to add the so-called “overall ratings” to your pages, posts, and custom post types (automatically or via a shortcode), give the ability to users to vote and even allow them to rate different aspects for a specific review. For example, if your post is centered around a movie review, aside from rating your post, you can allow users to rate separate aspects of the movie itself, such as the plot, the cinematography, the acting itself, etc.
If you want, you can upgrade the plugin to the premium version and get access to many other features such as the ability to add user reviews and fake ratings, customize your rankings, add custom star sets, and so on.
Blog & Magazine Themes
View Collection


Setting the Plugin Options
To set the Yasr plugin options, after installing the plugin and activating it, head to Yet Another Stars Rating >> Settings. Once there, you will have access to multiple tabs that contain different plugin options.
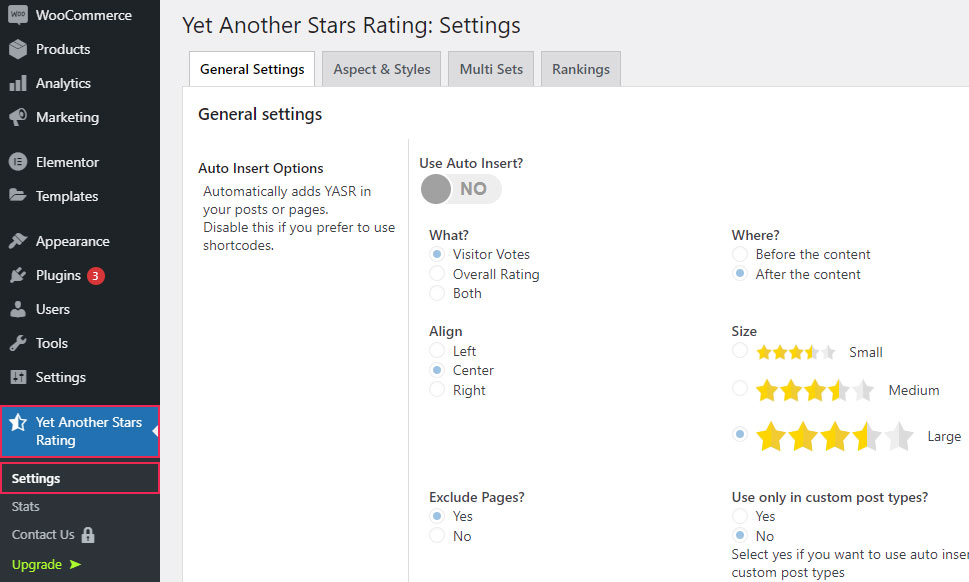
In the General Settings tab, you can enable the Auto Insert Options, i.e. choose whether you want to automatically add Yasr to your posts or pages. However, if you’d rather use shortcodes to add them manually anywhere you want on your page or post, you can leave this setting disabled.

If you enabled this option, you then get access to some other specific options, such as the ability to choose whether to show visitor votes, overall rating, or both, insert them before or after your content, choose an alignment (left, right, or center), and icon size (small, medium, large). In addition, you will get to exclude or include pages from this setting and select whether you want to use the auto insert option in custom post types only.
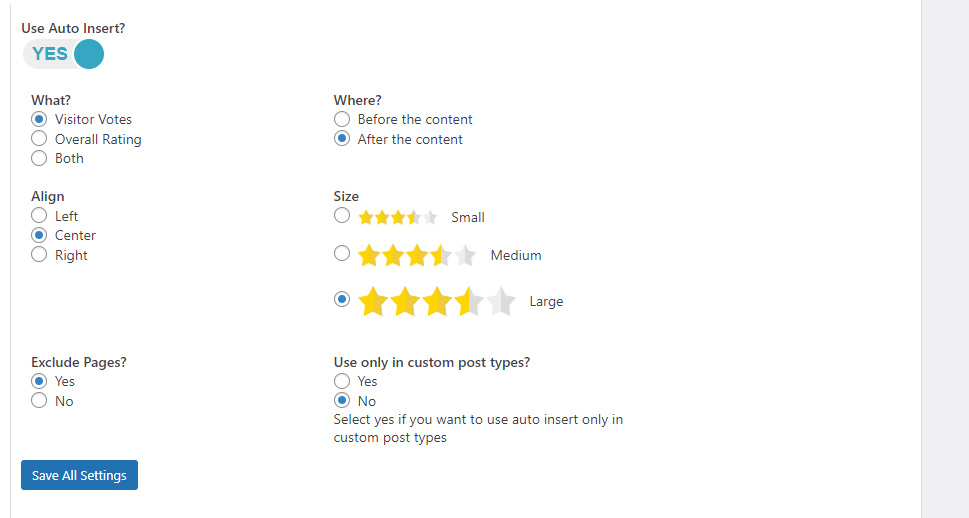
Next, if you turn on the setting that allows you to show your stars next to the title itself, you unlock access to a few other useful options related to it. Namely, you can choose whether you want to select this setting for visitor votes or overall rating, include or exclude it from pages, choose a specific page or post type where you want it shown, and so on.
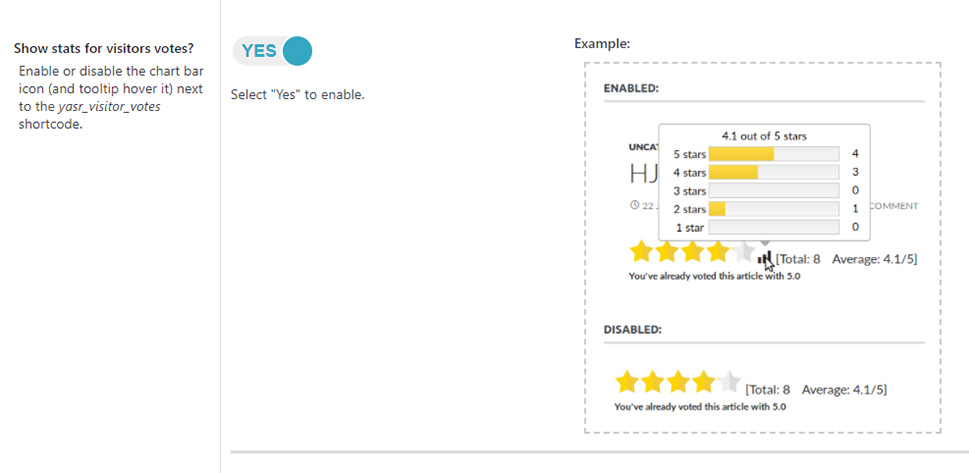
Another useful option in this tab allows you to show (or not show) stats for visitor votes. If switched on, this setting will display a chart bar icon that will show additional visitor vote stats when hovering over it.
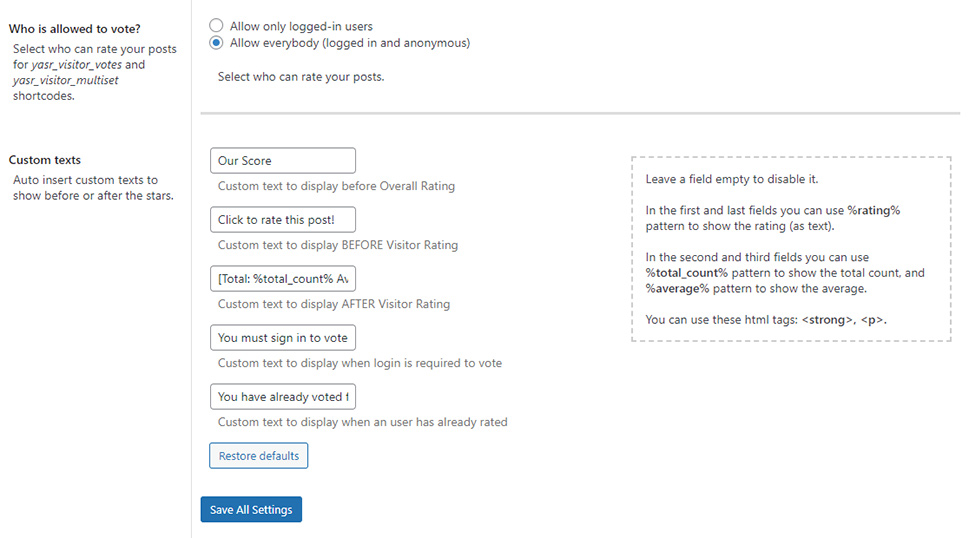
Plus, you will get to decide who is allowed to vote (logged-in users only, or everyone), and you can also insert different custom text that will be displayed before or after your star ratings. You can leave these fields empty to disable the setting.
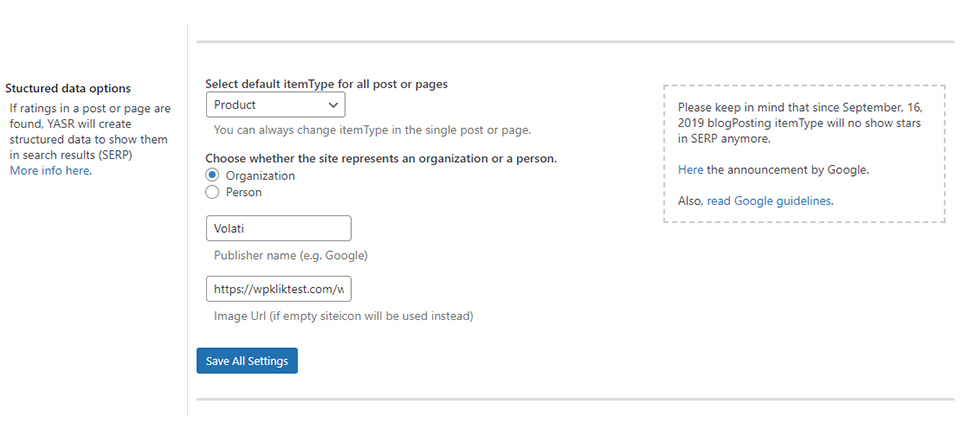
Near the bottom of the General Settings tab, there are some Schema-related options that allow you to select the default Schema type for all posts or pages, choose whether your site belongs to an organization or a person, etc.
Finally, there are a few Advanced settings at the very bottom, allowing you to select the loading of all results using AJAX and enable the storing of users’ IP addresses. Keep in mind that to comply with the GDPR law, you must notify users of doing this in case you choose Yes).
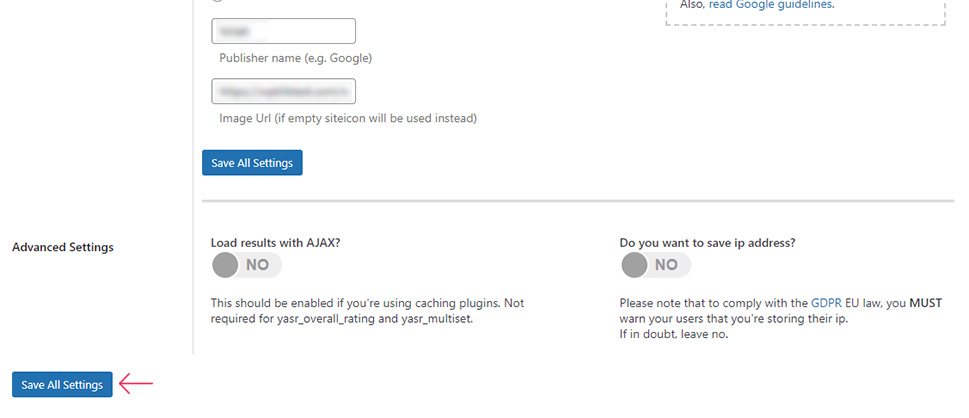
Don’t forget to hit the Save All Settings button after you’re done with setting the plugin to store all changes.
Then, in the Aspect & Styles tab, you will get to choose your stars set (you will have three different styles at your disposal). If you upgrade the plugin to pro, here you will also find options to upload your own custom icons and choose from a few other predefined icon sets as well.
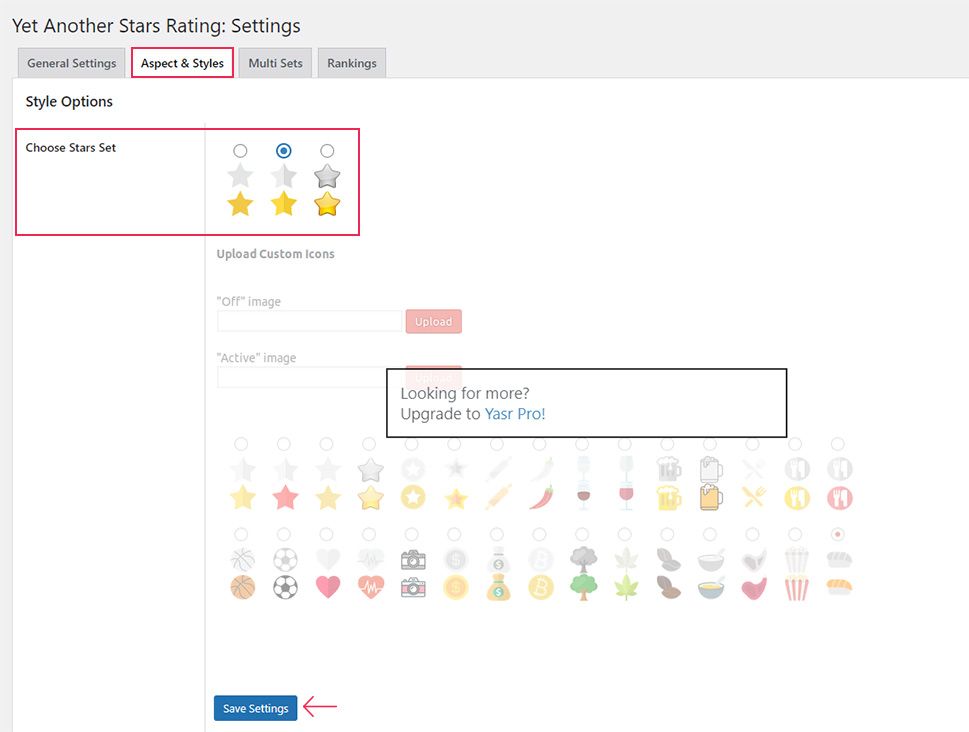
Once again, hit the Save Settings button after choosing the star set style that suits your preferences.
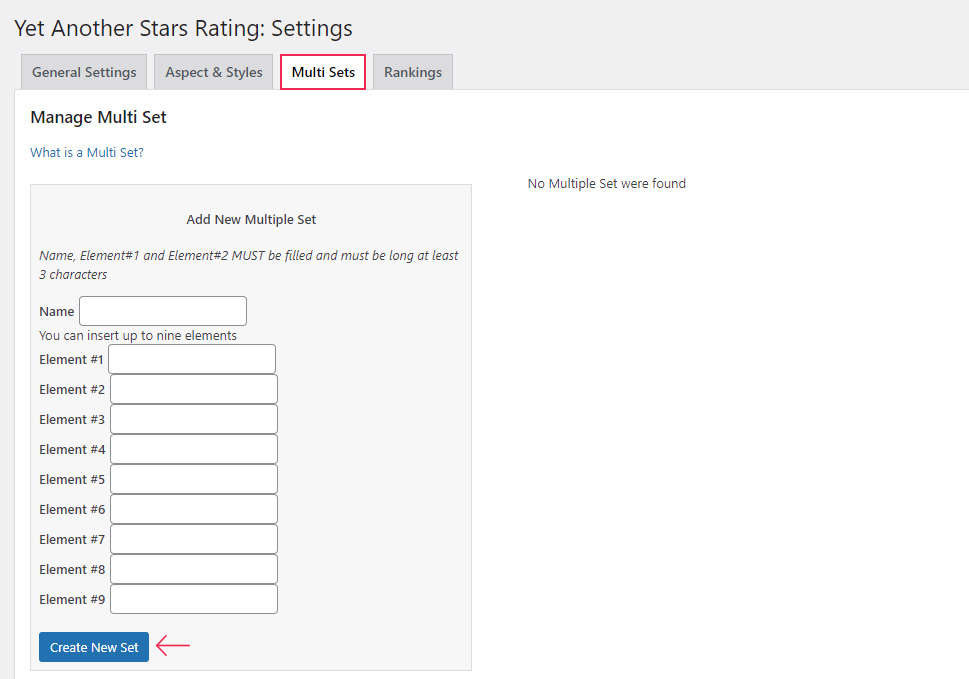
Now, in the Multi Sets tab, you get access to the settings that will allow you to add ratings for different aspects of your product, business, event, book, or anything else you are reviewing on your page or post. You will be able to generate 99 different multi sets here (add a name and different elements and then hit the Create New Set button) and each one of them can contain up to 9 different fields.
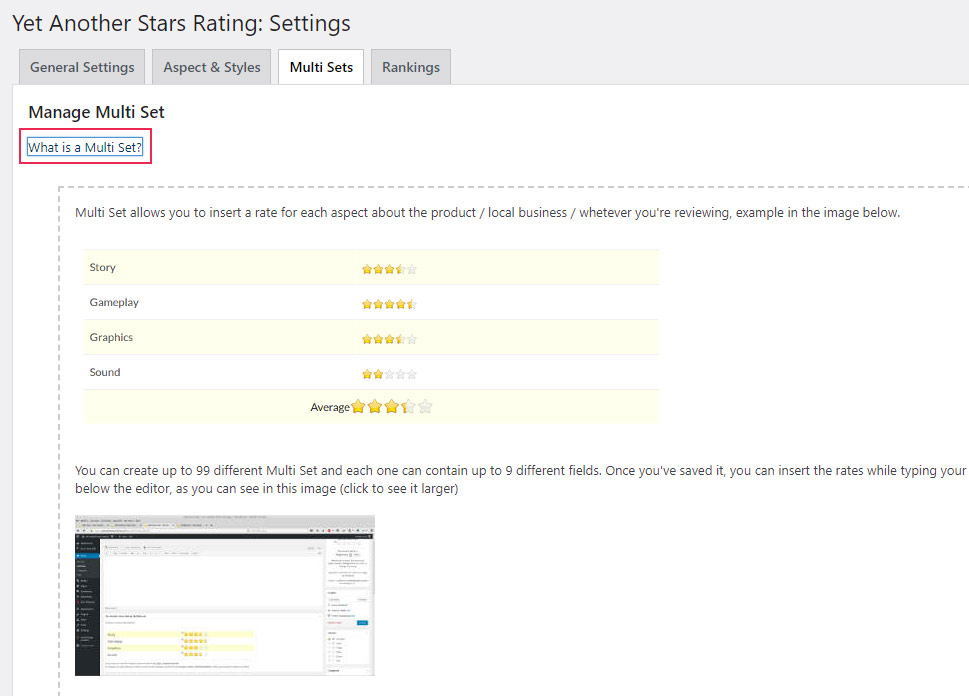
Then, after saving your settings, you will get to insert it on your page or post using the shortcode. You will get to use two different shortcodes here that will either allow you to rate these sets yourself or allow your visitors to do so instead. There are some detailed instructions available as well as an image you can preview in more detail if you simply click on the “What is a Multi Set?” link.
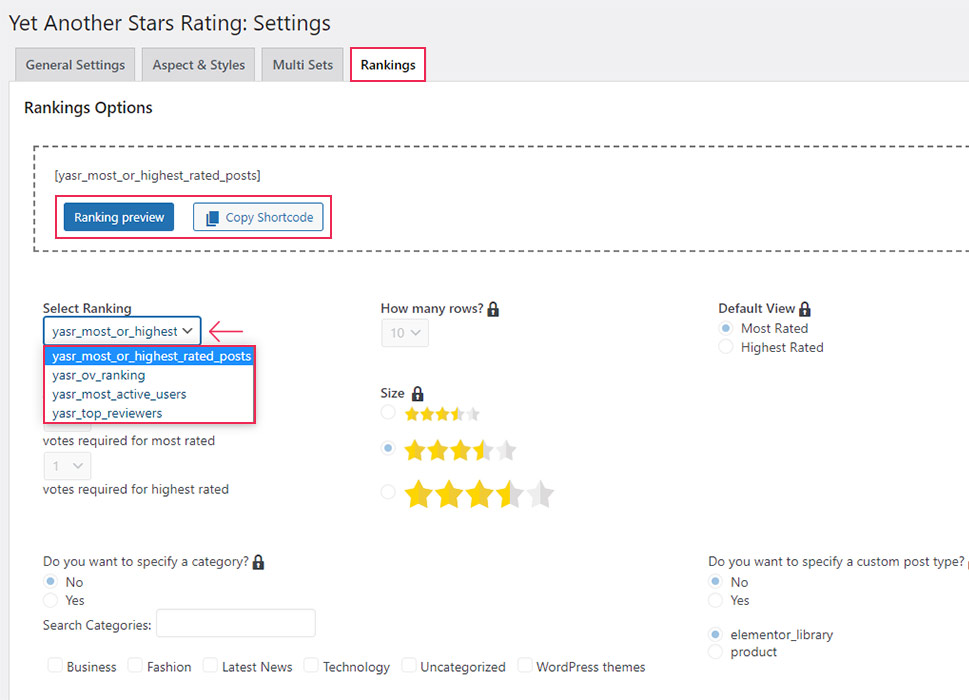
Last but not least, the Rankings tab allows you to select desired shortcodes to insert a specific rating type to individual pages or posts. Here you will get to select a specific ranking you want to add, and then copy and preview the way a shortcode will generate your ranking on your page or post.
Inserting Your Post Ratings Into Your Pages or Posts
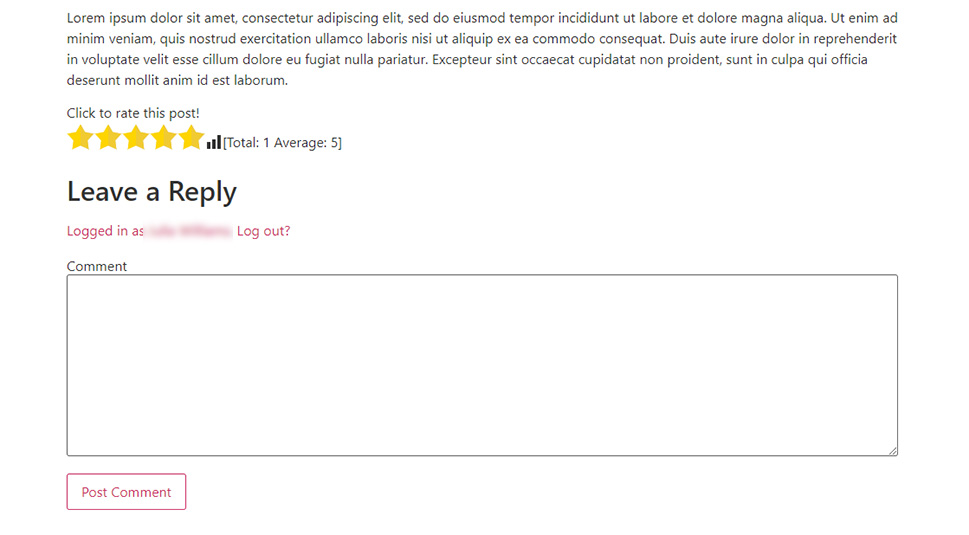
As we’ve already explained in the beginning, Auto Insert Options located in the General Settings tab will allow you to simply set the options for whether you want your ratings to be displayed before or after content. Therefore, if you want to add post ratings to your pages or posts automatically, you need to enable this option first. Then, after you select the desired rating type (visitor votes, overall rating, or both) and a few other options related to the rating position, you can proceed to go to your page or post.
After creating your page/post, simply click on Preview to see what your ratings will look like on your page or post.

Now, in case you prefer to add your ratings on individual pages or posts, simply head to the edit of your page or post and use one of the above-mentioned shortcodes you’ve previously copied in the plugin settings (Rankings tab).

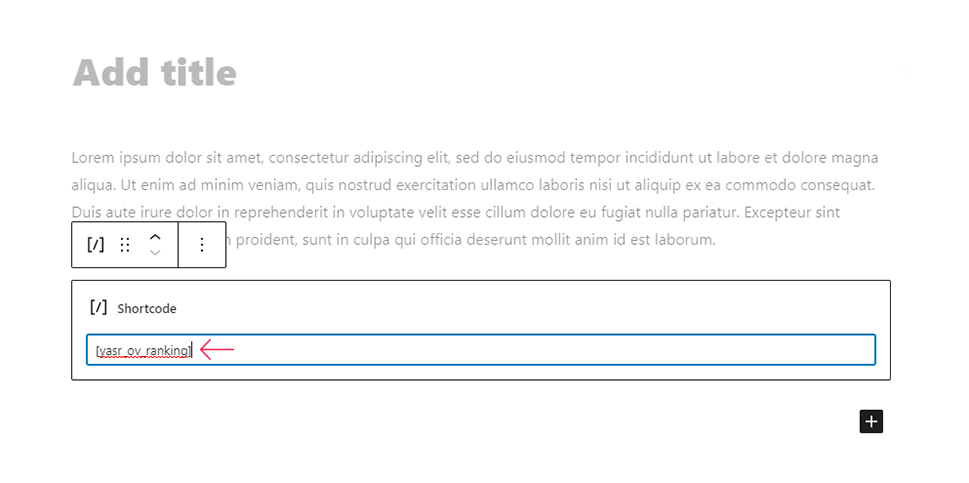
You can add this shortcode (or shortcodes) directly to your post if you use Classic editor. For Elementor, you can insert it using the Shortcode element.
For Gutenberg, simply paste the shortcode into the shortcode block (after hitting the plus (+) icon and then searching and adding the Shortcode block).
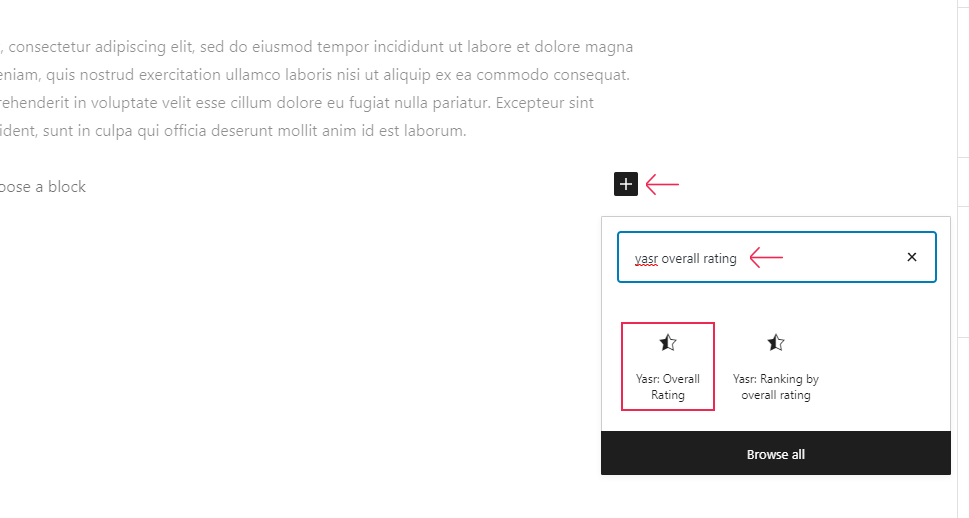
Alternatively, you can use blocks specifically made for Gutenberg that will also allow you to add different rating types to your posts. To do so, remove the previous block and hit the plus icon once again.
If you want to add a reviewer vote (overall rating), search for a block named Yasr Overall Rating and insert it anywhere you want on your page/post.
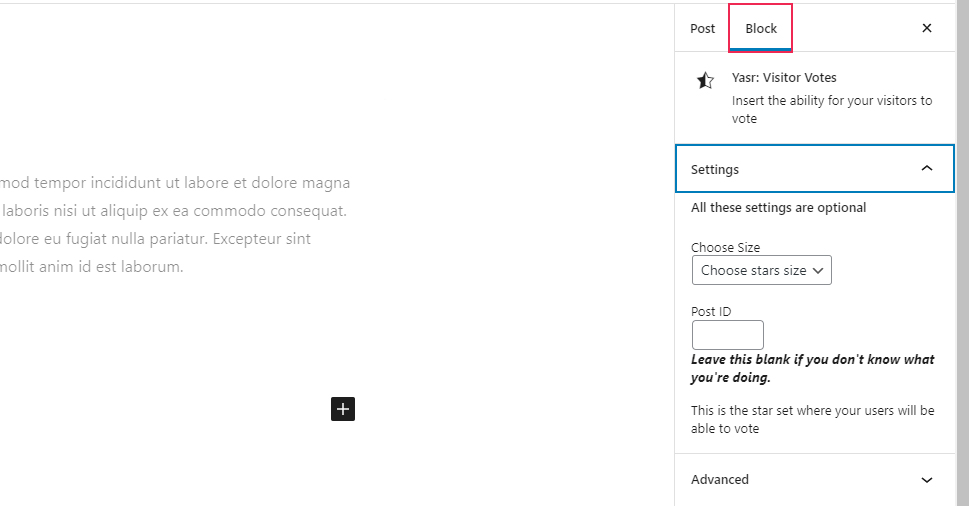
For visitor votes, hit the plus icon and search for a block called Yasr Visitor Votes and insert it into your post.
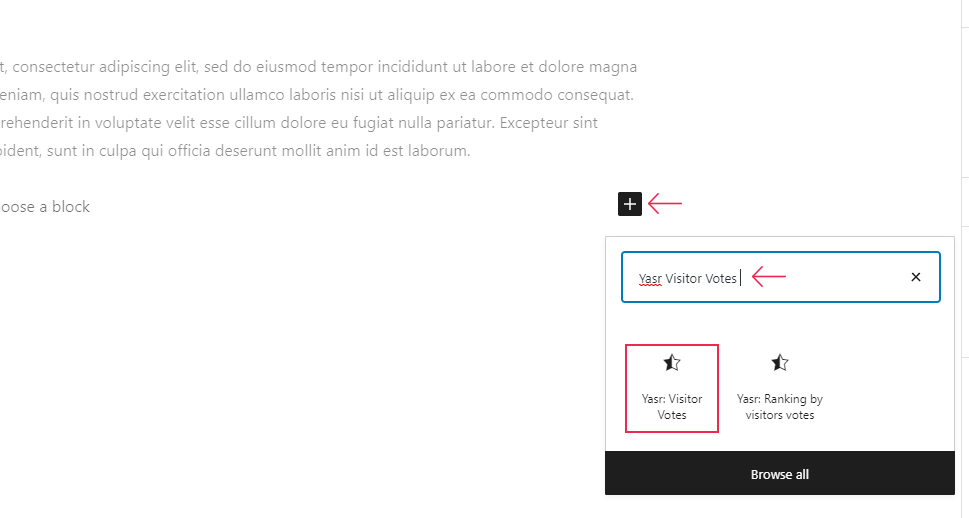
Within the block itself (in the Block tab on the right side of your post screen), you will also be able to select the desired star size (you can do this for both blocks).
Go ahead and preview the look of your post with your rating when you’re done.
Conclusion
Adding any kind of post rating system on your site or blog is an excellent way to encourage user engagement around your content. In the long run, post ratings can even bring you more credibility and reputation in your field, which is why we highly recommend that you add one to your WordPress-powered site.
Even though there are many great post rating plugins out there, we recommend using the Yasr plugin for this task. Not only is it completely user- and SEO-friendly out of the box, it also offers plenty of features to customize and style your rating system according to your preferences. No matter if you want to add overall ratings on your posts or wish to give the ability to users to rate different aspects related to your content, you will be able to do so with Yasr, and then some. Plus, you can add your ratings anywhere you want on an individual post, or set them to be added to all your posts automatically. Also, you will be able to add them to your pages or posts via a shortcode or using the Gutenberg block. Our step-by-step instructions and the plugin’s flexible and intuitive options will help you follow through with ease.

Dario Curvino
Hi, plugin author here.
Thank you so much for this tutorial, it is really complete and very clear!
Best,
Dario
Qode Interactive
Hi Dario,
Thanks for the kind words! We’re glad you like the article!
Best Regards,
Qode