How to Fix “Upload: Failed to Write File to Disk” Error in WordPress

Media files play a key role in the visual presentation of every WordPress website, and they can also affect its functionality. Their role in drawing in, engaging, and keeping visitors on a website cannot be overstated. This is why an error that prevents you from uploading new media files can draw your workflow to a halt.
In this article, we will discuss a file upload error called Upload: Failed to Write File to Disk. We’ll cover the reasons why it may occur as well as the steps you should take to solve it. Fortunately, this error can be solved more easily than you might expect. There are a few troubleshooting methods you can use, and we’ll cover them all below:
Qode Themes: Top Picks
View Collection


What causes the Upload: Failed to write file to disk error
The Upload: Failed to write file to disk error happens when you try to upload media files to your WordPress installation. The specific error message you get varies depending on the source of the issue. Phrases like “Unable to create directory wp-content/uploads/xxxx/yy”, “WordPress has failed to upload”, “WordPress has failed to write”, as well as some that mention a lack of disk space, are the most common.
There are several reasons why this error occurs. The most frequent one is having incorrect file permissions on your server. More precisely, if you set incorrect permissions for a folder, then you will be unable to modify it, i.e. write files to it. If that happens with your uploads folder, it means you won’t be able to add any uploaded media files to it.
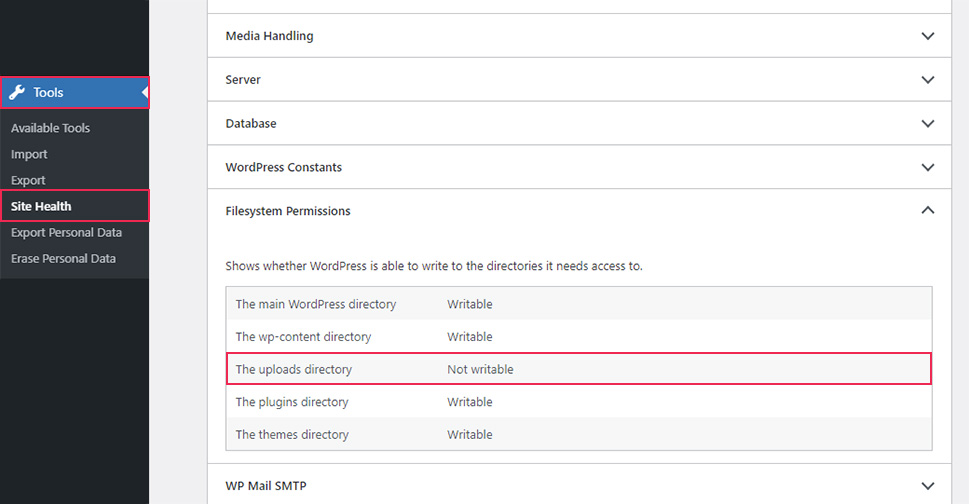
The easiest way of testing if this is the reason for the Upload: Failed to write file to disk error on your end is to navigate to Tools > Site Health, and open the Info tab. If in the Filesystem Permissions, you see that the status of the uploads directory is set to Not writable, it means that incorrect permissions are causing the error.
Apart from that, this error can happen if you simply run out of disk space on the server. New media files get stored in a temporary file before being transferred to the uploads folder. A lack of space in the destination folder can stop the transfer process and result in the Upload error.
How to fix the Upload: Failed to write file to disk error
Now that you understand why the error occurs, let’s examine the possible ways of solving it. We divided the troubleshooting process into three easily implemented steps, each addressing a potential reason for the error. With that being said, let’s dive in.
As we mentioned, the most common reason for this error is that the permissions for your files and folders, especially on the folders that store uploaded media files, were not set properly. Therefore, the first troubleshooting step you should perform is to inspect the current permissions set for your files and folders using FTP. Depending on what you find, you might need to change them.
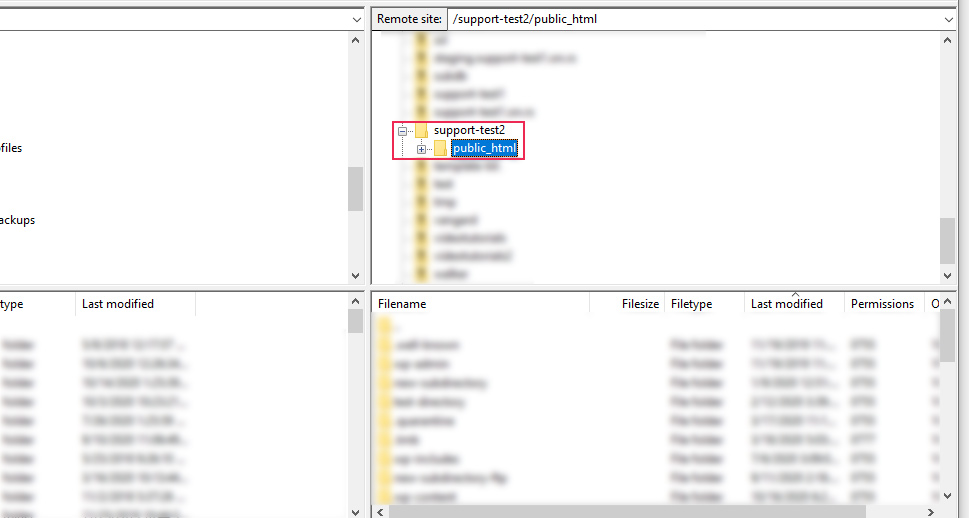
To start, connect to your server using your FTP credentials and navigate to your root WordPress directory, often called public_html.
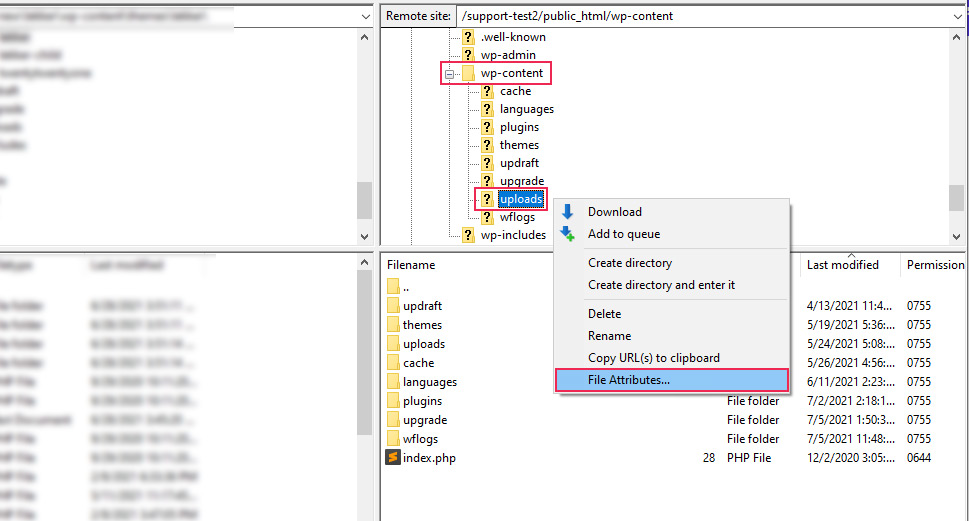
Then, navigate to the wp-content directory and locate the uploads folder within. Right-click on the uploads folder and then select the File Attributes… option from the dropdown menu.
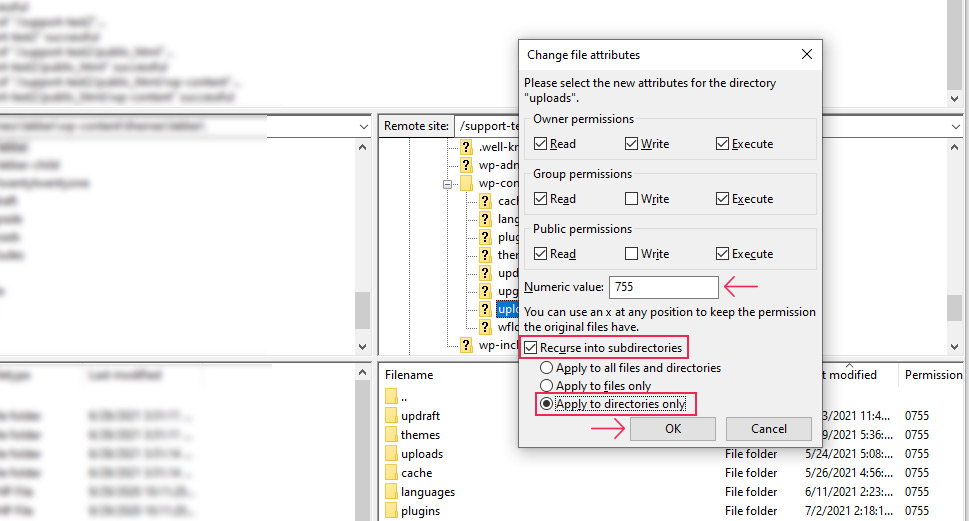
This will open a popup where you can set the permissions for the uploads folder, including all its files and subdirectories. The permission level for subdirectories should be set to 755 to make it possible to upload media files.
To do this, insert 755 in the Numeric Value field within the popup screen. Then tick the checkbox next to the Recurse into subdirectories option. After that, select the Apply to directories only suboption and click on the Ok button to apply the selected permission level.
You will need to wait a bit for the selected permission level to be applied to all subdirectories within the uploads folder. Once that’s done, your uploads folder will be writable and you should have no trouble uploading media files. Check if everything is working by trying to upload a media file.
If you discover that you still have issues with uploading media files in WordPress, then you should check the permission levels above the uploads folder. More precisely, you should check if the file and folder permissions are properly set for all files and folders belonging to your WordPress website. The permissions should be set to 755 for folders and 644 for files. Please note, since the wp-config.php file is one of the crucial files in a WordPress installation, you should implement tighter permission levels for that particular file (use 440 or 400 instead of 644).
If you need further help with applying the necessary permission levels site-wide, we recommend taking a look at our article on setting proper file and folder permissions in WordPress. When you’ve set everything, try to upload a media file once more to check if the error was resolved.
If setting the file and folder permissions correctly hasn’t fixed the error, it is time to explore some less obvious reasons for experiencing the Upload: Failed to write file to disk error. One possibility is that the temporary WordPress folder is full. WordPress tends to store uploaded content in a temporary folder on your server before saving it within the uploads folder. As such, if your temporary WordPress folder is already full, then new content can’t be added to it. Then, that same content can’t be placed within the uploads folder on the server, which results in you getting the upload error.
In that case, to solve the error, you would need to empty the temporary folder used by WordPress. Unfortunately, that folder isn’t accessible via FTP. Instead, you will need to consult your hosting provider regarding this matter. They will examine the content of that folder and empty it on your behalf. Once they give you the all-clear, you should check if the issue is still present by trying to upload some media files to your website.
Another reason why an Upload: Failed to write file to disk error can happen lies in reaching the storage limit provided by your hosting plan. This is a major concern for users who are on hosting plans with limited storage. Particularly because all the themes, plugins, and other WordPress website content can occupy a considerable amount of space.
To verify if exceeding your hosting storage quota is the reason for the Upload: Failed to Write File to Disk error, you need to check your WordPress disk usage. If this turns out to be the source of the problem, you will need to either optimize your existing content to save some storage space or upgrade to a hosting plan with more space. In either case, you can consult your hosting provider on the best solution for you.
Final Thoughts
As images and other media files are a crucial part of every WordPress website, getting an Upload: Failed to Write File on Disk error can be a pain. This error will hinder the editing process, stop the creation of new pieces of content, and affect your workflow as a whole.
Fortunately, this error can be easily solved by following the instructions we’ve laid out in this article. The possible troubleshooting steps include setting the proper file and folder permissions, emptying the WordPress temporary folder, and increasing the hosting storage limit if it’s been exceeded. These steps aren’t difficult to implement, and we are confident you will be able to solve this error in a flash.
