How to Automatically Change WordPress Salt Keys
Maintaining the security of a website should be one of the top priorities of every WordPress owner. Steps for doing so include regularly updating the WordPress Core, plugins, and themes, as well as choosing a trusted hosting provider, and not using any weak passwords. With passwords, specifically login ones, WordPress uses an additional layer of protection called salt keys to shield them. WordPress salt keys play an important role in securing a site, but most WordPress users know very little about them.
In this article, we’ll take a closer look at the topic of WordPress salt keys, and we’ll answer the following questions:
When a user logs into a WordPress website using their login credentials, they can choose whether to remain logged in. If you do, this information is then stored in cookies, to make staying logged in possible. But, even though this is quite convenient, it’s a potential danger if the cookies are exposed. As such, WordPress uses a combination of salts and authentication/security keys to secure WordPress login information.
A WordPress security key is created by transforming your password into a long, random, alpha-numerical variable. And if anyone discovers the variable, it is nearly impossible to figure out the original password from it.
WordPress salt keys (or salts) are elements used in cryptography. They work by hashing the corresponding security keys into random strings of alphanumeric characters. This makes them an essential feature for information security. They are present in all kinds of applications, and salts are even used to sign your website’s cookies. As such, you should never disclose your WordPress security keys and salts as, with them, some malicious users could decipher your password and possibly endanger your website.
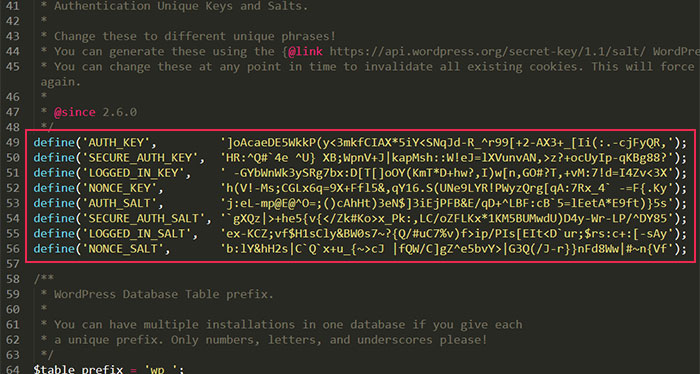
WordPress salts and security keys are located in the wp-config.php file, within the Authentication Unique Keys and Salts section. There are four security keys, followed by four corresponding salts.

Every new WordPress installation comes with its own unique set of security keys and salts. This ensures the security of a default WordPress installation. However, there are various reasons why you should change them periodically.
First, by doing so, you are actively working to prevent malicious actions against your website. For example, every time you change your salts and security keys, all logged-in users will be logged out. So, if you accessed your WordPress dashboard using a public computer recently and, accidentally, remained logged in, changing your salts and keys is highly advisable as it will forcefully log you out. And if you suspect that your security has been breached by hackers, you should change your salts and security keys. This will log out anyone that has access, and you can later advise all your users to change their passwords. Please note, changing your salts and keys is NOT the same as changing your WordPress login password.
Given that there are so many benefits to being able to change WordPress salts and security keys, it’s unfortunate that there isn’t any built-in way to change them within WordPress. But, that’s what we’re here for—to guide you when you have to step off the beaten path. So, let’s move on to the how-to’s of this article and see what approaches you can take.
Qode Themes: Top Picks
View Collection


How to change WordPress salt and security keys
You can change WordPress salts and security keys either using an appropriate WordPress plugin or by manually editing the wp-config.php file. We will show you both methods in this article, and you can decide which one to use. You’ll see from the instructions below that both are quite easy.
Thanks to WordPress and various third-party developers, there is a multitude of plugins you can install for various purposes. In the case of changing WordPress salts and security keys, you can take a look at some of the available security plugins. They will most likely have suitable options for changing your salts and keys, and it’s helpful to examine them first as most users have some kind of security plugin already installed. Alternatively, you can try to look for plugins built specifically for changing WordPress salts and security keys. For this article, we have chosen to show you the latter. The plugin we will be using in our examples is the Salt Shaker plugin.
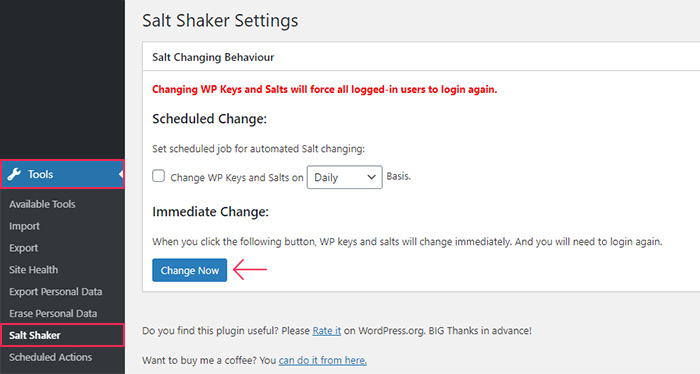
After installing the plugin, navigate to Tools > Salt Shaker. To change the security and salt keys, simply press the Change Now button. This will immediately change the keys for you.
If you want to enable automated changes, you should tick the checkbox under the Scheduled Change: section before pressing the Change Now button. You can also choose how often the automated keys change should occur: daily, monthly, quarterly, or biannually.
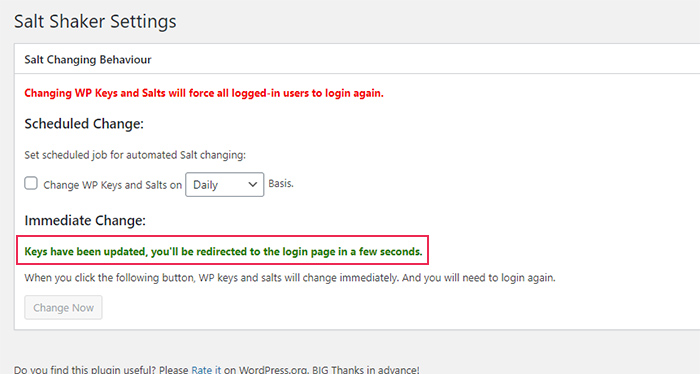
After pressing the Change Now button, you will see the following success message: Keys have been updated, you’ll be redirected to the login page in a few seconds. Then you will be logged out and redirected to the WordPress login page.
As this method requires the use of FTP, we advise brushing up on your knowledge of it before proceeding. Also, you should make a backup of your WordPress files, just in case. It’s best not to take any chances with your site since this method requires you to edit the wp-config.php file. When you have everything ready, you can proceed as described below.
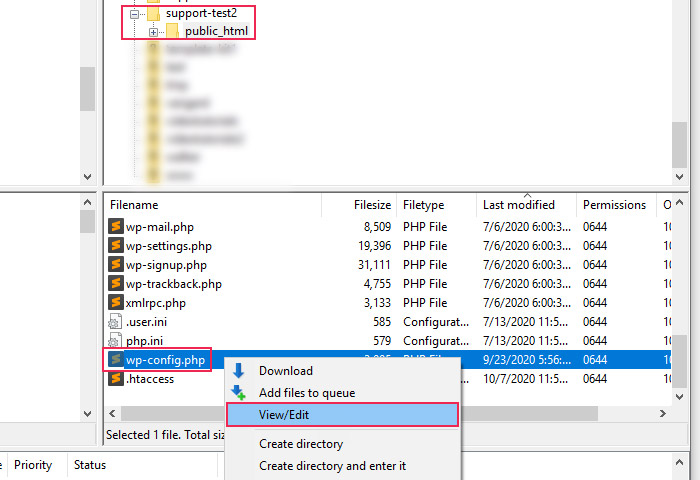
First, connect to the server using your FTP credentials and navigate to your root WordPress directory, often called public_html. Find the wp-config.php file within, right-click on it and select the View/Edit option.
Open the file using your preferred text editor and locate the part with your authentication and salt keys.
Then, delete those keys and navigate to the salt keys generator, provided by WordPress.org.
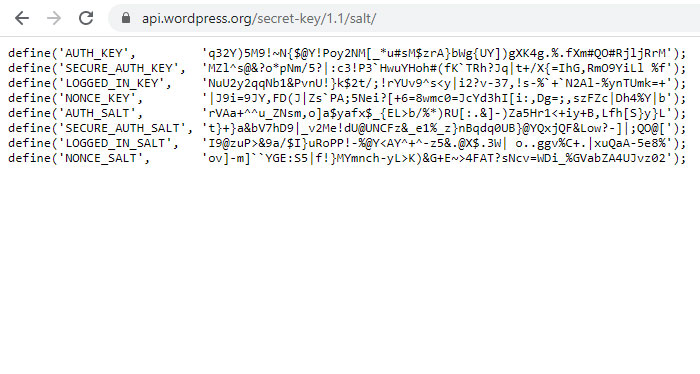
Copy the code from that page and paste it into the wp-config.php file, in the same place where the old keys were located.
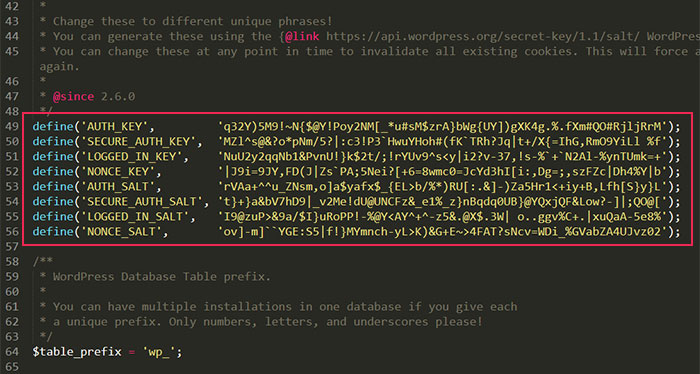
Afterward, save the changes you made and upload the file back to your server. This will override the file with the old keys that is currently on your server.
As we mentioned before, after changing the WordPress salt keys you will be logged out of your admin dashboard and redirected to the login screen. So, you will need to log in with your credentials to continue managing your WordPress website.
Final Thoughts
WordPress salts and security keys represent a way of securing website login passwords against potential hackers. Even though they are set by default when a website is created, we advise periodically changing them. To do so, you can use either of the two methods we outlined in this article. Keep in mind that changing the WordPress salt keys will log you out of your WordPress dashboard, as the change invalidates any stored website cookies. And don’t forget to notify any users you have so they can log back in and change their passwords if necessary.
