How to Add Your WooCommerce Store to Facebook
If you are running an online store on WordPress, you probably know all about WooCommerce, the most popular online store plugin. So, you‘ve set up a WooCommerce store, populated it with excellent products, equipped it with perfect product images, and used some carefully selected WooCommerce plugins to make it just right. All you now need is to start making some sales.
And in order to make some sales, you first need more store visitors. Why not try reeling them in by integrating your store with the world‘s most popular social network? WooCommerce and Facebook can be integrated to benefit your store, but the setup takes a while. Luckily for you, you have us to show you how it‘s done, every step of the way. Here‘s what we‘ll be talking about:
eCommerce WordPress Themes
View Collection


As we‘ve said before, Facebook is by far the most popular social network currently in existence. This means that, if you have a Facebook presence, your actual impact is greater than the sum of your social followers: Facebook “friends“ can see interactions of others, extending your organic reach.
Not to mention more promotion channels through Facebook ads and sponsored posts, and, consequently, more exposure from your store. We honestly see no way how integrating your WooCommerce stores with Facebook (especially if you already have a Facebook presence) can be anything but useful in terms of sales and attracting more customers.
We’re going to assume that you already have a WordPress website, and that you already have set up an online store using WooCommerce. Whether you are using a premium online store theme or a free one is irrelevant – all you need is a fully functional WooCommerce store.
Another thing you need to do before you begin is open a Facebook account and set up a Facebook page. We won‘t be showing you how to do it, but it‘s not very hard. Any Facebook user can create a page, and on-screen prompts make it easy and quick.
Finally, you will also need to set up Facebook Pixel. Facebook Pixel is a piece of code which has a range of functions, but most of them have to do with the commercial aspects of Facebook.
Once you have all that done and dusted, you can move on to the next section.
The integration functionalities you need require a plugin. We will be using the Facebook for WooCommerce plugin, developed by Facebook, which you will also need to install and activate on your website.
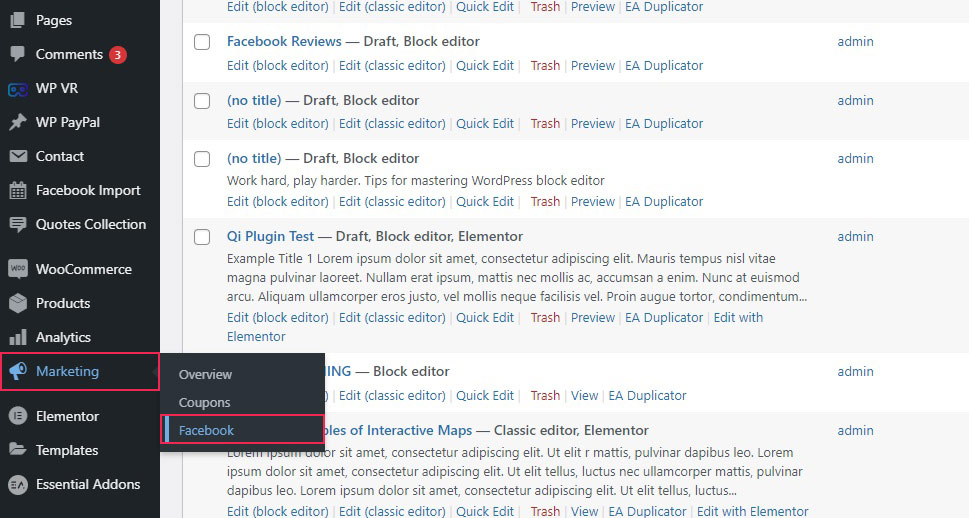
Once you have done that, navigate to the plugin‘s settings by selecting Marketing/Facebook from your WordPress dashboard.
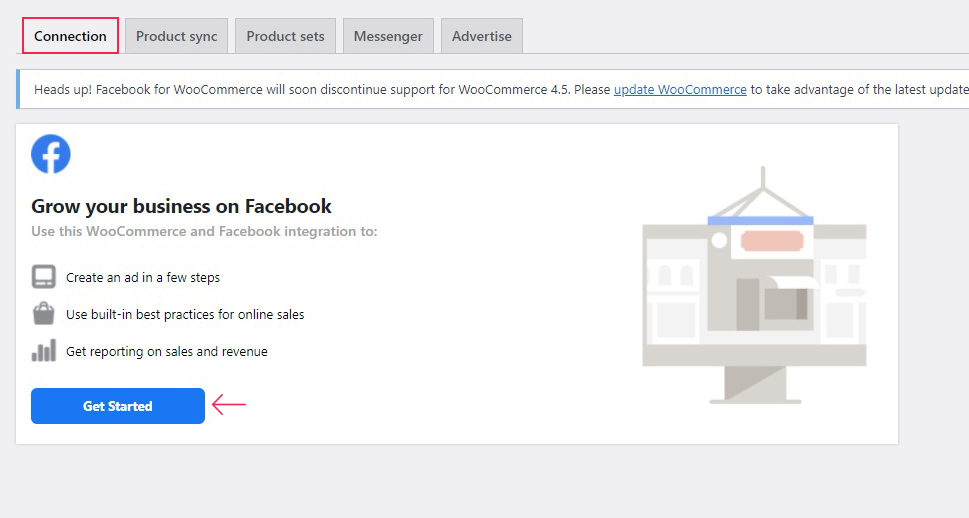
You will be taken to the plugin‘s Connection tab. To get started, click the Get Started button.
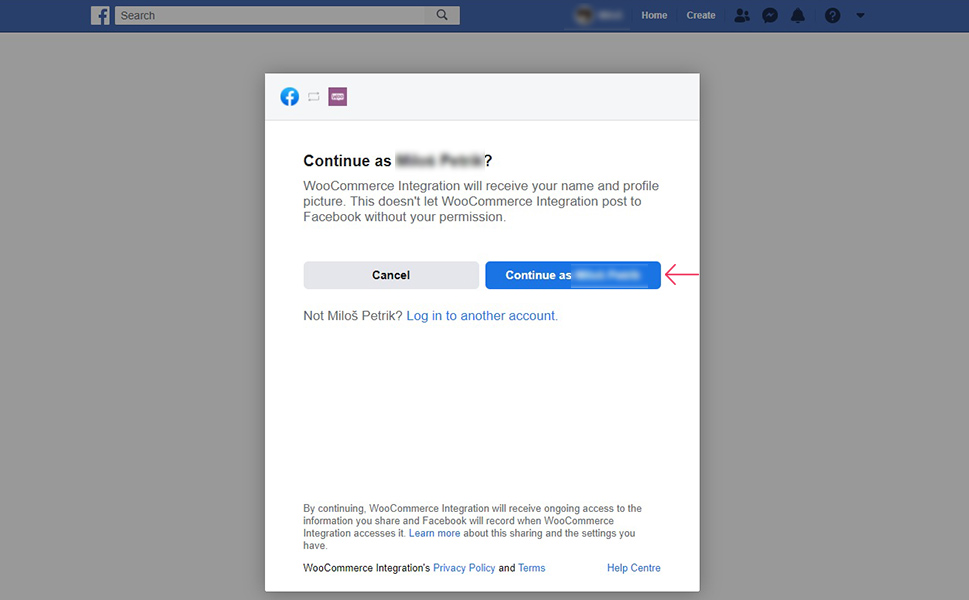
You will immediately be taken to Facebook‘s login screen. If you are logged into your Facebook account, as we have suggested, click to Continue.
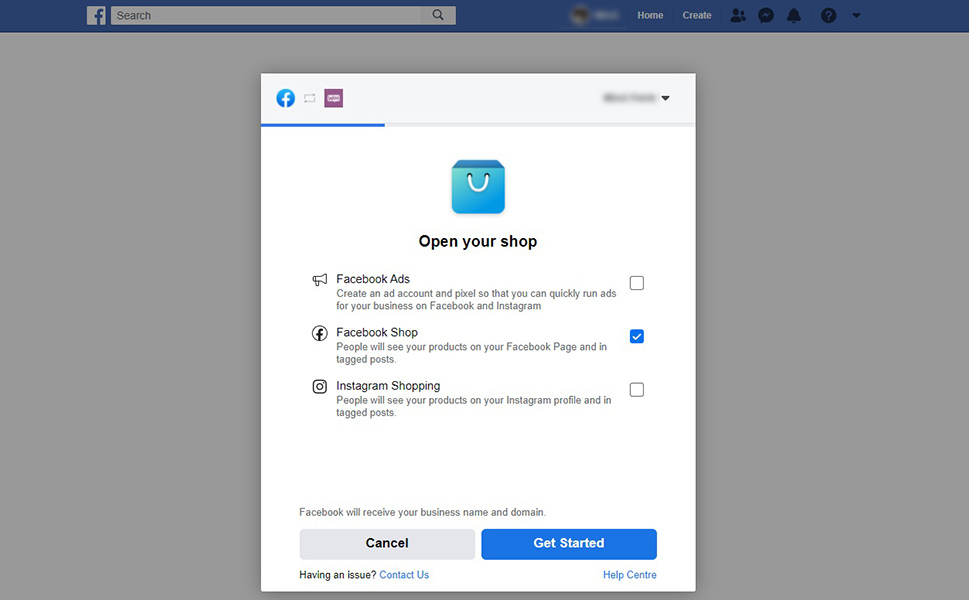
You can now uncheck the features you don‘t want. We will be concentrating on our Facebook Shop, so that‘s what we‘re leaving checked. You can add both Facebook Ads and Instagram Shopping later.
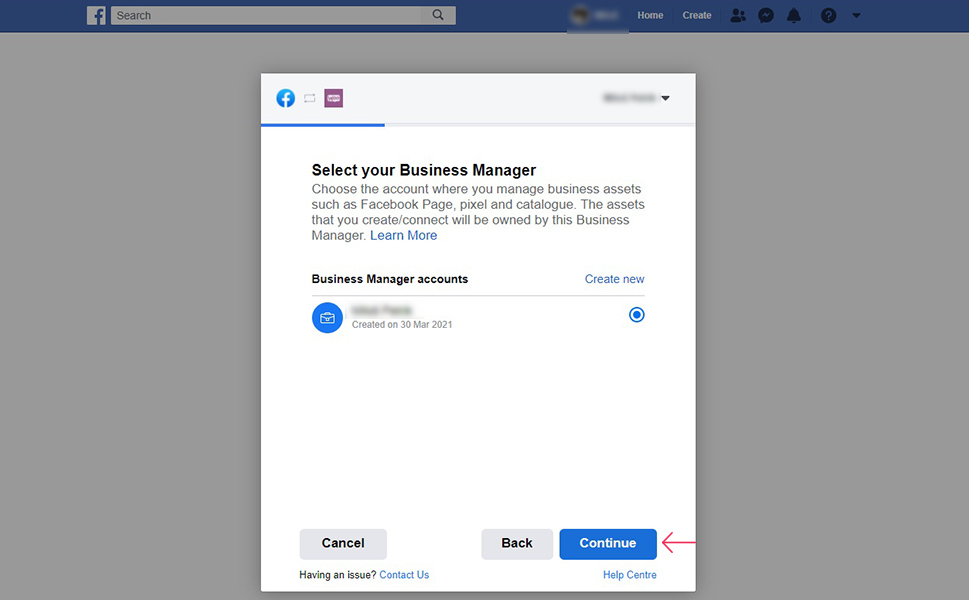
Next, you need to select the account you will use to manage the business of your WooCommerce store on Facebook. This can be your account, or you can select or create another one. Once you have selected the account you want to use, click Continue.
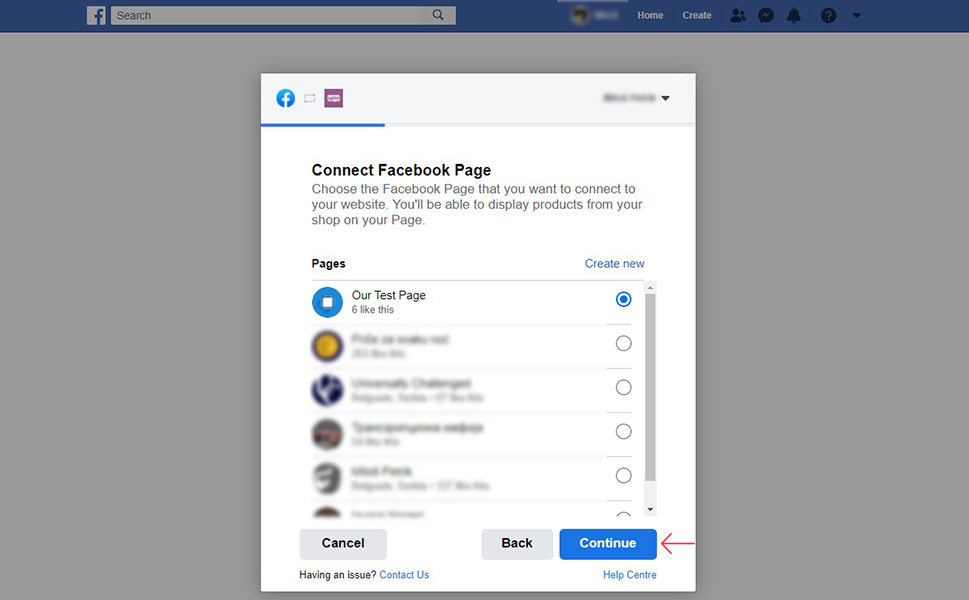
You will then need to select a page which will host your online store. If you haven‘t already, you can create a new Facebook page from here. We have created Our Test Page. Once you have selected your page, click Continue.
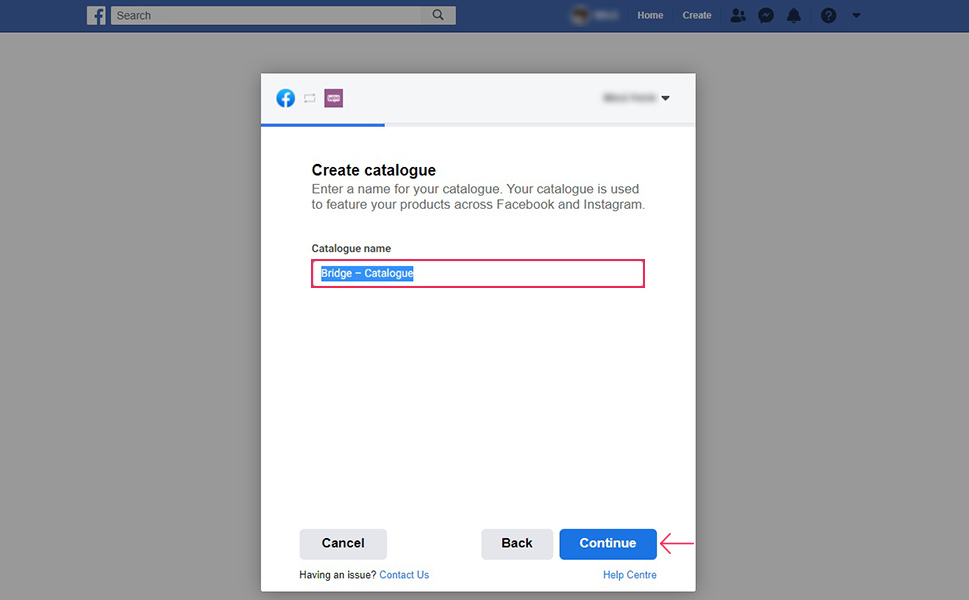
The next thing you need to do is name your catalogue. You can have multiple catalogues, and can add them later. Click Continue when done.
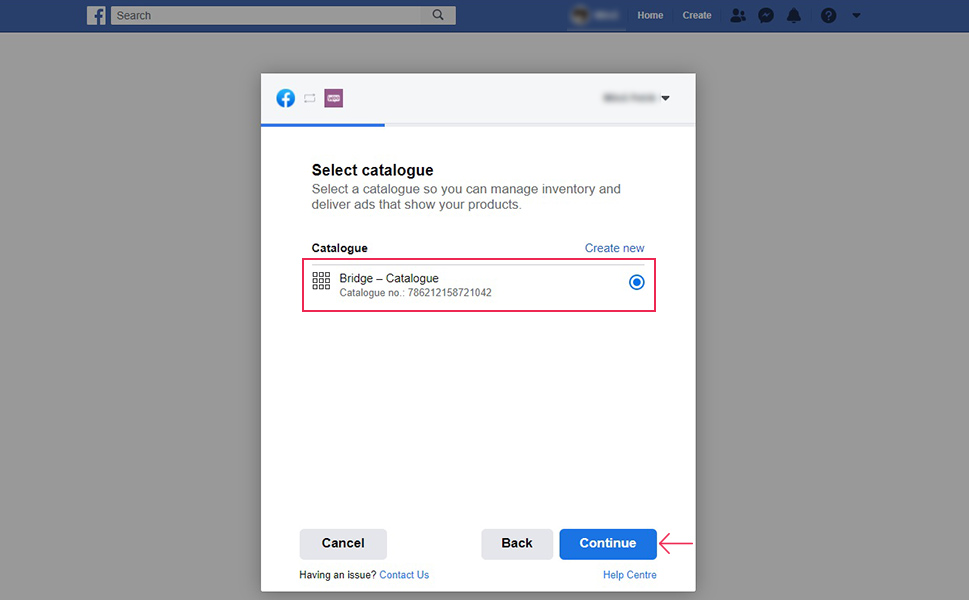
On the next screen, you will need to select a catalogue for your shop. We will go with the one we have just named. Click Continue once you have selected a catalogue.
You will then need to select a Facebook Pixel or create one and click Continue when done.
Next, you will need to select a name for your account, and then choose whether you‘d like to use Facebook checkout or the checkout from your WooCommerce shop. When you have set this up to your liking, click Continue. You will need to confirm your selection on the next screen.

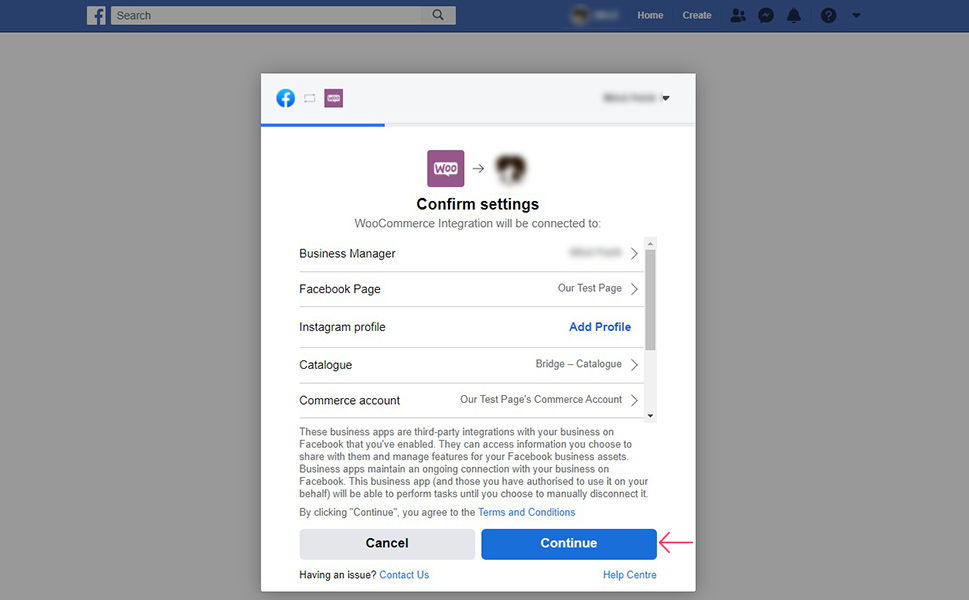
You will then be taken to a screen where you can review and correct any settings you have made. Once you are satisfied, click Continue.
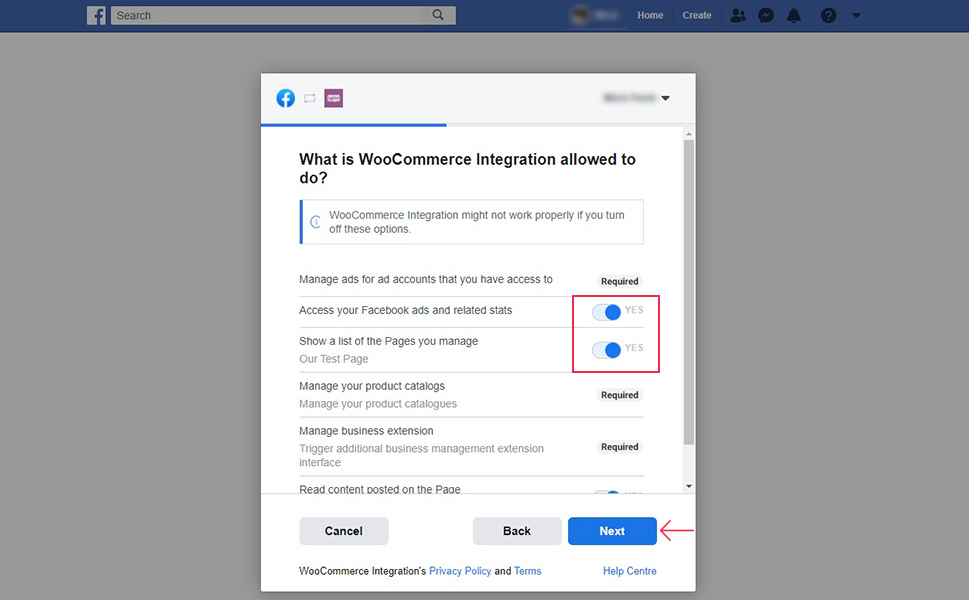
On the next screen, you will be prompted to give permission to WooCommerce to use certain data from your account. In order to enable all the functionalities, leave all the sliders on Yes and then click Continue.
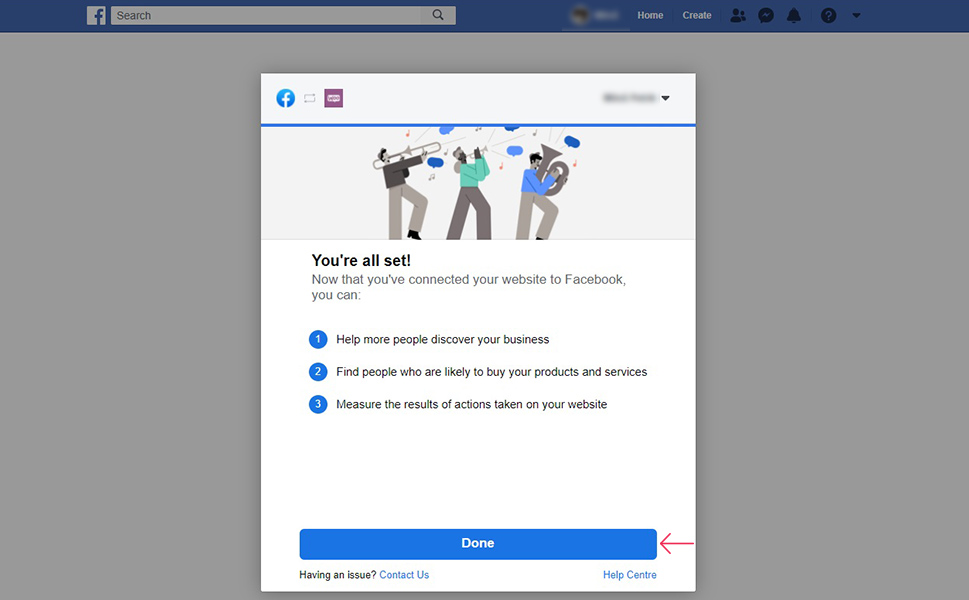
Your WooCommerce store will now be integrated with your page. Click Done to continue.
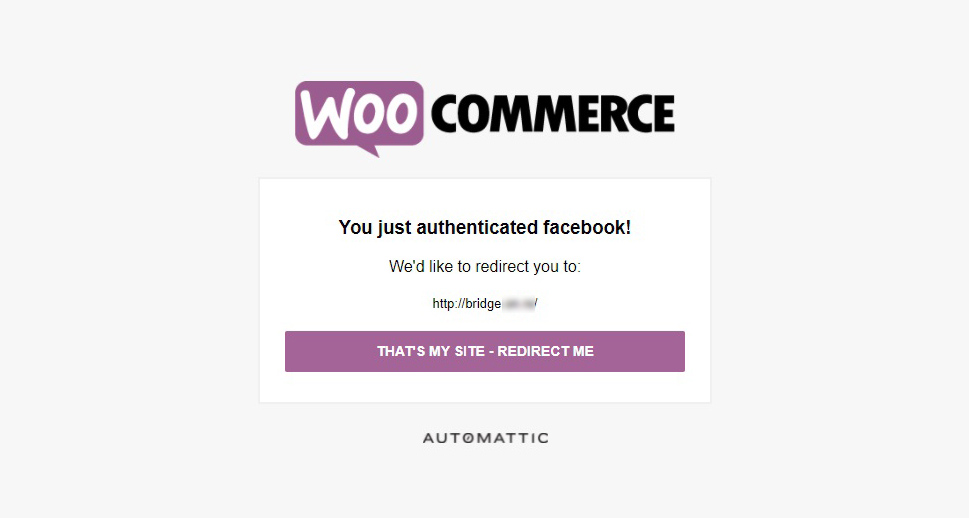
With the Facebook side of things all squared, you will be asked to be redirected back to your website. Click That‘s My Site – Redirect Me.
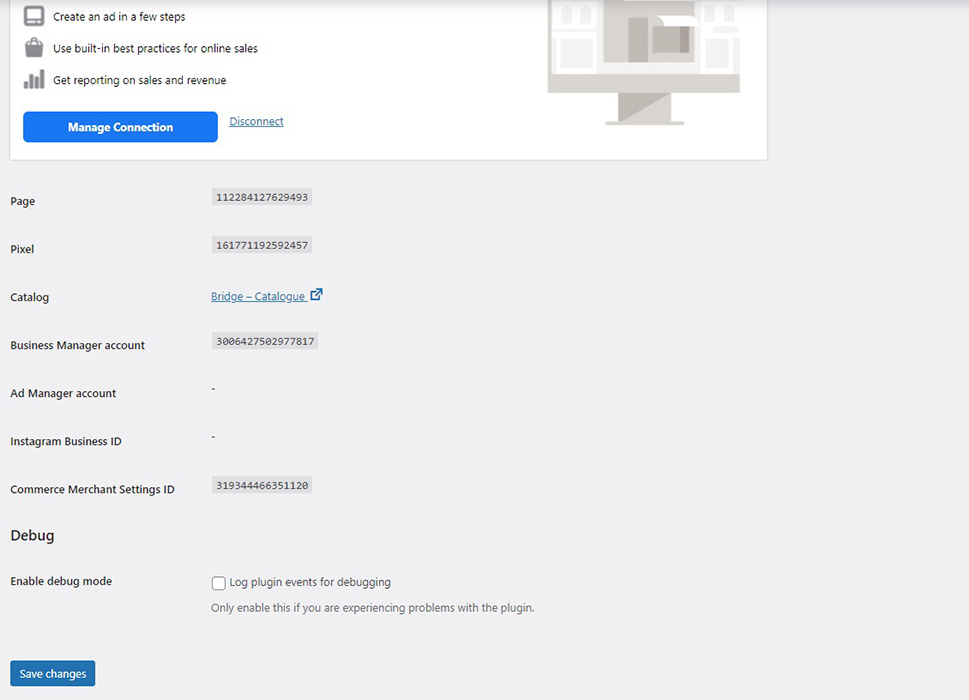
Click Save changes, and you‘re done: pending review.
As we‘ve mentioned above, in order for your store to be featured on Facebook, it requires a manual review, as Facebook wants to be certain your store (and every store) is compliant with Facebook‘s rules and community guidelines. While more than a little annoying, this is a must – and it means it may be weeks before your store or any of its products are visible on Facebook.
In Conclusion
As you saw, though it may take some time, integrating your WooCommerce store with Facebook isn‘t that hard at all. Even for these somewhat complicated integrations, we‘re sure WordPress‘s central tenet of the internet being for everyone still holds. Your own sales and marketing strategies are up to you, of course, but with this tutorial we feel you are at least technologically equipped to make a killing.
