How to Automate Posts with a WordPress Scheduler Plugin

You don‘t need a massive staff roster to maintain a regular, round-the-clock publishing schedule. You just need to have your ducks in a row with regards to content. Once that’s settled, you can schedule WordPress posts to be published at a later date with just a few clicks of the mouse. And you can do it in bulk using a WordPress scheduler plugin.
Not only does this mean you can time your posts to coincide with specific events, but it is also very useful if you want to maintain your schedule with content you‘ve produced ahead of time while, say, traveling or otherwise unable – or unwilling – to be online. If your target audience is in a different time zone, you might also want to adapt to their reading habits. If you are also automatically posting on Facebook, for instance, you‘ll want to post during peak traffic hours for your target audience without having to get up at odd hours.
While we find automating WordPress posts to be especially useful for blogs or other smaller operations, large companies may find post scheduling useful, too. Especially in instances such as promotions and special offers. Simply set up your website to post for you and reap the benefits.
Still, scheduling individual posts may take an inordinate amount of time, especially if you are running a webzine or blog with multiple authors. This is where Auto Post Scheduler, our preferred WordPress scheduler plugin, comes into play.
How to Configure the Auto Post Scheduler Plugin
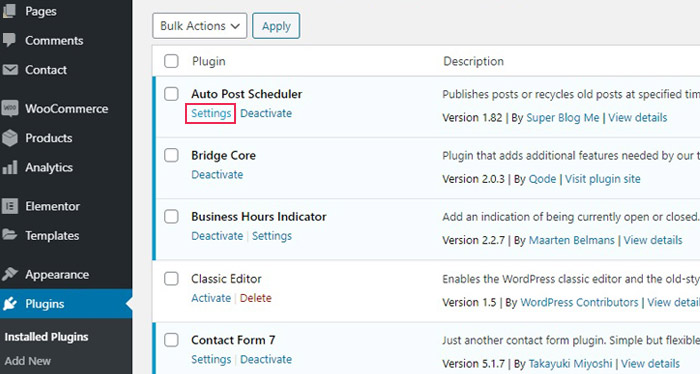
The first thing you need to do is install and configure Auto Post Scheduler. You can install and activate the plugin the same as with any other plugin.
Next, you‘ll want to configure your plugin for posting. Access it through your plugins list, and click the settings link.
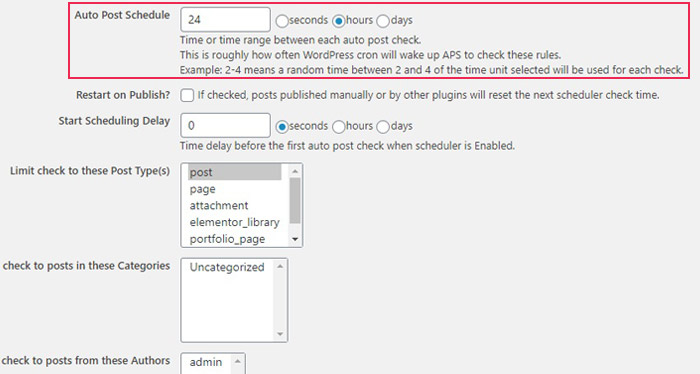
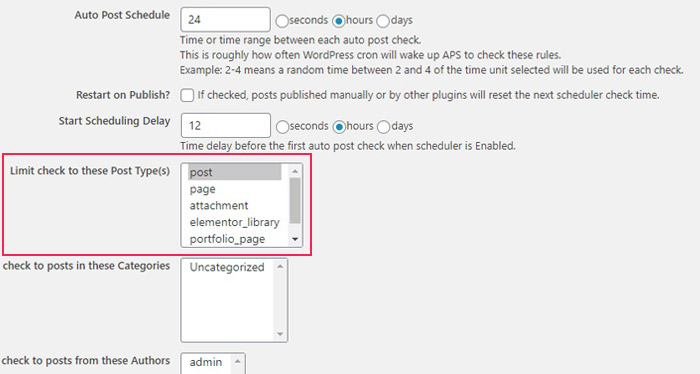
The first option you need to take a look at is the Auto Post Schedule option. This sets the interval during which this WordPress scheduler plugin checks for publishable posts and publishes them. You can set it for a number of seconds, hours or days, and you can also use a hyphenated range, as in the developer-provided example, for a random interval between checks (useful, say, if you want to add a random element to a special offer you‘re having. The default is set at 24 hours, meaning one post a day.
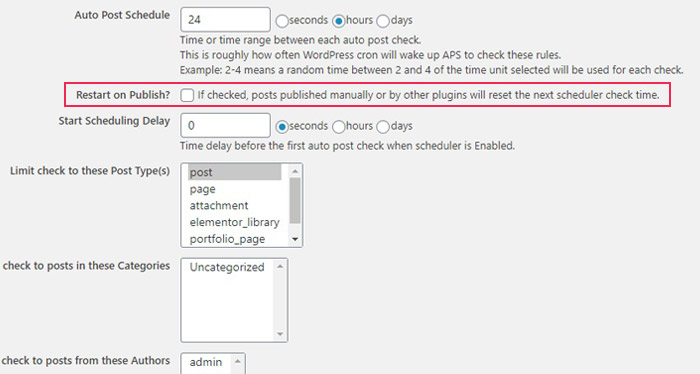
Next comes the Restart on Publish checkbox. This resets the checking period if a post is manually published while the counter is running. This is useful if you have a bunch of “filler“ posts lined up in case your regular posting schedule lags behind.
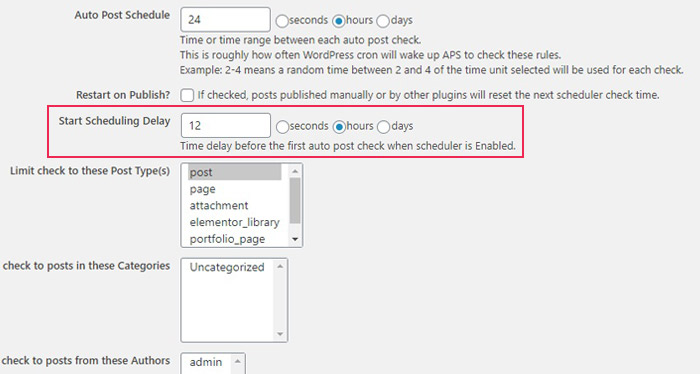
The Start Scheduling Delay functionality serves to delay the time when the plugin begins to check for eligible posts. If you set it to 12 hours, like we have, it will wait for 12 hours after being enabled, and then check for available posts.
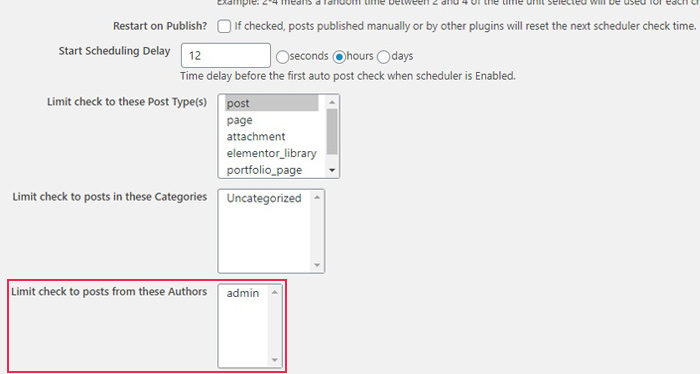
The next option is really useful. You Limit check to Post Types by shift-clicking the kinds of posts you want to have available. Typically, these will be posts, and that‘s the default, but you can set up whole new pages to be published.
Similarly, you may want to limit your automated posting to certain categories. The default setting confers no such limits.

If you are running a multi-author blog, you may want to rack up one particular author‘s posts during their vacation or hiatus, for instance. This is what the Author limit option is for.
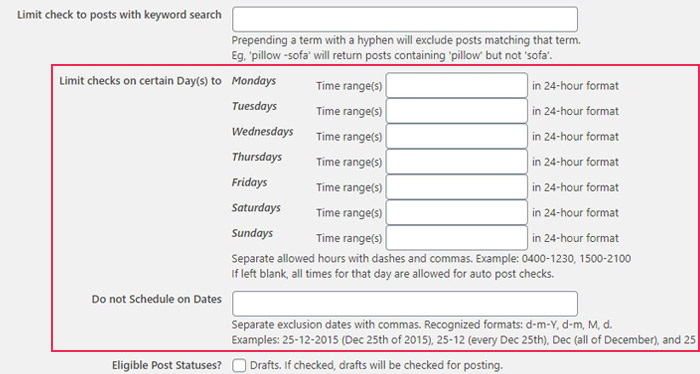
The penultimate limit concerns keyword searches. If you want your website to keep posting automatically about a certain topic, you‘ll want to make use of this functionality. It also works with the minus (-) operator, if you want specifically to exclude a keyword.
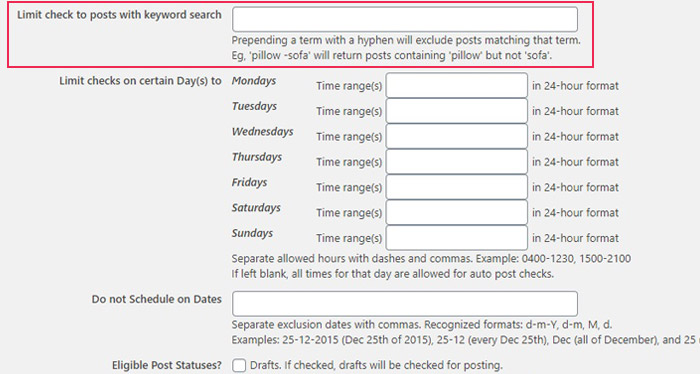
The final limit concerns days of the week and specific dates. You can use these options to set allowed hours and disallowed days for posting. This is incredibly useful if you have weekly theme days or similar weekly schedules, or if you don‘t expect your visitors to be active during holidays. You can easily set your WordPress scheduler plugin to post on the days your visitors expect it to.
The Eligible Post Status checkmarks tell the plugin which posts may get published. You can set it for drafts, pending, and published. This last checkbox recycles already published posts.
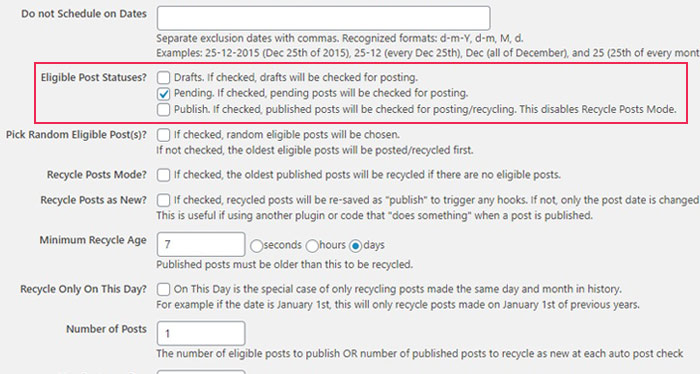
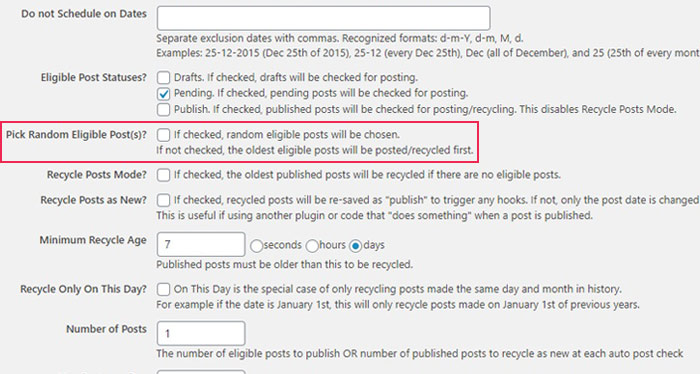
Pick Random Eligible Posts randomizes the order in which eligible posts are posted. The default is unchecked, and the oldest eligible posts (as checked above) will be published first.
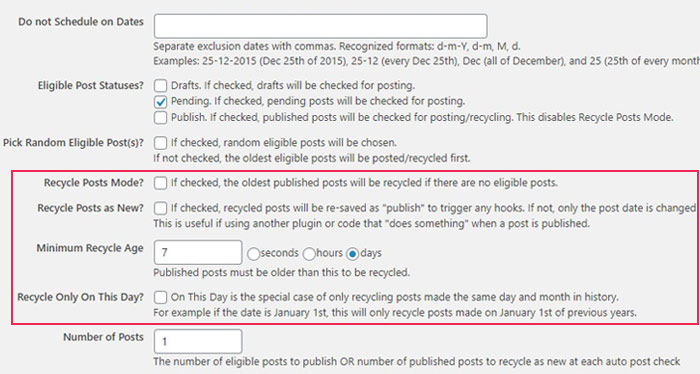
The next set of checkboxes deals with post recycling. The first checkbox (Recycle Posts Mode) publishes your oldest published posts once there are no unpublished eligible posts. The second (Recycle Posts as New) deals with how recycled posts are treated. Unchecked, only the post date is changed, and checked, the post is republished, triggering any on-publish code or script you may have set up. Especially useful for time-sensitive events counting from the date of “publication“.


The Minimum Recycle Age sets the minimum age for a post which can be recycled – a useful functionality if you want to avoid multiple consecutive publication of the same content even when recycling.
Finally, Recycle Only On This Day is a functionality which allows you to recycle posts each day and month. That way, you can have a recurring New Year‘s Eve post, a recurring Labour Day post, a recurring National Day post and so on.
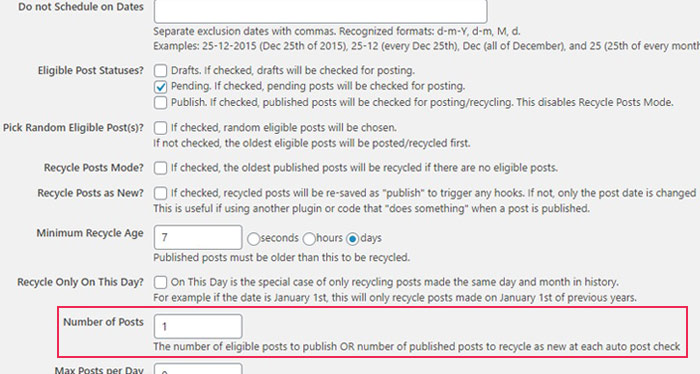
The Number of Posts published at each check can be changed, too. You can set the WordPress scheduler plugin to publish any whole number of posts at each Auto Post Schedule interval.
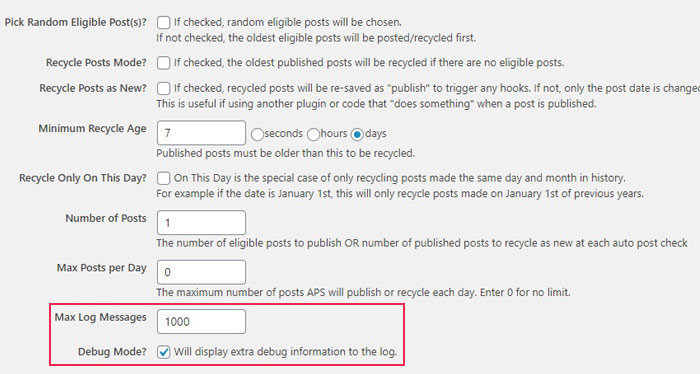
Finally, the Max Posts per Day number is there to make it easier for you to limit the number of posts each day, convenient when using a randomized publication time. The default is 0, which signifies no limit (multiple daily posts enabled).
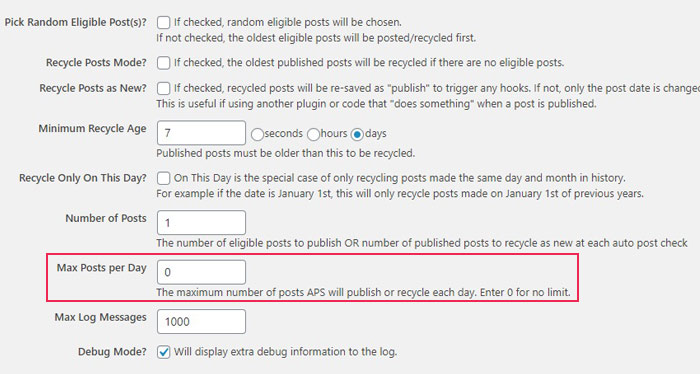
The final functionality is the debug log. This is how the plugin will notify the administrator if something goes wrong. You can maximize the number of log messages and switch the Debug Mode on or off.
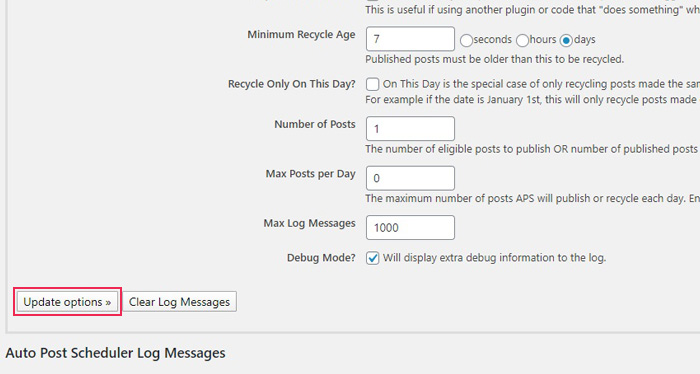
Finally, your plugin is configured. In order for your options to take effect, click the Update Options button.
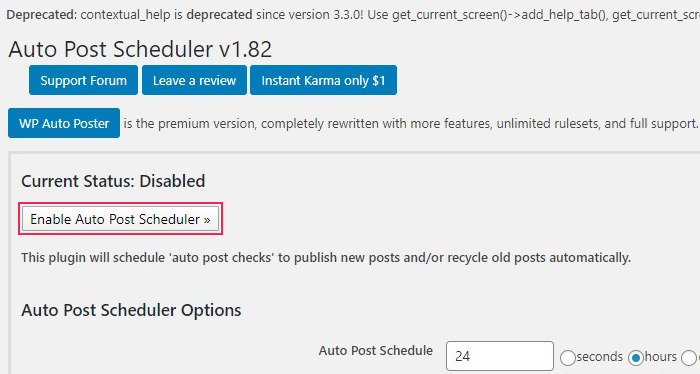
When you have your content ready, too, all that is left is to Enable Auto Post Scheduler. Scroll all the way up and click on the button.
And your content will now be automatically published without any further intervention on your part.
In Conclusion
Maintaining a regular publishing schedule is crucial to growing a community around your website. With a WordPress scheduler plugin, you can be sure that your website will be continuously updated even in your absence. This is also a useful tool for an editor who is running a webzine or a blog with multiple contributors. The contributors can simply save their own posts as drafts, and all the editor needs to do is review them before automatic publication. With bulk scheduling, you can save time with automation.
