How to Automatically Post to Facebook From WordPress
Promoting your business on social media is a great way to spread the awareness of your brand. With almost 2.5 billion monthly active users worldwide as of 4th quarter 2019, Facebook is the most popular social network by far. As such, it is ideal for sharing your business-related content, and holds a huge potential for increasing your website traffic. This is especially true if you run a blog and publish new posts regularly.
The process of manually sharing your content to social networks from WordPress is not necessarily a smooth one, especially if your plan is to share every post you publish on your site. Luckily, you can avoid the trouble and save yourself a lot of time by setting up automatic sharing of your WordPress posts.
Stay tuned as we explore three different ways to post to Facebook from WordPress automatically:
An abbreviation of ‘If This Then That’, IFTTT is an online tool that systematizes two online accounts by using the methods of trigger and action – with ‘This’ being a ‘trigger’, while ‘That’ stands for an ‘action’. Simply put, if the ‘trigger’ is found on one account, your predefined ‘action’ will be performed on the other.
In this case, the ‘trigger’ would be a post that got published on your WordPress site, while the ‘action’ would be the automatic sharing of said post on Facebook. So, essentially, this is the final message: “If there’s a new post on my WordPress site, then the post will be shared on my Facebook page as well”.
Let’s take a look at how to use the FTTT tool to automatically post from WordPress to Facebook.
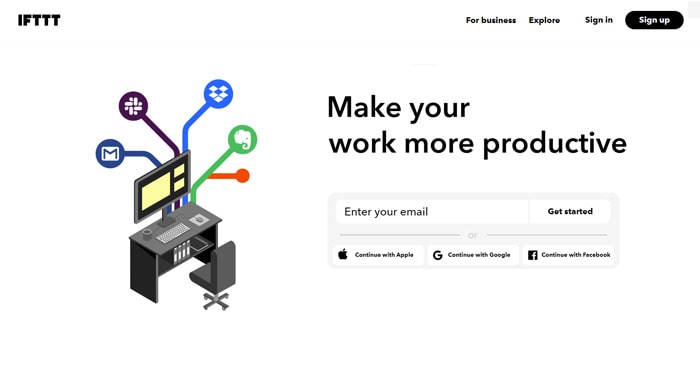
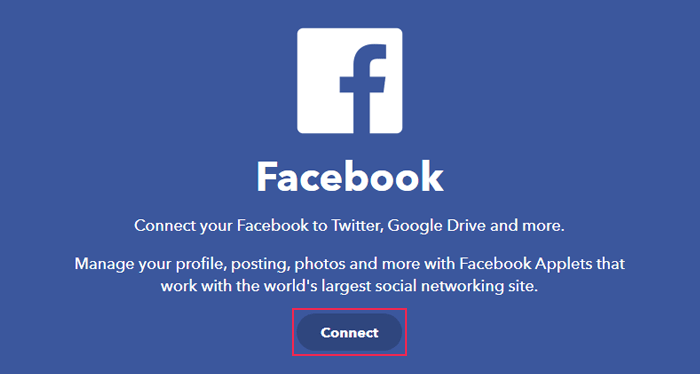
First of all, you should go to the IFTTT website and create an account. Then, head to the IFTTT Facebook page. You can also access it by typing in ‘Facebook’ in the search bar and selecting the Services tab.
Click the Connect button to add your Facebook account to the IFTTT service.
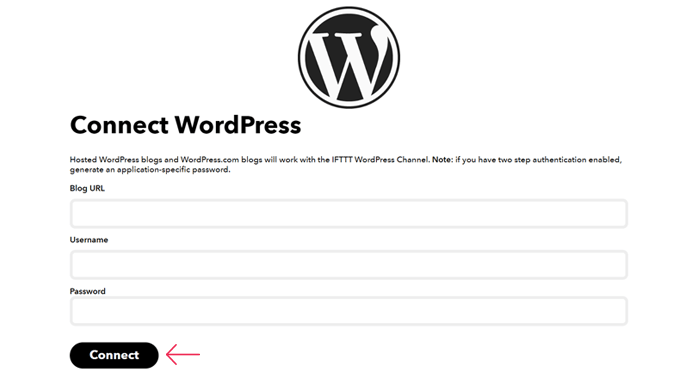
Then, head to the IFTTT WordPress page (type in ‘WordPress’ in the search box and select ‘WordPress’ in the Services tab), and click on Connect to add your WordPress account to IFTTT.

Add your blog URL, username and password and click Connect once again.
Next, you should select “Automatically share new posts to a Facebook Page” and hit the Connect button.
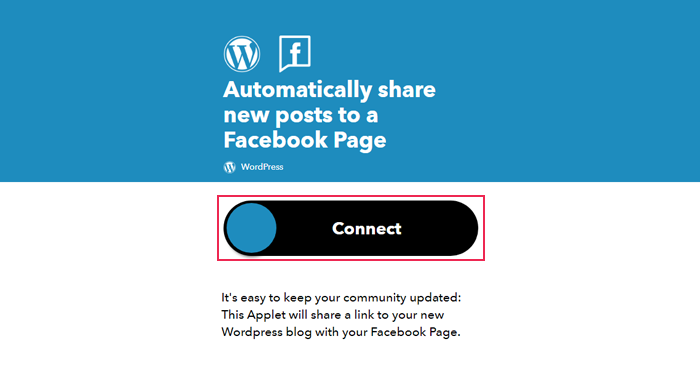
And that’s it – you’ve successfully connected your WordPress website and Facebook. Now, whenever you publish a new post on your WordPress website, it will automatically get shared on your Facebook page as well.
Buffer is another useful (and very popular) online tool that will let you schedule status updates for your social media profiles – and of course, this includes Facebook as well.
Buffer is great because it offers the option to schedule at which exact times you want your posts to be shared across your social profiles. This means you can choose the ideal time to share your posts on Facebook, no matter when you publish them on your WordPress website. You can use Google analytics to find out at which times people are more likely to engage with your posts and schedule them accordingly.
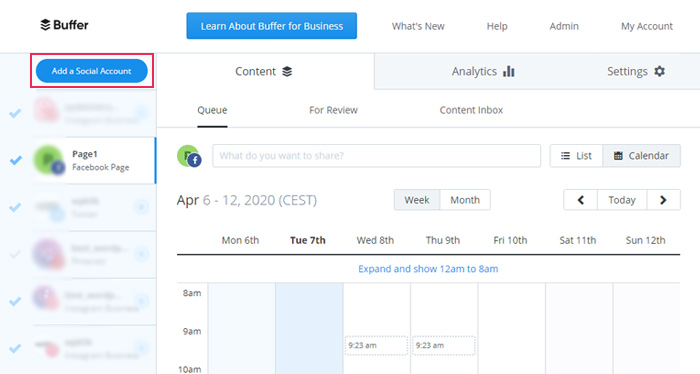
You need to create (or login into) a Buffer account in order to start. Once you have done so, you will be taken to your Buffer dashboard where you will see the option to Add a Social Account.
To connect with Facebook, simply select “Facebook Page”.
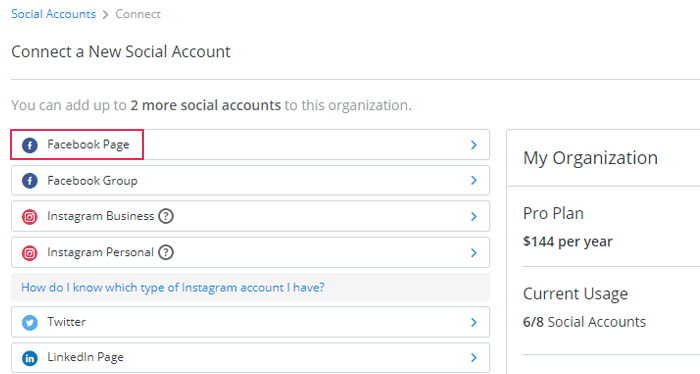
You will be prompted to sign in to your Facebook account, which means you’re authorizing Buffer to have access to it.
Afterward, you should connect your Buffer account to your WordPress site. You can do this by installing the WordPress to Buffer plugin.
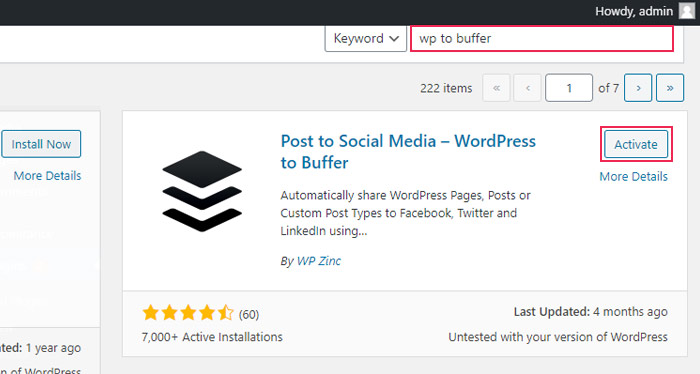
Go to Plugins > Add New and find the WP to Buffer plugin in the search bar, install and activate it.
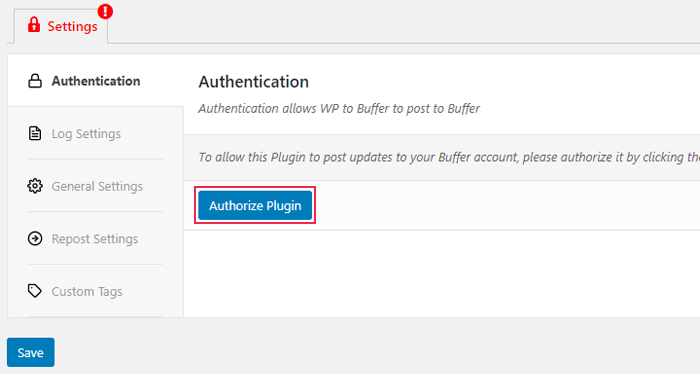
Then, head to WP to Buffer > Settings in your WordPress dashboard. You will have to authorize the plugin first for the plugin to post updates to your Facebook account. To do this, select the Authorize Plugin button.
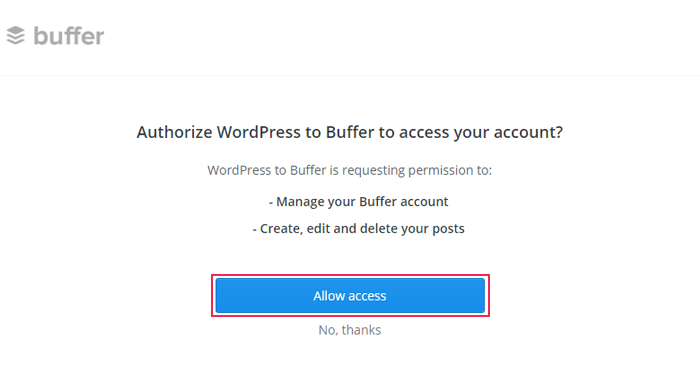
The plugin will then request permission to manage your Buffer account and create, edit and delete your posts. You should hit the Allow access button.
And with that, you’ve successfully authorized the plugin to post updates to your Buffer account. leo.
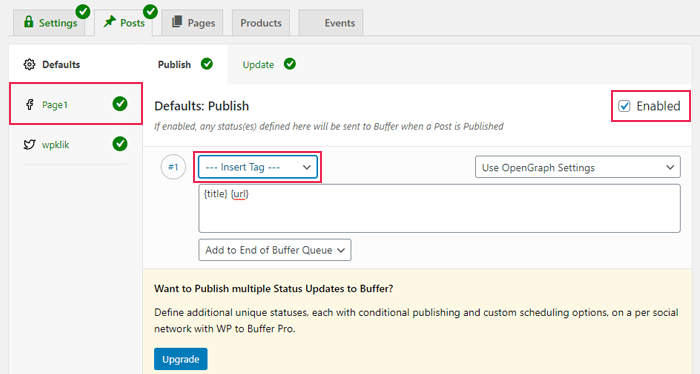
Now, you can go to the Posts tab and enable or disable your social media accounts (your Facebook page should be enabled). Also, here you can define any statuses you want to appear on your Facebook page when the post gets published and insert the tag of your choice (Site Name, Post Title, and so on).
When you’re done, click the Save button, and you’re all set. The WP to Buffer plugin will now add your recently published posts to its queue and from there, they will get posted to your Facebook page.
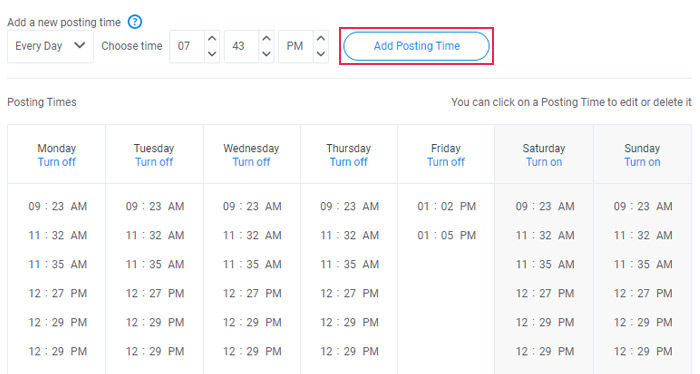
Finally, you will be able to easily schedule your posting times on your Buffer profile.


If, for whatever reason, you don’t feel like using Buffer, you can simply use a WordPress plugin developed for this purpose. Namely, with the help of the Social Media Auto Publish plugin, you will be able to create a Facebook app which you will then authorize and connect to your WordPress website in order to automatically share your posts on Facebook. The plugin will also allow you to choose different posting methods (such as a simple text format, text with an image, or link), select WordPress custom post types, post categories, and so on.
Before you begin, however, we should note that due to Facebook restrictions, this plugin supports the use of the Facebook App in HTTPS sites only. Also, the app will allow your posts to get published only to Facebook Pages (not to Facebook profile).
Finally, since this plugin is provided by xyzscripts.com, you should create an xyzscripts account in order to use the Social Media Auto Publish plugin (registration is free).
Installing and Activating the Social Media Auto Publish Plugin
First things first, you should install the plugin.
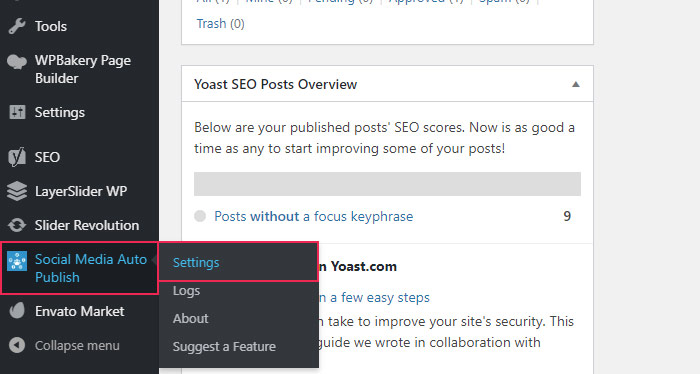
Once the plugin is installed and activated, you will see a new menu item titled Social Media Auto Publish (located under your Settings). Go to Social Media Auto Publish > Settings and the new screen with the plugin settings will open.
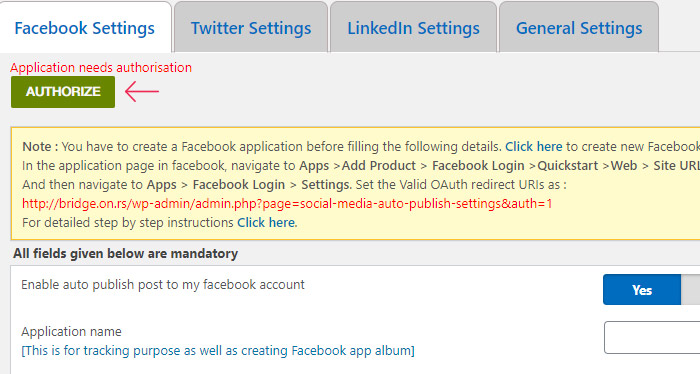
To begin, in your Facebook Settings screen, you should make sure that the “Enable auto publish post to my Facebook account” option is switched on (the setting should be switched on by default).
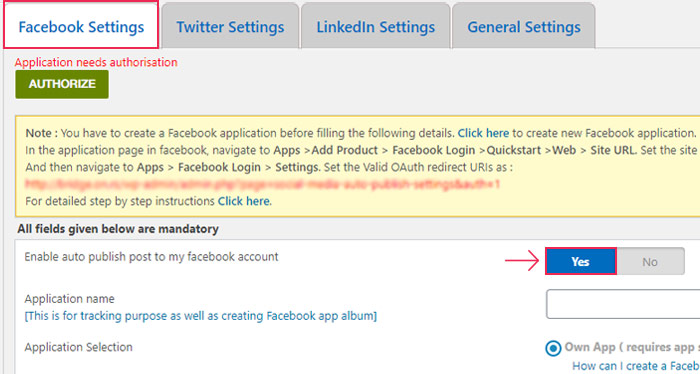
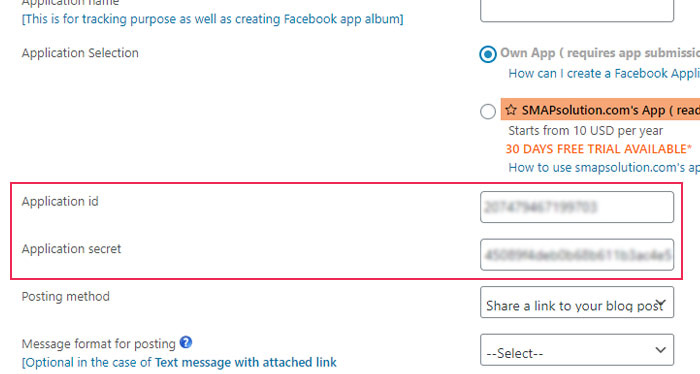
On this screen, you will also see the fields reserved for the Application ID and Application Secret key.
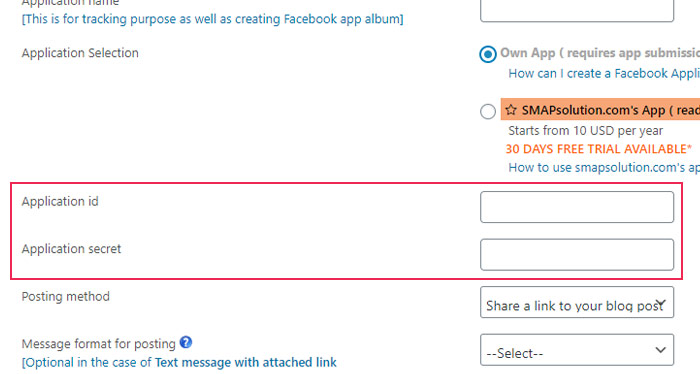
To acquire the ID and the secret key, you need to head over to the Facebook Developers page and create a Facebook App first. Let’s see how to do this.
Creating a Facebook App
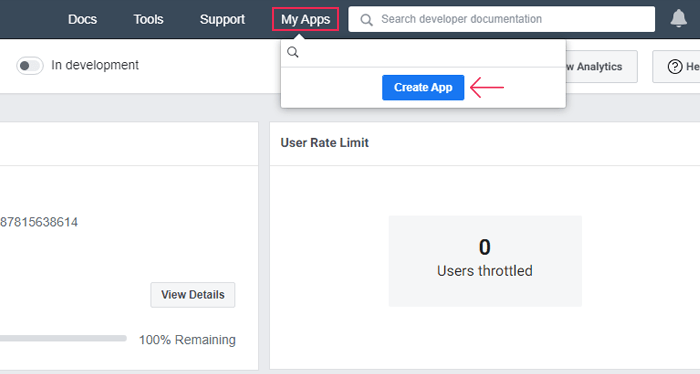
Once you’re on the Facebook Developers page (make sure your account is registered first), click the “Create App” button.
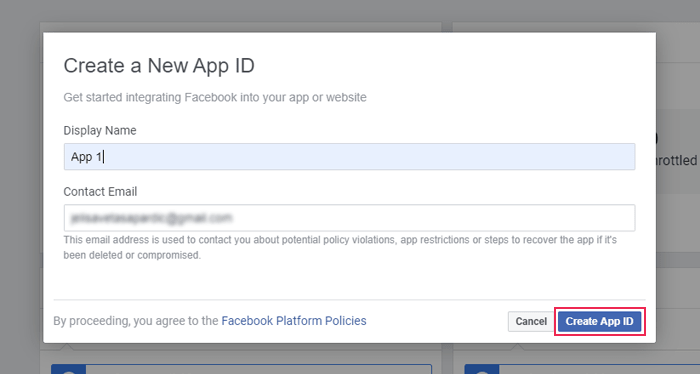
Then, a popup will appear asking you to create a New App ID in order to start integrating Facebook into your website. Here, you will be able to enter your Display Name and Contact Email.
Click on Create App ID once you’re done and Facebook will create a new app.
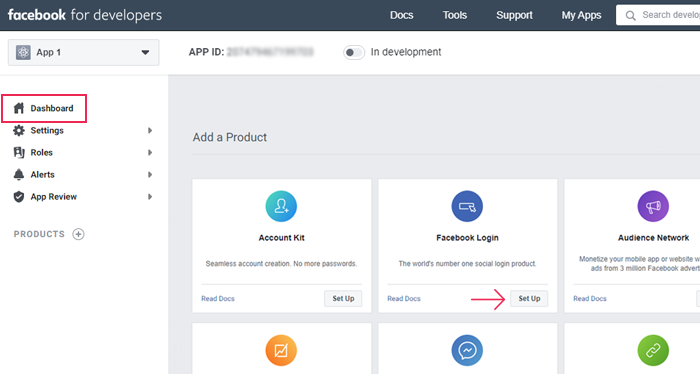
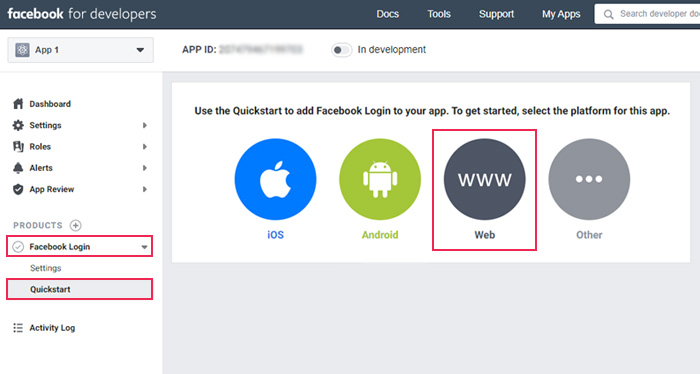
Next, access the Dashboard screen and select Add a Product. Find the product called Facebook Login and click on Set Up.
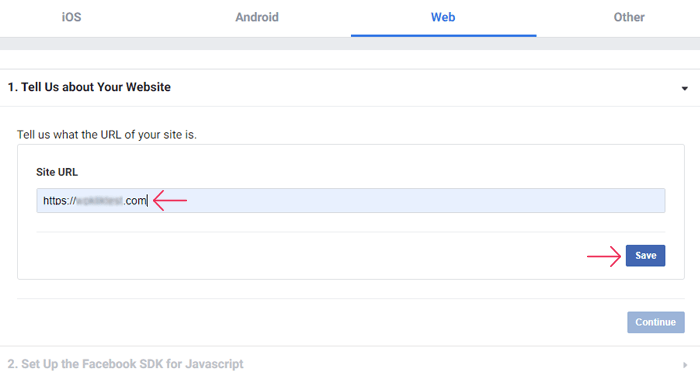
Then, head to Facebook Login > Quickstart and select Web as your platform.
A new field will appear where you will be able to enter your website URL.
In case the Quickstart page is blank, go to Settings > Basic and scroll down until you run into the Add Platform option.
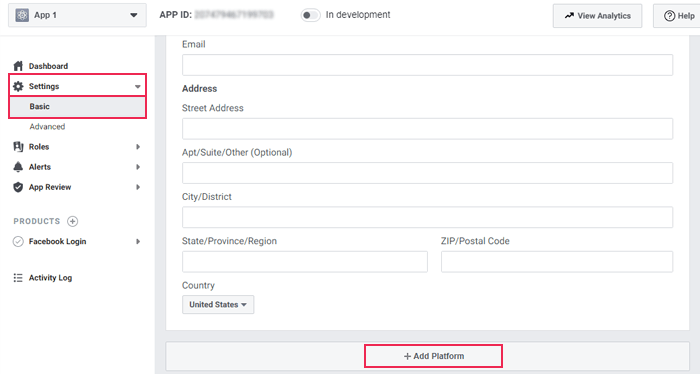
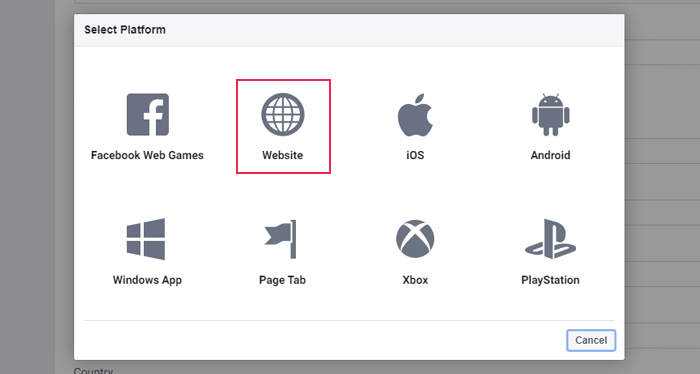
Click on it and select Website as your platform. Here you can enter your site URL.
Save all your changes once you’re done, and go to Facebook Login > Settings. Once there, you should add the Valid OAuth Redirect URI.
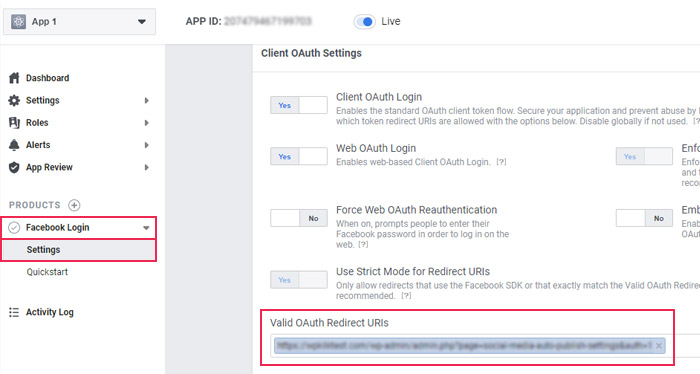
You can find both the website URL and the Valid OAuth Redirect URL in the Facebook Settings tab of the plugin settings, located at the top.
Once again, don’t forget to save your changes.
Now, to get the App ID and Secret key, you should click on Settings > Basic. In the App Secret section, click on Show to see your secret key.
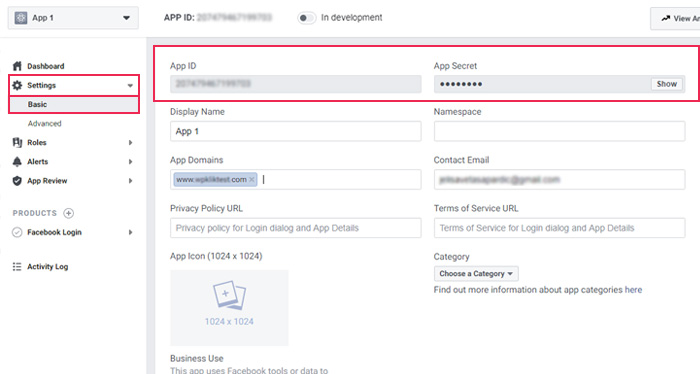
Copy and paste both your App ID and Secret key into your plugin settings page.
Afterward, you should go back to the Facebook Developers page.
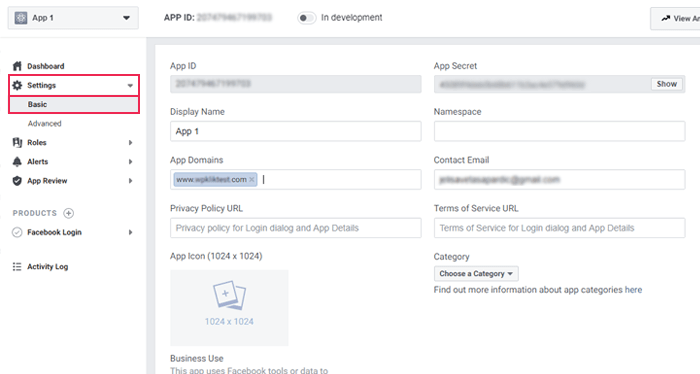
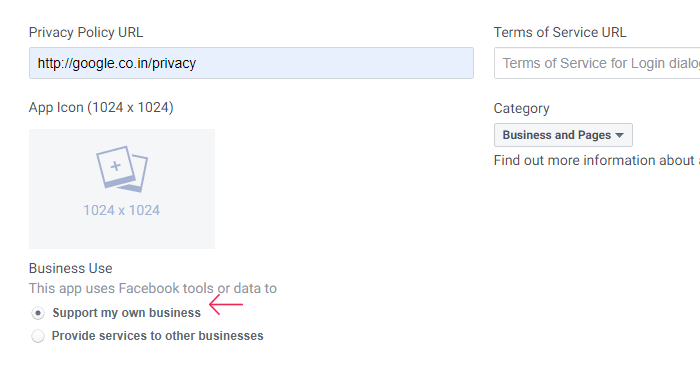
There are some additional fields you need to fill in the Settings > Basic page before you can submit the app for approval. These include your display name, App domain (where you should enter your website’s domain name), the Privacy Policy URL and the Terms of Service URL, App Icon, and the Category of your app (you can choose from Business and Pages, Education, Entertainment, etc.).
For Business Use, you should pick the “Support my own business” option.
Also, you need to Verify Your Business on Facebook in order to use certain app permissions (which we will talk about a bit later).
To verify your business, you will be asked to upload a document that shows the name of your organization, as well as its physical address.
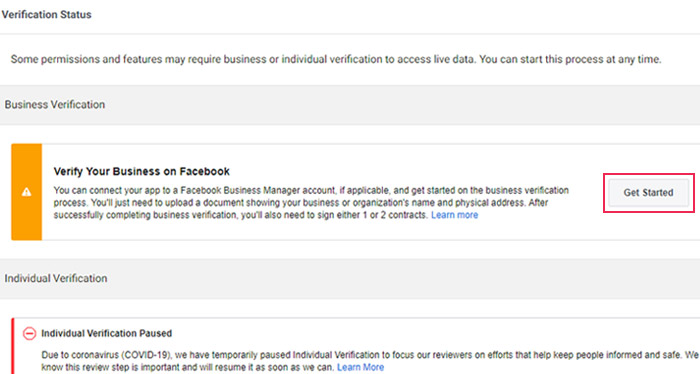
After you click the Get Started button and complete the business verification process, you will also need to sign one contract and fill in the Data Protection Officer Contact Information.
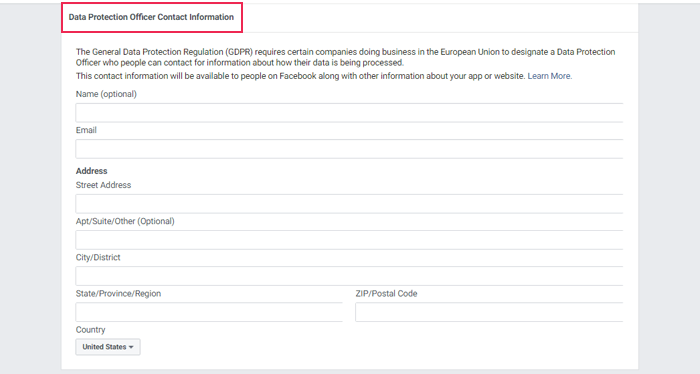
Click on Save Changes when you’re done.
Switching the Facebook App to Live Mode
Now, we should note that your app is set to private by default. With that status, it is only available for testing purposes. You will be able to use it for posting to Facebook once you make the app live.
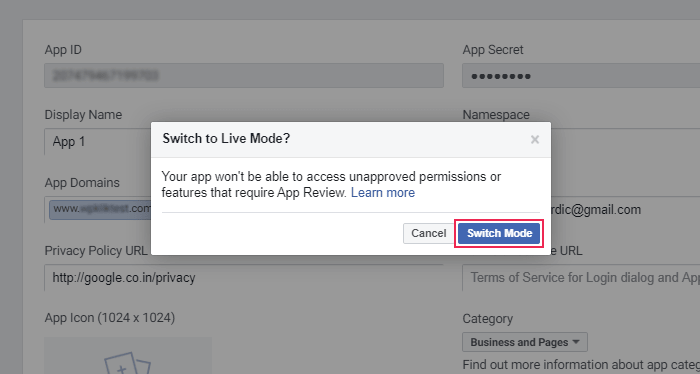
To switch the app to Live status, make sure you’ve entered the Privacy Policy URL in Settings > Basic first, and then click on the status switch.
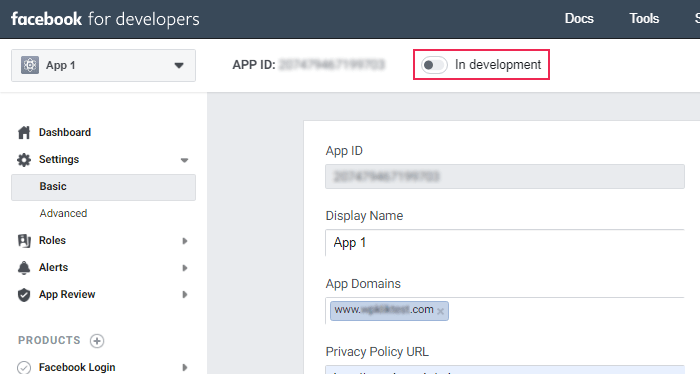
A popup will appear allowing you to switch the mode from Development to Live. Click on the Switch Mode button, and your app will be made public.
Facebook App Review
To be able to use this app and let users see your WordPress posts on Facebook, you need to submit the app for approval first.
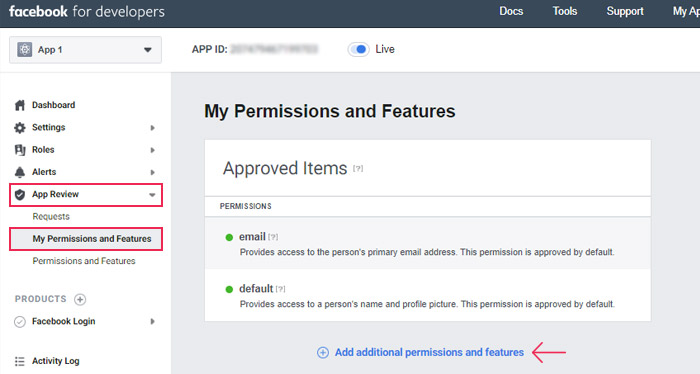
Go to App Review > My Permissions and Features in the Facebook Developers page, and click on Add additional permissions and features.
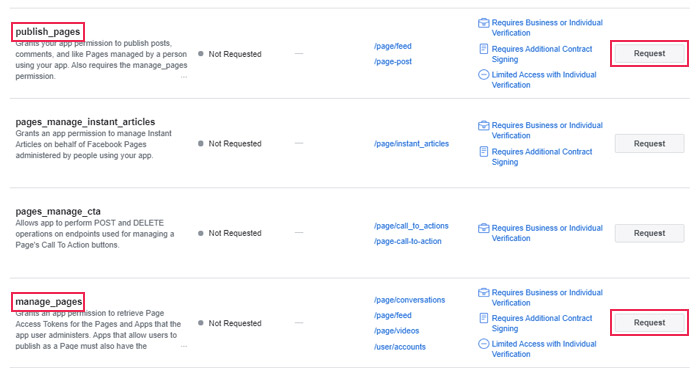
You will be redirected to the Add Permissions and Features to Your Request page. Here, you should find and select manage_pages and publish_pages permissions (you will need both of these items to automatically display your WordPress posts on Facebook), and then click the Request button.
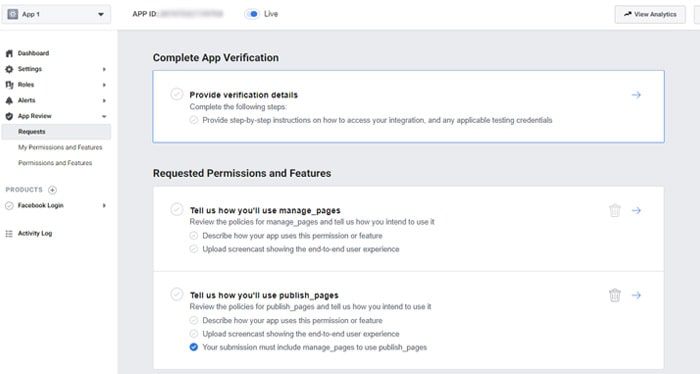
A Continue button will appear after the request. You should click Continue for both permissions and fill in the details for each item in order to get the permissions and the app approval. Hit the Submit for Review button when you’re done.
To learn how to complete all the necessary steps to get manage_pages and publish_pages permissions, as well as to complete your app verification and request an app review, you should follow the detailed guide located in the xyzscript’s Section 2: Facebook App Review on the How can I create Facebook application page.
Note that once your app gets submitted for approval, it may take anywhere from 1 week to 3 months to get the app approved by Facebook.
Authorizing the App in the WordPress Admin
Once you go through all the steps we presented above, you need to complete one final step – and that is authorizing your app to automatically publish your WordPress posts on Facebook.
Go back to your WordPress Admin. In the Facebook Settings tab of the Social Media Auto Publish plugin, you will see the Authorize button located above all other options.
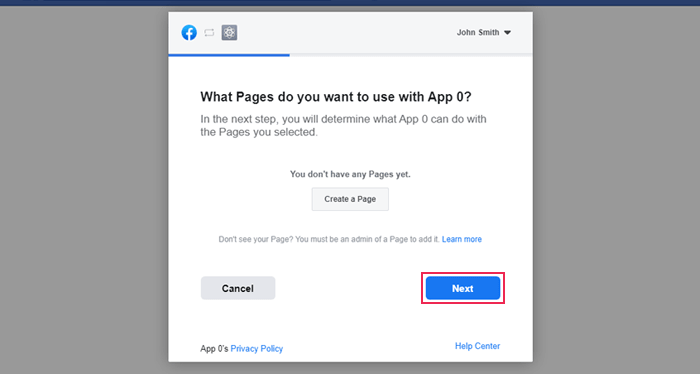
Once you click on it, you will be redirected to a Facebook popup box which will ask you what pages you want to use with your app (If you don’t have any pages yet, you will be urged to create one). Click Next when you’re done.
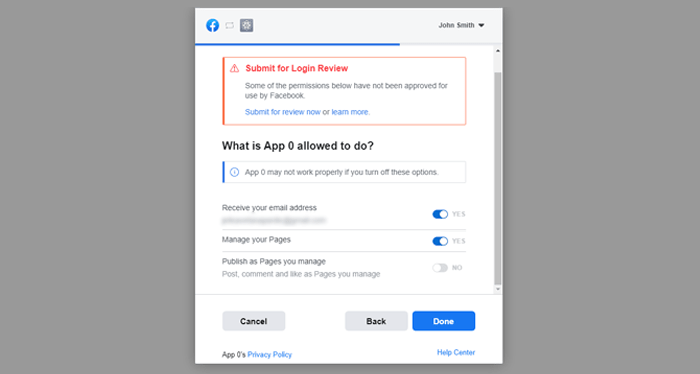
Next, you will determine what your app is allowed to do. You should switch the Manage your Pages option to YES and click the Done button.
Finally, a popup will appear letting you know you’ve linked your app to Facebook. Click OK one final time, and that’s it – the authorization process is complete.
Wrapping Up
One of the easiest methods you can use to set the automatic sharing of your WordPress posts on Facebook is the IFTTT tool. However, if you prefer to have more sharing options, we recommend trying with the Social Media Auto Publish Plugin. That being said, the plugin is somewhat complicated to set up and it does have certain limitations. On top of only being able to use the app support only if you have a HTTPS website, you will be allowed to publish your WordPress posts to Facebook with the approved app only – and getting the approval itself can take up to 3 months.
In case you don’t want to wait and you’d prefer to use an alternate solution for publishing posts to Facebook, we recommend trying the SMAP Solutions plugin. This premium plugin allows you to automatically publish posts to Facebook from WordPress without having to create an app in the first place. This will save you a lot of time and trouble but it will also cost you – the price starts at $10/year.
We made sure to cover all the angles so all you need to do is pick the solution that works the best for you. Happy sharing!
