How to Add an Old Post Notification in WordPress (And Why)

A website or blog that’s been around for a while most likely has a considerable amount of content published over time. Depending on the specific niche, that content may be more or less time-sensitive, topical or susceptible to changes. In short, it may be outdated.
Keeping your content fresh, updated and relevant is vital both for the reputation and trustworthiness, and for SEO reasons. However, sometimes it’s hard to keep all the content perfectly up to date. And yet, the visitors need to know if a piece is no longer relevant or if some of the information in it has changed. That’s when we might need a WordPress old post notification. Let’s see what it’s all about and how to set it up.
Qode Themes: Top Picks
View Collection


In blogging and web publishing, there’s a thing called content decay. It is a term used for pieces of content that haven’t been updated in a while and may require some work. Blogs and websites with a lot of content generally have a hard time keeping the content fresh and updated. This is true both for time-sensitive content and for evergreen content that, despite being always relevant, may still require some factual tweaking.
Outdated content can be damaging from several aspects. First of all, it hurts your reputation. You want to establish yourself as a reliable and trustworthy source of correct, relevant and fresh information, not stale and incorrect content.
Second, search engines just love updated content. It signals to them that you’re a viable factor in the online publishing community and therefore they rank you higher.
Now, it’s clear that, unless you run a major operation with big staff and plenty of resources, it can be hard (if not impossible) to always keep all of your content up to date. For situations when you’re aware that a piece needs updating but you can’t get around to it just yet, displaying old post notifications can be of help.
An old post notification, or alternatively a date when the piece was last updated, lets your visitors know that they need to take the information in it with a grain of salt. At the same time, it shows that you care about relevance and that you’re honest about your work.
Displaying the “Last Modified” date instead of the publishing date is one way to take care of it, and displaying an “Old Post” notification is another. Let’s see how to set them both up.
WordPress stores the published data for a post as meta data. Each change you make to a post is recorded and stored. If your blog or website displays the publication date above an article, you may want to change this to the date it was modified (updated) so that the visitors can know just how fresh it is.
To do this, however, you will need a plugin. Specifically – WP Last Modified Info. This is a simple and lightweight plugin that automatically inserts the “Last Updated” or “Last Modified” label to your post and can be configured to your liking.
Start by installing and activating the plugin as you would normally. Next, head over to the Settings in your left-hand dashboard menu and click on WP Last Modified Info.
The first thing to do is to turn the toggle on in order to show the last modified info on your posts.
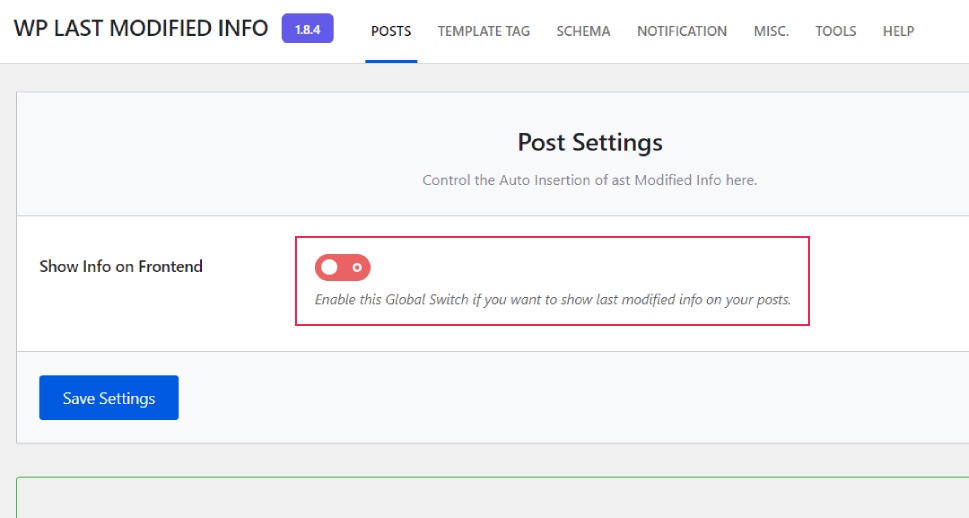
Don’t forget to save your settings before you proceed.
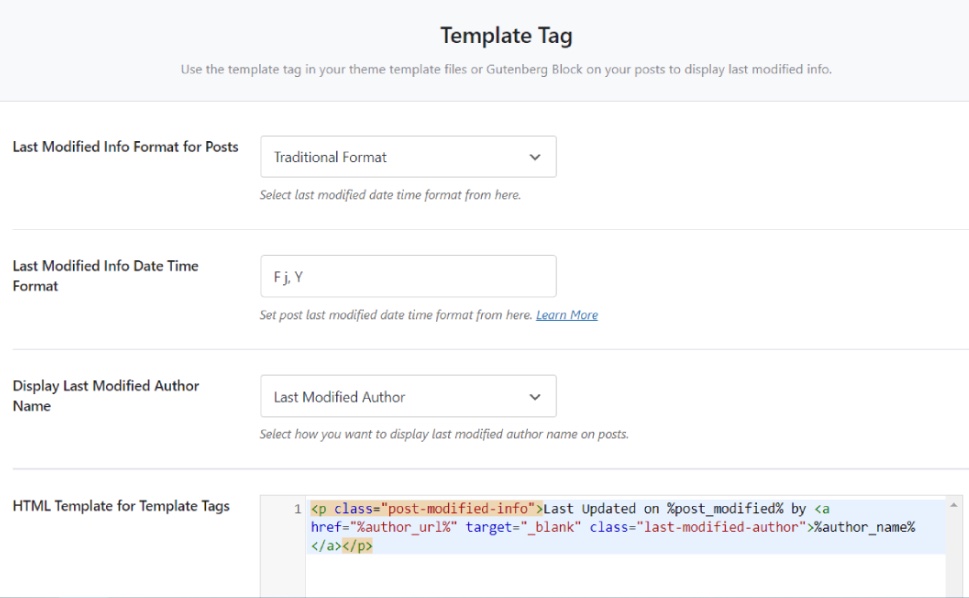
Next, under Template Tag, you can pick the info format, date format, and how you want to display the author.
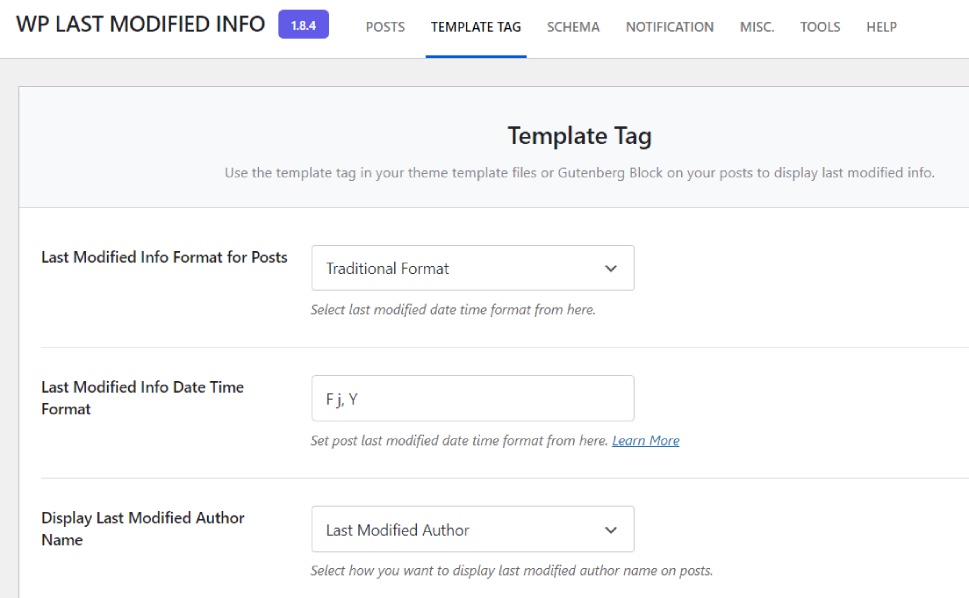
The date format doesn’t have any options to choose from because the plugin uses the values you’ve set as default in Settings>Date.
Here you’ll also find a handy HTML template for template tags, with available dynamic tags. If you’re not an advanced WordPress user, you can just skip this part of configuration.
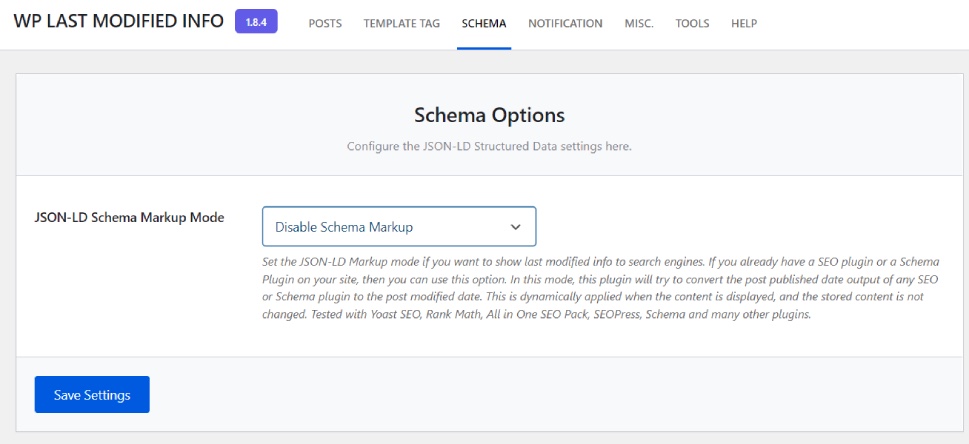
Next, you can decide whether you want to enable the JSON-LD Markup Mode. The plugin is compatible with all major SEO plugins (Yoast, All In One, Rank Math…) and will automatically try to convert the “published” data by these plugins into “last modified.” Don’t worry, this data is displayed dynamically when the post is displayed and does not affect the stored data.
The next section is for setting email notifications any time someone updates a post.
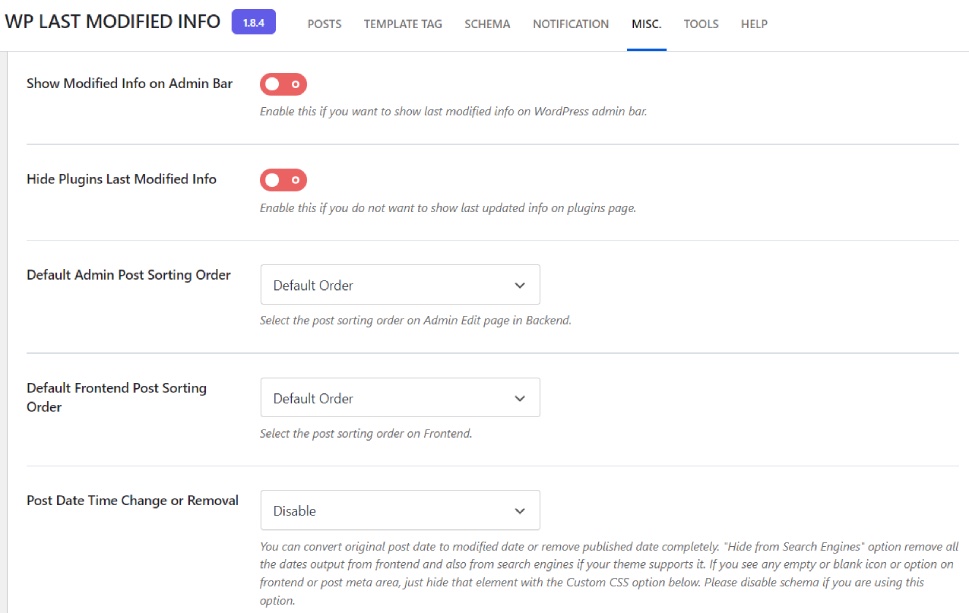
Following that, we have the Miscellaneous settings. Here, you can show or hide the modified info in the admin bar, set the default admin post order (the modified posts go first or last) and the default sorting order on frontend.
The Post Date Time Change or Removal is an important option. Here you can choose to disable the change or removal, convert the original publishing date to modified, and hide from search engines (both on frontend and from your SEO plugin’s output). Note that if you’re using schema, this option should be disabled.
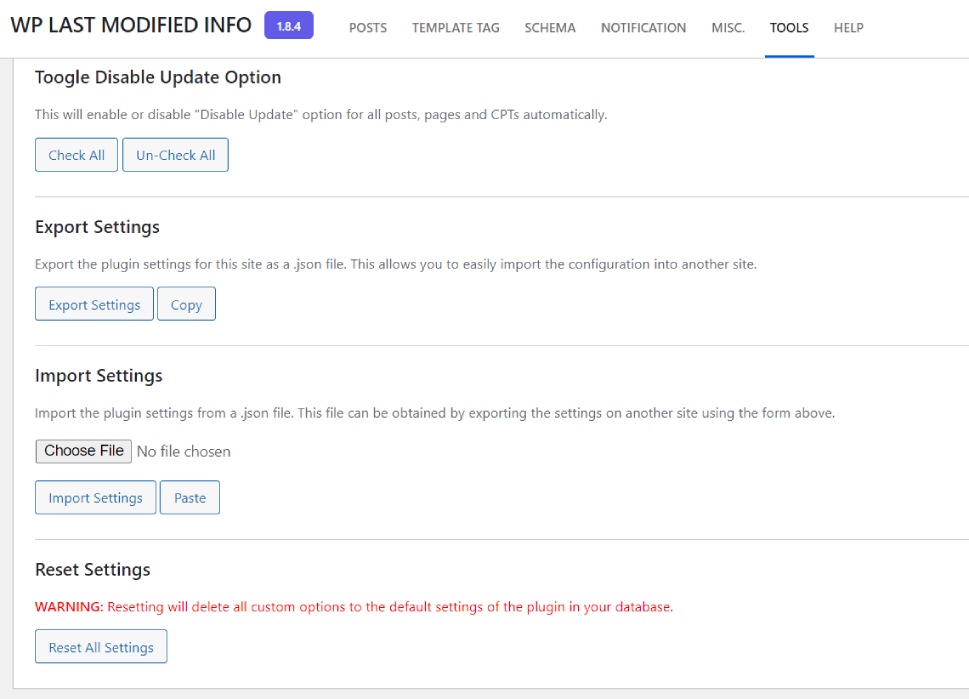
The Tools section contains the option to turn “Disable Update” on or off for all posts. Here you can also export or import the plugin settings for use on another site. Finally, here you’ll find a button that resets all the settings you’ve made and restores them to default.
Remember to hit Save Changes after each change you make.
Now, if you don’t want to change your publishing date to “modified” or “updated,” you can use DX Out of Date. This plugin adds an option of displaying a message box indicating out of date content after a certain preset period of time has passed.
Install and activate the plugin from your dashboard and head over to Settings>Out of Date.
The first option is to set the duration value and the amount. The default is one year, but we changed it to six months. Here you can also set the message you want to be displayed with your post.

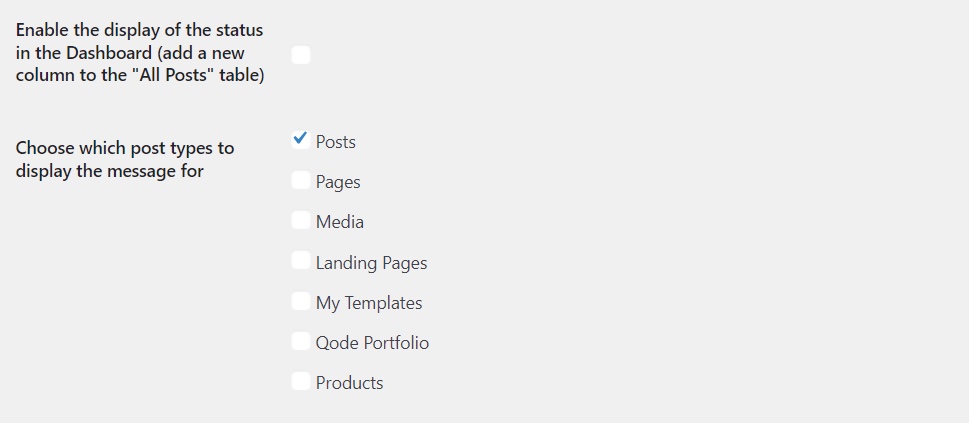
Next, you can decide whether you want this to apply to all outdated posts (those that fall within the time range you’ve set in the previous step). You can also set whether you want the message to be displayed in your backend as well.
The default setting is to apply the message to posts alone, but you can set it to apply to other formats too – your pages, media, products and so on.
Finally, you can set how you want your message to appear. You can specify the position (top or bottom of the content; the default value is top), as well as the color of the message box and of the text itself.
If you know your way around CSS, you can add your custom CSS values here.
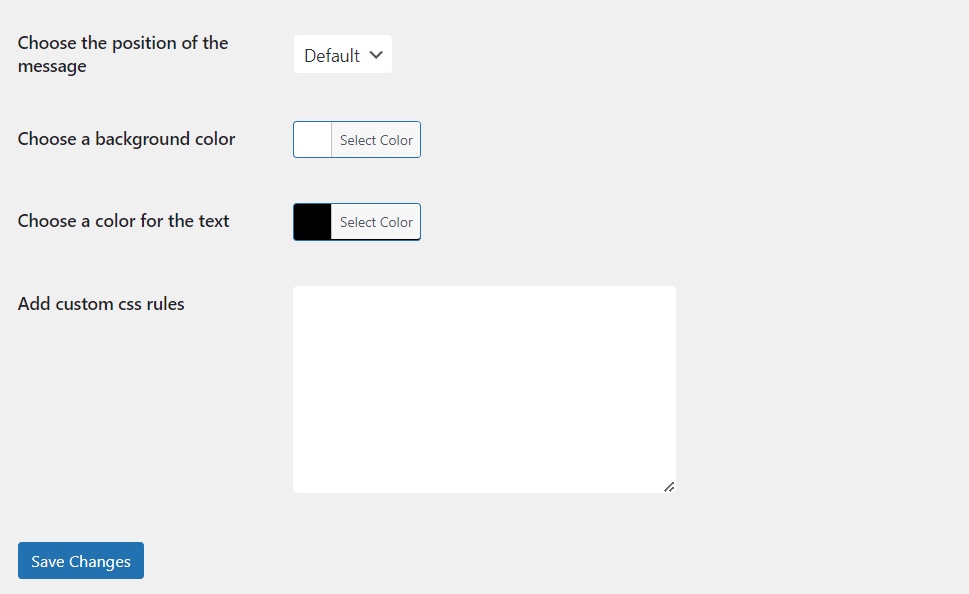
Don’t forget to hit Save Changes once you’re done setting it all up.
Wrapping It Up
As we saw, letting your visitors know about your outdated content is as easy as 1-2-3, with the help of the right plugins. Today we saw two different methods for indicating that a piece of content is not exactly fresh. Now it’s up to you to figure out which works better for your website – displaying the “Last Modified” date or an “Old Post” message. From there, with a little bit of tweaking of the configurations, the plugins will do all the work for you!
