How to Take Automatic Screenshots in WordPress

There is a singularly important and nonrenewable resource that people often tend to overlook: time. You can’t make more of it, can you? What you can do is save it. And one of the ways to do it is to use the tools available to you to do for you what you would otherwise have to do manually.
This tutorial is all about taking automatic screenshots in WordPress. There are two ways to do it, both of which we will show you. But before we sink our teeth into the nuts and bolts of the how to, to mix a metaphor, let us take some time to discuss the situations in which you might want to use this function. Here’s what we’ll be talking about.
As it’s very often the case, creating a WordPress post involves a lot of different kinds of work. From research and data collection to the writing itself, a lot of the processes may involve boring or repetitive tasks. That much is unavoidable. Some of them can, however, be automated, streamlining your process and saving you time and labour, and website screenshots are among those tasks.
A screenshot is effectively a window into another website which you can build into your post or page. This functionality is useful in those cases when you’d want to give examples of web design or layouts as part of your posts or pages, or in case you want your visitors to be able to view a page which is often updated, such as a list of prices which may be subject to discounts. Also, in case a website is inaccessible from your location, a screenshot might bypass any restrictions, allowing your visitors to access content they otherwise couldn’t. Finally, a screenshot can be used for navigation, as a link to a target website which teases the target website’s current content.
One thing you have to be mindful of when using either of the methods we will be discussing is that the screenshots will update automatically when the source website is updated. Useful when embedding a frequently updated news website, less so for content with limited long-term value.
Qode Themes: Top Picks
View Collection


You can automate screenshot-taking in WordPress using a plugin, which we recommend if you don’t feel confident modifying your website’s code. The plugin we will be using is Browser Screenshots – a user-friendly and free screenshot plugin. You can use it to insert a screenshot of any website into your pages or posts. The screenshot will automatically update any time the target website is updated, too.
Once you have installed and activated this plugin, you have more or less done what you need to do. You will have gained the use of a shortcode – [browser-shot] – which you can use to take screenshots of any websites you choose, provided you supply the shortcode with the adequate shortcode parameters.
To show you how it works, we will use it as part of a post, but you can use the shortcode in any widget-ready space on your website.
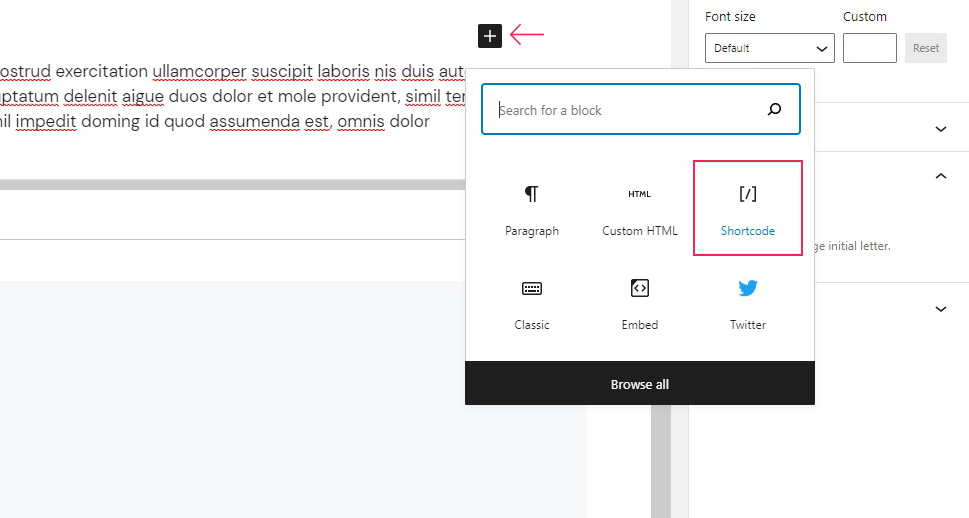
We will start with a post which we have supplied with some placeholder text. To add an automatic screenshot, we will need a shortcode block. Click the plus sign icon and select a shortcode block from the menu.
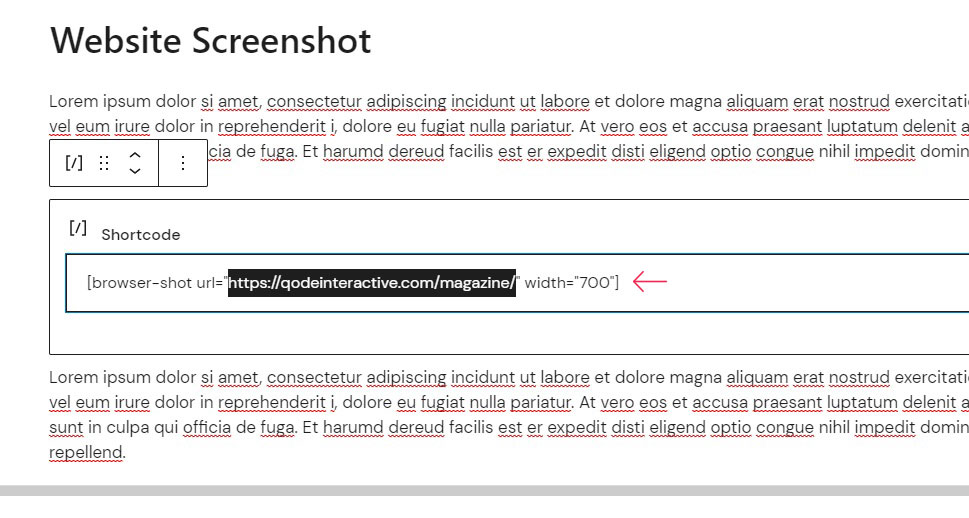
We will add the requisite shortcode, but it requires two other parameters to work: the website URL and the screenshot width. Say we want to use the shortcode to create a screenshot of our own website 700 pixels wide. This is the exact shortcode we will use: [browser-shot url=”https://qodeinteractive.com/magazine/” width=”700“].
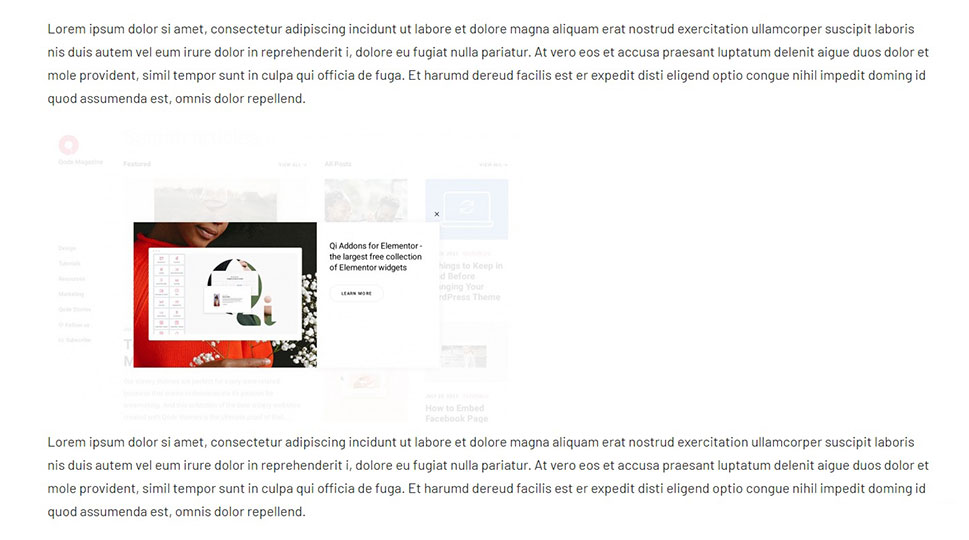
And our screenshot is now a part of the post.
There is also a bunch of other parameters you can use to supplement your screenshot. Here are a few of the most useful, with the rest to be found on the plugin‘s wordpress.org page.
-
height – the height of the screenshot;
-
alt – the image alt text;
-
link – screenshot link (the default is the screenshot source);
-
target – set to _blank to open in a new window.
Of course, if you are using the Elementor visual editor, you need to use the shortcode element, while, for the Classic editor, you can just plop your shortcode wherever you want it while in the HTML editing mode.
The plugin described above uses a function developed by WordPress itself, and you can do that, too. You will, however, need to modify your website‘s functions.php file. We strongly recommend you use the plugin method above if you don‘t feel confident modifying your website‘s code.
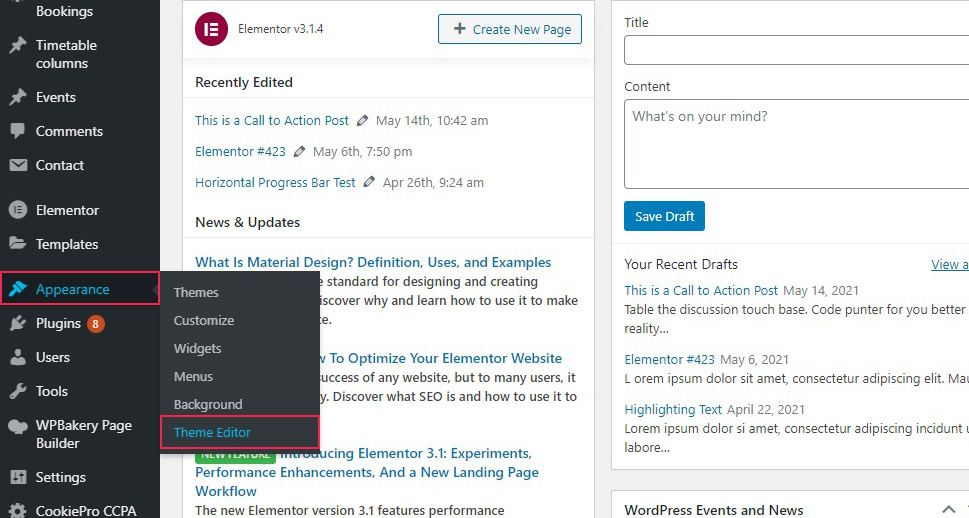
To access it, navigate to Appearance/Theme Editor using your WordPress dashboard.
Find the functions.php on the right hand-side menu of your Theme Editor screen and scroll to the very bottom of the file.
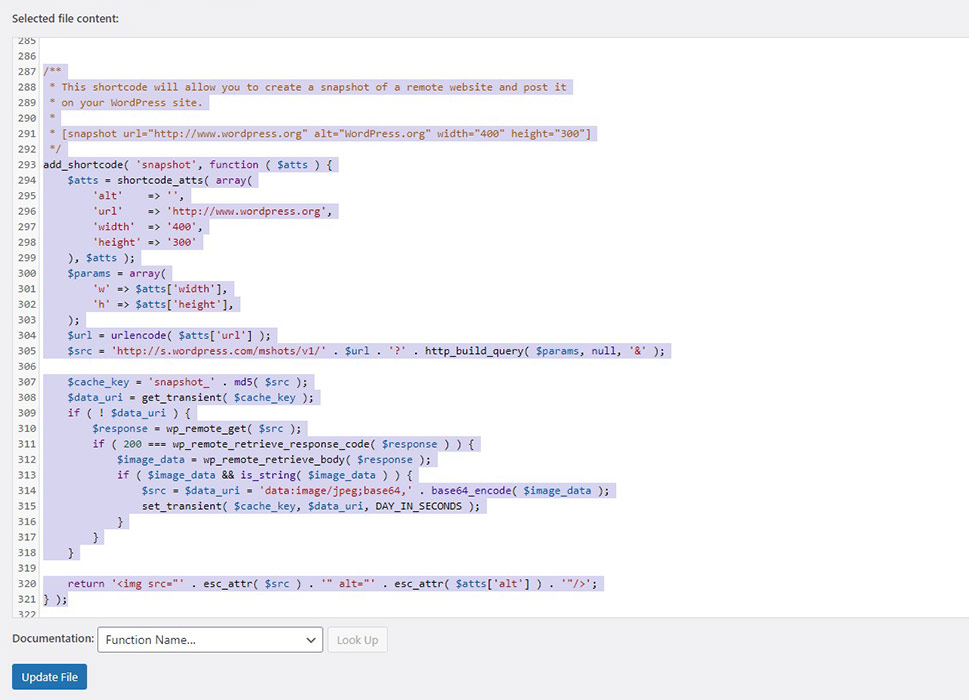
This is the code you need to paste into your functions.php file. Do so, but be very careful not to disturb any other code:
/**
* This shortcode will allow you to create a snapshot of a remote website and post it
* on your WordPress site.
*
* [snapshot url="http://www.wordpress.org" alt="WordPress.org" width="400" height="300"]
*/
add_shortcode( 'snapshot', function ( $atts ) {
$atts = shortcode_atts( array(
'alt' => '',
'url' => 'http://www.wordpress.org',
'width' => '400',
'height' => '300'
), $atts );
$params = array(
'w' => $atts['width'],
'h' => $atts['height'],
);
$url = urlencode( $atts['url'] );
$src = 'http://s.wordpress.com/mshots/v1/' . $url . '?' . http_build_query( $params, null, '&' );
$cache_key = 'snapshot_' . md5( $src );
$data_uri = get_transient( $cache_key );
if ( ! $data_uri ) {
$response = wp_remote_get( $src );
if ( 200 === wp_remote_retrieve_response_code( $response ) ) {
$image_data = wp_remote_retrieve_body( $response );
if ( $image_data && is_string( $image_data ) ) {
$src = $data_uri = 'data:image/jpeg;base64,' . base64_encode( $image_data );
set_transient( $cache_key, $data_uri, DAY_IN_SECONDS );
}
}
}
return '<img src="' . esc_attr( $src ) . '" alt="' . esc_attr( $atts['alt'] ) . '"/>';
} );
Click Update File when done.
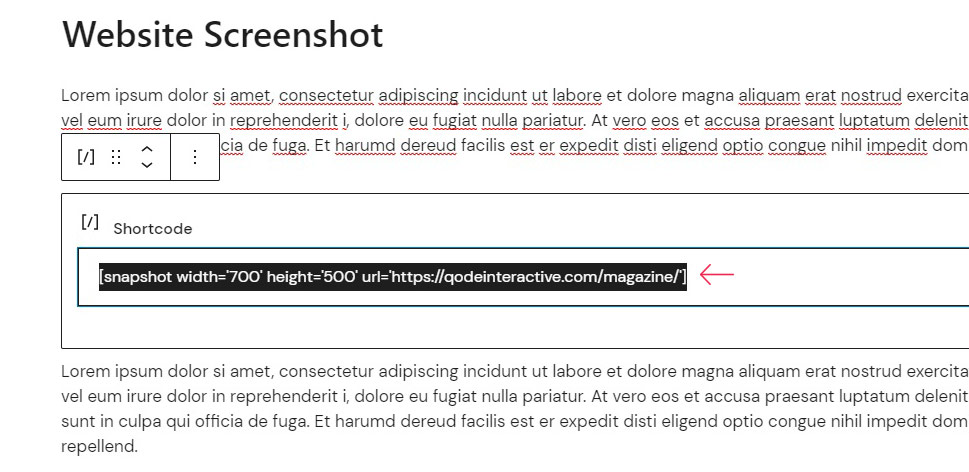
This works much the same as the plugin method described above. The shortcode is now called [snapshot] and uses some of the same parameters: url, width, height, and alt. Working with the same post as used above, we will enter [snapshot width=’700′ height=’500′ url=’https://qodeinteractive.com/magazine/’] into our shortcode block for a 700 by 500 pixel screenshot of our website.
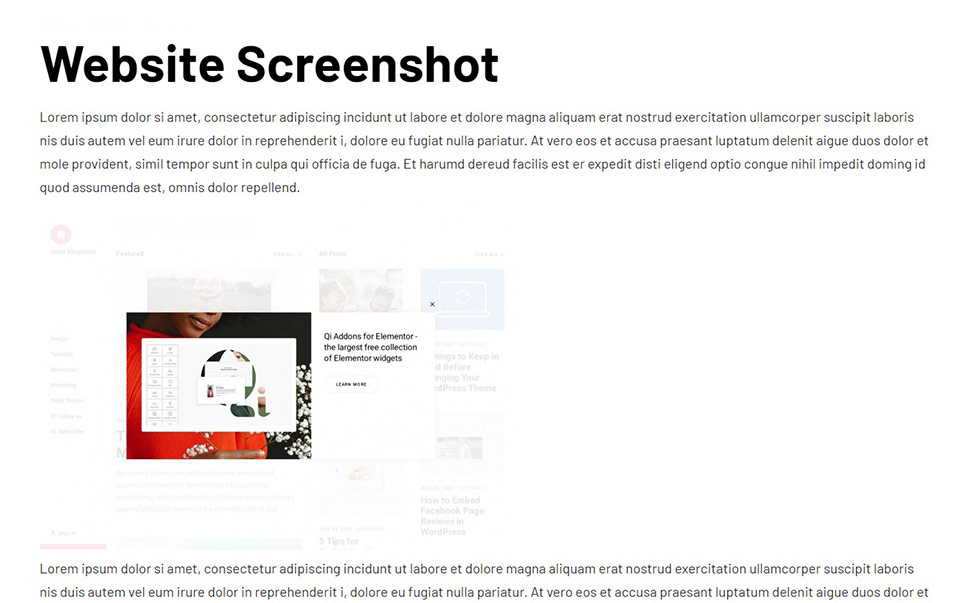
As you can see, the screenshot is there. This one is just an image, and does not link to the website the screenshot is from.
In Conclusion
There you have it, it’s as easy as that. Whether you’re relying on a plugin or on your own ability to modify code, you can now save loads of time, money and effort by automating screenshot-taking. As is so often the case with WordPress, you can add a functionality, such as this one, to your website in just a few clicks of the mouse or a simple copy/paste command, and it needn’t cost you a penny.
