How to Permanently Delete a WordPress Site

Whether you are moving on from an old project, closing an online business, or swapping blogging for a new career deleting a WordPress site is not as simple as you might think. Even if you erase the website’s files and database search engines might still have the site indexed and would list it within the same searches as before. If you’d like to avoid such things, follow this step-by-step guide and learn how to delete your WordPress site permanently and completely from the internet. If you’d like to skip to any specific part of this article, simply click on one of the links below:
Create a Backup
The first step, which applies to many other things you might do with WordPress, is always to save a backup of your site. This may seem redundant since you are trying to delete that very website but you can never be completely sure that you will not need some of the data later or that you might even reconsider the deletion. If you do, it would be much easier to simply restore the site backup than it would be to build the same website from scratch.
Now that you have the website’s backup for safekeeping you can proceed with the next steps.
Search engines keep records of a website even when you delete all its files, databases, and the domain. A search engine can still include your site in relevant searches even if you deleted it. They do this on the assumption that your website is temporarily down, and might be up and running again. This, of course, is not ideal.
You can hide your website from search engines by reconfiguring the robots.txt file. This file is essentially a directive for search engines on how to crawl and index your site files. By setting these directives to signal the crawlers not to index your website you will effectively hide the website from search engines.
To do this you need to create a new file with the name robots.txt and type the following code within it:
User-agent: *
Disallow: /
This code disallows any search engine bots, like the Googlebot, from accessing any URLs of the domain that contains the file.
Deleting a website that is hosted with any third-party hosting company, meaning it’s not with wordpress.com, can be done with three relatively easy steps. By deleting website files, the database, and the domain name you will be erasing any present trace of the website.
Deleting Website Files
Deleting website files for a self-hosted website can be done either via cPanel’s File Manager or an FTP client.
To do this via cPanel you need to navigate to your hosting account and log in to your cPanel dashboard. Then simply access the File Manager option.

Once inside the File Manager navigate to the public_html directory. If you have multiple websites hosted on this account you will see multiple folders within the public_html directory. If this is the case, access the folder of the website you’d like to erase and delete all of the files within it.

In order to erase website files using an FTP client, you will need to connect to the server with your FTP credentials and navigate, once again, to the public_html directory. Open the website’s folder and delete all of the files within it.

Deleting Website Database
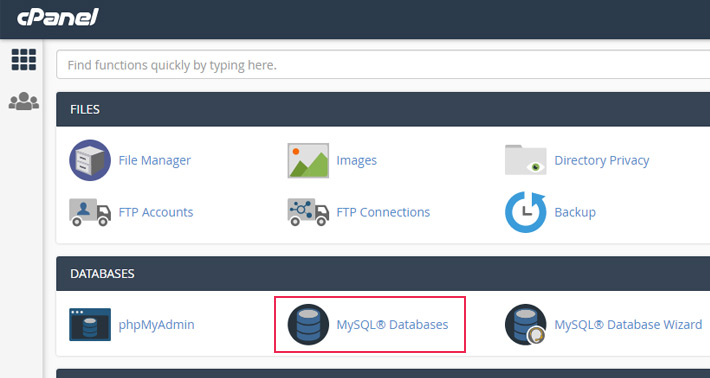
The database is the main part of a website and it must be deleted as well in order to completely erase the website. To do so you need to navigate to the cPanel dashboard once again and access MySQL Databases.
Once there, you will be able to scroll down to find a list of databases that you have on your server. To the right of each of the rows containing the name of the database is a link to delete that database. Use only the link for the database you would like to delete.

If you do not have this option available you will need to contact your hosting provider to consult on further steps to delete the intended database.
How to Delete WordPress Website Domain Name
Though some people like to retain the purchased domain name, you might not need it anymore. In this case, it might be best for you to delete the domain name along with the files and database of your website.
To do so you need to access your cPanel dashboard and click on Domains.

Once in, you will see a list of all domains registered to that account. Find the one you’d like to delete press the Manage button on the right-hand side of the row.

You will be redirected to a page where you can change the root directory of the domain and, below that, you will have the option to remove the selected domain by pressing the button Remove Domain.

With websites hosted at wordpress.com, the procedure is further simplified. Namely, here you have an option to simply press a button and the files along with the database of the website will be deleted.
To do so you need to navigate to the My Sites link in the navigation bar.

Expand the Manage option and click on the Settings link. Once you have done that, scroll to the bottom of the settings page where you can follow the Delete your site permanently link.

You will be redirected to a new page where you will find the Delete Site button.

With this, you deleted all of the website files and databases associated with it. This has also deregistered the domain name you have used for that particular website. The next step, if you wish to do it as well, will be to delete the wordpress.com account.
To do so you need to access your profile via the profile icon link on the right side of the navigation panel.
From your profile page, you will have to select the Account Settings link from the options on the left-hand side. Then choose the Close your account permanently link.

This will lead you to the Close account page where you can click on the Close account button in order to perform this action.


Although hidden from bots and with all of the above-mentioned measures in place, search engines will still list your website within relevant searches. To stop this completely and to explicitly tell search engines that your website is permanently being taken down you need to alter the .htaccess file as well.
You will need to create a new .htaccess file and place it where your root WordPress directory was on the server. Place the following code within the newly created file:
RewriteEngine On
RewriteCond %{REQUEST_URI} !^/robots.txt
RewriteCond %{HTTP_HOST} ^www\.example\.com$ [NC]
RewriteRule ^(.*)$ - [L,G]
Note: Make sure to change the example and com to your domain.
The code above will use a 410 redirect for all of the URLs on that domain except for the robots.txt file. The 410 redirect is used when a file is no longer available and it will not be available in the future.
This in conjunction with the previous steps will permanently erase your website from any future web searches.
Using this method may take some time, so if you’d like to speed the process up a little bit you could submit a request for content removal. This can be done directly to Google, for example. In Google’s case, you can navigate to their Remove outdated content page. Here you will be able to submit the URL of the website that you have deleted and the content that you do not want to be shown anymore.

Now if you’d also like to erase any records of the previous state of your website you will need to delete the cached snapshots of it from the Wayback Machine. The Wayback Machine is a website service containing cached versions of all versions of most of the websites that were ever available online.

The only way to effectively delete cached screenshots from the Wayback Machine is to contact its creators at Archive.org and request that they remove the files in question.
If you, for whichever reason, change your mind about deleting your website you can restore it. For websites hosted with wordpress.com, this can be done within thirty days of deleting the website. You will, however, need to contact their support in order for them to restore the website for you.
As for restoring the website that is self-hosted, you can do this yourself and there is no limit to the number of days that pass after deletion. You simply need to restore the backup you have previously made.
Final Thoughts
There are many reasons why you might want to permanently delete a WordPress website. We touched on some of them in this article, but regardless of your reasons, the steps outlined are the same for all. So if you want to thoroughly remove your site from the internet, you can do that following the steps outlined in this article. Moreover, you now know how to eliminate all of your site remnants. We hope that erasing all traces of your website will be a lot easier and smoother for you given the guidelines above.
