How to Password Protect Your Whole WordPress Site

For one reason or another, you might want to allow only certain people to view your website. Everyone from online magazines to businesses that provide service online and message boards routinely restrict access to their website – either the whole thing or just a part of it. And it’s really simple to do – you just install and set up a membership plugin, and you’re done.
But what happens if you’re not interested in restricting access based on membership? What happens if you’re a developer who was hired to set up a WordPress website and now wants to show their client the live version of the website? You don’t want the client to jump through hoops and have to become a member of their own website.
This is one of the situations when putting a whole website behind a password without any form of member registration makes sense. It’s an elegant solution to restrict access to an otherwise live website. Thanks to a simple plugin, it’s really easy to set up, too!
Qode Themes: Top Picks
View Collection


How to Put a Whole Website Behind a Password
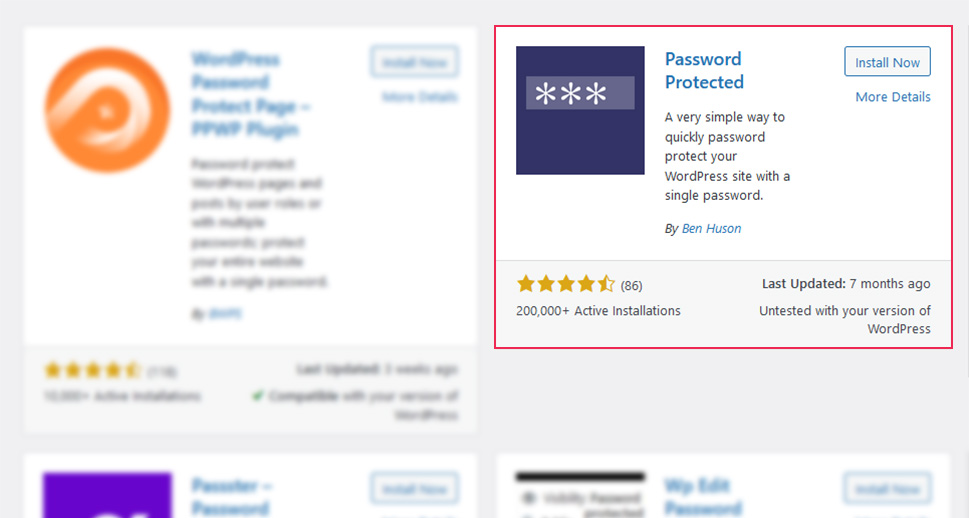
If you check on WordPress.org for password protection plugins that will work on a whole website, you’ll probably come across Password Protected. With over two hundred thousand active installations and a decent average rating, the plugin is certainly the most popular plugin for this purpose. It doesn’t hurt that it’s free, either.

The plugin has a couple of downsides you should be aware of, too. For example, any content you upload to it, as well as images, will not be protected. Anyone with their link can access them. The plugin also doesn’t work well on websites that use caching – either through a plugin or the host’s service. Finally, if you come across any bugs or issues, it might be better to point them out on the plugin’s GitHub page instead of the WordPress.org one.
But if you’re fine with these downsides or just want to have an easy access control solution before the official launch of a website, you can go ahead and install the plugin. From your website’s dashboard, go to Plugins > Add New, search for Password Protected, and install and activate the plugin when it appears in the search results.
Once you install the plugin, you can either find it in the list of installed plugins and access its settings from there, or navigate to Settings > Password Protected for the plugin settings. Either way, you’ll end up looking at a user interface where you can set the password protection status, permissions, the password, IP exclusions, and if you want the plugin to remember you and for how long.
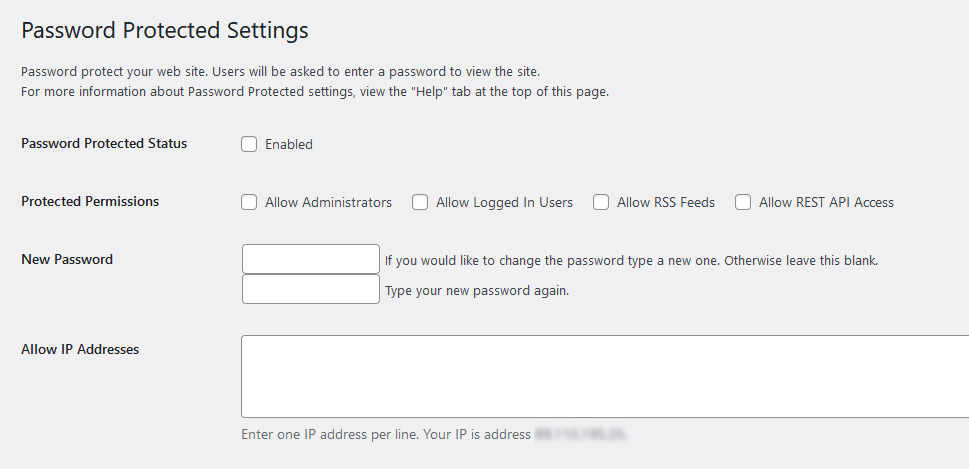
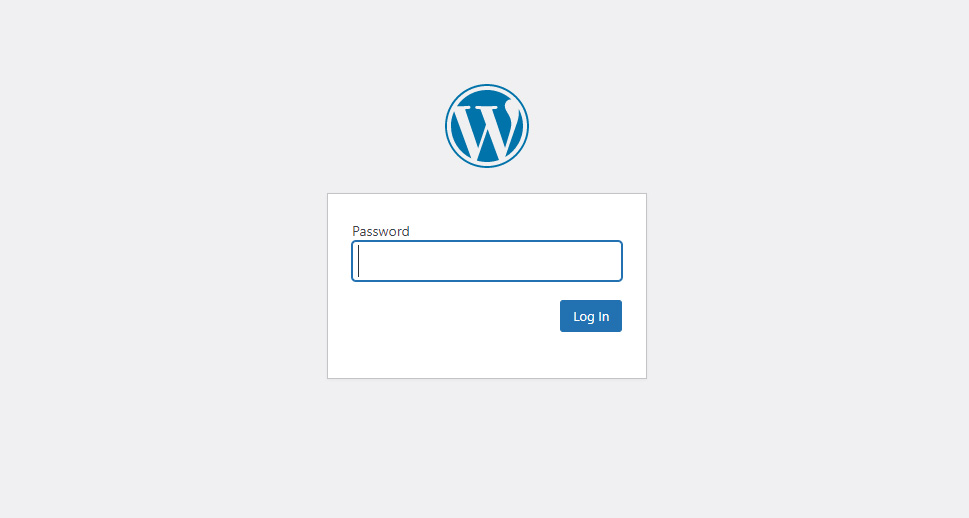
These are the only options the plugin has. After setting them, anyone trying to access your website from an IP address that’s not whitelisted will be prompted to enter a password before being able to access the website.
What Else Can You Password Protect in WordPress?
Being able to protect your website with a password is all fine and well, but it’s not the only option you have. WordPress was developed with password protection for specific parts of the website. Where WordPress lacks this kind of protection, plugins might be there to step in. Let’s see how you can protect specific parts of your WordPress website with a password.
Password Protecting Posts and Pages in WordPress
Sometimes, all you want to do is make sure that people don’t have access to certain posts or pages on your website. There are a couple of reasons why you’d want to do it, such ensuring that your work is well-reviewed by a third-party before publishing, for example.
If this is something you’d want to do, don’t worry – WordPress has given you an easy option to do it. We’ve written a whole article about it before, so read it to get the full detail.
Password Protecting Categories of Posts
If you want to paint with a broader brush and password protect more posts at once, you can do so using a free plugin called Access Category Password. After installing and activating the plugin, navigate to Settings > Access Category Password. There you’ll find all the plugin settings.
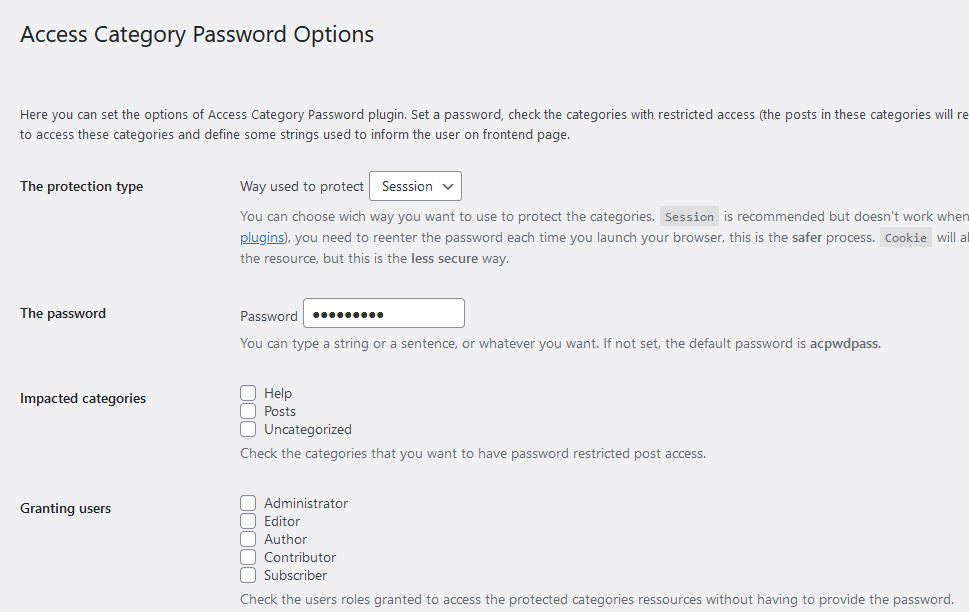
The plugin will allow you to choose the categories of posts whose content you want to password-protect. You’ll also get to choose between session and cookie protection, excluded roles, and various messages to the visitor. You’ll even be able to modify the form that replaces the content of the articles you’re protecting with the plugin.
Password Protecting Parts of Posts
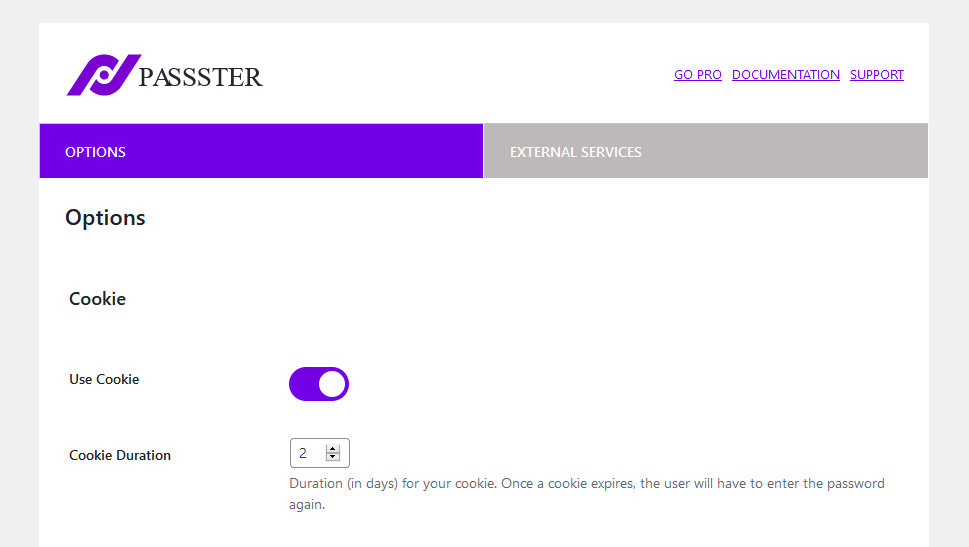
But what if you don’t want a broader brush, but something that lets you paint the finest details? There’s a way to password protect only parts of posts, and it involves a plugin called Passster – Password Protection. If you install and activate the plugin, you’ll find a new option in your dashboard menu appropriately called Passster. Clicking on it brings you to the plugin’s option.
To actually protect parts of your content with the plugin, you’ll have to use shortcode with the following structure:
[passster password="123"]your hidden content[/passster]
You can replace the “123” password with anything you like and place the content smack in the middle of the shortcode. When someone visits the post with the content, they won’t be able to see whatever content you’ve added to the shortcode until they’ve entered the password.
Let’s Wrap It Up!
Password protection is a useful way to restrict access to your website even if you don’t have any plan to charge for it or allow it only to select members. As WordPress doesn’t have a native function to restrict access in this particular way, you’ll have to rely on a plugin for help.
That might not be the case if you’re interested in only protecting certain pages or posts on your website, though – WordPress has that option built-in. If, on the other hand, you want to zoom out and protect more posts at once, or zoom in and protect specific parts of specific posts, you’ll have to once again turn to plugins.
