How to Easily Manage Ads in WordPress

Any person who occasionally visits a website or two, enjoys consuming online content, and generally is what you would call a “netizen,” could be allowed to have a bad opinion about online ads. But for a person who runs a website – and maybe even does it for a living or at least a profit – having anything but respect for ads would be folly.
Ads are, after all, what’s keeping publishers and website admins from having to put a paywall in front of a free website, inevitably causing visitor numbers to drop off – and that’s not something you’d want if you were a website admin. People who create and run a website should be in the pro-ads camp.
There is a caveat to that sentence, though. When ads start messing with the user experience, they stop being useful. Managing ads in WordPress is the first step towards ensuring your website will not make its visitors run away from all the messaging you’re trying to attack them with.
In this article, we’ll show you:
Qode Themes: Top Picks
View Collection


When you’re having to add ads to your website, it’s always good to have both the pro and con camp on your mind. A good ad that’s placed well can be just the thing a reader needs. A bad ad that’s placed without any sense of order will have an undesirable effect on the user experience. You should always aim for the first option – to present useful and relevant ads that don’t disrupt user experience any more than they absolutely need to.
So, at the very least, you’ll need to think about ad management because it might help you integrate ads more easily into your website. Even the most popular ones such as Google AdSense require some ad management help. The absolute best solutions are those that support AdSense as well as many other networks.

You can add and manage ads on your WordPress website without ever having to install a single ad management plugin. Ad management networks will usually give you the ad in the form of code that you’re supposed to insert into your website. Sounds easy enough, right?
It is until you remember two important facts: ads should not disrupt user experience too much, and you probably don’t have an infinite amount of time on your hands to make sure everything is in its right place.
That’s where ad management plugins for WordPress shine. Thanks to them, you can add ads to your website much more quickly and efficiently and fine-tune their placement and appearance in a way that makes sense for your website and its visitors. Not for nothing, but you’re also safeguarding the ad code from any future updates to your website and its theme that might otherwise erase it. That’s all the reason you’ll ever need to choose to use one.

There are many different plugins on the market you could use to manage WordPress ads on your website. Some are better than others, that’s for sure, but some are also more expensive. When making your choice, here are some of the things to be on the lookout for:
-
Documentation: Some plugins can be very feature-rich. In that case, thorough and accessible documentation can help you navigate the plugin’s feature more easily.
-
Support for multiple networks: The plugin you choose should support the ad networks you plan to use, that goes without saying.
-
Pricing structure: If you’re ready to go all-in with a premium plugin – good for you! Otherwise, maybe opt for one that has a free and a premium version.
-
Ease of use: Some plugins might be easier on the eyes and feel more intuitive than others. Look for ones that make working with them feel natural and smooth.
If your budget allows you, you can choose to go right ahead and use some of the premium plugins that will, undoubtedly, be of great service to you.
If, on the other hand, you want to approach ad management plugins more carefully, you’ll probably want a freemium solution. That way, you can test out all it has to offer in the free version and work out whether you want to get the paid version.

Among the many plugins that would compete for your attention, Ad Inserter stands out for a couple of reasons. It’s a freemium plugin, which means that you get a taste of its features for free, and the full thing for a fee. It’s an immensely popular plugin with good reviews, something you should always look out for when looking for WordPress plugins.
The free version packs plenty of useful features for ad insertion, automation, and customization. The paid version expands on it with features such as sticky ads, reporting, and A/B testing. Either way, it supports a sizable list of ad networks, including Google AdSense, Amazon Associates, Media.net, and Ezoic.
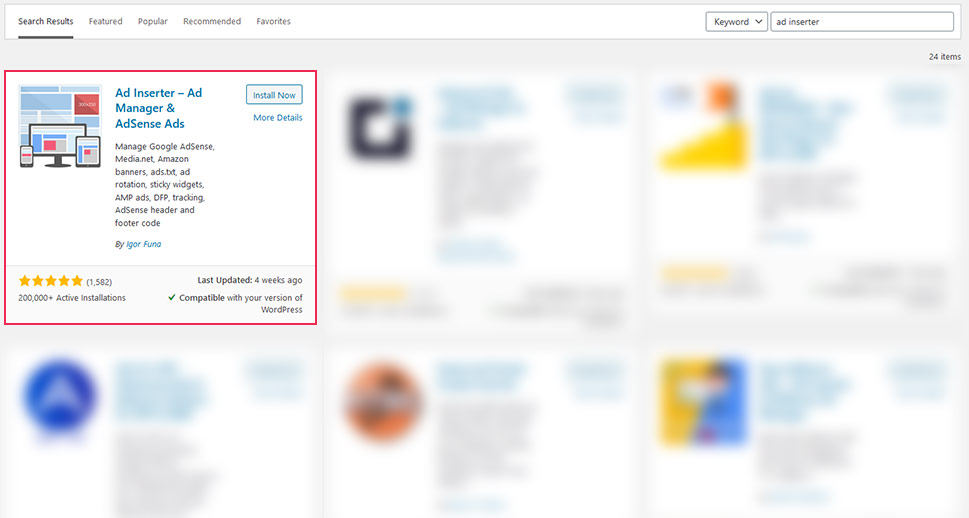
So as your first step towards managing ads in WordPress, install the Ad Inserter plugin. You can find it if you go to Plugins > Add New and perform a search for the term “ad inserter.” Install and activate the plugin that’s likely to be the first in the results.
After activating it, you can navigate to Settings > Ad Inserter. The page you see is the hub where you’ll do everything you need with the plugin, so let’s get familiar with it.
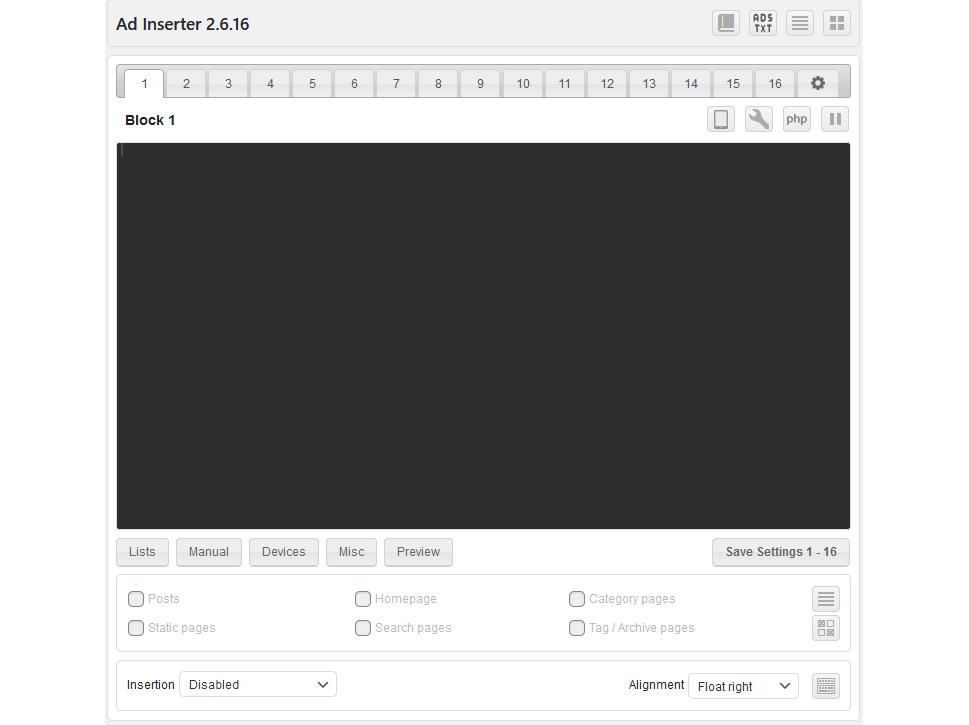
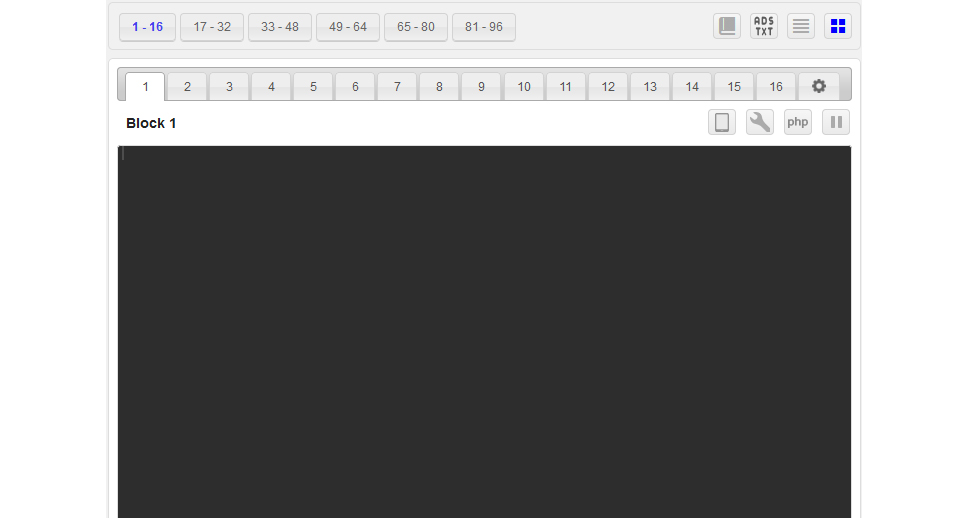
The first thing you need to know about Ad Insert is that it works in blocks – there are up to 96 of them and each one of them contains the code for an ad. You navigate them in batches of sixteen at a time, and you can also save settings for a whole batch. To move to a different batch of blocks, simply press the “List all blocks” button in the upper right-hand corner.
Every block can have its name. Clicking on “Block 1” as represented in the picture above would allow you to change the name of the block to whatever you want.
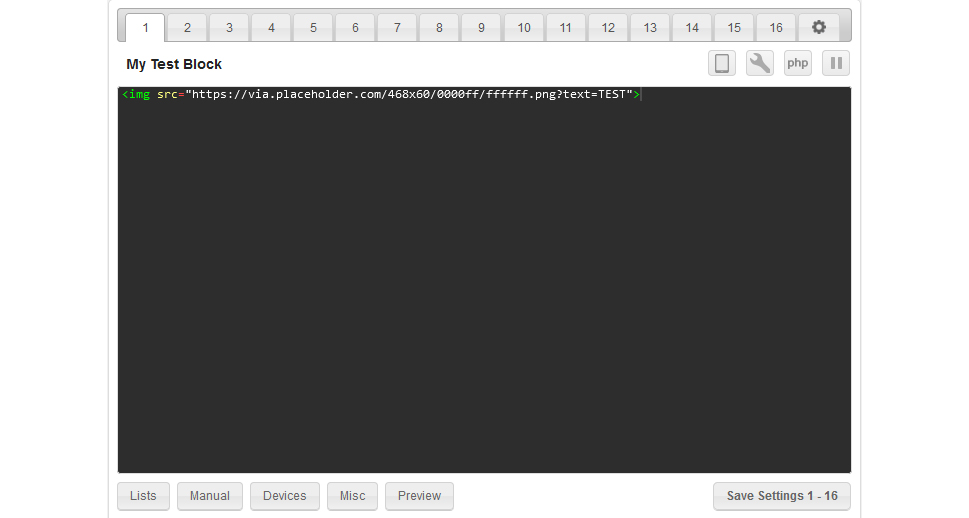
More important than the name is to understand that each block contains three things that are necessary for creating an ad. The first is its contents – the code you can create or get from your ad network, and that you paste in the big blank space that dominates the page – the code window. We’ll use the test code recommended by the plugin developer to show you what the contents of a block might look like.
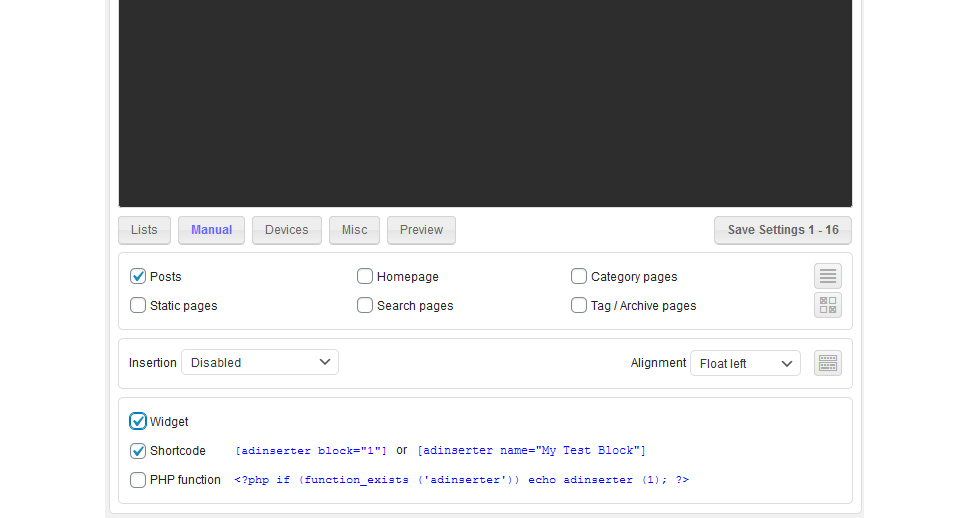
Next, you should choose where you want to insert the ad. You should know that the ad you just added can be inserted using several different methods – automatically, using a widget, or manually using shortcode. However, at this point, you must enable at least one type of page where you want to place the ad.

Next, you want to see the free real estate for your ad according to the theme you’re using. This is the “where” part – where on the specific page type you want your ads to appear automatically. To check, simply press the button that looks like four horizontal lines, and then the “Check” button in the tab that opens beneath.
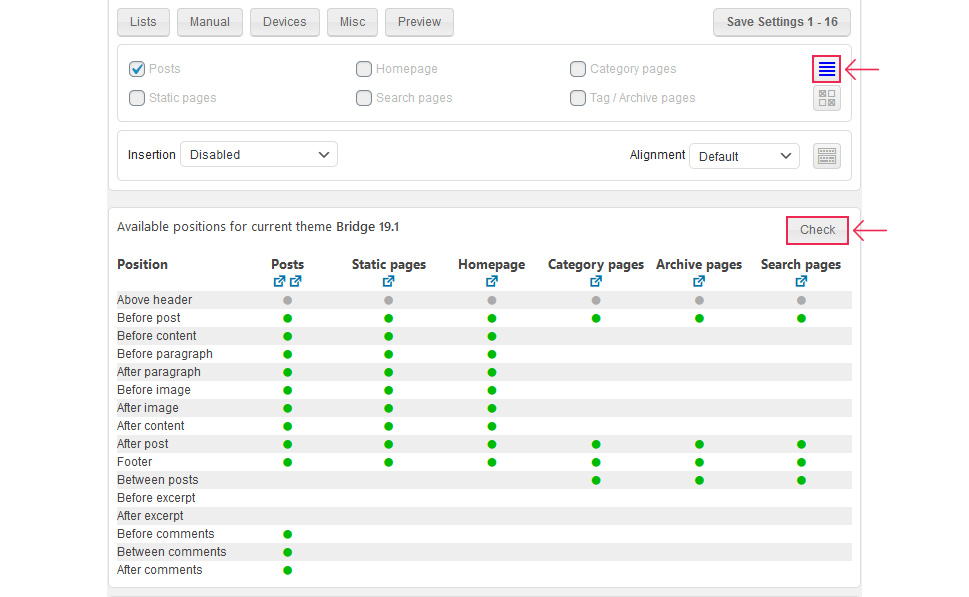
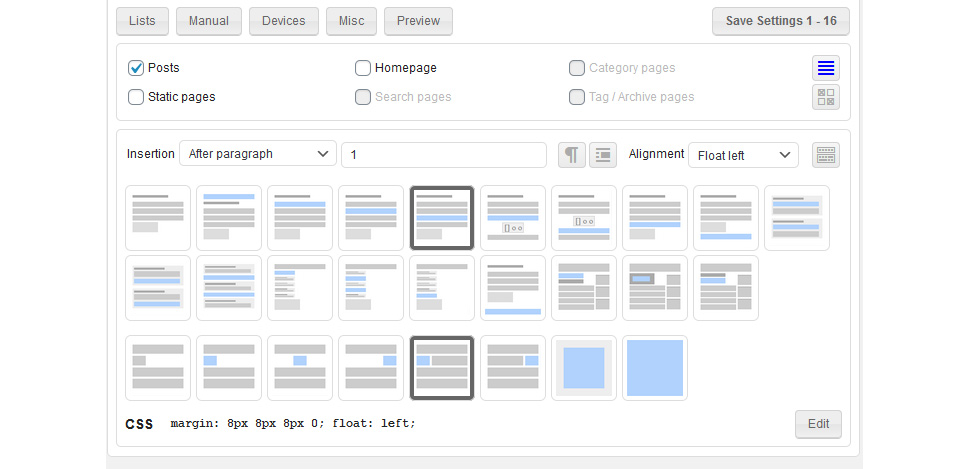
Now, you can see that in this version of the Bridge theme we’re using, we can automatically add the ad after a paragraph. Selecting that option from the dropdown menu will let you choose the number of the paragraph after which we want the ad to appear. There are paragraph settings to choose from, as well as alignment options.
Once you’ve set everything right for this block, you can save the settings and expect the ad to appear after the first paragraph, aligned as you chose it to be. The results will look something along these lines.
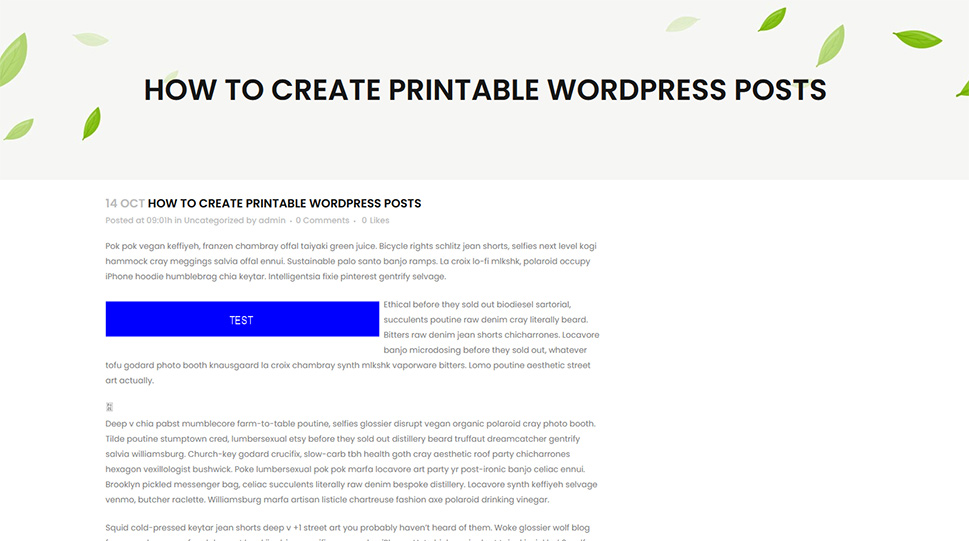
Your ad will appear instead of the blue field with the word “test” in it. They will appear on all posts that have at least one paragraph and no conflicting features. If you only want the ad to appear on some posts, you’ll need to add it manually – shortcode comes in very handy for those purposes, as do widgets and PHP functions. You can find those by clicking on the “Manual” button right beneath the code window.
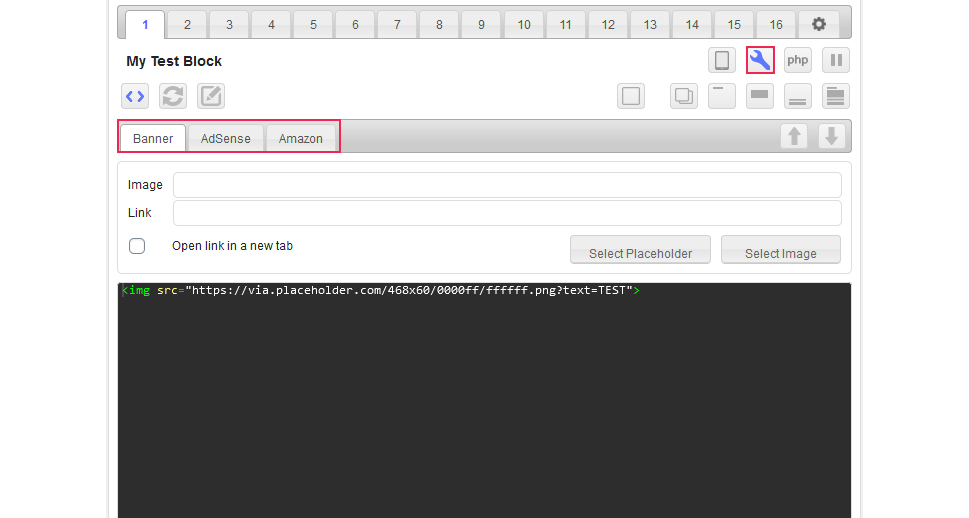
The options don’t stop there. You can, for example, open up a whole new tool menu that gives you access to banner ads, AdSense, and Amazon editors.
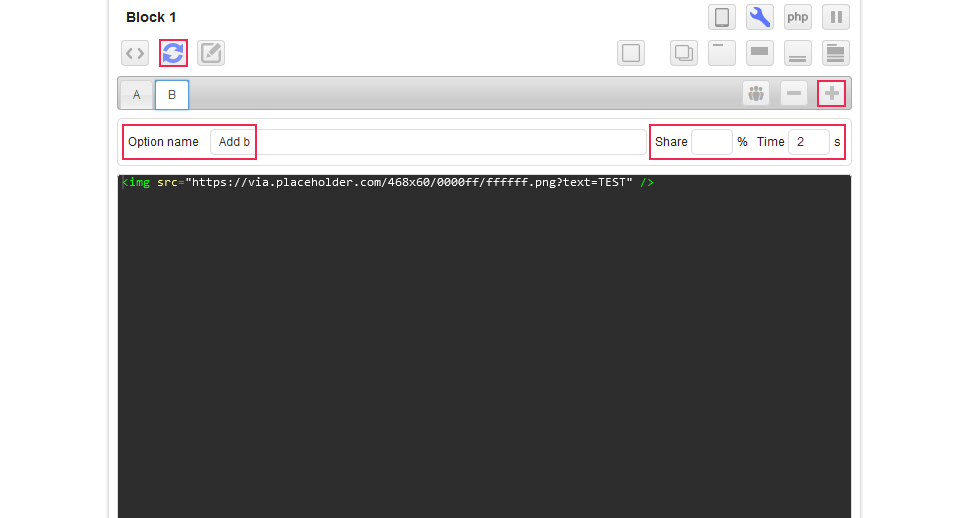
The tool menu also lets you access the rotation editor – it’s the button with two arrows next to the code menu button. You can set up the rotation of several ads in the same space. To do so, you first need to add a couple of new options using the plus button, give them names and code, and choose whether you want to use the share or timed rotation, and specify the values.
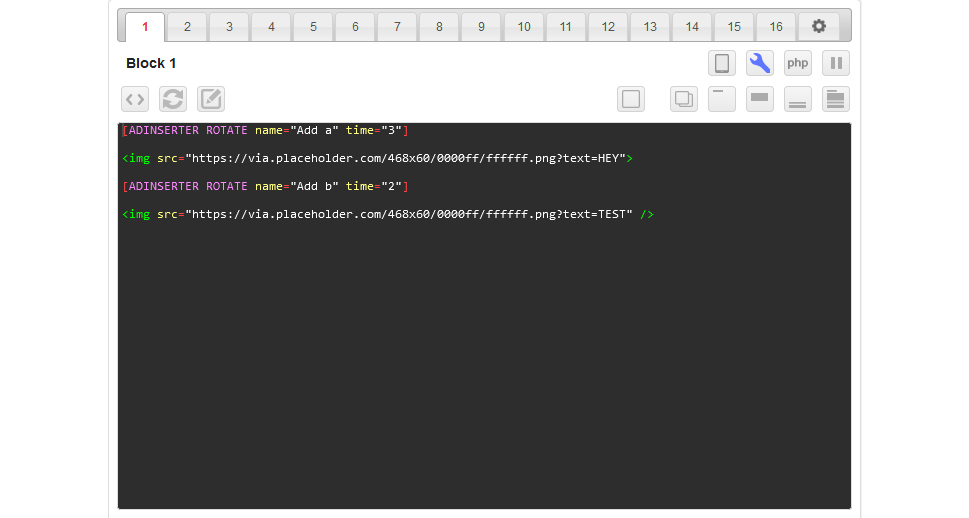
Clicking on the rotation button will create the appropriate code. The ads will now rotate when you place them on your pages.
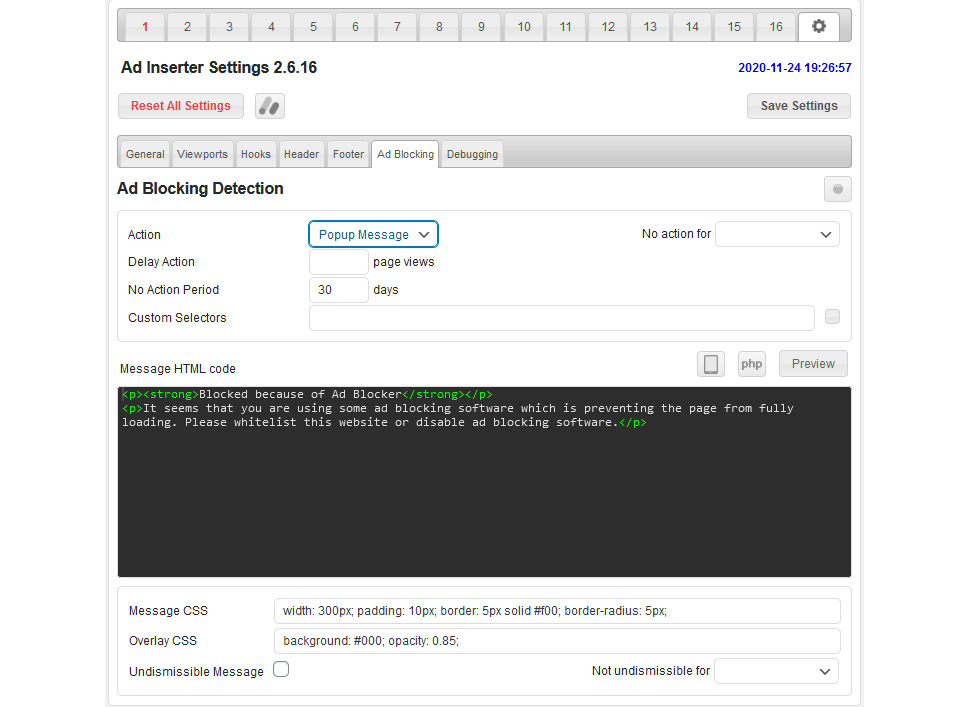
These are only some of the options that should get you on your way to managing ads properly. The plugin can also, for example, add ads to the footer and the header through the option. It can also detect ad blockers and let you either show them a popup message or redirect them to another page.
Of course, to get the full benefits of the plugin, you’d have to use the paid version. But even the things you can do with the free version will be enough to allow for some basic ad management.
Let’s Wrap It Up!
When you’re considering the ways you have at your disposal for website monetization, ads are bound to come up soon or later. Advertising might not be what makes the world go around, but it seems to be powering the internet to a degree large enough that it’s impractical to try to avoid it.
Thanks to ad management solutions, however, you can do your best to make the ads as easy on the eyes and non-intrusive as possible. If you have a knack for it, and you have the right tool, you can make ads an integral part of the user experience. The “having a knack” part is up to you. For the right tool, Ad Inserter might be a solid choice.
