What Are WordPress Sticky Posts and How to Make Them

WordPress sticky posts are probably the easiest and most convenient way to highlight your most popular or most important blog content. Since so many publications use this practical feature, you’ve probably seen sticky posts around, whether you know it or not. Today, we’ll cover all there is to know about WordPress sticky posts, from what they actually are to how to create and use them on your own blog.
What Are WordPress Sticky Posts?

Sticky posts are actually a rather simple concept. If you’re using WordPress as the platform for your blog, you have probably noticed that your latest posts get displayed at the top of the page or blog list. That’s the default WordPress setting, and, to be honest, it makes sense. You usually want your freshest content to be displayed first. But sometimes, a post you publish is so important that you’d like to give it some more attention before letting it descend into your archive. And that’s exactly what the sticky post functionality is for. By setting a particular post as sticky, you ensure that it always gets displayed at the top of your page, regardless of when it was published. So, you use the sticky post feature to literally “stick” posts to the top of your blog.
You can also “unstick” posts at any point, when you decide they no longer need to be featured in such a prominent position. Furthermore, you can set multiple sticky posts, too. All posts you set as sticky will always be displayed at the top of your page or list, and their internal order will be determined by the date they were published. For example, if you want to have three sticky posts, the one that was created the last will be the first, the one published before that will be displayed as the second, and the oldest one will be the third sticky post on your list.
As for the purpose of sticky posts, they can contain your brand statement, an introductory video, a set of rules you want to make sure are understood by everyone, or something along those lines. Of course, you can also simply use sticky posts to make sure your visitors see your best content first.
How to Make Sticky Posts in WordPress
Sticky posts have been a default feature of WordPress since version 2.3, which means you don’t have to install any plugins or use any custom code to create sticky posts. In fact, creating them is extremely simply.
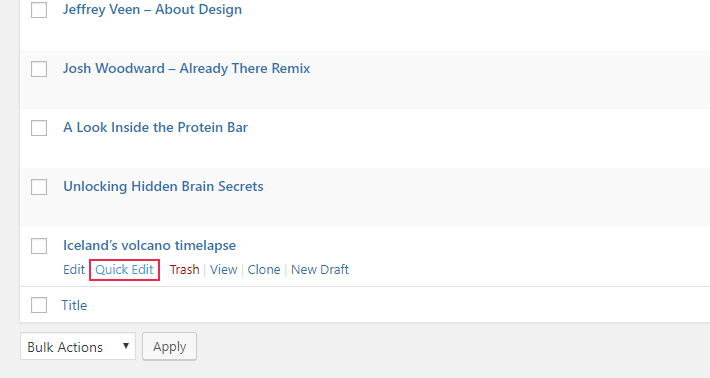
First, you need to log into your WordPress dashboard and navigate to the list of your posts. Once you locate the post that you want to set as sticky, click on the Quick Edit link below the post title.
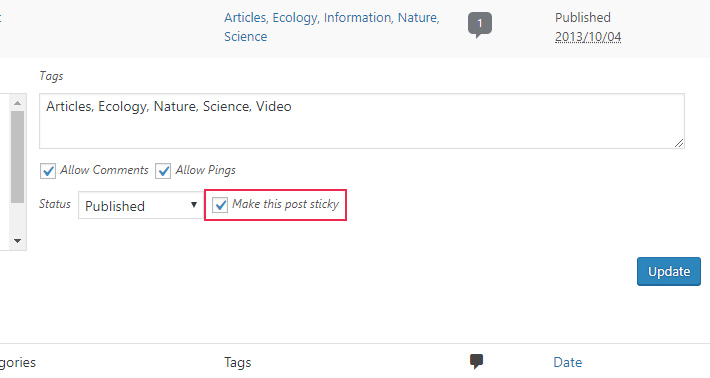
Now find the option that says Make this post sticky and check it. As soon as you click the Update button, the post will be “stuck” at the top of your list of posts.
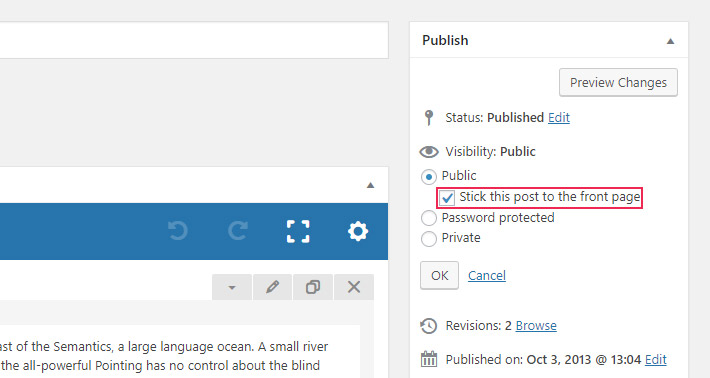
You can also do this from within the post itself, while editing it. In the sidebar, to the right of the editor, you will see the option Stick this post to the front page, along with options for protecting the post with a password and making it private. Simply check the box and update your post.
The steps are similar for Gutenberg users. You can use the Quick Edit option in the list of posts like we discussed above, or you can set it within the post itself:
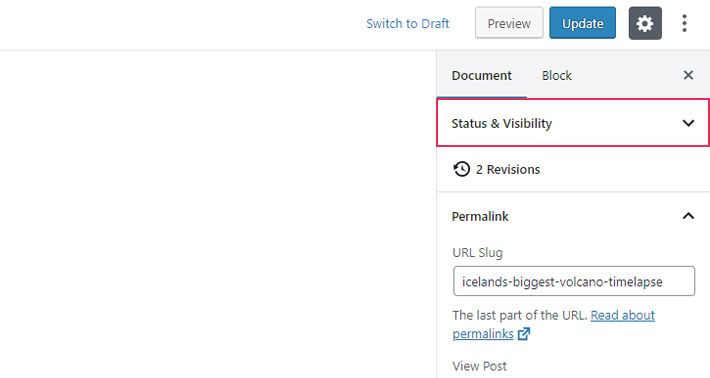
Open the Status & Visibility tab and look for the checkbox that says Stick to the top of the blog .
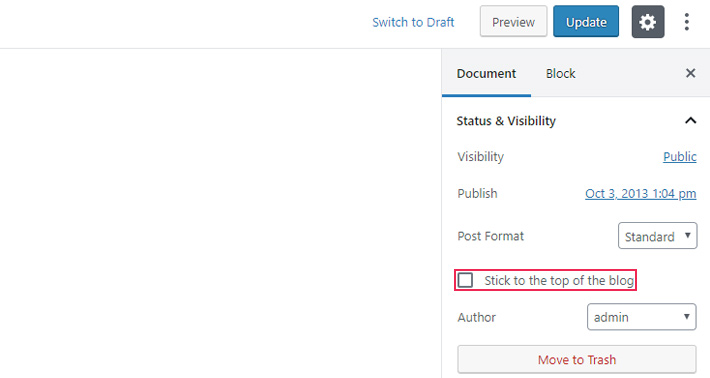
Check this box and your selected post will appear as sticky, listed above the other, newer posts.
If at any point you decide you want to “unstick” a post and go back to the regular chronological sequence of posts, you can do so by simply unchecking the box you used for making the post sticky in the first place.
Final Thoughts
Making sticky posts in WordPress is obviously as easy as it gets. All you need to do is decide which posts you want to highlight as sticky and check the related box. Feel free to share your experience with sticky posts and tell us about how you’re using them in the comments below!


