How to Log in to Your WordPress Website

So you decided to start your own website. And you want to build it using WordPress, because you’d like to be in full control of the entire process and make everything on your own. Moreover, with so many premium WordPress themes available, you know you’ll be able to create just the kind of website you want.
But before you start playing around with themes, plugins, and settings, you need to know how to log in to your WordPress website and access the almighty dashboard. This is the heart of WordPress, the place where you control the look, feel, and all the content of your website. So, today we’re going to show you how to access the WordPress dashboard and reveal a few tricks you can use to make logging in to your WordPress website easier.
1. Where to Find the Login Page
For starters, it’s necessary to locate the login page. To find it, all you need to do is type /wp-admin right after the end of your website’s URL.
You can also add just /admin, /wp-login or /login.

2. How to Log in to Your WordPress Website
The moment you open the login page, this is what’s going to appear on your screen.
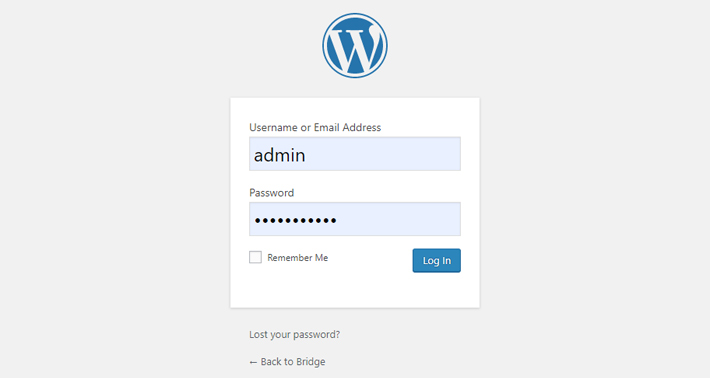
Now’s the time to enter the credentials you chose when installing WordPress on your server. If you don’t want to go through the hassle of entering the credentials the next time you access the dashboard, simply tick the Remember Me box. That way, your browser will remember your username and password, thanks to a good ole cookie. When you’re done, click Log In and you’ll be redirected to your WordPress dashboard.
If, for whatever reason, you end up forgetting your password, there are simple ways to recover it, so don’t worry. At no point will you end up not being able to access your WordPress website. Just make sure not to give out your credentials to anyone else and you’ll be fine.
In case you do decide to hire someone else to assist you in crafting and later maintaining your online greatness, you should set up a separate account for them. But before you do this, it’s important you understand what WordPress user roles are and the amount of power each role has. Better to be safe than sorry, don’t you agree? So, learn all about these roles before you decide to trust others with your project.
Ways of Saving Your WordPress Login Link
The simplest way to save the link to your WordPress login page would be to just bookmark it. Nothing groundbreaking about that, is there now? But bear with me, please. I have a few more tricks up my sleeve.
What if I told you there’s a way to add a WordPress login link to your website, either to the navigation menu, footer or to the sidebar? Sounds good, right? This is especially handy if you have multiple contributors to your website. By adding a login link to the frontend of your site, you’ll ensure anyone with the proper credentials will be able to access the dashboard easily.
Adding the WordPress Link to the Navigation Menu
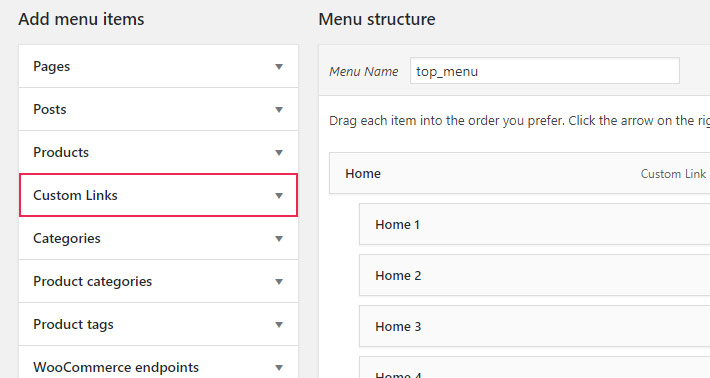
For starters, let’s add the login link to the navigation menu. Head over to your admin dashboard, and from the menu on the left-hand side select Appearance > Menus.

Now, look for Custom Links and click on that option.
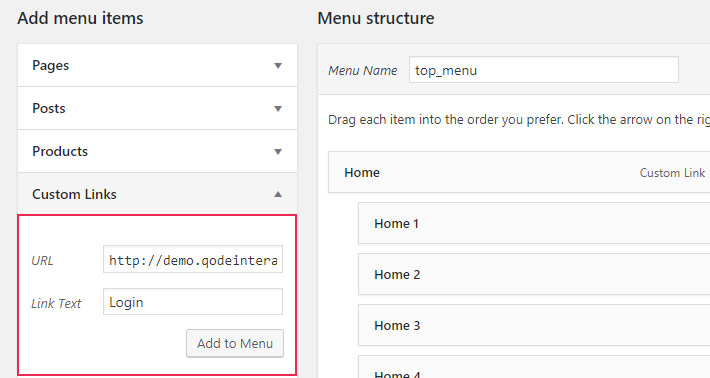
Next, paste the URL to your log in page in the designated field and don’t forget to enter the Link Text you want. Once you’re done, all is left to do is hit the Add to menu button.
Oh, and don’t forget to save all the changes you’ve made. On the right-hand side of the screen you’ll find the mighty Save Menu button. Click it, et voilà, you’ve successfully added the link to the navigation menu of your website.

Adding the WordPress Link to Your Footer or Sidebar
If you’d like to add the login link to your footer, head over to the admin dashboard once again. Go to Appearance > Widgets.
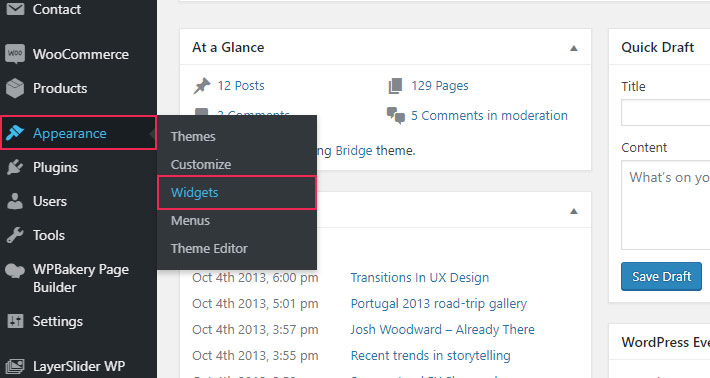
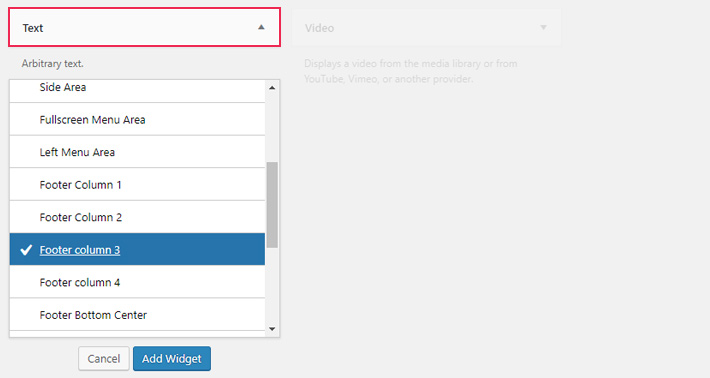
The widget we’ll use is the Text widget. Just click on the arrow in the right corner of the Text widget to open the dropdown menu. Now, select the widget area you want your login button to appear in (in our case, this will be the Footer widget area). When you’re done, click Add Widget.
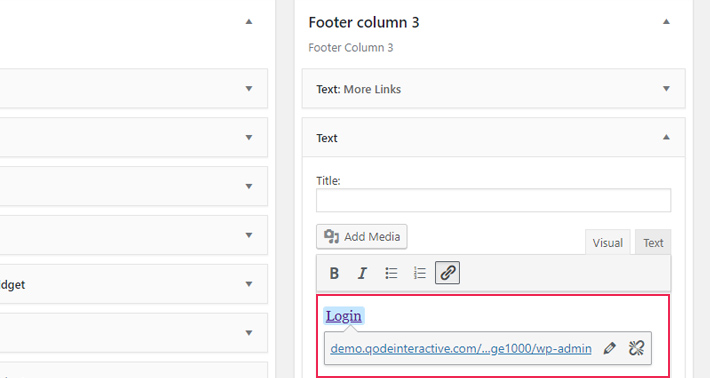
Now, open the Text widget and in the text box type Login. Click on it two times with the left mouse. Then, click on the Insert/edit link icon (right above the text space, the last one in the row), and paste the link to your login page. When you’re done, click Save.
The same goes for when you want to add the URL login link to your sidebar. Again, you’ll have to head over to Appearance > Widgets, choose a widget, and then just add it to the Sidebar widget area instead of the Footer. After that, just follow the same steps described above to add the link to the Text widget.
Conclusion
That wasn’t so hard, was it? You can now log in to your WordPress website with ease, and create new content like a boss. WordPress in general is not exactly rocket science. All it takes is some time to get used to the platform. Play around with the options and try out all the possibilities. If you mess something up, you can always undo the changes you made. The bottom line is, there’s nothing wrong in nurturing your inquisitive nature and exploring this mighty CMS on your own. Whenever you need a helping hand, you got us, so you have nothing to worry about.


