How to Limit the Number of Form Entries in WordPress

Forms are there for your users to submit them to you. That’s generally the point. While we tend to think of forms in terms of contact forms, and typically welcome any kind of interaction with and feedback from users, there are some instances when you would do better to limit the number of times a user can submit a form.
In this article, we will be showing you how to limit the number of form entries on your WordPress website. But before we get stuck in with the how-to, we would like to expand a little on when it might be useful for you to do so. If you are confident that limiting the number of form submissions is just the thing you need, feel free to scroll down to the tutorial section.
Here’s what we’ll be talking about.
Say you are running a giveaway. You can use a dedicated giveaway plugin, but you could decide to do the same with a modified, limited version of a contact form. All you need to do is set your form up so that it is only available for a certain amount of time.
Perhaps you are in the micro-publishing business, or are hosting self-submitted art on your website, in which case you might also want to limit the time during which your submission window is open, to avoid getting flooded by submissions you cannot process. The same feature is similarly useful in case you are a teacher or examiner, and want to disqualify any late entries.
Finally, you may be organizing an event to which invitees are expected to send an RSVP in a certain time window. You could, again, use an RSVP plugin, but there is no real need for a specialized event planning plugin if all you’re looking for is to limit the time for form submission.

Though they go beyond the scope of this article, there are other limits to form submission you might need to consider.
In the above example of the giveaway, perhaps you don’t want the entire world to participate. It may be due to shipping costs, legal issues, or for whatever other reason. Perhaps you also want to prevent known spammers from spamming you. In that case, you may want to block certain IP addresses from submitting.
Depending on the kind of content you are hosting, you might want to limit your visitors from submitting forms on the basis of age. You could add a simple check box to the form, confirming their age, or you could add age verification to your entire website.
Now, with that out of the way, let’s take a look at limiting the number of form submissions.
We will be showing you how to limit form entries using a Contact Form 7 form. However, you will need one additional plugin: CF7 Form Submission Limit. Once you have installed and activated both plugins, you will gain access to additional submission limitation options.
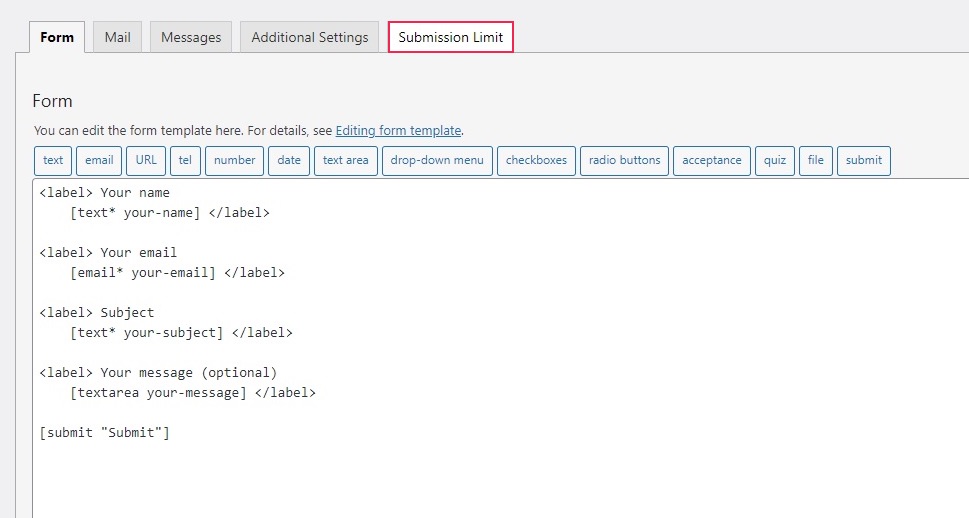
To limit submissions for any form, access that form to edit it. You will find the Submission Limit tab in the tabs section. Click it to access the limitation controls.
In order to enable the submission limit, make sure the Enable Submission Limit checkbox is checked. The Submission Limit Type you can select either Depend on total form submit or Depend on user total form submit. The first option is the default, while the second option means that a user can only submit a form when logged in.
In the Total Submission field, enter the number of times you will accept a form.
The Disable Displaying Remaining Message checkbox will, when checked, disable the message advising the user on the number of submissions remaining to be accepted.
Select from the After Successfully Form Submission dropdown menu the action to be performed upon successful form submission: Do nothing, Reload Page, or Redirect to specific page. The first, default option does nothing, the second reloads the form page, while the last lets you pick a page from the Redirect Page menu to which the user will be redirected upon submitting a form.
By default, the plugin will automatically periodically reset the submission limit. You can prevent it from doing so by checking the Disable Reset Submission Limit checkbox.
As far as the Reset Submission Limit section is concerned, this is where you can set up the date and period of the reset. You can set the date for the first reset using the Start Date control, while the Reset Interval menus let you control the interval. Finally, the Reset Limit button lets you instantly reset the submission limit.
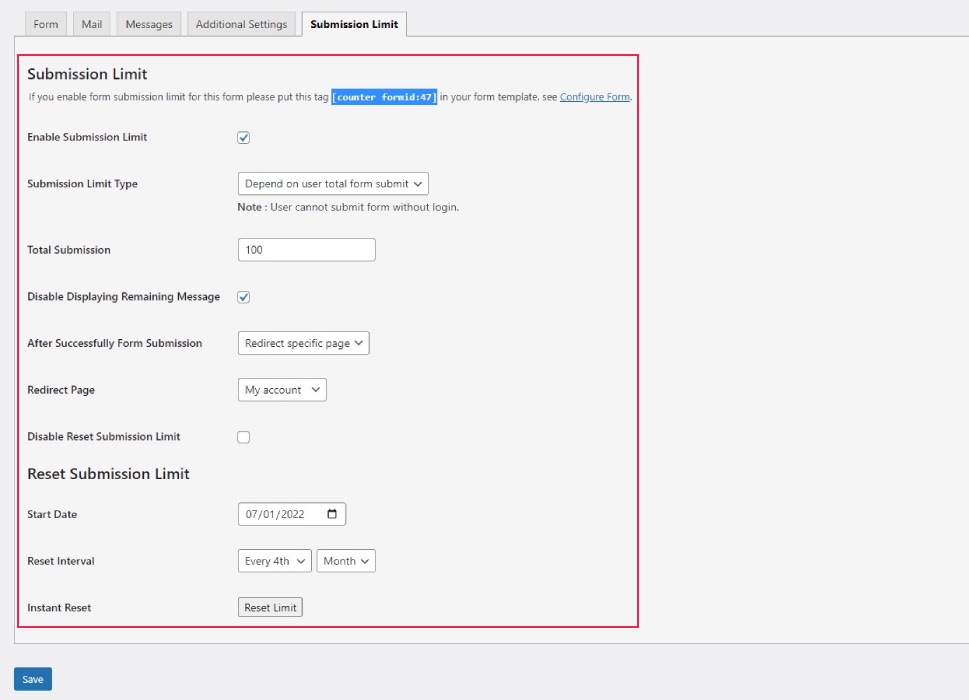
The tag you need to make the limit work will be generated in the upper section of the tab. When you have configured your form, you need to add the tag to your template. Copy the tag and click on the Form tab.
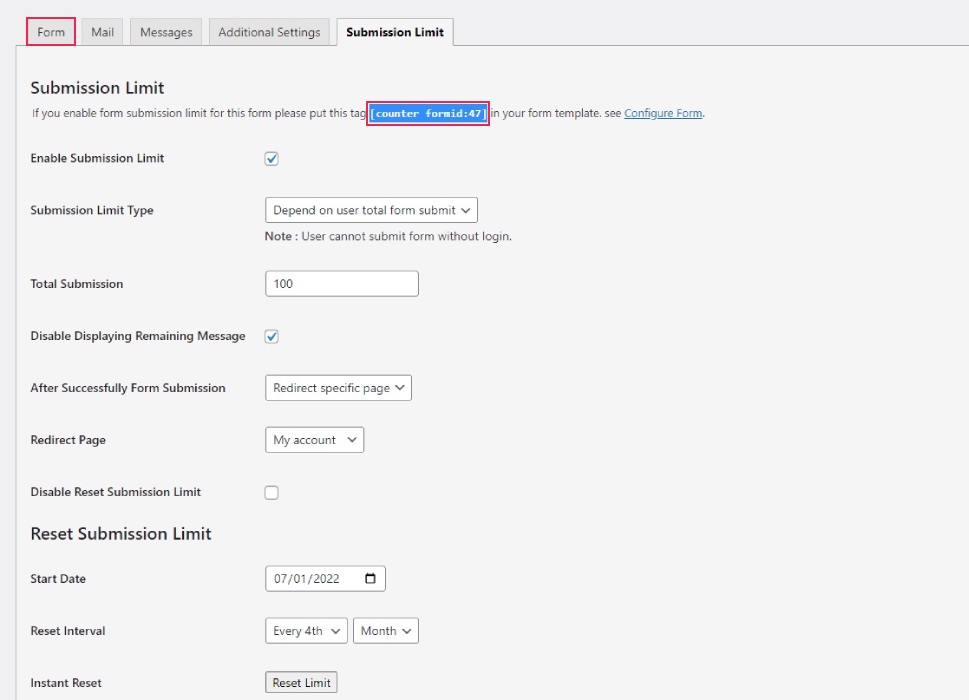
Paste the tag somewhere in the form template, making sure not to disturb the rest of the code, and then click the Save button.
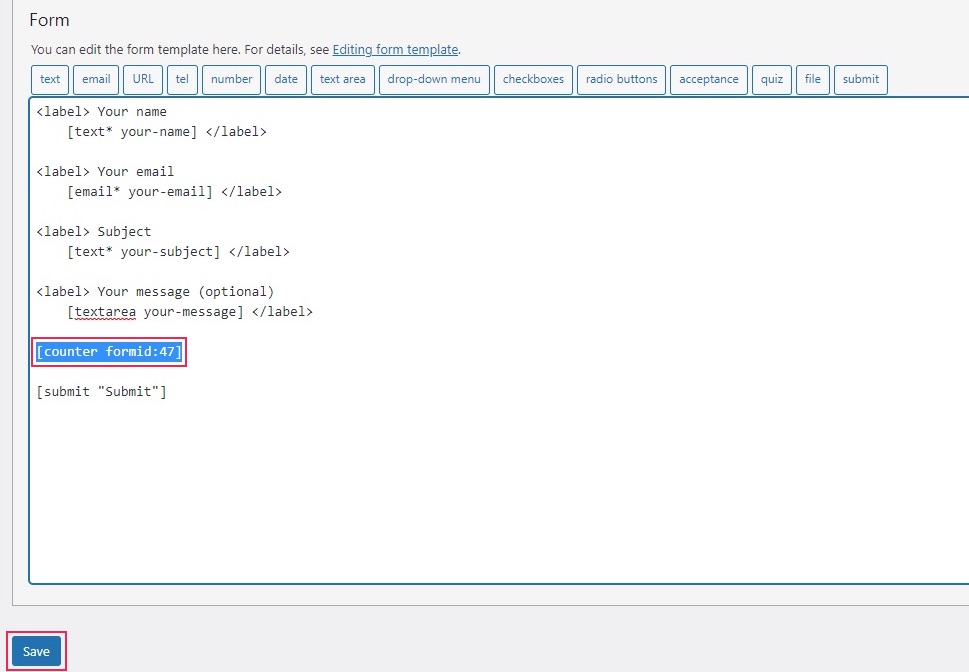
When you next use the shortcode to place the form on a page, as you would with any other form, it will include the form submission counter.
In Conclusion
As you can see, there are a lot of reasons you might have to limit form submissions on your WordPress website. Be it student papers, story submissions, RSVPs, or something else entirely, making a form accessible for a period of time is something a lot of website admins and operators can make use of. And while some premium, specialized plugins offer that as an in-built feature, there is a way to do so quickly and easily using only free software. And now, thanks to us, you, too, know how it’s done.


