How to Create a Front-End Login Page in WordPress
WordPress is a very powerful platform that comes with plenty of ready-made solutions for your website. Although perfectly functional, these solutions are not always ideal. That’s just the case with the WordPress default login functionality. It can be confusing to visitors who simply want to log in to their account on your site when they are suddenly redirected to the WordPress admin area. So, unless your visitors have something to do in the admin area, like to write a post or share some content, it doesn’t make a lot of sense to send them there after login. Therefore, enabling your visitors to log in to your site directly from the front end can provide a lot more satisfying user experience.
Why Is It Better to Have a Front-End Login Page?
Before we show you how to create a front-end login page in WordPress, let’s name a few reasons why this could be beneficial for you:
-
A styled login page with your own logo and branding often gives off a more professional look than a default login page that looks nothing like your website. Plus, it can help strengthen your brand.
-
Many users, especially if you run a membership site, simply do not need access to the admin area. It only confuses them, which may lead to them losing interest in what they came for to your site in the first place.
-
If letting users to the admin area is unnecessary, then allowing them to access it could be potentially dangerous as they might unwillingly edit or change something on your site. So, it is a better solution to keep your visitors out of the admin area to prevent them from doing anything they shouldn’t do on your site.
Frankly speaking, any kind of website gives off a much better impression if their login page is not the default WordPress login screen that we’ve seen so many times. A customized front-end login page simply shows that you put in the effort to provide a better user experience for your visitors, care about your brand and think about every detail. And considering how easily you can add a styled front-end login page to your WordPress site, there are really not many reasons not to do it.
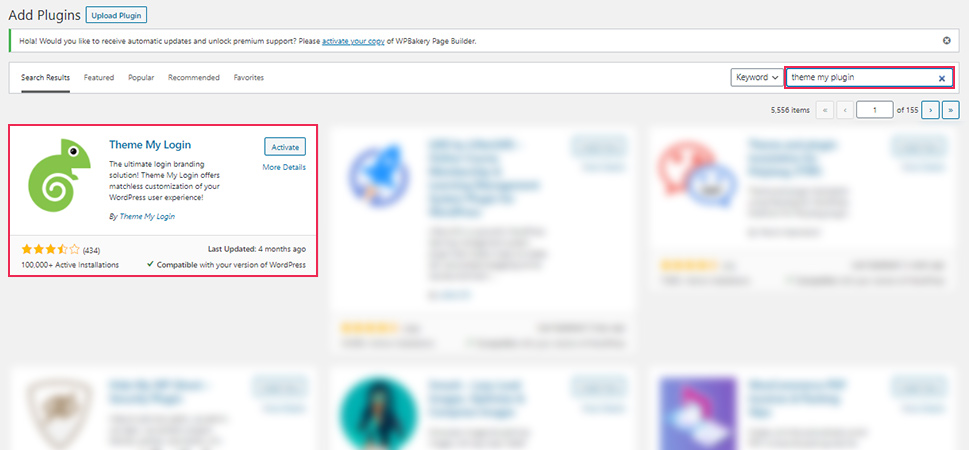
Today, we’re going to show you just how simple it is to implement a front-end login page using the Theme My Login plugin.
The fact that the Theme My Login plugin has more than 100 000 active installations speaks for itself about its reliability and efficacy. The reason why we choose this plugin over some other plugins is that it is incredibly simple to use, requires no configuration for building a custom login page, and is entirely free. The plugin ensures that the pages will match your current theme, they will have the same font and colors like the theme you’re using. It works right out of the box, with no need to customize any settings. Plus, the plugin adds a new widget to your site that you can place in your sidebar, footer, or header area and make logging in or registering easily accessible.
Qode Themes: Top Picks
View Collection


How to Create a Front-End Login page for WordPress With the Theme My Login Plugin
We’re going to assume you already know how to install a WordPress plugin, so we’ll skip that step. But in case you do come across any issues during the installation process, make sure you check the link above.
Once you’ve installed and activated the plugin, it’s time to set it up. Let’s take a look at the settings Theme My Login offers.
Setting Up the Theme My Login Plugin
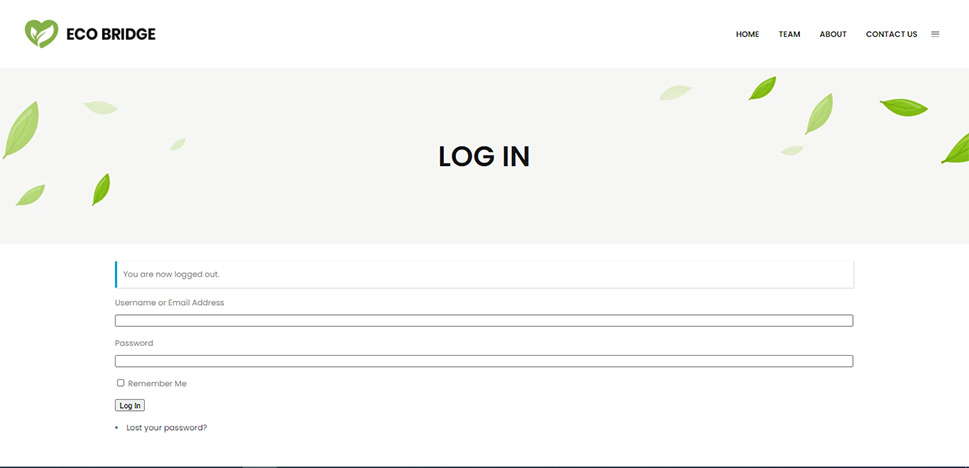
The plugin creates five new pages instantly after the activation. You will find the login, log out, register, lost password, and reset password page. They are instantly live and will replace the backend login page by default.
This is how the login page looks in our case, the plugin automatically created it with the font and the colors that follow our theme’s style:
To adjust settings for these pages click on Theme My Login in your WordPress admin and then select the General option.
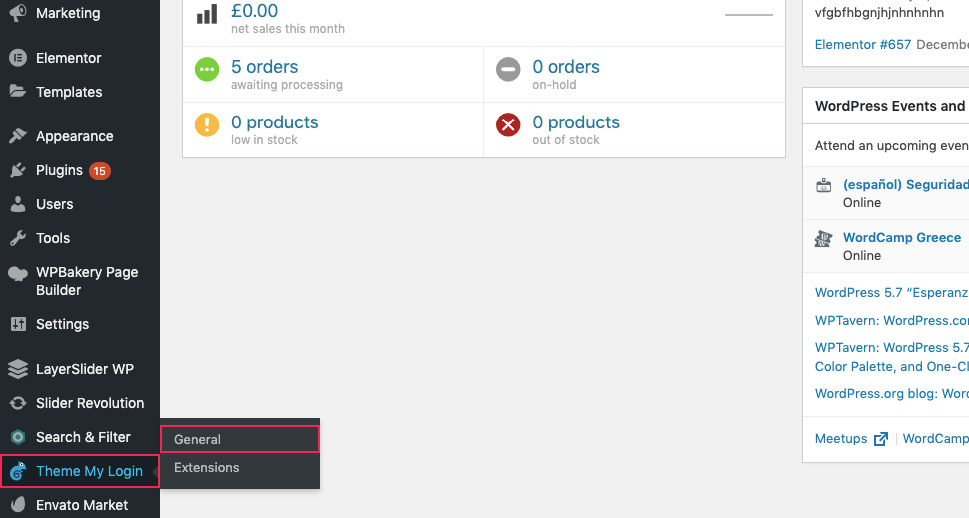
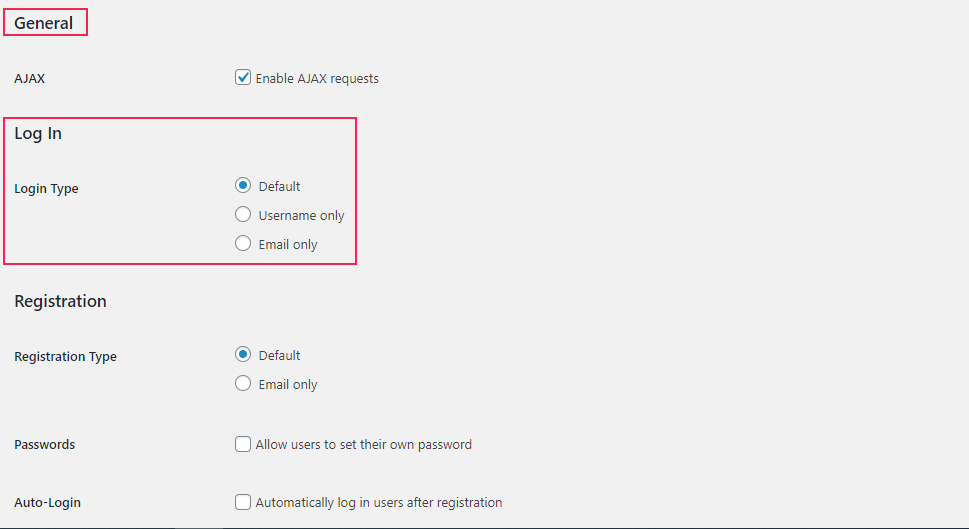
Here you will find settings to customize each of the five pages, as well as links that lead to them. The settings are split into three segments: Login, Registration, and Slugs.
-
Login Settings
In the login settings you choose whether you want the visitors to enter the default credentials like username or email, username only, or email only when logging. It is up to you to choose the kind of settings that work best for your site.
-
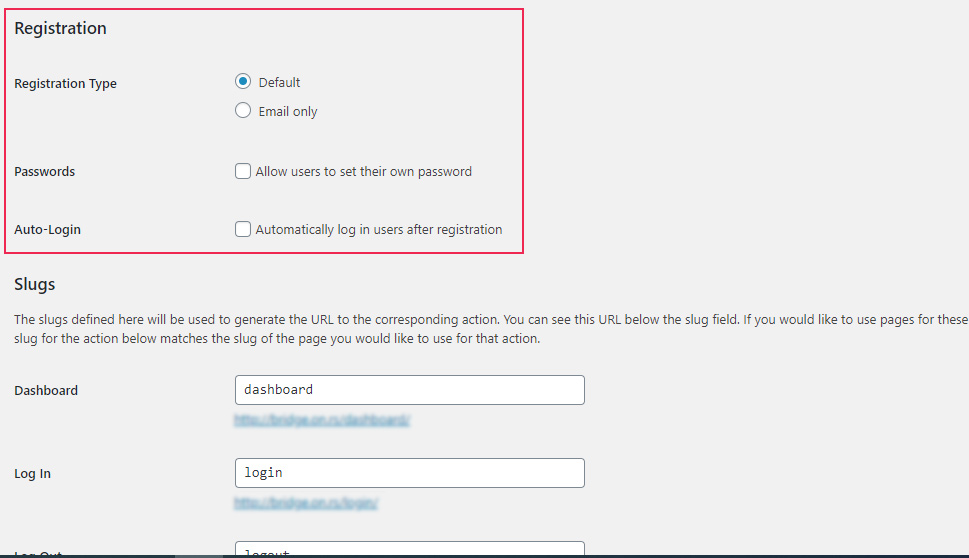
Registration Settings
In the registration settings, you determine what data the user has to enter in order to register an account on your site. You can choose between the default option to ask for both the username and the email, or you can request just the email or just the username. But, bear in mind that the registration settings should match the login settings. If, in the login options, you decided to limit users to logging in with a username, here you need to ensure that they also have to create that username upon registration.
You also have more options here that are dissabled by default but you can enable them if you wish. The first allows users to set their own password and the second automatically logs in users after registration.
-
Setting Slugs
A slug is a unique identifier for each page on your WordPress site. It’s the part of the URL that comes after your domain, and that determines what page a user will view. The Theme My Login plugin generates a simple slug for each of the pages it creates. Generally, when it comes to slugs they should clearly indicate what the page is meant for. In this case, the plugin’s automatically generated slugs are actually ideal. Of course, you can change them if you find it necessary. Just beware of empty spaces in slugs as they are replaced with a “%20” sign, which can quickly make your slugs ineligible. You can use a hyphen instead (e.g. “login-page” instead of “login page”).
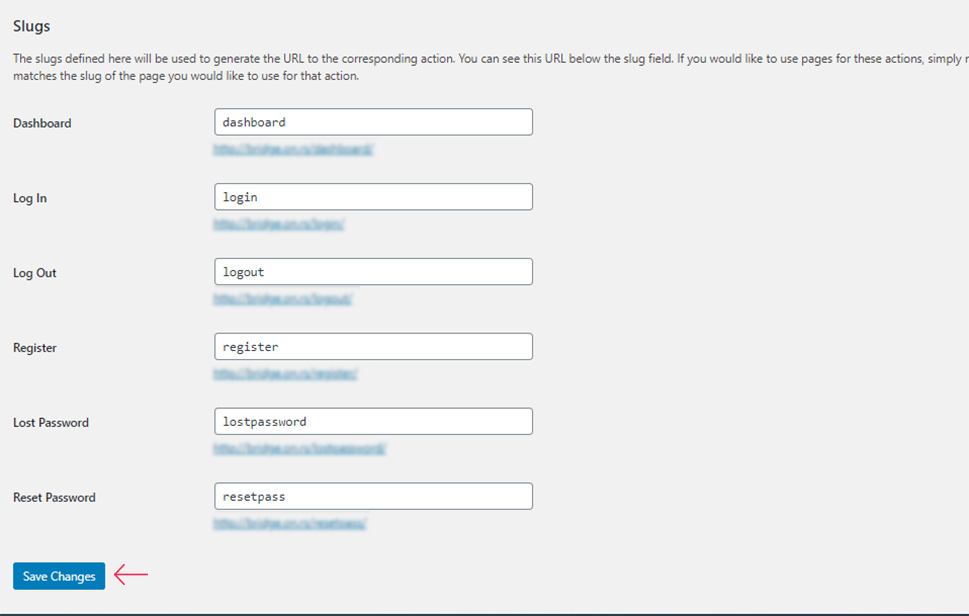
And, remember to save changes after you adjust all the settings.
How to Add the Theme My Login Widget to Your Site
As we mentioned, the plugin comes with a handy widget that you can add to the sidebar or footer. To access it, go to Appearance > Widgets and select the Theme My plugin widget. By clicking on it, a dropdown menu will open and you’ll be able to choose which widget area to place the widget in.
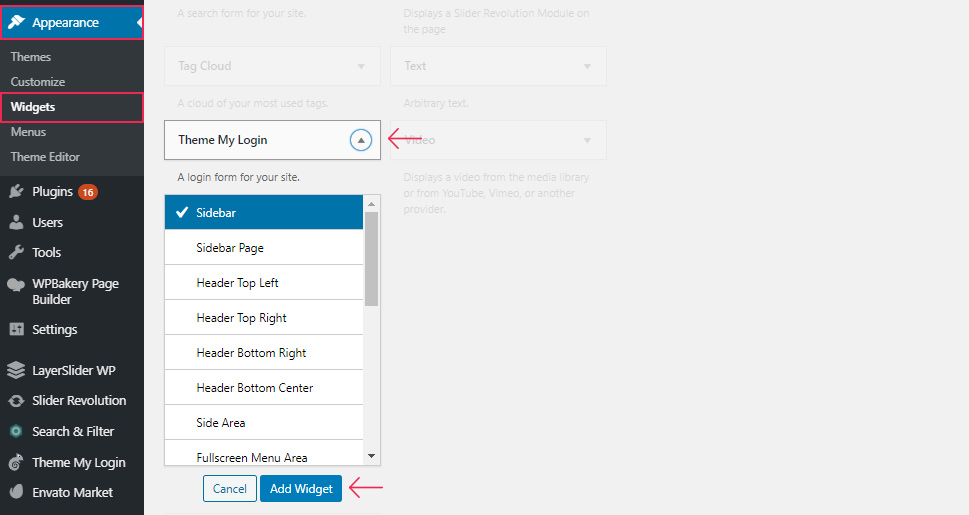
When you add the widget to a widget area, you can start customizing it. To do so, find the appropriate widget area on the right side of the screen and open it. Inside, you should see the Theme My Login widget. Once you also open that, you’ll be able to choose whether you want it to have a login, register, or recover lost password functionality.
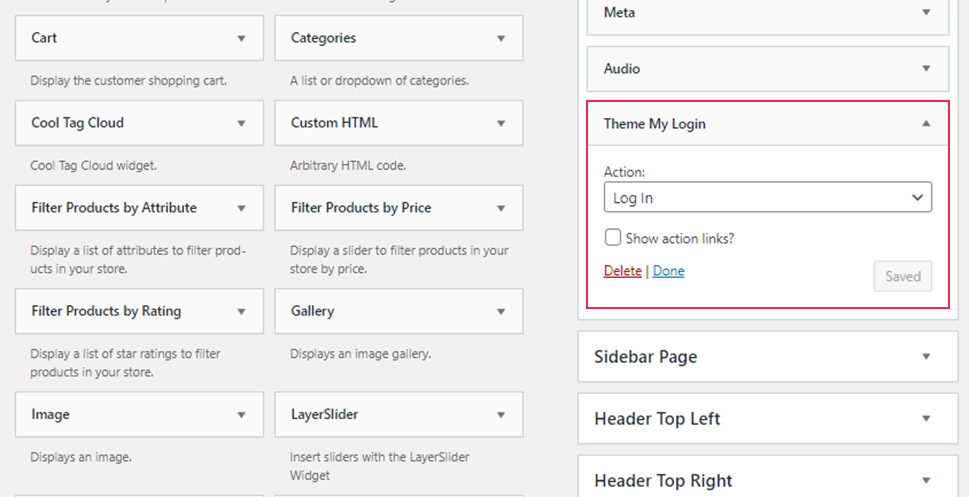
You can add up to three widgets to your widget areas, and select a different option in each one. But, as they usually take up a lot of space, this is not recommendable. To see the widget that you added, you will have to log out of your account or open the site in an incognito tab.
Useful Extensions for Theme my Login
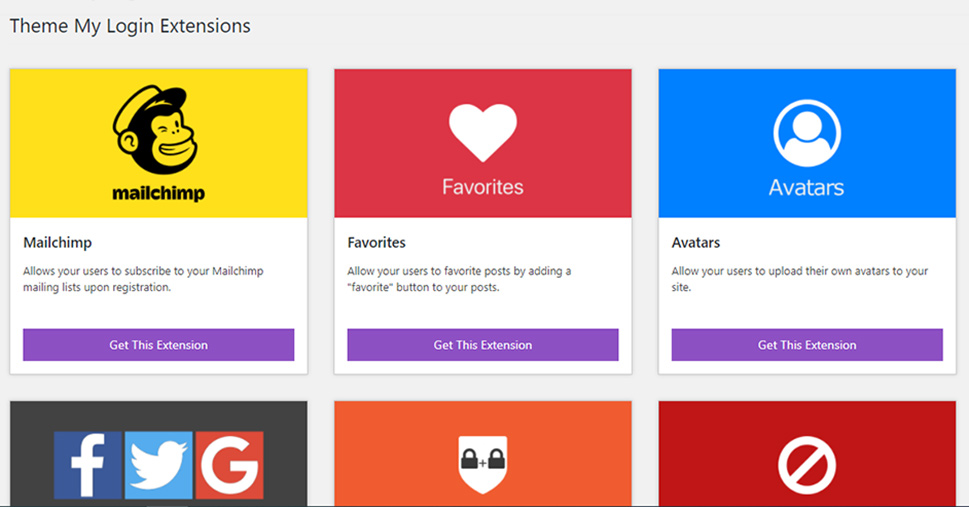
The Theme My Login plugin supports a wide array of extensions that are very useful but are not free. At the moment of writing this, the plugin supports 13 different extensions that include Mailchimp, Avatar, Notifications, Favorites, Restriction, Legacy Bundle, etc. And while the free version of the plugin will cover your basic needs in terms of front-end login, these extensions can be useful if you need additional functionalities.
Let’s Sum Up
Logging in is not something that visitors especially look forward to when they come to your site, but if you’re already running a type of site that requires logging in, why not make it as smooth and easy as possible. Considering how competitive the online world can be, every detail that brings more quality to the user experience matters, and a front-end login page is something that can significantly improve UX and also help you strengthen your brand image.
