How to Change Your WordPress Username

During the initial setup of your WordPress website, you had to create a login username together with other credentials. However, just like with everything else during your website use, there may come a time where a username change is required.
If you find yourself in a situation where you need to change your WordPress username, you’ll be happy to hear that there are a few simple methods to do this. But, before we showcase these methods, let’s take a look at why you might have to change a WordPress username in the first place.
Why You Might Need to Change your WordPress Username
There are more than a few possible reasons why you might decide to change your username. One of the most common, and possibly, the most logical reasons is the need to make your username more secure. With so many hackers threatening to take over WordPress websites at every turn, it’s always wise to take every precautionary measure possible in order to protect your own site from any intrusions.
Other reasons for a username change include wanting to assign your account to another user, or simply wanting to adjust your username to your brand.
No matter if one of these reasons applies to you, or if you want to change your WordPress username because of some other reason entirely, one of these three methods is bound to work:
One way to change your WordPress username is to create a new user account and assign it an administrator user role. After you create a new account, you will transfer all your content to it and delete the old one.
First things first, go to your dashboard and access Users >> Add New.
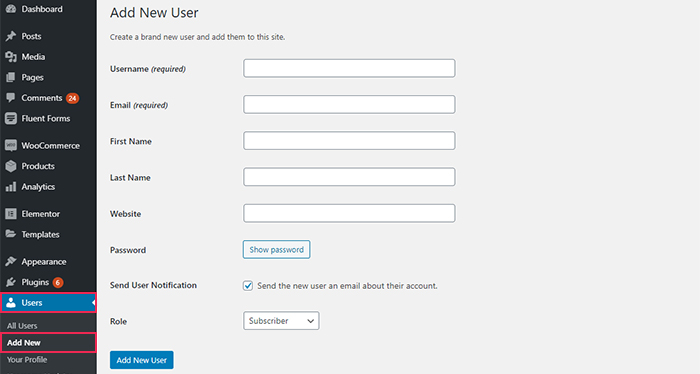
Then, you need to enter a new username and the rest of the required information, such as email and password. You will need to insert a completely different email address to the one you use for your original account. Luckily, you can easily roll back to your original address after you delete your old account.
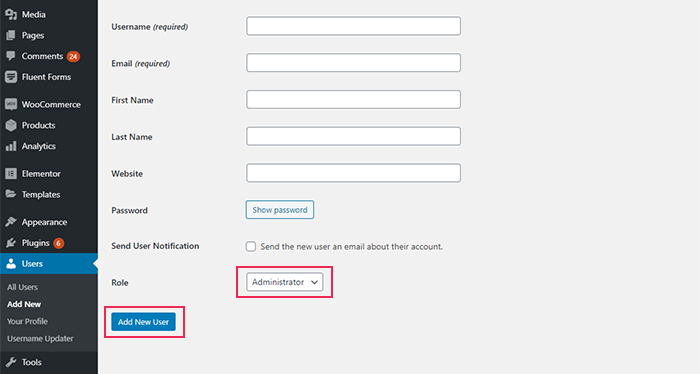
Finally, make sure to set your user role to Administrator, and hit the Add New User button once you’re done with filling in all the info.
Then, you should log out and then log in once again, only using a new account.
Head to the Users tab and find your old admin account. Simply click the Delete button located under your old username.
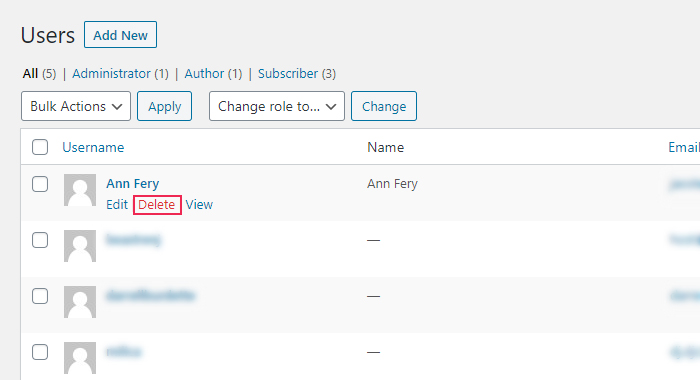
Once you do this, you will get asked about your old account’s content. Here you should select the option called Attribute all content to: and choose the new username you’ve just created from the drop-down.

This action will transfer all important data and give direct ownership to your new account.
Click on Confirm Deletion and you’ve successfully changed your WordPress username.

Another simple way to change your username in WordPress is to use a plugin. We’ve chosen the Easy Username Updater plugin for this purpose since it’s quite simple to use.
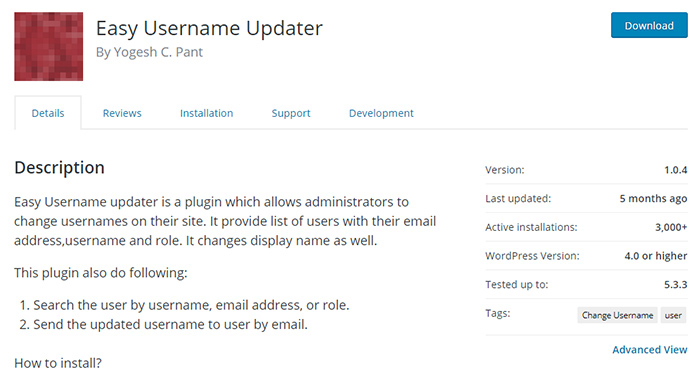
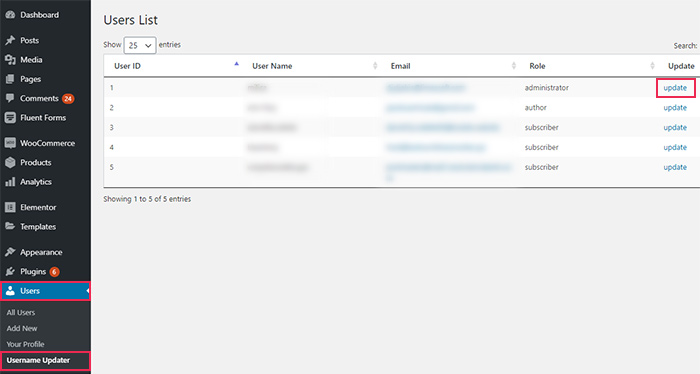
After you install the plugin and activate it, go to Users >> Easy Username Updater.
To change your WordPress username, click the update button next to the user that you want to edit.
Enter a new username, and select whether you want to send an email notification about the changes or not.
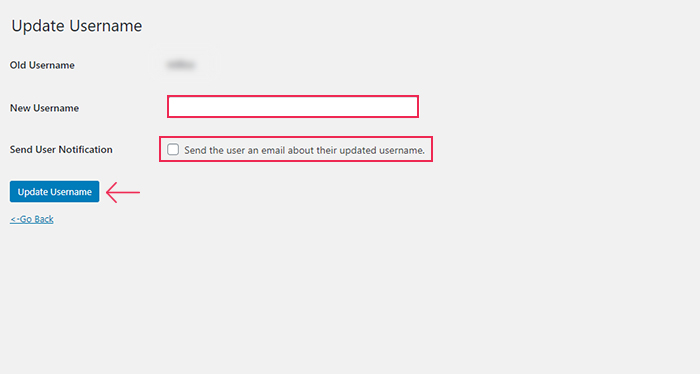
Then, click on Update Username and you’re all set.
We have to note that with the Easy Username Updater plugin, you will be able to change your username for multiple accounts, time and time again with ease, which makes this method particularly convenient.
This final method requires that you make direct changes to your WordPress database. Even though using the phpMyAdmin for this task isn’t recommended as a first option, there may come a time when you simply won’t have a choice. For example, this can happen in cases when you forget your username and email address, which means you won’t be able to get to your admin dashboard in order to change your username there. However, if you use this method, not only will you be able to change your username, but you will also be able to find the original one.
First things first, you should log in to your cPanel. Then, head down to Databases and select phpMyAdmin.
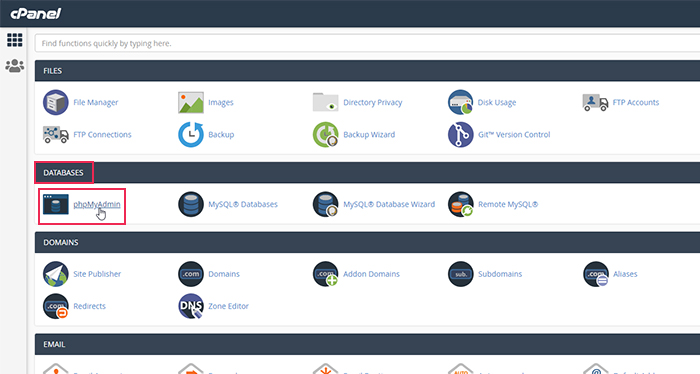
Next, choose the database where your blog is hosted.
From then on, you will be able to see your WordPress database tables, which use wp_ as a prefix by default.
You should select the wp_users table located on the left, find the username you wish to change, and then click on Edit.
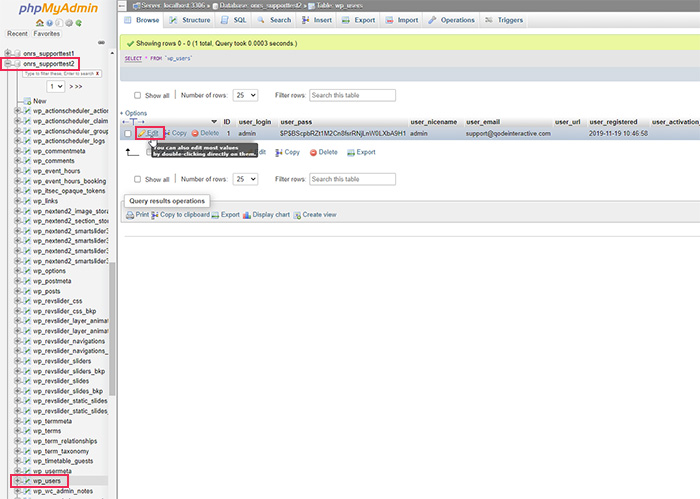
Then, change the user_login value to any name you prefer.
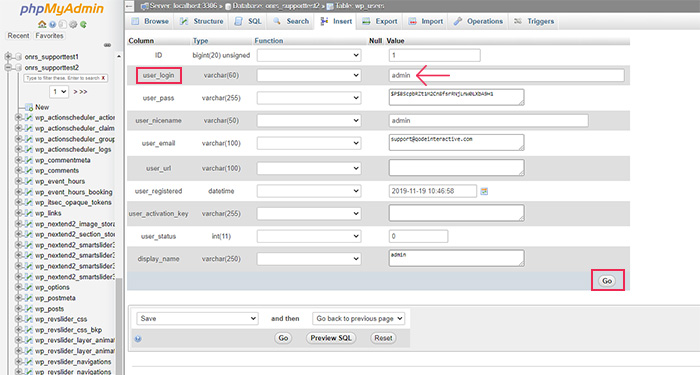
Finally, the only thing left to do is click on Go, and that’s it – you’ve successfully changed your WordPress username using phpMyAdmin.
Conclusion
As you can see, changing a WordPress username is not a complicated process. And if changing it manually or with a plugin doesn’t end up working for you for one reason or another, you can always head to phpMyAdmin and change your username directly from the WordPress database. Just make sure that your new username choice is as unique as possible to prevent any future security issues.


