How to Automatically Tweet About New Posts in WordPress

With over 200 million daily active users worldwide, it’s no wonder you should be interested in integrating Twitter with your WordPress website. And integrate with WordPress Twitter does: you can display Twitter feeds on your website, invite your visitors to follow you by adding an official Twitter button, or make your shared links look better with Twitter cards.
In this tutorial, we will be showing you how to automatically tweet whenever a new post is published on your blog. But before we get into that, we’d like to take some time to discuss why this feature might be useful for your WordPress website, and why it might not be.
Here’s what we’ll be talking about:
There are two major reasons why you’d want to automate your tweeting: time and security.
Automating anything lets you excise a couple of steps from your pipeline: manually sending out tweets takes time which may be better spent elsewhere, especially if your website is run by a small team or if it’s a one-man-show. Avoid having to run a social account in addition to the website by automating it entirely or in part.
On the security side, you might have reasons not to allow your contributors access to your social media. Social media is how a large part of the internet sees you, and you have every reason to control that aspect of your public image. This is why, if you feel your contributors don’t need to think about anything apart from their own contributions, you might want to choose to automate your tweeting.
There is a major drawback to automated behaviour on social media: it is generic. All your tweets are going to be followed by the same message, something to the tune of “Hey, look, here’s a new post!”
This may work if your Twitter followers use your Twitter account primarily to follow your website updates, but if your whole Twitter account is filled up with notifications which all look the same, you should think about whether you really need a Twitter account at all – perhaps setting your WordPress website up for an RSS feed is what you’d really benefit from.
As usual, when you need to add a functionality to your website, our recommendation, for users without a background in coding especially, is to use a plugin. The plugin we have selected for this demonstration is Uncanny Automator. We will be using the free version of this plugin.
You will also, obviously, need a Twitter account before we can begin.
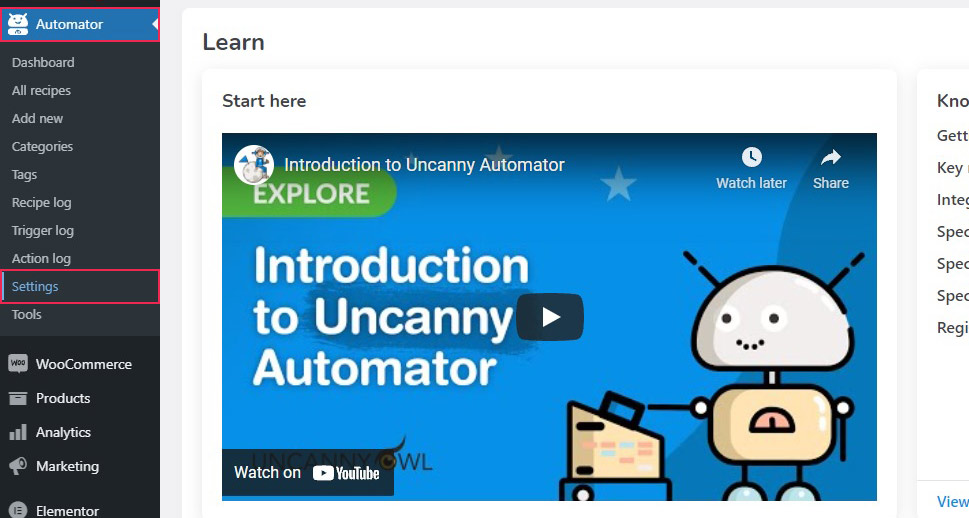
Once your Twitter account has been set up, and once you have installed and activated the plugin, access its settings by navigating to Automator/Settings from your WordPress dashboard.
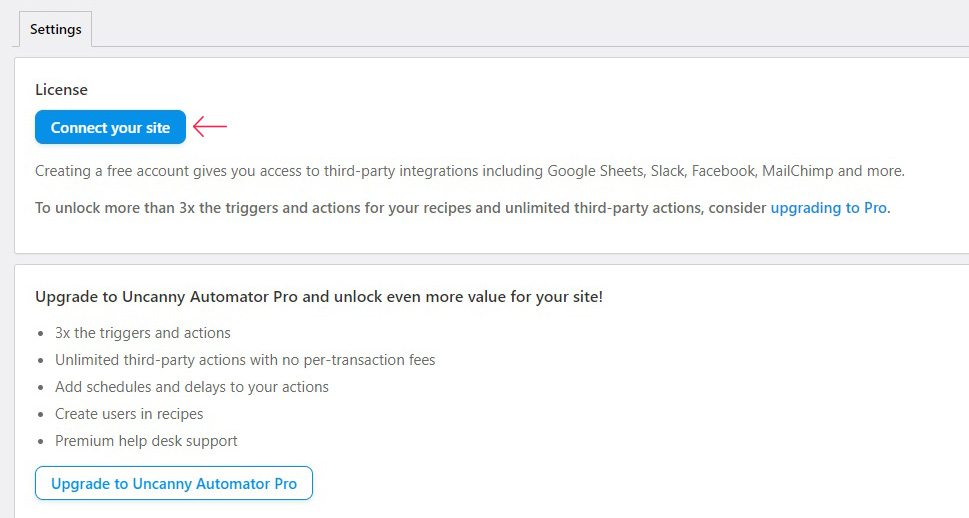
Once there, you will need to create a free account. Do that by clicking the Connect your site button.
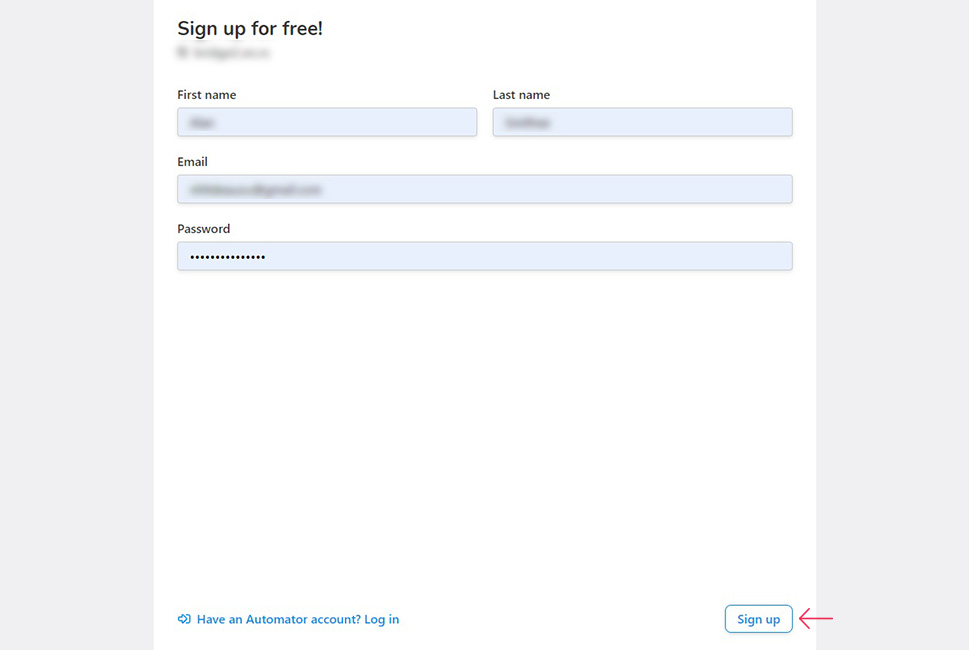
Fill out a simple form and click the Sign up button.
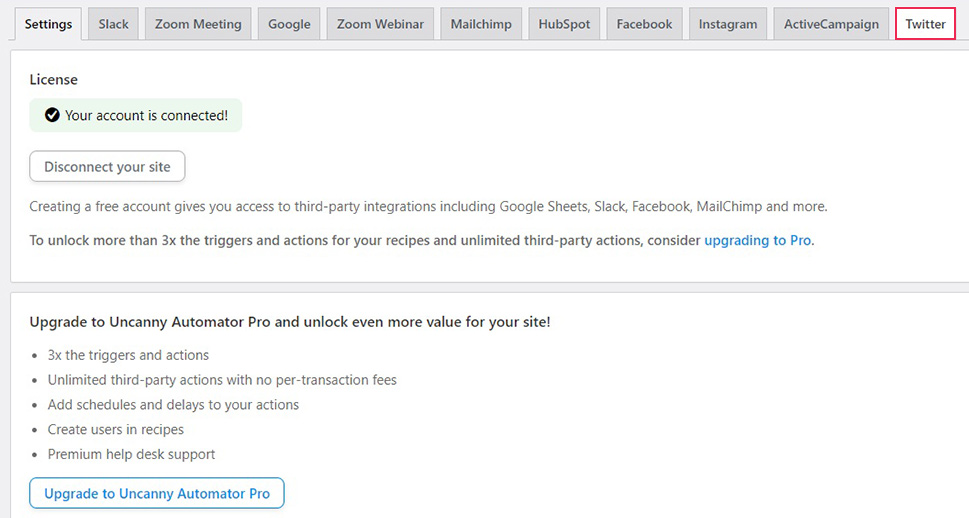
You will then be taken back to the plugin settings. Open the Twitter tab.
The first thing you need to do is connect your Twitter account to your Uncanny Automator account. Start by clicking the Connect an account button.
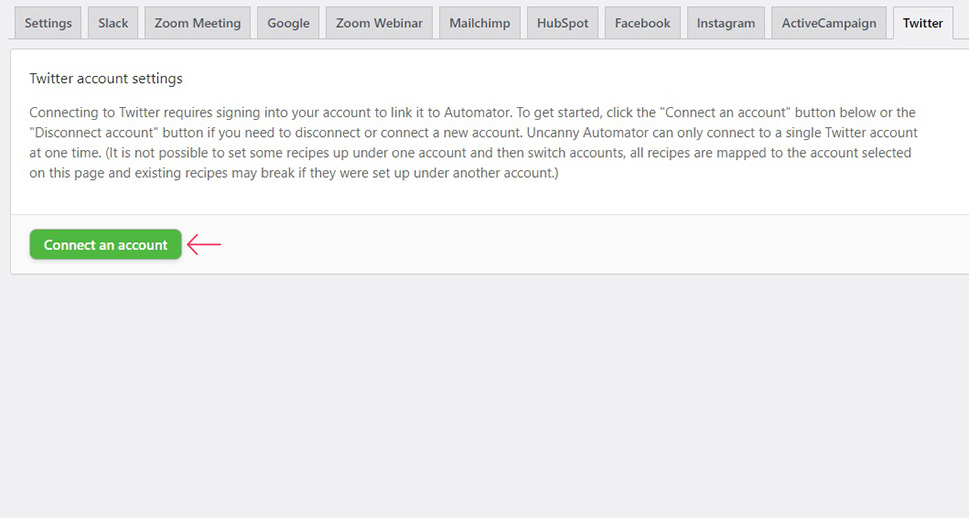
You will then be asked by Twitter to authorize Uncanny Automator to access your Twitter account. Simply enter your Twitter credentials and click the Authorize app button.
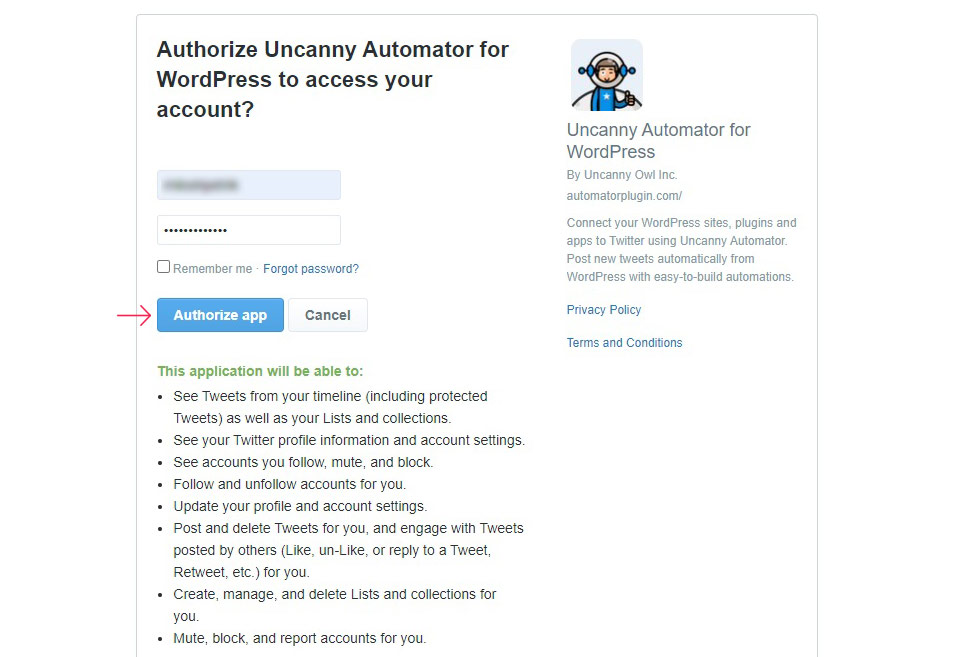
Once you have done that, you will be redirected back to your plugin settings. You can now create automatic actions for Twitter. Start by navigating to Automator/Add new from your WordPress dashboard.
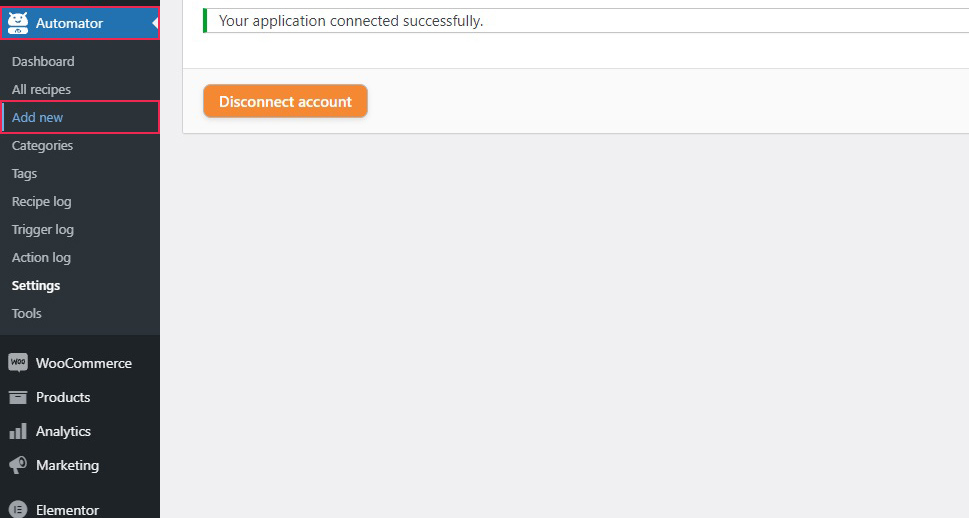
An automatic action is called a recipe in the Uncanny Automator. You will first be prompted to select a trigger for the automatic action. For this recipe, we need the Logged-in users recipe and click Confirm.
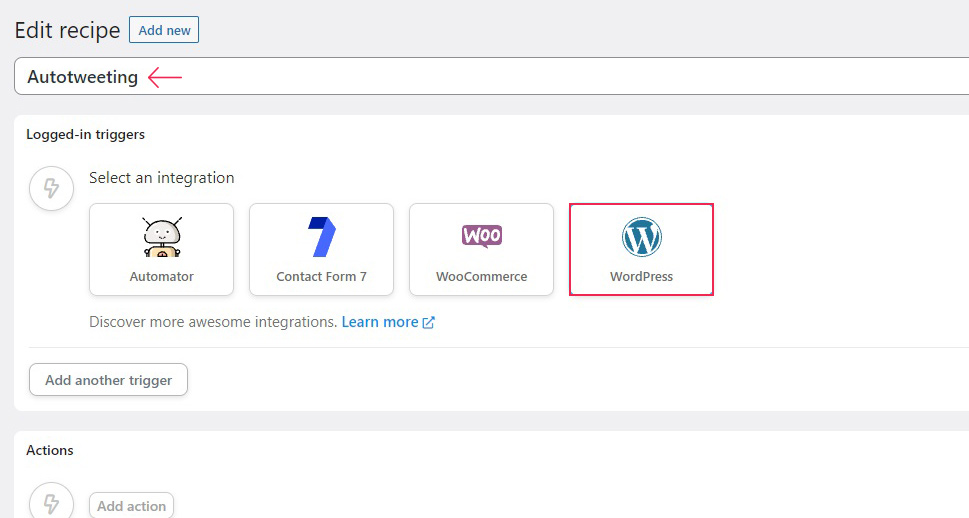
To create a new recipe, give it a title (we have gone with Autotweeting). Then, you need to click the WordPress icon to set up the trigger.
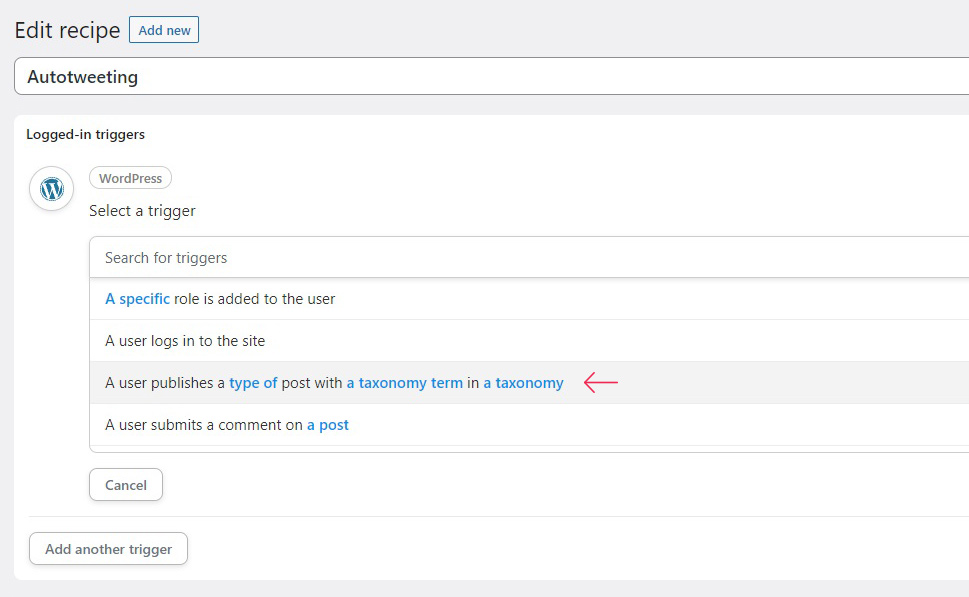
From the menu, select A user publishes a type of post with a taxonomy term in a taxonomy.
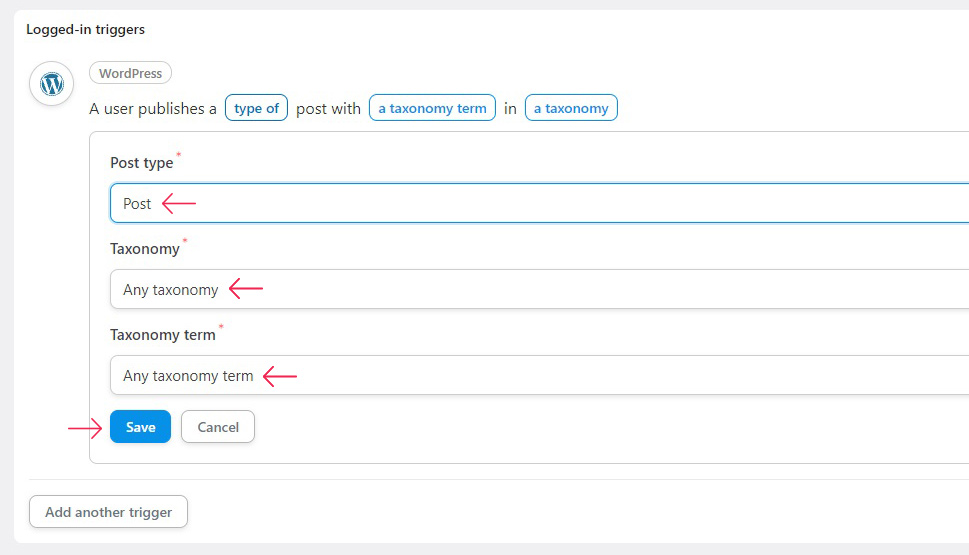
To further configure the trigger, you need to select Post for Post type, and leave the Taxonomy and Taxonomy term settings as they are. This way, the action is triggered when a (logged-in) user publishes a post. Click the Save button.
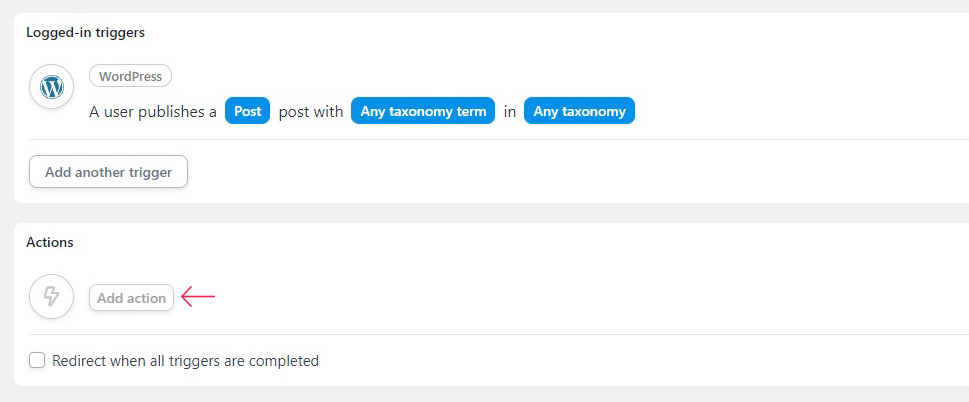
Having set up the trigger, click Add action.
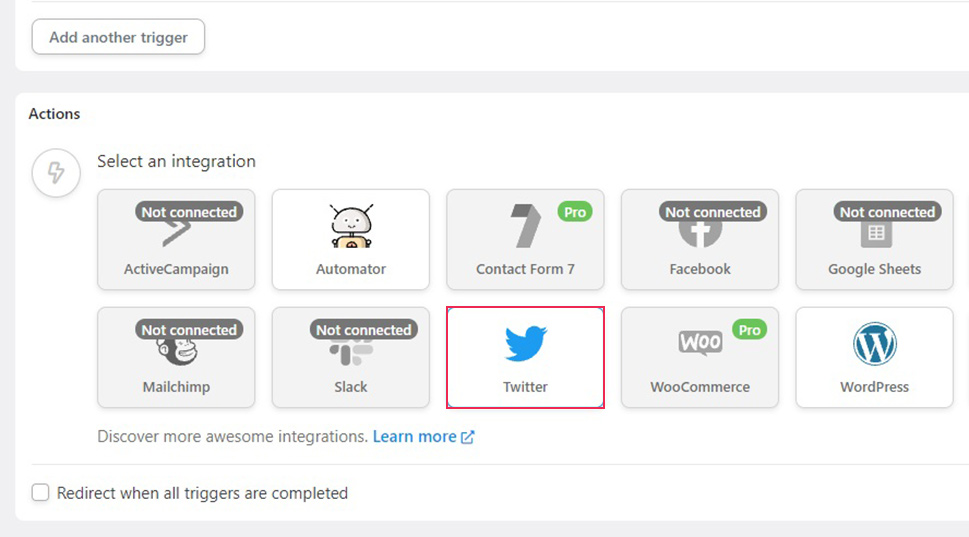
Next, choose a Twitter action from the menu of available actions.
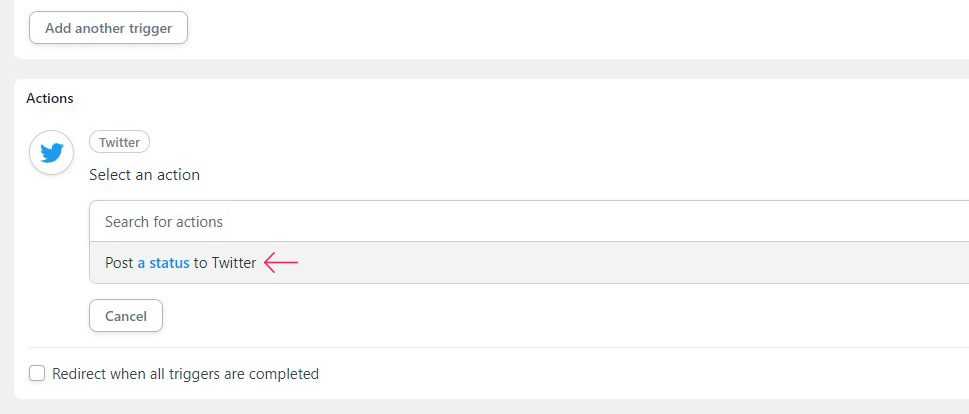
You then need to select the only available action: Post a status to Twitter.
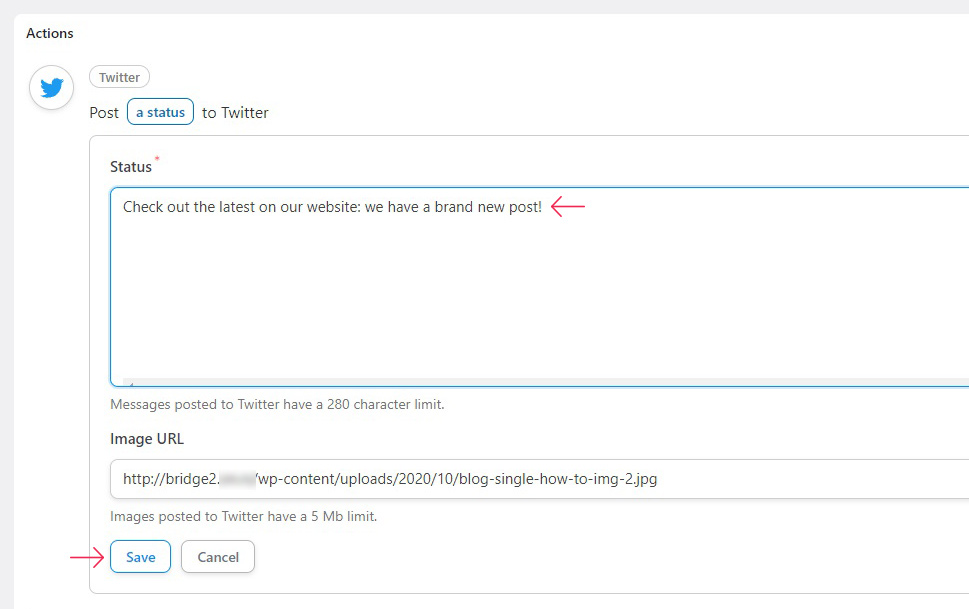
Next, you need to set up the status text and, optionally, add an image to the tweet by pasting a URL into the Image URL field. We strongly recommend accompanying your tweets with images where appropriate, as they make your tweets more visible in the timeline. If you are using Twitter cards – even better.
For the Status text, we went with Check out the latest on our website: we have a brand new post! This is the text which will accompany all your posts, so keep it as non-specific as you can. Click Save when done.
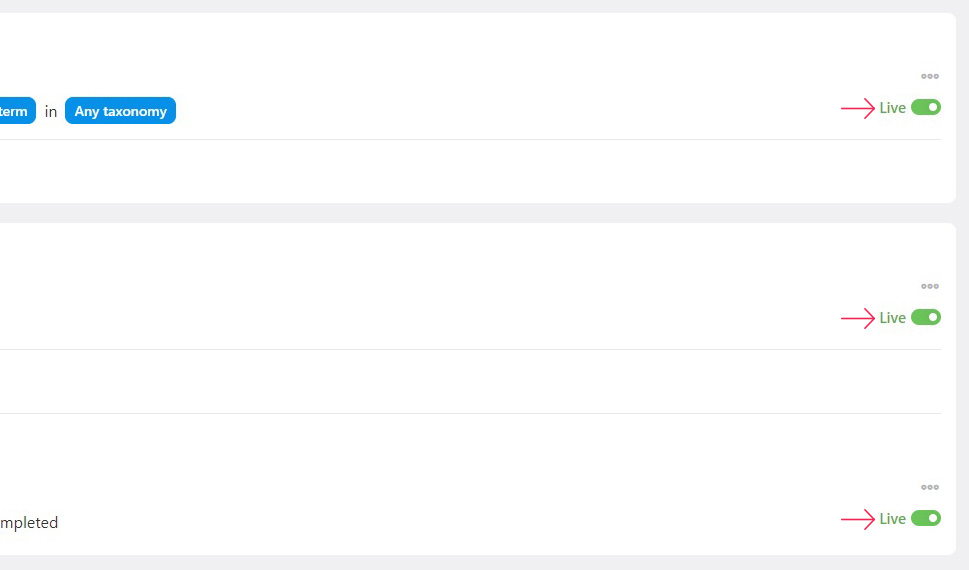
Finally, once you are satisfied with your setup, slide the Draft slider on the extreme right to Live, and you’re done.
However, you might want to allow your users to click through to your new post. To do that, while editing the Status, click on the Asterisk (*) sign and search for and select the Post URL token.
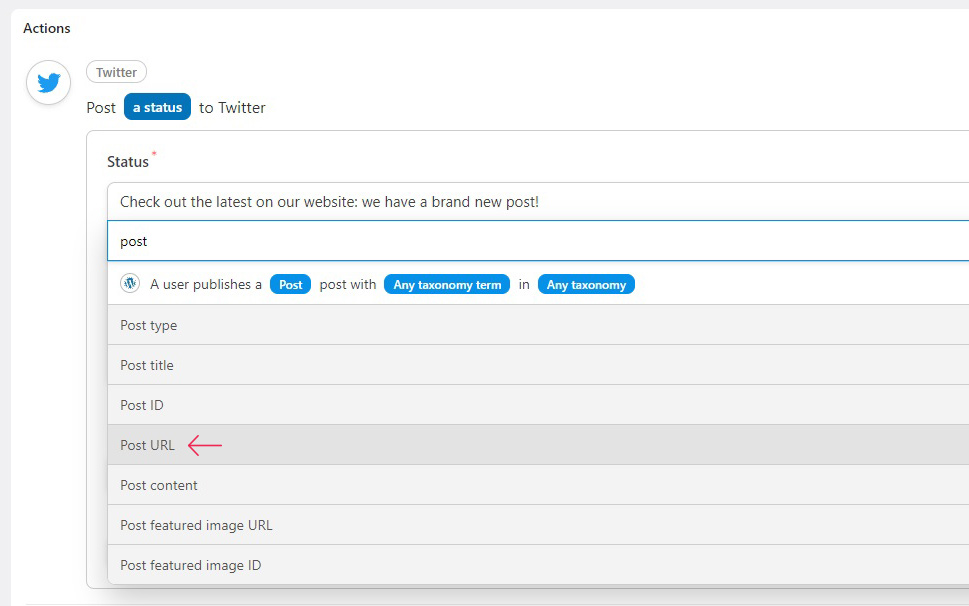
This way, each of your new post tweets will be accompanied by the corresponding post URL.

Note, though, that the free version of this plugin uses credits (of which you get 1000 to start with), and each published tweet will cost you one of those credits. If you want to continue using the plugin after you run out of credits, you need any paid version of the plugin.
In Conclusion
As you can see, setting up automated post tweets in WordPress is not at all difficult or time-consuming: and we have only just scratched the surface of Uncanny Automator’s capabilities. Unfortunately, if you want to continue using it, you will need to invest some real money into it. So if you feel you could benefit from some automation in your Twitter account maintenance, now you know how it’s done.


