How to Add Tooltips in WordPress

Whatever sort of website you’re running, you want your visitors to have an easy time getting around. Ease of navigation means you have designed your website well and that your visitors know where to find the content they want, making for a better user experience overall. Sometimes, though, even great design may confound some users, or complex content requires more clarification. This is when WordPress tooltips may come in handy.
In this article, we will be showing you how to add tooltips to your WordPress website. We will be adding WordPress tooltips in two ways: using CSS code and using a tooltip plugin. But before we get down to the nuts and bolts of the tutorial, we would like to examine the tooltips themselves: what are tooltips in WordPress, and how can adding tooltips improve your website. If you feel you know this already, feel free to scroll right down to the tutorial you want.
Here’s what we’ll be discussing:
Qode Themes: Top Picks
View Collection


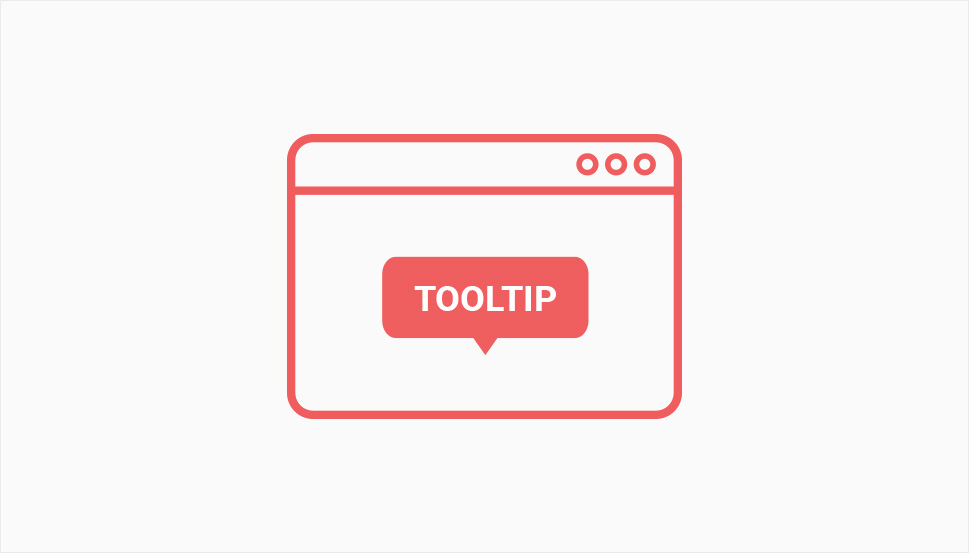
Tooltips are annotations that appear when a user hovers their mouse over an active area. They usually contain a short description or indication of what clicking said area will do, but are not limited to that. Tooltips are not unique to WordPress by any means, but in the context of WordPress, they are a useful way of making your content more accessible.
When not used to explain the action of buttons and other clickable items, they most often take the shape of footnotes or notifications. You can use them to explain some of the more obscure terms, or to provide additional information on graphics and other images employed on the website.
As far as WordPress tooltips are concerned, they take the shape of a pop-up box that can contain images and text and be styled to best fit your website. If you feel like you could use tooltips on your WordPress website, we will explain how it’s done in the subsequent two sections.
If you are a more advanced sort of WordPress user, you might want to try exerting total control over your tooltip boxes. You can do that by altering your theme’s code using the WordPress theme customizer.
However, changing your theme’s code directly has several drawbacks, mainly due to it being vulnerable to updates. A theme or WordPress update might undo all your hard work, as your theme files are replaced by their newer version. This is why we suggest using a child theme or a plugin to add your custom code, and creating a backup of your website just in case.
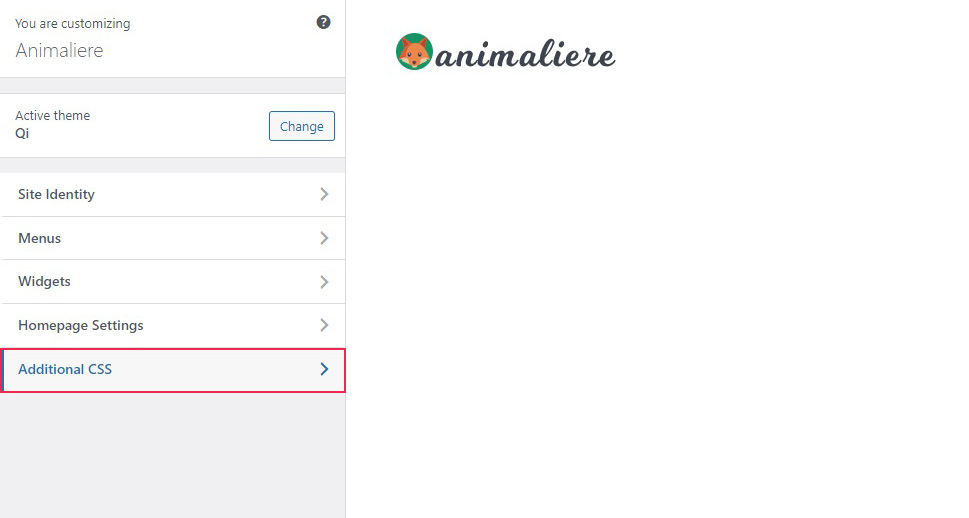
Once you have made all necessary precautions, you need to add your code. To do so, navigate to Appearance/Customize from your WordPress dashboard.

Once you open the customizer, select Additional CSS from the left-hand-side menu.
Finally, you need to paste the following code into the box and click the Update or Publish button.
.tooltip {
position: relative;
display: inline-block;
}
.tooltip .tooltip-text {
visibility: hidden;
width: 100px;
background-color: #26c1cd;
color: #ffffff;
text-align: center;
padding: 4px 0;
position: absolute;
z-index: 1;
}
.tooltip:hover .tooltip-text {
visibility: visible;
}
This code has three parts, establishing CSS classes for the tooltip box and the tooltip text, showing the elements only on mouse hover. Note that the code contains parameters that you can customize to your preference, such as changing text color or font, decorations and effects, and the like. A full demonstration of the capabilities of CSS in this case is beyond the scope of this tutorial, which is why we don’t recommend it for novice users.
To actually show a tooltip, you need to add it to an element using HTML. To demonstrate this, we have created a post and added some placeholder text to it.
To create a tooltip, edit a block to which you wish to add it as HTML.
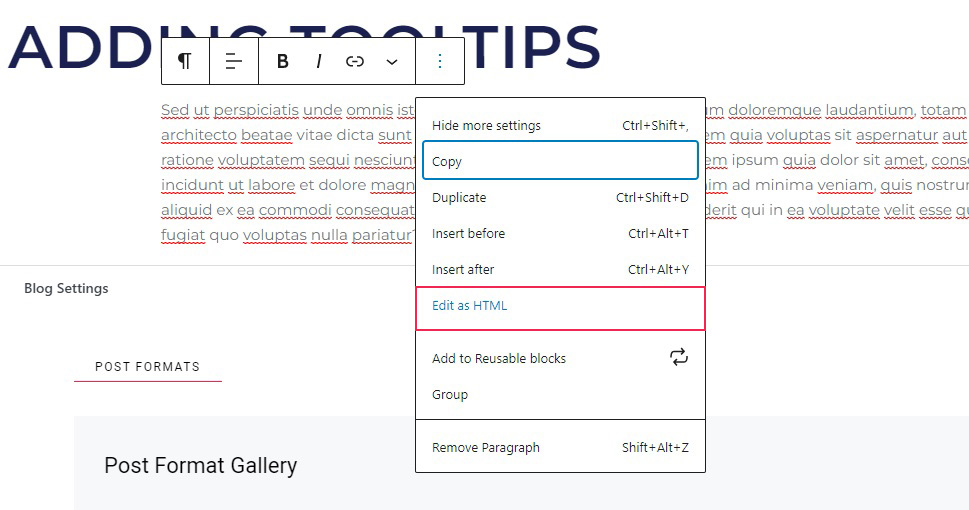
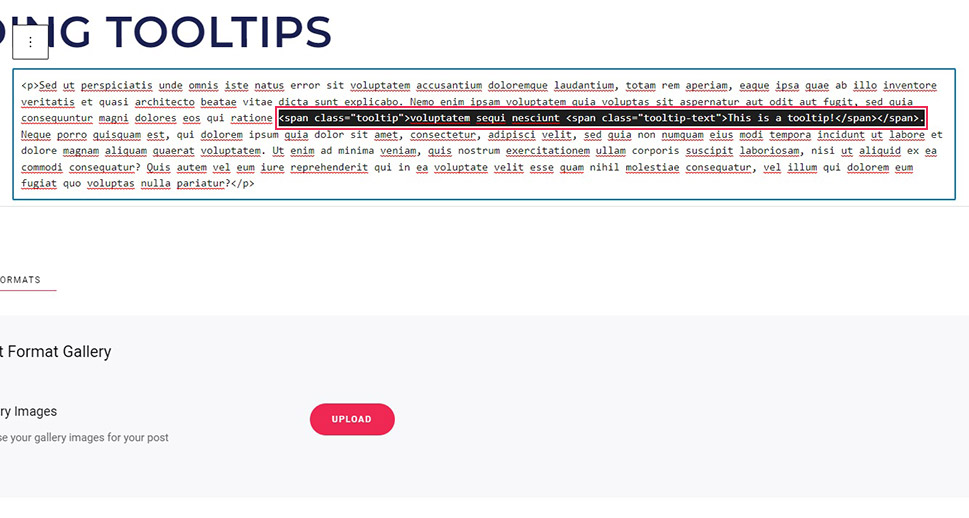
Find the place in the text where you wish to add a tooltip, and replace it with this piece of code:
<span class="tooltip">ONHOVER
<span class="tooltip-text">TOOLTIP</span>
</span>
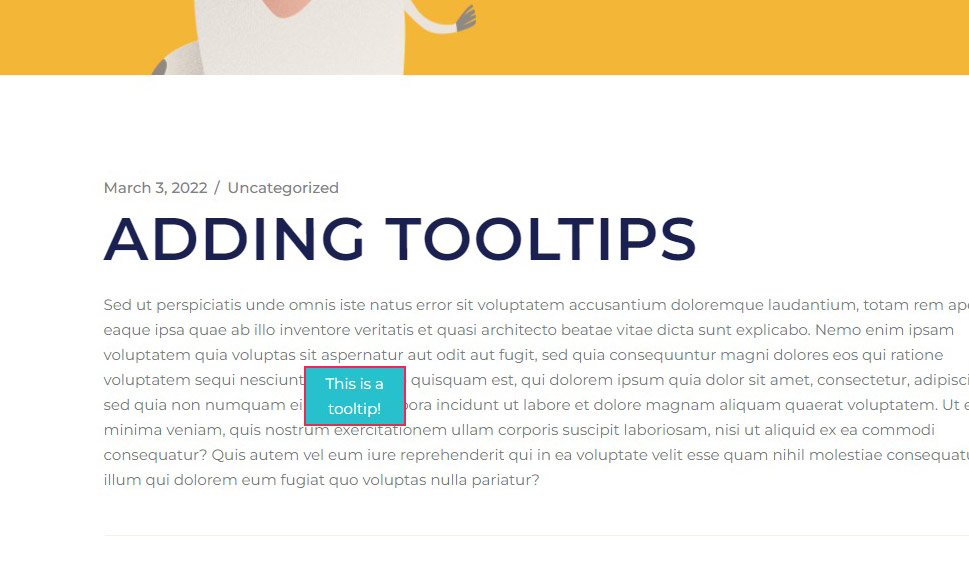
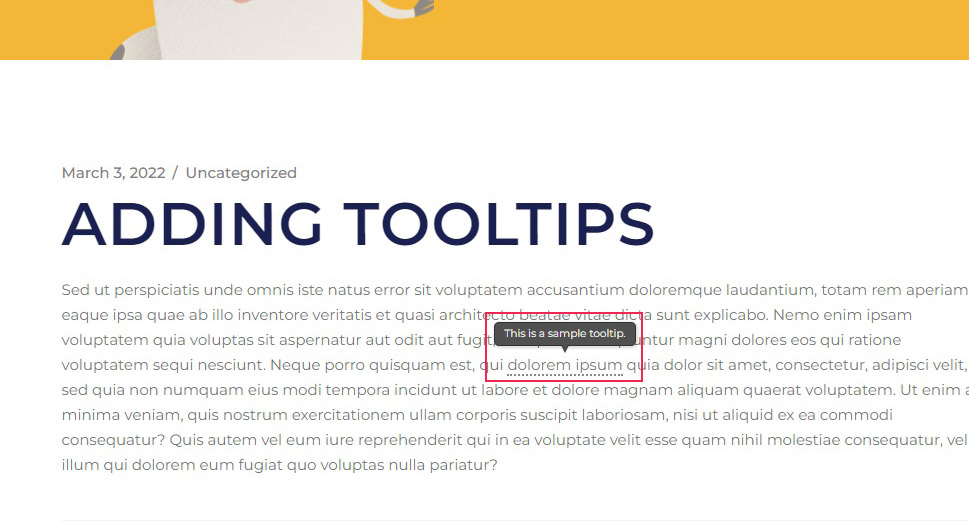
Of course, replace ONHOVER with the text you wish to assign the tooltip to, and TOOLTIP with the actual tooltip text, as in the example below.
And, as you can see, once we hover over the text in question, the tooltip box pops up as configured in the code.
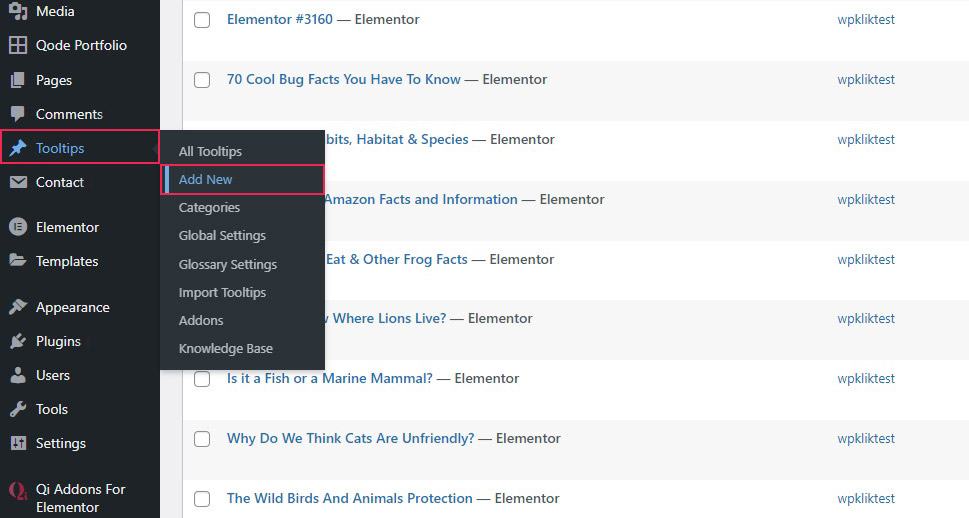
Probably the easiest way to add tooltips to your WordPress website is to add the requisite functionality using a plugin. We will be using a free and user-friendly plugin called WordPress Tooltips. After installing and activating the plugin, you can add a tooltip by navigating to Tooltips/Add New from your WordPress dashboard.
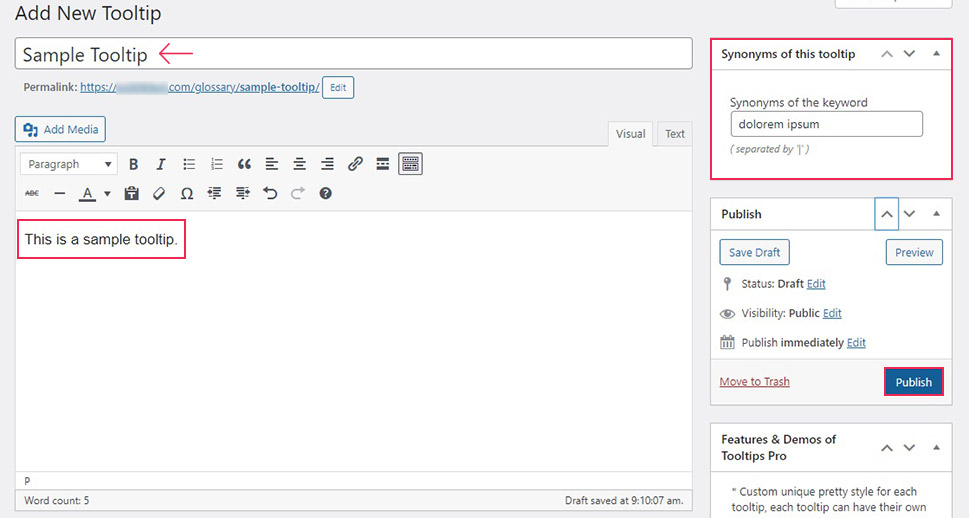
To add a simple tooltip, give it a title, some content that will appear on mouse hover, and a synonym, or keyword, that will trigger the tooltip functionality. You can add media such as images or video to your tooltip or add multiple keywords to trigger it (though you need to separate them using a vertical bar (|) sign), but we will be using only text for this demonstration. Once you have set up your tooltip, click the Publish button.
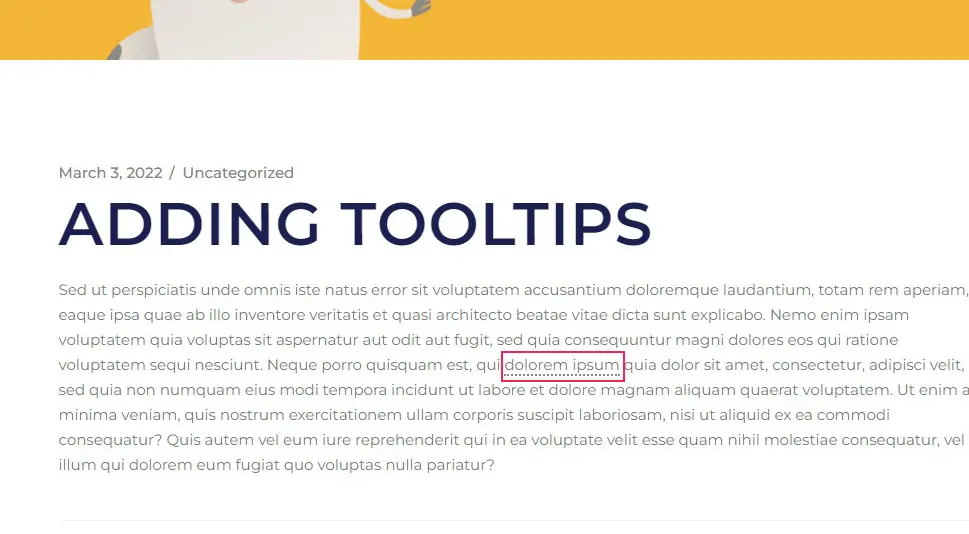
To see this tooltip in action, we will start with a post and some placeholder text making sure it contains an instance of the tooltip’s keyword. The keyword is underlined by a dotted line.
Once we hover our mouse over it, the tooltip pops up. This tooltip will appear with each instance of the keyword across your website.
However, if you wish a tooltip to appear only in a single instance, this plugin also provides you with a shortcode you can use to do just that. Again, we will begin with a post and some placeholder text. In fact, we will be editing the same post as used in the above example.
To add a one-off tooltip, you need to edit the text as HTML. Select the block and switch the drop-down menu to Edit as HTML.
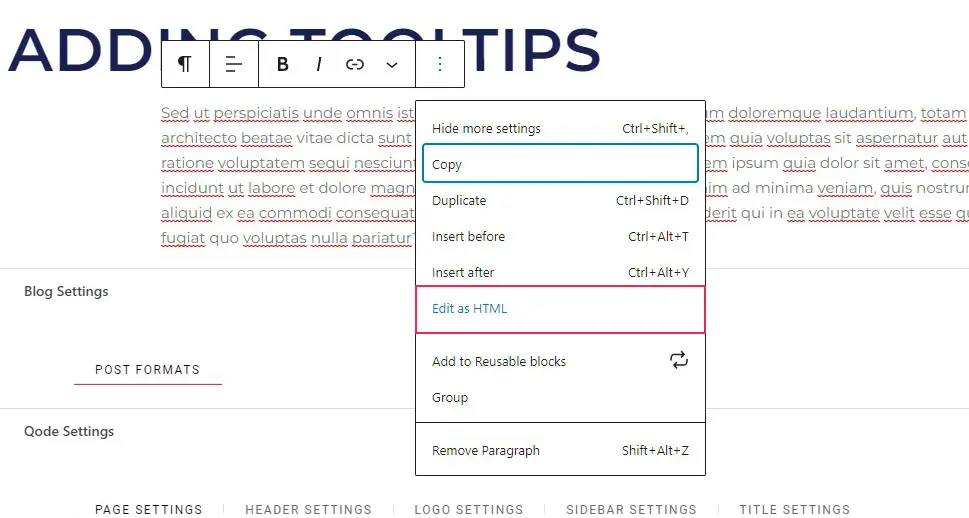
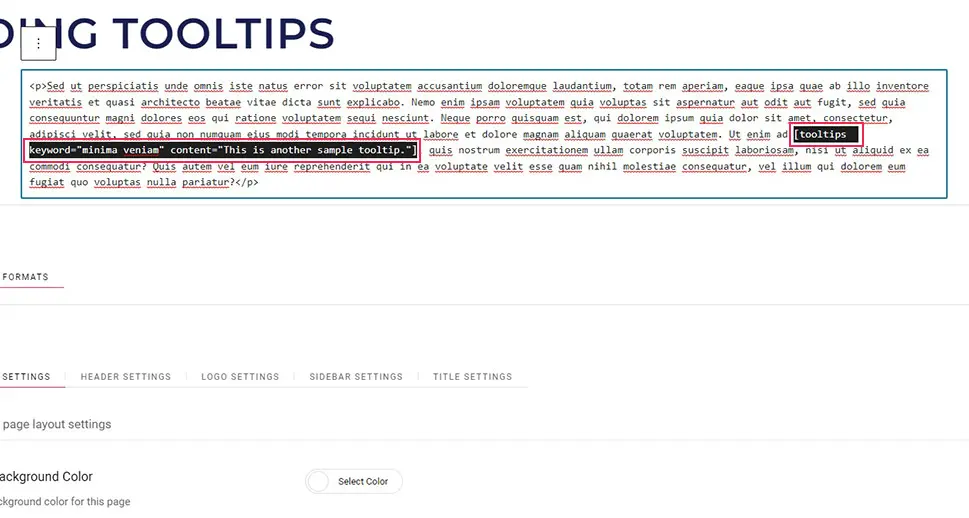
Once there, replace the part of the text you wish to add a tooltip to with the following shortcode:
[tooltips keyword="KEYWORD" content="TOOLTIP"]
Of course, you need to replace KEYWORD in the shortcode with the part of the text you wish to attach a tooltip to, and replace TOOLTIP with the tooltip text. Once done, click the Update button.
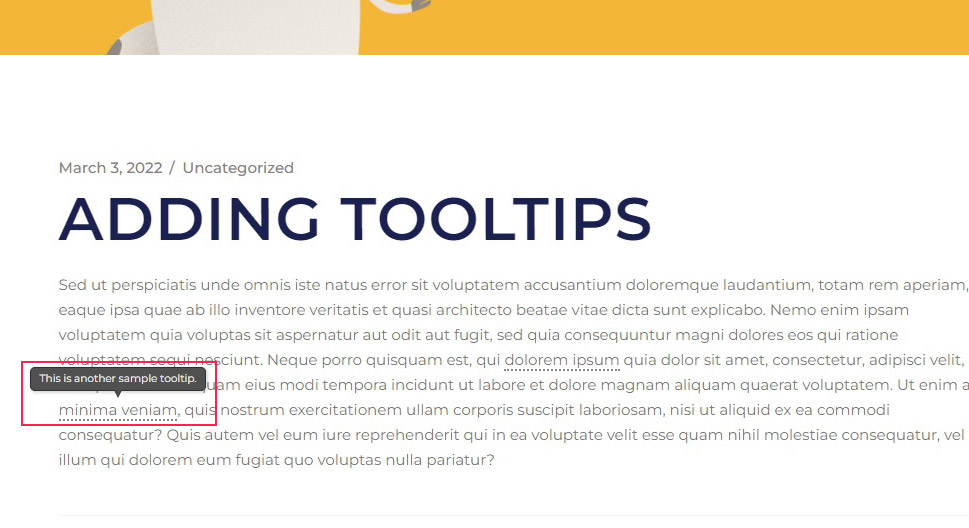
And there you have it, the new tooltip appears in the preview. With this shortcode, you can add however many one-off tooltips you want.
In Conclusion
As you can see, adding tooltips to your WordPress website takes a little time and effort, but needn’t cost you a penny even if you end up using a plugin. If you feel your website can benefit from some additional information about particular keywords or topics, now you know how to add it.
