How to Add an Interactive 360 Degree Image to WordPress

Technology continues to change our everyday lives and empower us to do things once possible only in our imagination. Now we have the tools which let us complete a lot of actions blazingly fast from the convenience of our computers and phones, including going on virtual tours and exploring distant places. That is possible thanks to 360 degree pictures which represent a huge achievement of technology development.
Interactive 360 photographs consist of several images that, placed one next to the other, form a continuous circle around the spot where the photos were taken. They are usually shot with special 360 cameras that come with two ultra-wide lenses (each lens has a visual angle of at least 180 degrees) and then joined together using a stitching software. You can also create them with special apps on smartphones. An interactive 360 image puts us in the photographer’s shoes and allows us to observe the surrounding environment of the place where the photo was taken. By moving our mouse (or our head in the case of VR headsets) in whatever direction we please, we can take control of the view.
Incorporating interactive images into a marketing strategy can highly benefit brands, but 360 degree photographs can help them break through the online noise even more efficiently. We will now discuss the principal advantages of this in-demand service and demonstrate how to add an interactive 360 image to a WordPress website using a plugin.
Qode Themes: Top Picks
View Collection


Benefits of 360 Photography
Recognizing the potential of 360 degree images can help your brand in the long run. Here are some of the main reasons why you should consider adding them to your site:
Increase User Engagement
We love and appreciate seeing great visual content, and interactive 360 degree photos, in particular, have the power to captivate users’ attention and make them browse websites longer as opposed to pages with still imagery. An interactive 360 image is immersive and can conjure up beautiful emotions, which is why people enjoy seeing and exploring them. And the more time users spend on your site, the higher the chance of them converting to paying customers.
Stand Out from Competitors
Interactive 360 degree photos allow you to differentiate your brand and your products from competitors. For instance, if you run an eCommerce store, you can create captivating product presentations, allow users to zoom into your products, and rotate them however they please to get a sense of what your products are like. Not many brands use this type of photographs to their advantage, but you should consider adding them to your site because they can help you attract potential customers. After seeing and touching a product in person, inspecting it via an interactive 360 image is the next best thing.
Bring Your Business to Life
360 degree images let people take virtual tours of your business and get to know it on the inside. They can explore your resort, restaurant, shop, venue, or hotel from the comfort of their home, and understand how it’s organized and the services it offers. By providing people with a fully immersive experience as no 2D picture can, you can inspire and convince them to visit your establishment in person.
Attract New Customers
Appealing 360 imagery is a remarkable marketing tool that can bring new clients your way. For example, if you’re listed on Google Places, interactive 360 degree photos can help attract users to your business. Once they come and visit your business, you have the chance to show them what makes you better than competitors and let the quality of your service persuade them to come back.
Now that we’ve listed the pros of using 360 degree photographs, let’s show you how to add them to your WordPress website.
Introduction to the WP VR Plugin

The best way of adding a 360 image to WordPress is by using the WP VR – 360 Panorama and Virtual Tour Creator For WordPress plugin. You can use it to create detailed virtual tours, too. Even the free version includes a myriad of customization options, more than any other similar plugin on the market. But to make an absolute most of its powerful options, you should consider purchasing one of the three available subscription plans. WP VR is compatible with WPBakery, Gutenberg, and Elementor. In this tutorial, we will be using the Gutenberg page builder to show you how to upload the 360 degree photographs to your site.
Before you start creating your first virtual tour, let’s go over the plugin’s options so you understand its potency. You should modify general settings first to make them fit your needs.
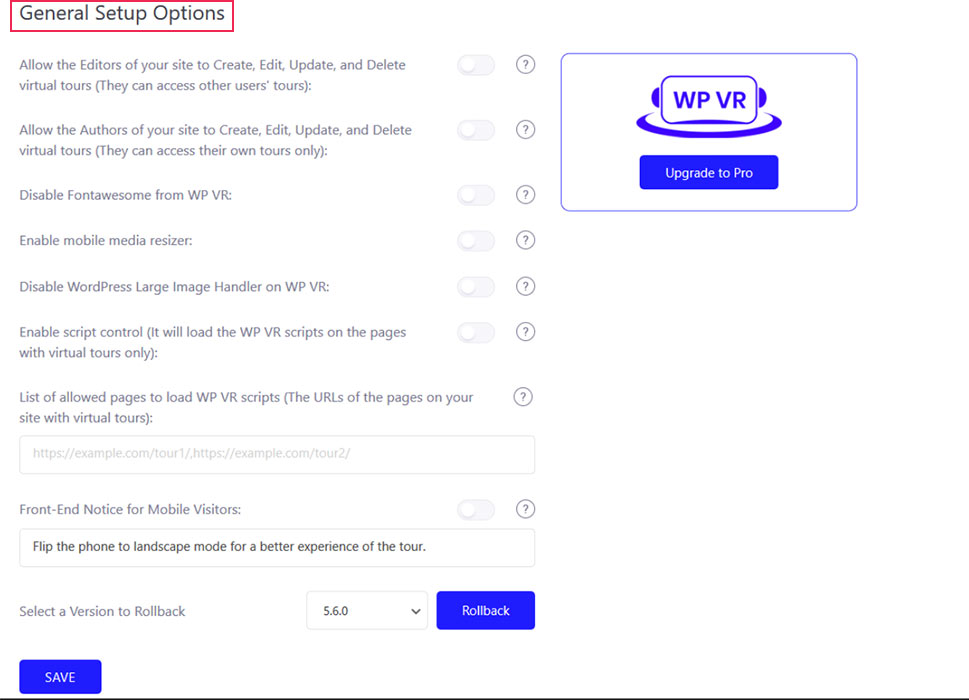
To do that, go to WP VR > Get Started and click on the Settings tab (or scroll down the page until you reach the General Setup Options section). You can enable other user roles to create virtual tours on your site (Editors and Authors), activate a mobile resizer that will make your 360 image suitable for mobile devices, enable script control which loads the WP VR assets only on selected pages with virtual tours, customize the notification for users visiting the tour from mobile devices to remind them to flip their phone to landscape mode for a more immersive experience, and more.
Once that is taken care of, head over to WP VR > Add New Tour. First up, you can enter the name of your tour.

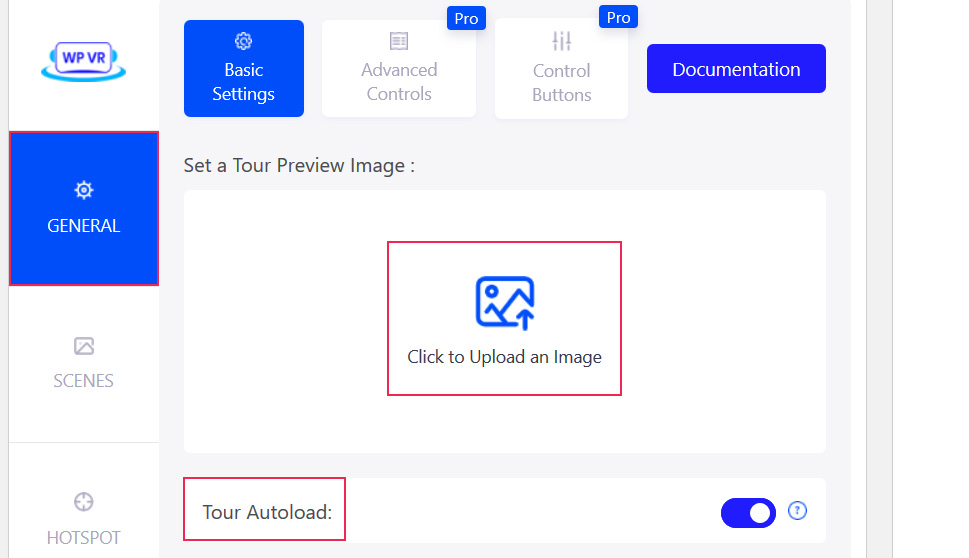
Then, select the General tab on the left and modify Basic settings. If you wish, you can upload the preview image that will be displayed before the tour loads. However, if you enable the Tour Autoload option, the preview image won’t be visible.
Moreover, you can display control buttons on your interactive 360 image, including Zoom In, Zoom Out, and Full Screen.
The Scene Fade Duration option allows you to enable the faded effect while users move from one scene to the next. It’s also possible to activate the Auto Rotation and set up the rotation speed and direction, as well as specify the time after which the rotation will start again and when it will stop.

At the bottom of the page, there is the Using This Tour section where you can find the tour’s shortcode that you can add to your pages and posts.

Advanced Controls are available to premium users only. You can use them to control what users can do on your 360 image. For instance, you can allow them to zoom in and out of the photo using their keyboard or their mouse, activate the gyroscope control, add a compass, and much more. You can also create a Scene Gallery and allow people to take a look at all the scenes included in the virtual tour. The pro version of WP VR enables you to add background music, to make the user experience all the more enjoyable. Control Buttons is another premium option that lets you add advanced buttons to the image, such as Move Up/Down/Left/Right, and customize the icon for each control button.
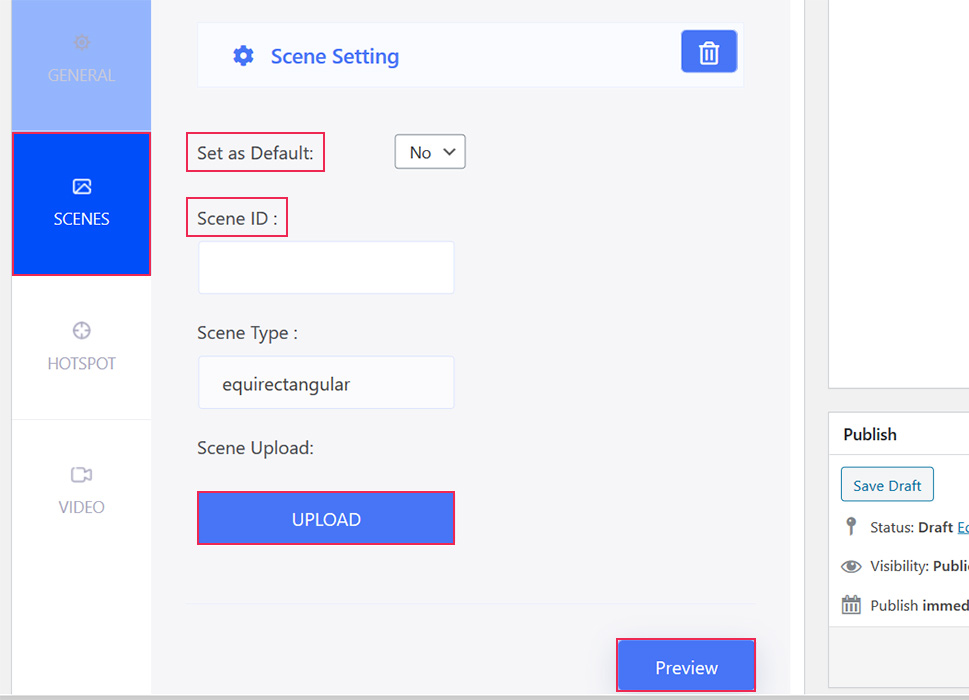
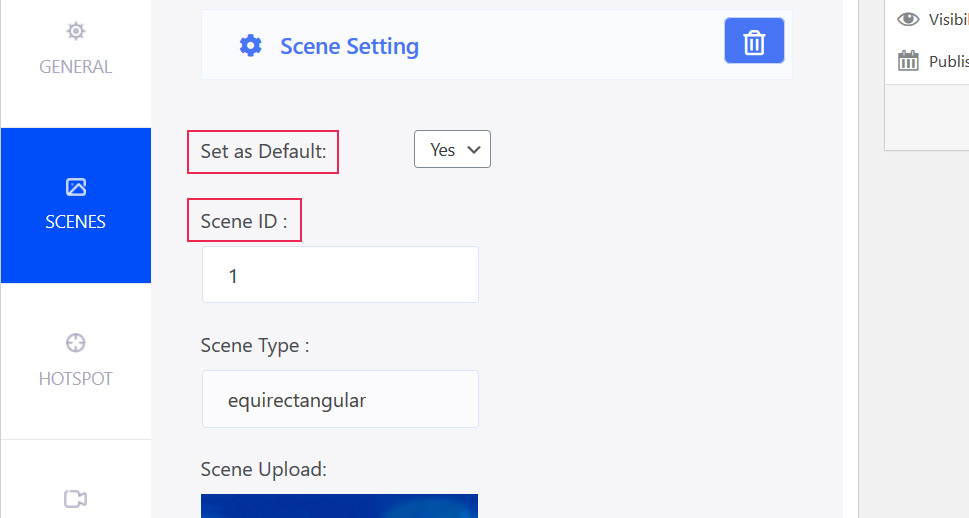
In case you wish to add several scenes and allow users to switch between them, you can take care of that by selecting Scenes and modify the settings to your requirements. You need to upload at least one 360 image (but you can add more if you want to have more scenes), enter a scene ID, and set at least one scene as default. When you finish, press the Preview button to see what it all looks like before saving the changes.
Premium users can customize each scene by adding titles to them, specifying the name of the author, and deciding how far a user can navigate left, right, up, and down, and more.
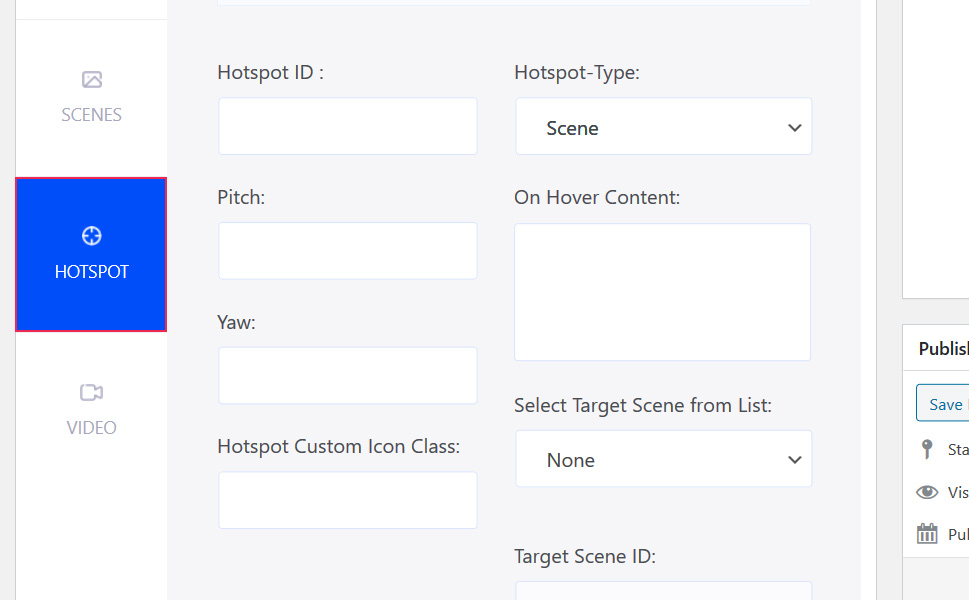
WP VR enables you to add hotspots to your interactive 360 degree photo. You have the possibility to add textual information, images, and videos, or add scene hotspots to let users go from one scene to the next by using hotspots.
Another great thing about this plugin is that it lets you create video virtual tours, too. As a premium user, you can also embed Google Street View.
How to Add 360 Images to Your Site Using the WP VR Plugin
Once you took care of all the settings and tweaked them to your needs, go to Scenes. Then, upload your interactive 360 photo, enter a scene ID, and set that scene as default. You can go with one scene only.
You can see what the tour looks like by pressing the Preview button. If you’re happy with the final result, click on Publish.
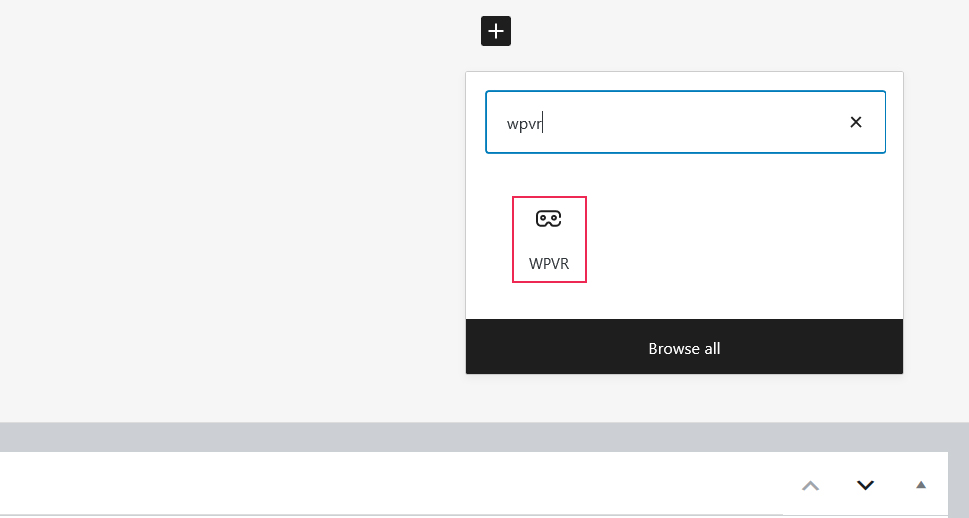
Now, to display the image on your page, first add the WP VR block to it (in Elementor, you need to use the WPVR widget, while in WPBakery you have to paste the shortcode to the desired page or post).
Look at the block options on the right side of the screen. Click on the first one – Id and select the tour you’ve only just created.
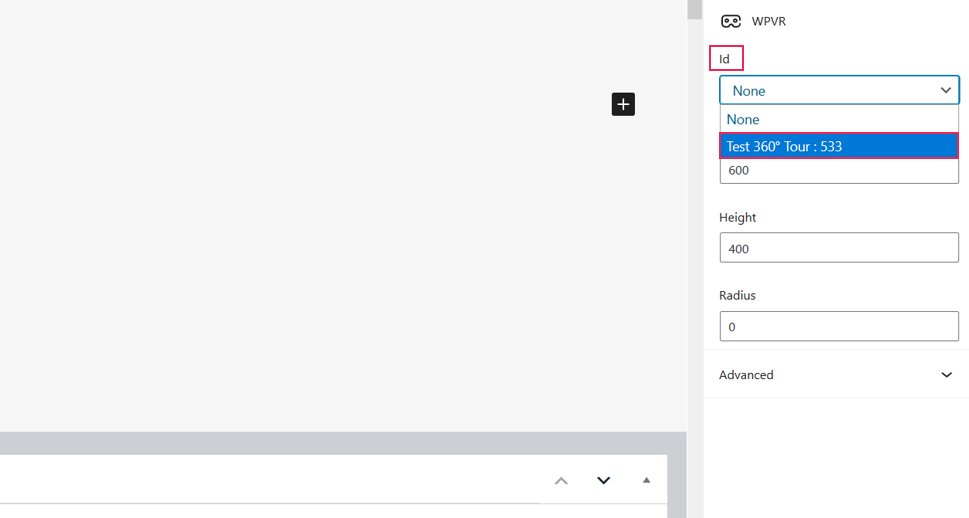
Next, click on Preview to see how the 360 image looks like on your page, and then Publish it.
Of course, if you wish, you can upload more scenes and add hotspots to make the image more informative for users.
Final Thoughts
An interactive 360 image undoubtedly has the power to turn an ordinary website into an eye-catching and commanding one in an instant. The WP VR plugin is a remarkable choice that packs impressive options for free, not to mention even more practical settings that come with premium versions. Alternatively to this plugin, you can go with the lightweight Algori 360 Image but it works only in Gutenberg or SR Product 360° View which is a good choice in case you run an online shop.
