How to Display Most Popular WordPress Posts

When a visitor comes across your website or blog, based on their first impression, they will either explore it further to check out what else you have to offer or flee. Naturally, your goal as a website owner is for them to stay a bit longer, and that’s precisely where you should be addressing a significant part of your efforts.
One of the most effective ways to achieve this is to add a list of your most popular posts somewhere easily visible on your site. Stick with us as we explore different ways in which you can display the most popular posts in WordPress:
If you ask us, this is fairly self-explanatory. As most popular posts usually represent your best and most engaging pieces of content, they can naturally boost your page views and help your website gain even more exposure. And as we already established above, it’s in the interests of every website owner to keep their visitors on their site.
For example, if your visitors keep browsing around and grow to like your content, they may become more tempted to subscribe to your mailing list, purchase a product or service you’re offering, or may simply contribute to your monetization efforts if you have any ads on your site.
A WordPress sidebar is a great place to display your most popular content. That’s because a sidebar is easily visible and also highly practical by nature since it allows you to insert multiple widgets with different useful functionalities. To switch things up from time to time, we recommend showcasing your most popular posts by day, week, month, as well as your all-time top articles. By doing this, you can avoid the trap of hyping only the same articles over and over while others essentially remain in their shadow, totally unnoticed.
Displaying all these differently classified posts is easy if you use a WordPress plugin – or, to be more precise, a combination of two different plugins. Here’s how to do it.
Blog & Magazine Themes
View Collection


First and foremost, you should install a plugin named WordPress Popular Posts.
As one of the most popular plugins of this type, WordPress Popular Posts allows you to display the most popular posts on your blog using a highly customizable widget. If you want, you can put up several widgets on your website and set them all differently – of course, all according to your preferences.
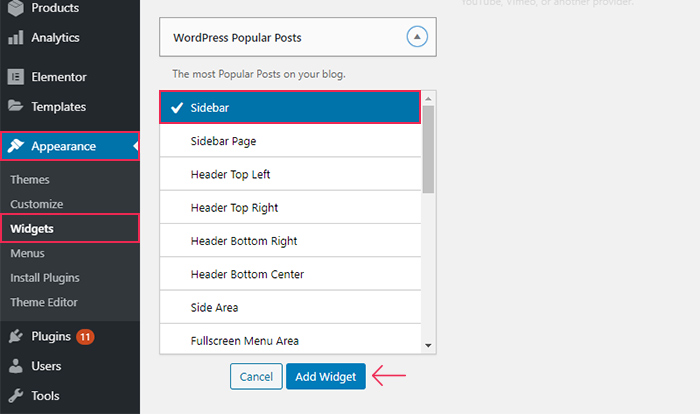
After you’re done with installing the plugin and activating it, you should go ahead and access Appearance >> Widgets. Find a widget called WordPress Popular Posts and drag and drop it in any widget area you like.
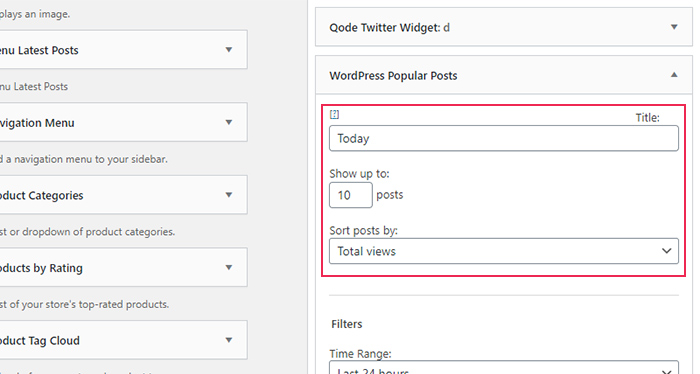
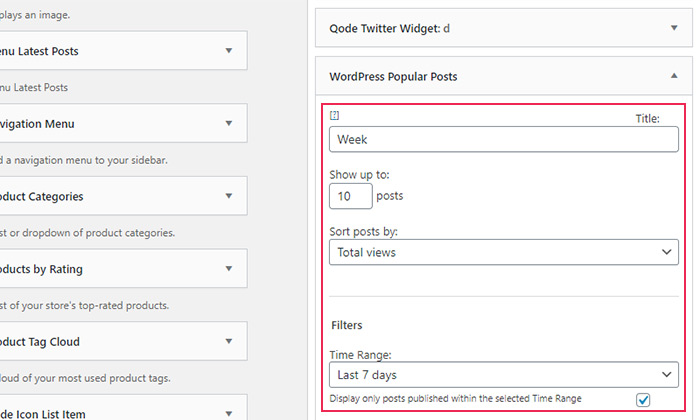
Then, it’s time to check out the widget’s options. You will get to give your widget a Title, determine a posts number you wish to show, and choose how you wish to display them (for example, whether you wish to sort them by comments, total views, or average daily views).
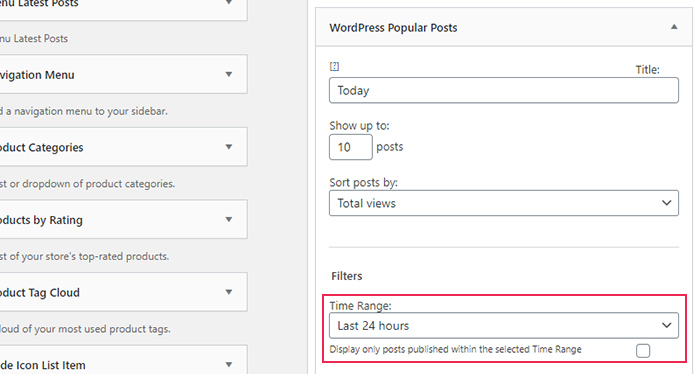
Also, in your widget, you will find the option to filter the time range of your posts. For example, you can name your widget “Today”, select “24 hours” in the Time Range field and check the box to only display posts within the time range you selected, and only those posts will be shown in the widget.
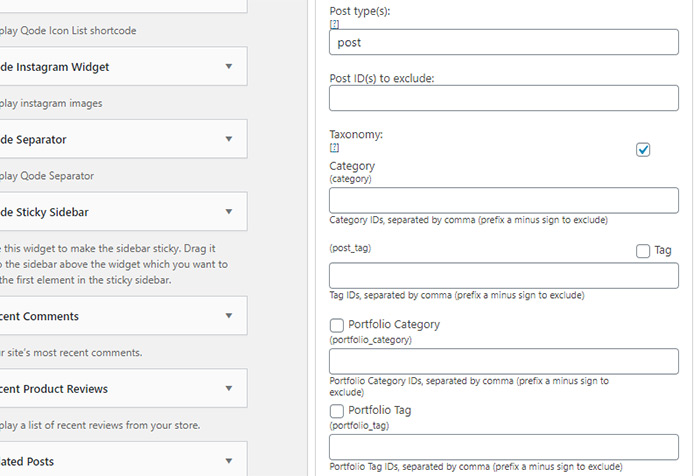
There are a few other useful settings you will find here, such as the ability to determine post types, exclude specific post IDs, specify taxonomy (like category), tag, and so on.
Once you are done, click the Save button, and repeat the same procedure to add popular posts widgets which will show weekly, monthly, and all-time popular posts. The steps you should take are the same as we presented above. You just have to select different options within the widget itself according to the function you want the widget to have. For example, if you want to display your most popular weekly posts, select “7 days” in the Time Range field for your weekly posts widget.
To adjust the placement of your widgets, you can install and activate the plugin called Ultimate Tabbed Widgets. If you use this plugin, you will be able to create widget areas and turn them into tabs or an accordion with the help of widgets or shortcodes.
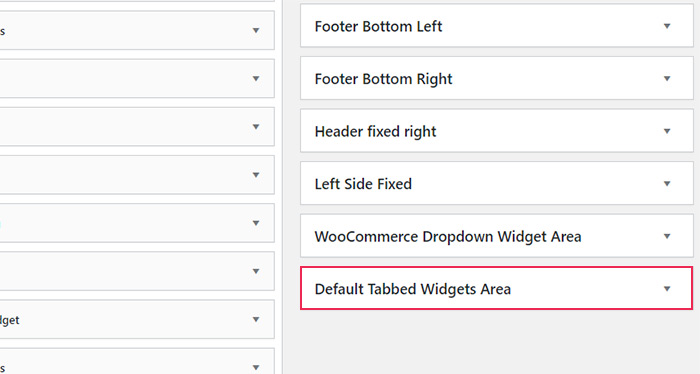
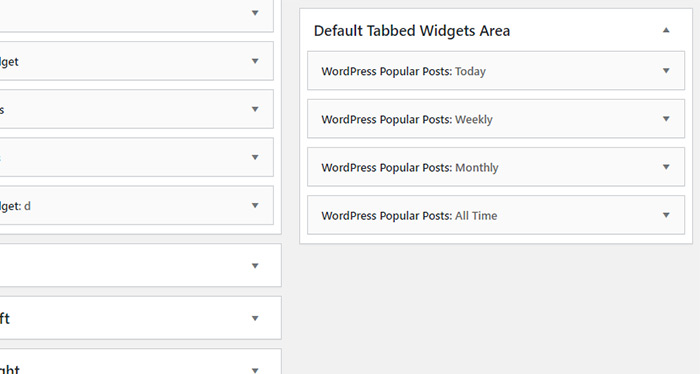
After installing the plugin, a new widget area with the name Default Tabbed Widgets Area will appear in the Appearance >> Widgets section of your dashboard.
Now, what you need to do is drag all your popular post widgets to this area. We should note that you can easily drag widgets up and down within the Default Tabbed Widgets area if you want to change the order of your tabs.
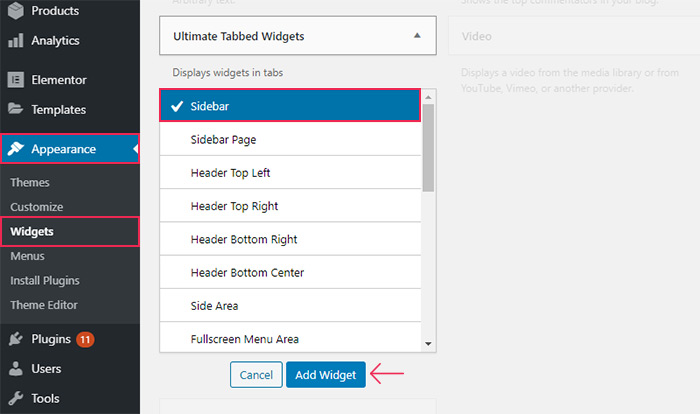
Then, find the widget labeled Ultimate Tabbed Widgets in the available widgets list and add it to your sidebar.
Give a title to your popular posts widget, and choose the Default Tabbed Widgets Area in the widget area dropdown. In the Template field, you should select the Tabs option.
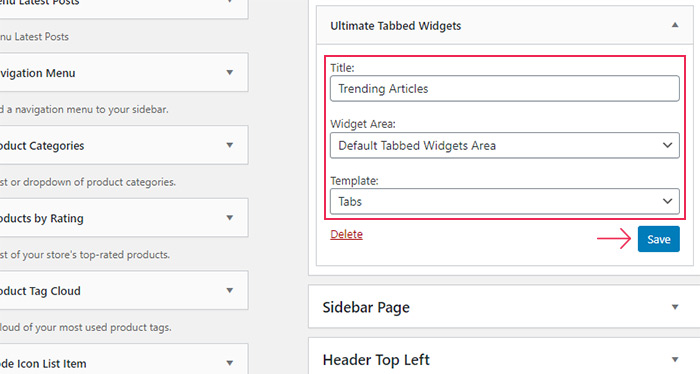
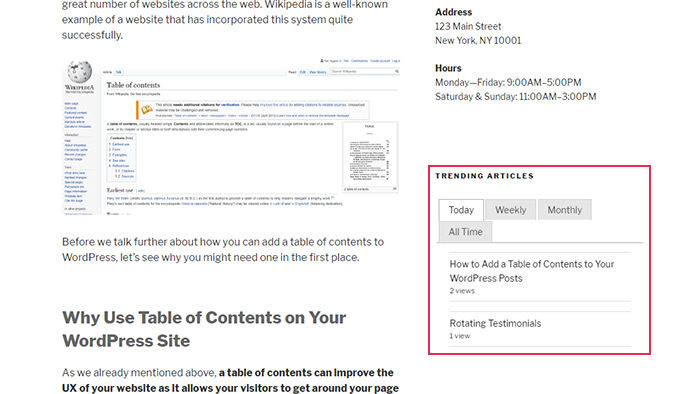
Hit the Save button, and that’s it. You can head over to your site and view the way your popular post widget displays your trending posts by day, week, month, and all-time in different tabs.
Conclusion
By displaying your most popular posts somewhere easily visible on your WordPress website, you can increase your chances of scoring more page views, lowering your bounce rate, and boosting user engagement as a whole. As you could see, adding the most popular posts to your WordPress sidebar requires very little effort if you use the right set of tools – and we recommend using a combination of the two plugins we mentioned above for this task. Just make sure to carefully follow all the step-by-step instructions listed above, and you’ll be well on your way to bring more exposure to your blog.
