How to Add Bing Maps to Your WordPress Website

If, for whatever reason, you are looking for an alternative to Google Maps, Bing Maps is the obvious choice.
You may ask yourself what the difference is, and the answer is – not much. Both Bing and Google offer accurate and correct maps. What more could you ask for? Well, for one, Bing offers a higher resolution, making Bing Maps better for finding one’s way in tight spots. This also means it can be better for desktop computers, when high resolution can really come into play.
Also, some people simply want to avoid Google wherever they can, and Microsoft’s answer to Google Maps, being functionally very similar, represents the perfect solution.
There are two easy ways to add Bing Maps to your WordPress website. One involves Bing’s own code generator, and another a free plugin and a Bing account. We will show you both.
Let’s get started!
How to Add Bing Maps Using an Embed Code
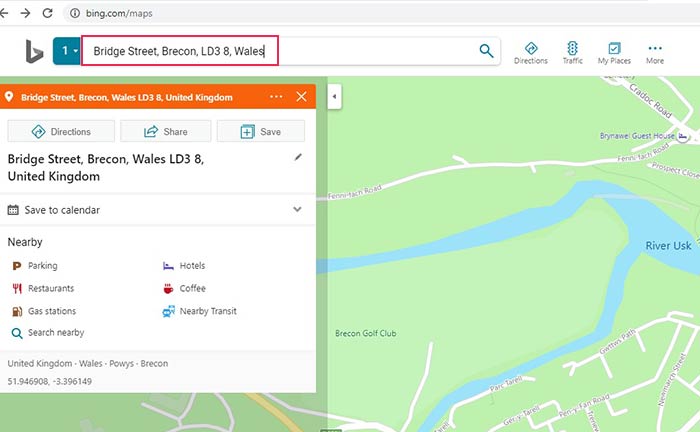
The first thing you need to do is go to the Bing Maps website and find the location you want.
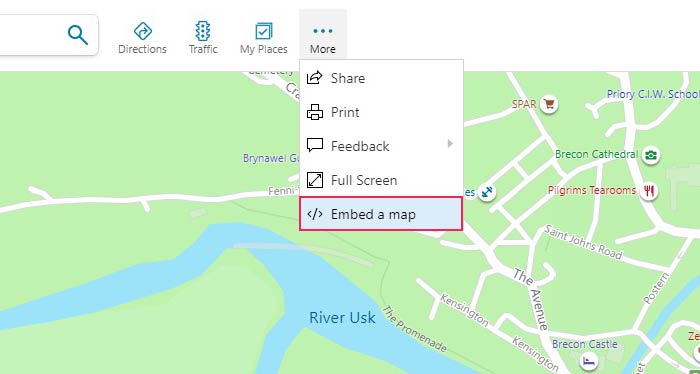
In the More menu, find the Embed a map command.
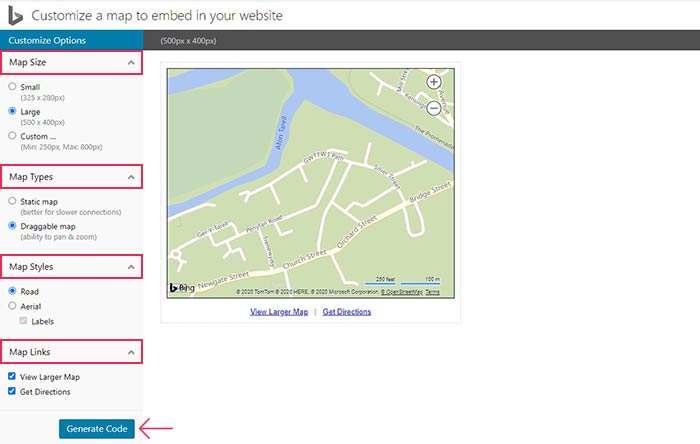
You will see a new tab allowing you to customize the map you wish to embed.
We will leave all the options on their default values, but suffice it to say you have several options here. You can change the Map Size to whatever size and aspect ratio you like (with a minimum of 250 and a maximum of 800 pixels). You can also change the Map Type into static, which might load a little faster than the default draggable, which leaves your visitors able to zoom and pan. The Map Styles menu lets you toggle between the default road and aerial (photo) views. Finally, you can toggle View Larger Map and Get Directions links.
With that done, click the Generate Code button.
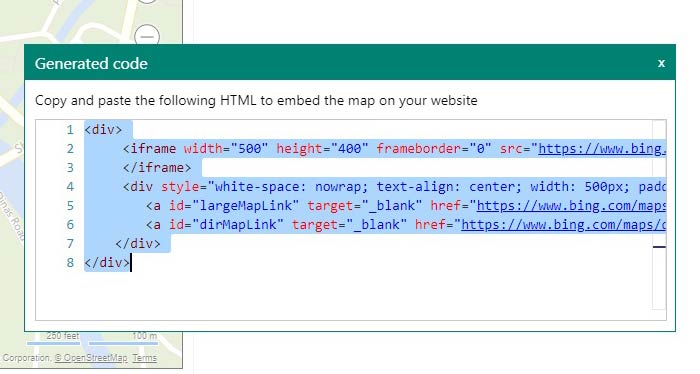
Copy the generated code, and you are ready.
Next, we will show you how to embed this code into a post.
If you are using the Gutenberg block editor, this is very straightforward. Open a post, and click the + sign to choose a block. Choose the custom HTML block.
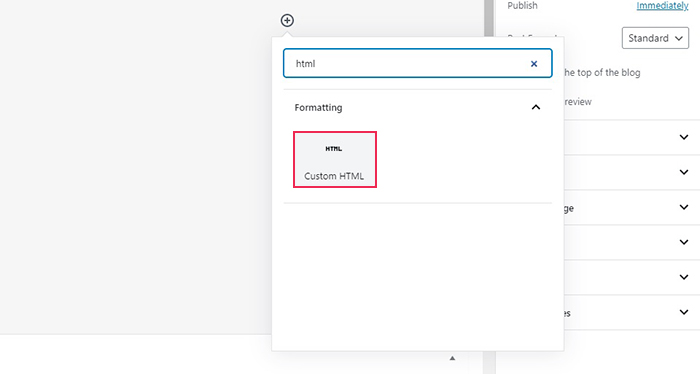
Next, paste the generated code into your block.
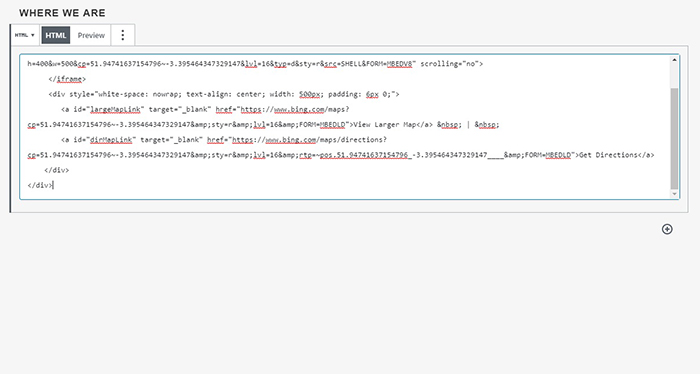
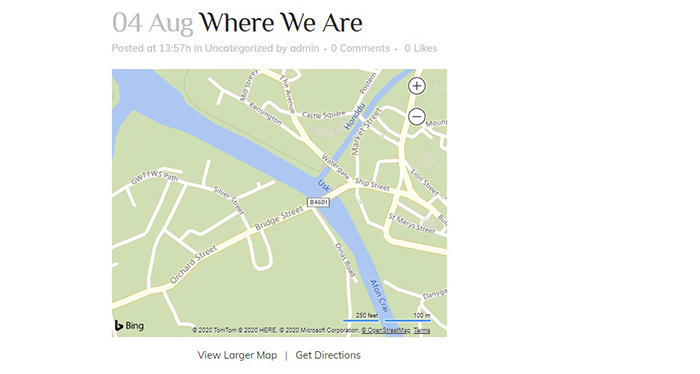
And your map will appear in your post, easy as that!
In case you are using Elementor, the procedure is much the same. Simply select the Custom HTML widget from your left-hand side menu, drag it to where you want it on the page, and paste the code you obtained from Bing.
And with the Classic editor, it’s even simpler, though you lose some of the WYSIWYG quality Elementor provides: make sure you have the text tab selected, then paste the code where you want it to appear in a post or page.
How to Add Bing Maps Using a Plugin
The above works great for a simple map. But say you operate from a range of different locations, or you want to add pins or shapes, to make a Bing map your own. You can do all that, and more, with a plugin. We will get you started on one of the commoner ones – a good all-round solution nonetheless.
The plugin we will be using is WP Bing Map Pro. You will need to install and activate it. If you’re unsure about what a WordPress plugin is or how to install and activate a WordPress plugin, we have tutorials for that.
Following that, you need to create a Bing account in order to get an API key. To do that, visit bingmapsportal.com and Sign in.
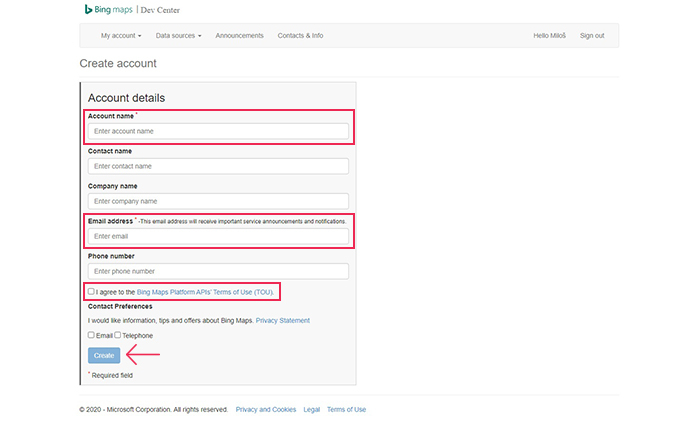
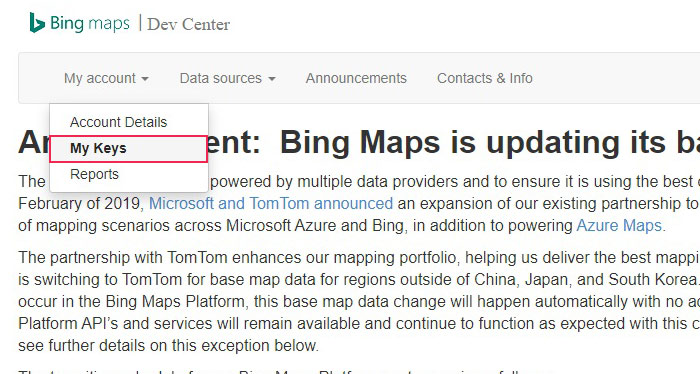
Log in with your Microsoft account data, and click Yes, let’s create a new account! You will be taken to the Create account form, which you need to fill out with your data before clicking the Create button. Having created the account, navigate to My account/My Keys.
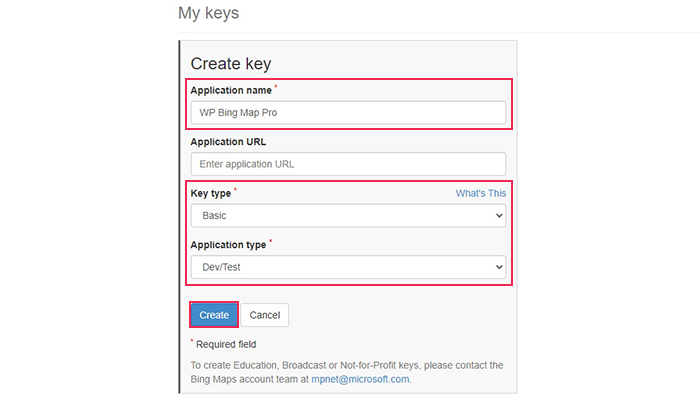
You will need to fill out a request form to create a key. Once you’ve done that, you can create a key by clicking the Create button.
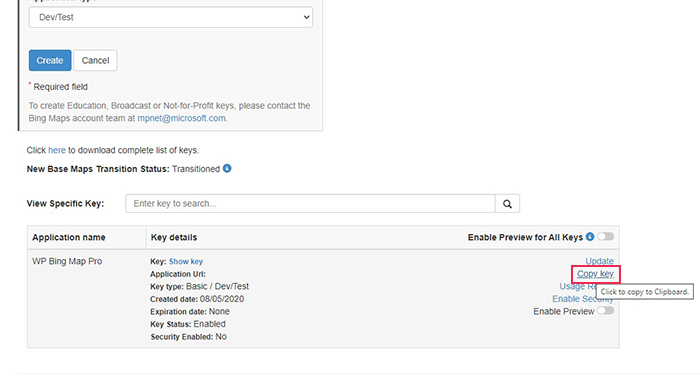
You can now copy it from the table below.
Next, you need to configure the plugin. Use the left-hand menu in your WordPress Dashboard to navigate to WP Bing Map Pro/WP Bing Map Pro.
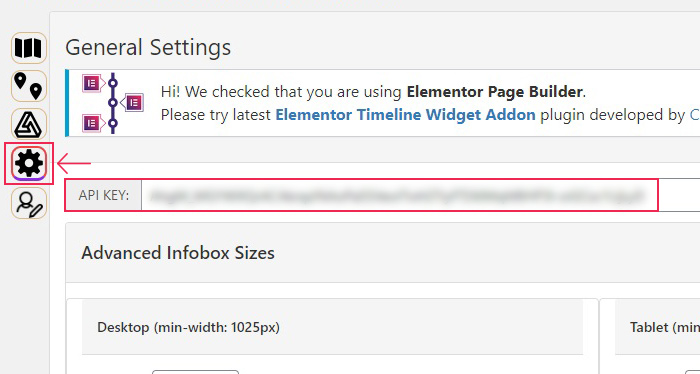
The plugin will open on the Maps screen. But first, we want to take a look at the General Settings screen. You need to paste the key you’ve copied into the API KEY box and click Save.
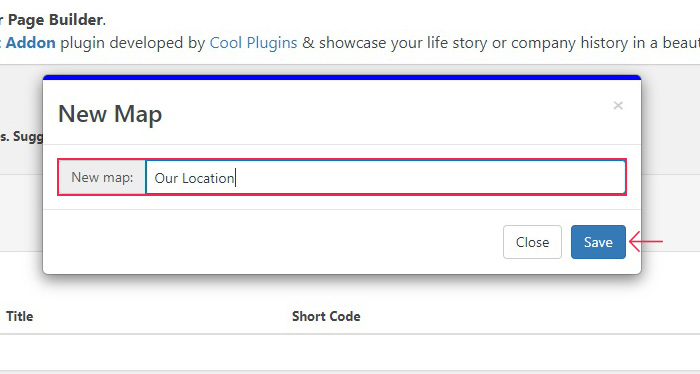
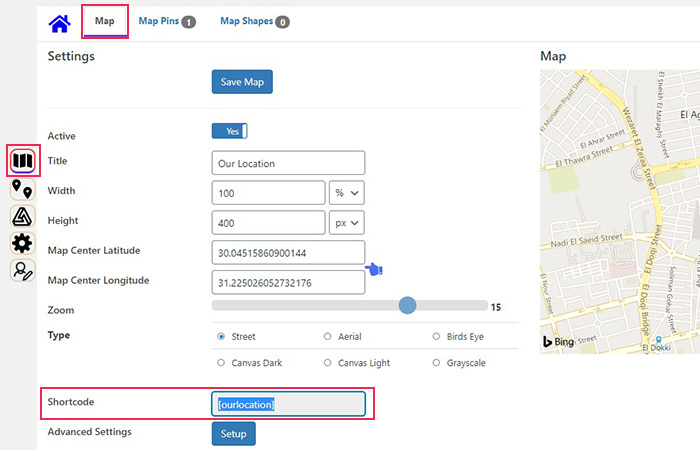
Click the + button to add a map, and name it. We have named it Our Location. Then click Save.
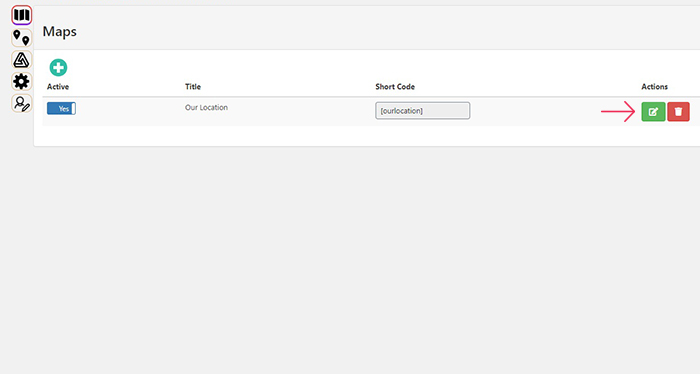
Now we have a shortcode for Our Location. Copying that shortcode into a shortcode block will render a world map. So we need to narrow it down a little. Say our location is near the 6 October Bridge in Cairo, Egypt. We will start editing the map by clicking the edit button.
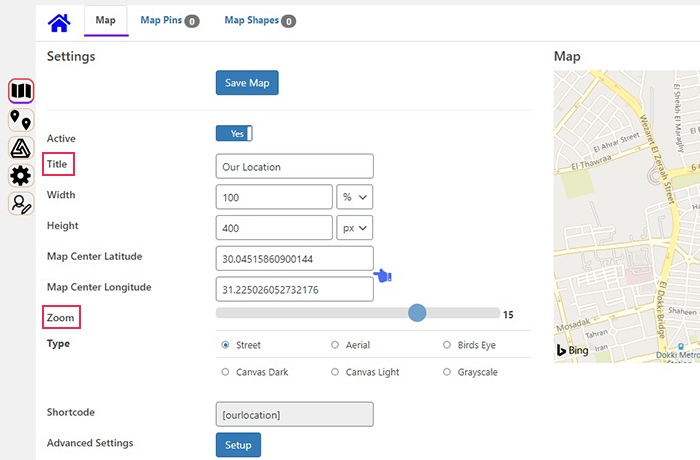
We will pan and zoom in on the map to find our location. You can use the search function on Bing’s website to do this for your location, or you can use the Map Center Latitude and Map Center Longitude commands. We feel a Zoom of 15 is appropriate for us.
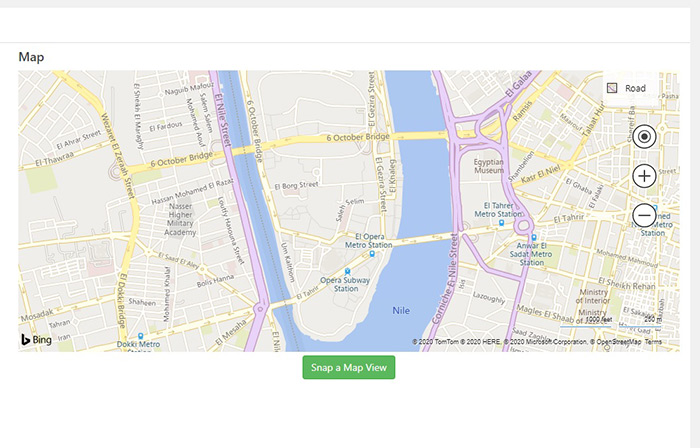
Here you can also change the map Title, the dimensions (Width and Height), as well as choose among the six map Types. Once done, we will Save our Map. You can also copy the image of the map to your clipboard by clicking the Snap a Map View button.
In case you want to pin your location to the map, you’ll need to take a look at the Pins screen. Click the + sign button to add a pin.
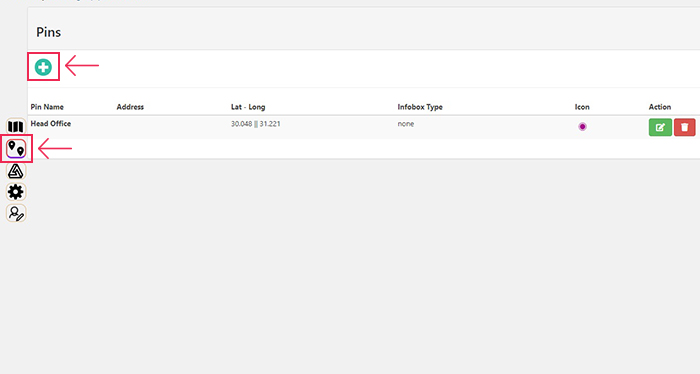
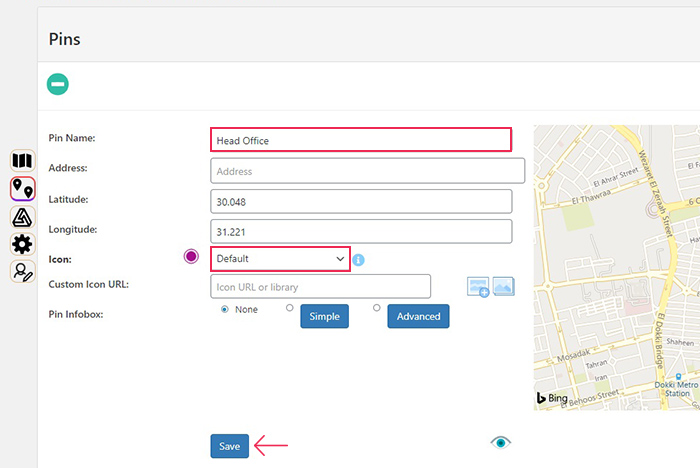
Then you need to edit your pin by giving it a Pin Name, an optional Address (or define it using coordinates of Latitude and Longitude), choose or upload an Icon for it, and Save it.
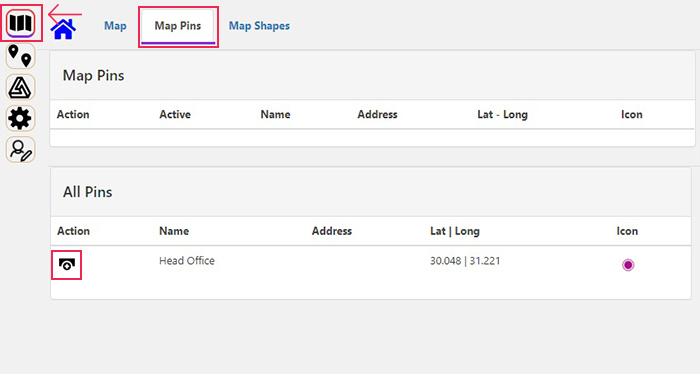
To see it on your map, go back to the Maps screen, then navigate to the edit screen for Our Location. There you will find the Map Pins tab. To add a pin to a map, find the pin you want (Head Office in our case), and click the Add icon.
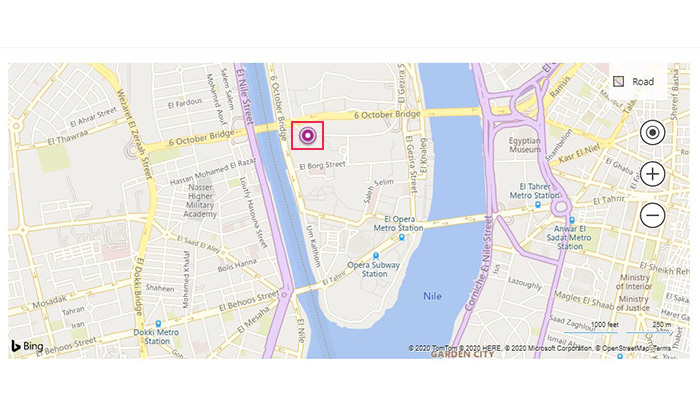
Once you return to the Map tab, you will find your pin stuck to the map. You need to Save your Map and copy the shortcode [ourlocation] for later use.
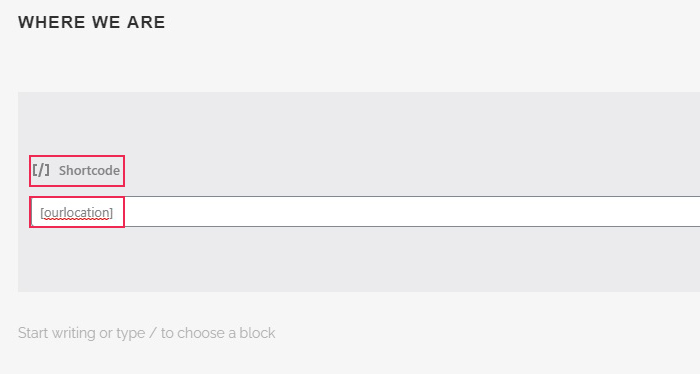
If you are using the Gutenberg block editor and want to display your map as part of a post, add a new shortcode block by clicking on the + sign and choosing a shortcode block. Paste [ourlocation] into its field.
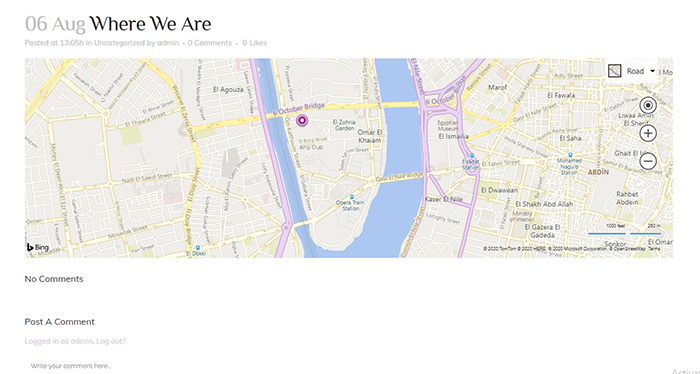
And now your map will be displayed as part of a post or page.
If you are using another page editor, the procedure is much the same as discussed above: for Elementor, select the Shortcode widget from the left-hand side menu, drag it to where you want it on your page or in your post, and paste the shortcode for your map into the shortcode field.
If you are using the classic editor, simply set your input to text and paste the shortcode. WordPress will do the rest for you.
In Conclusion
As you have seen, displaying a Bing map on your website is very easy and takes next to no time at all. If you are looking for a simple map, you can simply embed it using the code generated by Bing Maps. If, on the other hand, you are looking for a complex solution for, say, a range of locations over different cities, countries or even worldwide, if you are looking to add pins, lines or shapes to make your map more informative for your visitors, we suggest you get yourself set up with a Bing account and a plugin such as WP Bing Map Pro and use its customization functions – barely touched upon in this article – to create a map or set of maps that suit your brand and website style more.


