How to Add a Favicon to Your WordPress Website

You’ve probably noticed that most websites have a small icon (usually the site’s logo) located in the top left corner of their browser tab. This is called a favicon. Aside from helping users recognize your website in their browser and thus improving user experience, the favicon is also an essential form of branding. By adding a favicon to your site, you ensure users can differentiate your site from other sites they might be browsing, and you create a connection between the favicon image and your brand.
If you ask us, setting your WordPress favicon is one of the first things you should do after installing your WordPress theme. So today we’re going to show you how to add a favicon to your WordPress website.
How to Create a Favicon
First things first, we should address the ways in which you can create your favicon. If you’re looking for a quick solution, you can create a favicon using an online favicon generator. Platforms like Favicon & App Icon Generator let you choose an image from your computer in .jpg, .png or .gif formats and then convert it to .ico format. If you don’t have a preexisting image, you can also browse their icon gallery by keywords, letters or colors, and then you can download or edit an image you like.
Another great website for generating favicons is favicon.cc. This platform not only allows you to import your image or choose from one of their own, but also lets you create a new favicon from scratch.
If you don’t want to use an online favicon generators, you can always use Photoshop or Gimp to either create a favicon or resize an existing image. Just keep in mind that WordPress requires the dimensions for your favicon image to be at least 512×512 pixels.
When it comes to formats, we should note that the .ico format is used for generating favicons in general. But since the release of WordPress version 4.3, WordPress has implemented a Site Icon feature that generates everything for you. This means that if you use the 4.3 version of WordPress (or higher), you don’t have to prepare an .ico file on your own, and can upload a .gif, .jpeg or .png image instead. WordPress will then convert it into the .ico format and generate all the necessary dimensions (just make sure the original image you upload is 512x512px).
If, however, you’re still using a WordPress version older than 4.3, then you will have to add your favicon to WordPress manually (which we’ll talk more about later).


How to Add a Favicon to WordPress
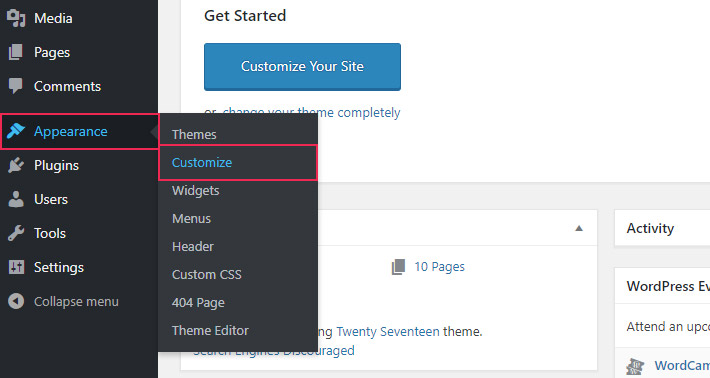
After you’re done making your favicon, it’s time to add it to your WordPress site. The first thing you should do is head to your admin panel and click on Appearance > Customize.
From there, select Site Identity.
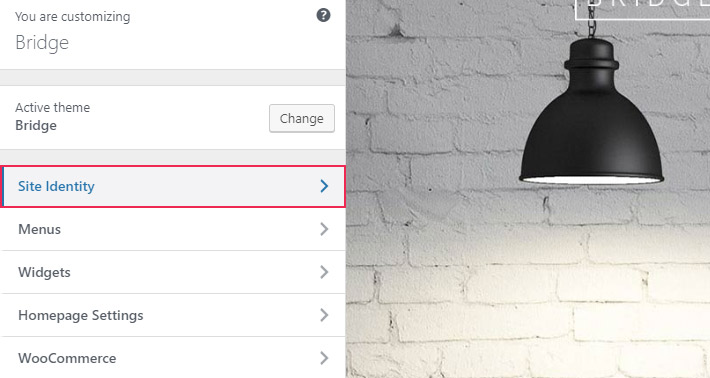
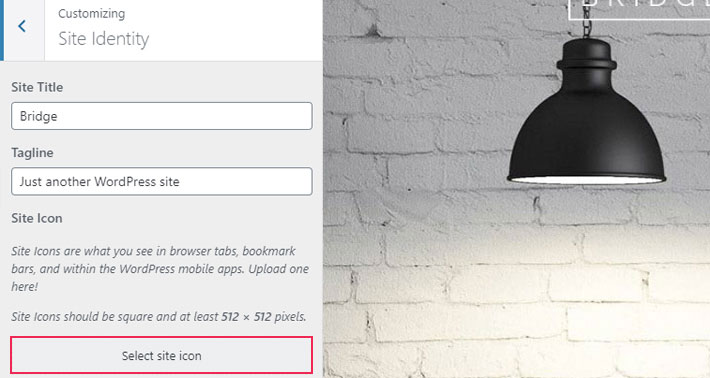
Here you can pick the image you want to use as your site icon.
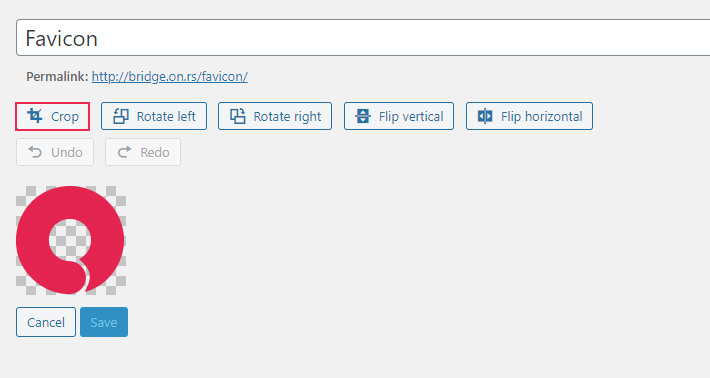
In case your image is above the recommended size limit, WordPress will allow you to crop it. To do so, click on Edit image.
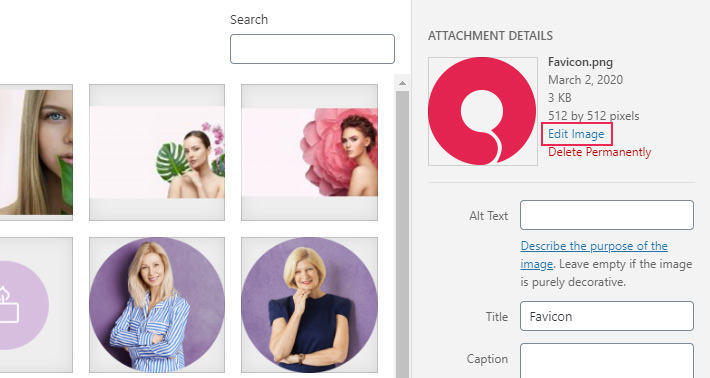
Once you’re done with cropping (which you can do by clicking on your image and dragging it with your mouse cursor), select the Crop button and then hit Save.
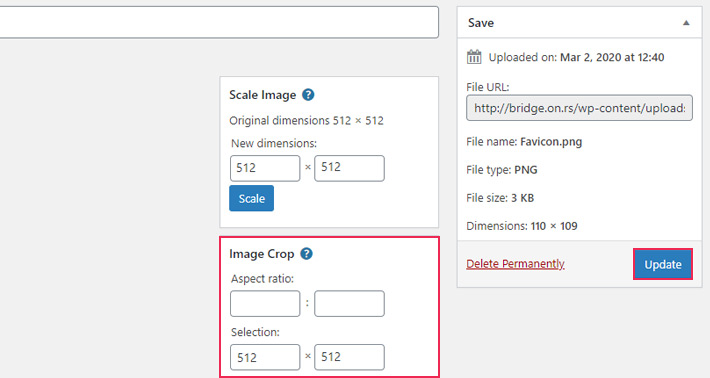
On the right side of the screen, you also have the option to scale your image, and in the Image Crop section, you can even enter the desired image dimensions and specify the aspect ratio manually.
Finally, don’t forget to click the Update button when you’re done.
And that’s it – you’ve successfully uploaded your favicon to WordPress.
Qode WordPress Themes: Top Picks
View Collection


Adding a Favicon to Older Version of WordPress (4.3 or less)
Though we recommend you always keep your website updated with the latest version of WordPress, if by chance you are using a version older than 4.3, you will have to add your favicon to your WordPress site manually.
First things first, you need to generate a .ico file using one of the online generators we mentioned above. Next, you should upload your favicon.ico file to your website’s root directory via FTP. If you’re not sure how that’s done, make sure to check out our beginners guide to FTP.
We should mention that there’s some debate about whether the favicon should be added to the root directory or the theme folder (or both). In any case, we suggest that you at least upload it to the root directory because this will display your favicon in feedreaders.
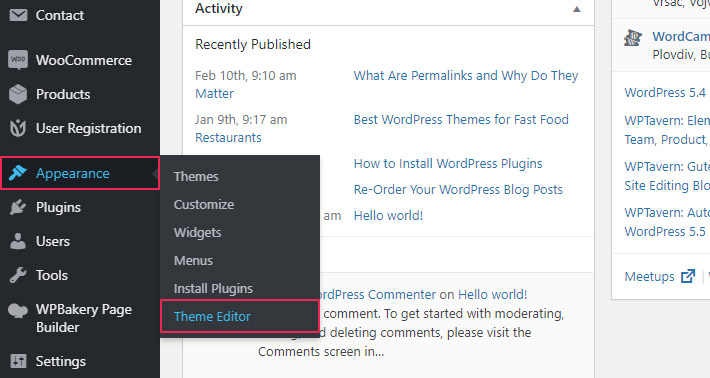
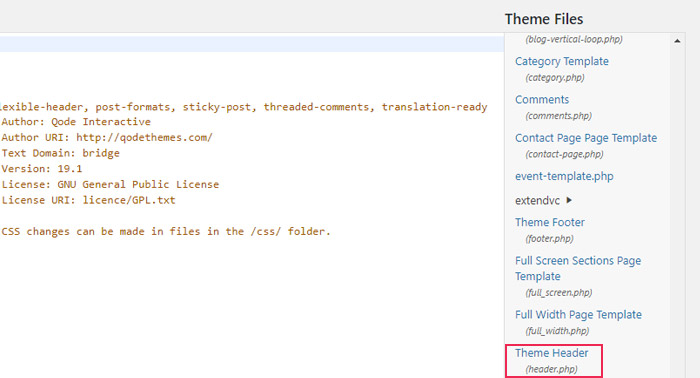
Finally, don’t forget to link to the favicon’s file location in your header, because this is a guarantee that all browsers will be able to find it. To do this, you need to use an HTML link tag in your theme’s header.php file to add the code. You can find your header.php file by going to Appearance > Theme Editor and then locating it in the Theme Files section on the right.
The code should be added between the <head> and </head> tags:
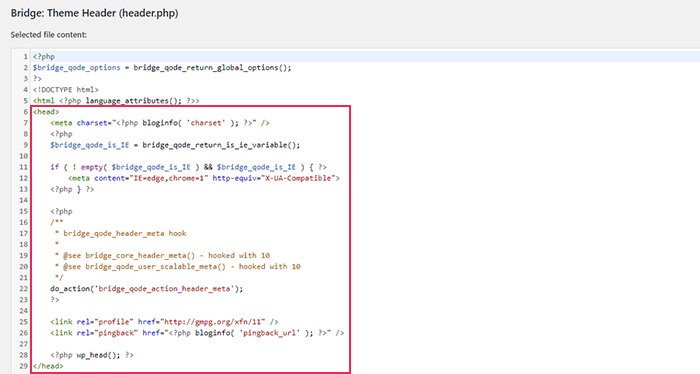
<link rel="icon" type="image/x-icon" href="http://www.yourdomain.com/favicon.ico">
<link rel="icon" type="image/x-icon" href="<?php echo get_stylesheet_directory_uri(); ?>/favicon.ico">
Adding a Favicon to WordPress With the Help of a Plugin
In case you want to add your WordPress favicon with a plugin, you can do so by installing Favicon by RealFaviconGenerator. This plugin is easy to use and helps you generate and set a favicon for different devices, such as desktop, Android, iPhone, and iPad.
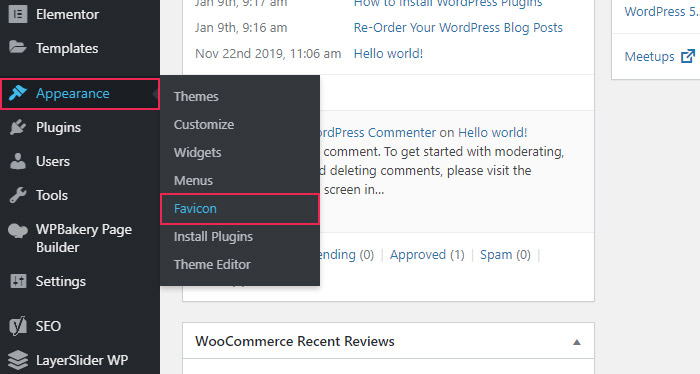
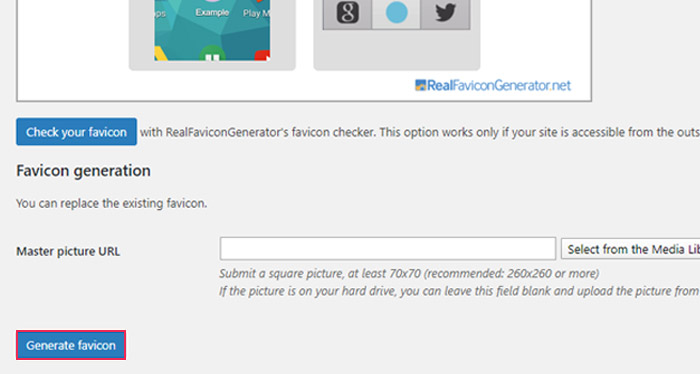
After you install and activate the plugin, go to Appearance > Favicon and then click the “Select from the Media Library” button.
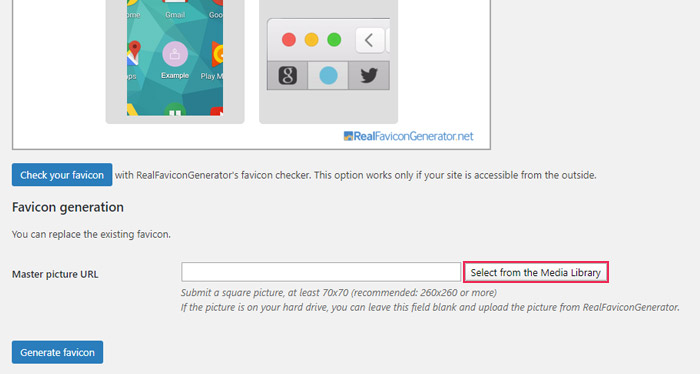
Even though you should upload an image of at least 512×512 px when adding a favicon through the Customize screen, the Favicon by RealFaviconGenerator plugin requires that you upload a picture at least 70×70 px in size, and preferably 260x260px.
Once you select your image, click on Generate Favicon.
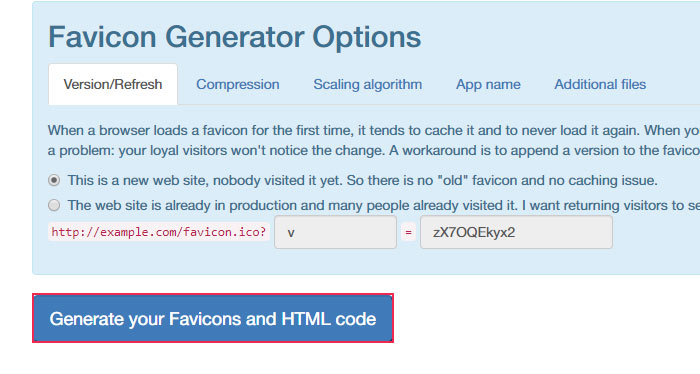
From then on, you will be taken to the RealFaviconGenerator website. Once there, you have to scroll all the way down and select Generate your Favicons and HTML code:
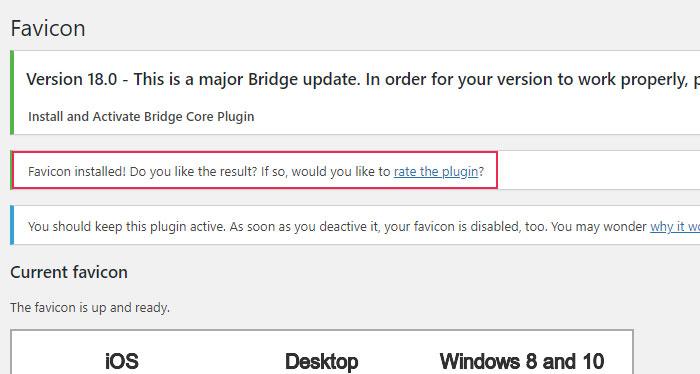
After a short while, you will be sent back to your WordPress site, and you will see a message on your dashboard letting you know that your favicon is all set.
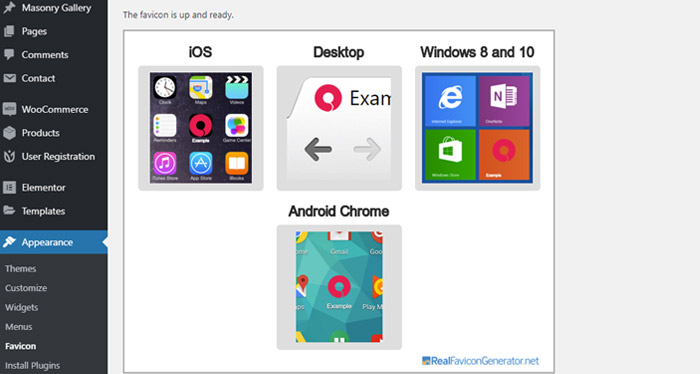
Also, here you will be able to get a preview of how your favicon looks like on different devices:
Conclusion
And that sums up the process of adding a favicon to your WordPress website. As is evident from the steps we’ve presented above, once you figure out the design which will best represent you or your brand, the rest of the process is truly a piece of cake.
