How to Add CAPTCHA to Your WordPress Login and Registration Form

Any WordPress website faces the issue of spam or other forms of abusive traffic. One of the commonest ways of combating it is CAPTCHA, a test used to determine whether your visitor is human or not. In this article we will discuss what CAPTCHA is and how you can implement it to your WordPress login or registration form, or indeed any other form you want.
CAPTCHA stands for “Completely Automated Public Turing test to tell Computers and Humans Apart”. As its name suggests, CAPTCHA is a system designed to distinguish human input from machine input on the web. It usually takes the form of a simple test for your visitors which does not take a lot of time to complete but does save you a lot of time wasted slogging through undesired traffic by identifying your visitors as humans and weeding out spammers or bots.
In this article, we’ll be using reCAPTCHA, which is simply Google’s CAPTCHA service.
Adding a CAPTCHA to WordPress websites is especially useful with comment and contact forms. It can also add an extra layer of security to registration forms and password reclamation forms, but it is not limited to that – any form you wish to make a little safer can be made so with CAPTCHA.
We are going to show you how to make your WordPress website safer and easier to run using the Advanced noCaptcha & invisible Captcha plugin. But in order to make the CAPTCHA work, you need to create a Google reCAPTCHA account.
Qode Themes: Top Picks
View Collection


The main difference between the reCAPTCHA (Google’s CAPTCHA service) versions is the test imposed upon your human visitors and/or their devices.
With version 1 of CAPTCHA, the visitor was prompted to parse a word or two from a distorted image, often with a strikethrough or a colour gradient in the background. As of March 2018, though, this version of CAPTCHA is unavailable.
Version 2 makes your visitors tick a checkbox and then either passes them or makes them validate their choice. v2 Invisible is called directly once a user clicks a button on your website or it may be called directly using JavaScript.
Version 3 is completely independent of user interaction and checks a multitude of functions in the background.
You may choose whichever of the supported versions you like, depending on the needs of your website.
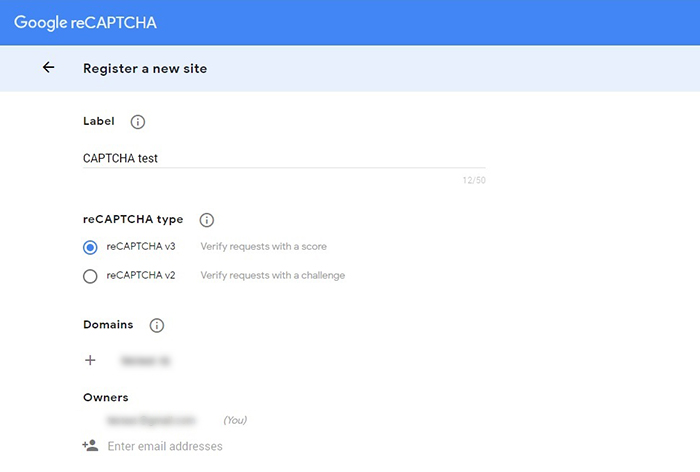
In order to use reCAPTCHA on your website, you will need two keys from Google. The Site Key and Secret Key are codes used and issued by Google to website owners. They are version-dependant and site specific. Since reCAPTCHA is a Google service, you need to log into your Google account and get them directly from the website. You can find the reCAPTCHA registration form here.
You need to fill it out with a Label used to identify your website, a reCAPTCHA type, a Domain, wherein you need to input the domain for which you will be using the CAPTCHA, and an email address for the Owner, i.e. the person responsible for the CAPTCHA.
The continuation of the form contains a checkbox you need to tick in order to Accept the reCAPTCHA Terms of Service and another to Send Alerts to Owners in case of unusual activity.
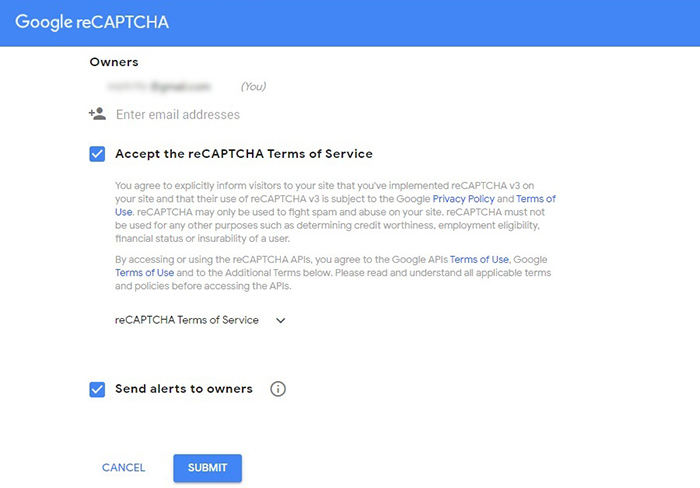
With that done, you will have registered your website. You have now obtained both the site key and the secret key.
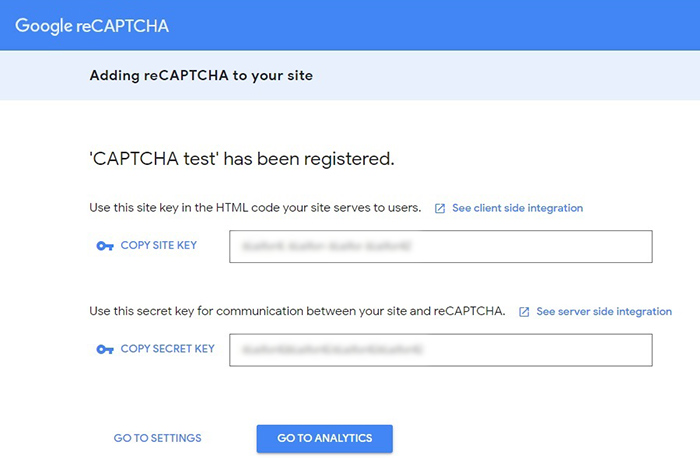
You will need these keys to validate and connect your site to the Google service. We will explain how to do that in the following section.
Having obtained the keys, you need to install the Advanced noCaptcha & invisible Captcha plugin. If you don‘t know what a WordPress plugin is, or if you don‘t know how to install and activate a WordPress plugin, we have you covered with some really easy to follow tutorials.
Once you have installed the plugin, open its settings. The settings are very much straightforward.
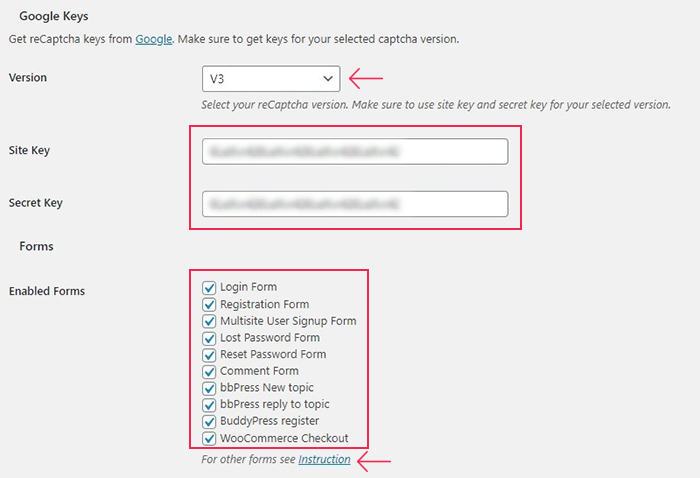
Firstly, the Version drop-down menu allows you to choose between versions of the CAPTCHA test. You need to bear in mind that since version 5.1, Contact Form 7 does not support v2 of CAPTCHA. We will show you how you can implement v2 with Contact Form 7 a little later in this tutorial, but for now, we’ll choose v3.
The following two fields are for the Site Key and Secret Key, respectively. We already explained how you can obtain these two keys in the previous section. If you haven’t already done so, you can get them now by clicking on the “Get reCaptcha keys from Google” link in the plugin’s settings.
In the Forms section, we will tick all the forms to enable CAPTCHA for them. This works automatically for the supported forms listed under Enabled Forms. To introduce CAPTCHA to your Contact Form 7 Contact Form and other custom forms, you‘ll need to use a shortcode provided under the Instruction link, which we will arrive at later.
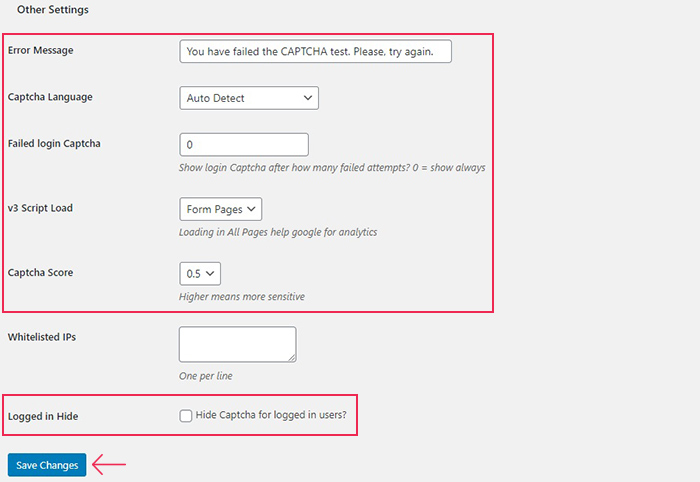
In the Other Settings section, you can change the default Error Message (as we will, to You have failed the CAPTCHA test. Please, try again.). We will leave Captcha Language on auto detect, but you can use whichever language you like and is supported. This plugin has been translated into over 40 languages. We will also leave the Failed login Captcha setting on 0, meaning that there is no limit for the number of times the CAPTCHA script is loaded, regardless of how many times the user was vetted.
We will set the v3 Script Load to Form Pages. This means that the CAPTCHA test will only be active on form pages rather than all of your site’s pages. The Captcha Score we will leave at 0.5, its default value. This setting governs the sensitivity of the CAPTCHA test, with 1 being the lowest tolerance. We suggest not touching it unless you are familiar with how the v3 test works.
Here you can also Whitelist IPs, making sure that trusted users access your website hassle-free. You can also choose to Hide the Captcha for Logged in users. You can then save your changes, and CAPTCHA will appear on all the forms you ticked.
Contact Form 7 is a popular premium plugin used to create all manner of forms. Contact Form 7 forms are not, however, supported by default in the Advanced noCaptcha & Invisible Captcha plugin and do not appear in the plugin settings under Enabled Forms. Still, that does not mean you can’t use CAPTCHA for your Contact Form 7 or other custom forms.
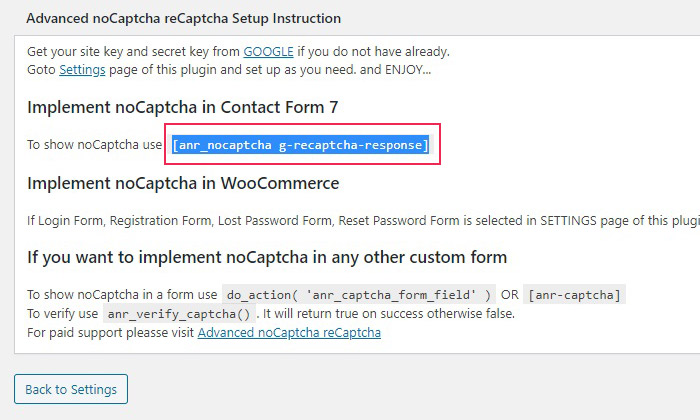
To add a CAPTCHA to your Contact Form 7 contact form, simply click on the Instruction link in the settings and copy the Contact Form 7 shortcode:
[anr_nocaptcha g-recaptcha-response]
Next, navigate to Contact/Contact Forms using your left-hand side menu, and select the contact form you wish to add a CAPTCHA to, then paste the shortcode to the desired spot.
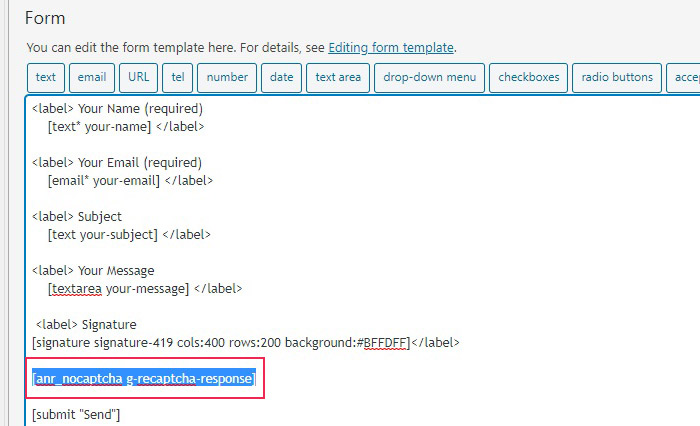
And now all you have to do is add your Contact Form 7 contact form to whichever page or post you like. You will not be able to see it, since CAPTCHA v3 is invisible to your users, but trust us – it is there, protecting your website.
But what if you still want the CAPTCHA v2 on your Contact Form 7 form? You can still have it, you just need another plugin to do it. Our recommended solution is the ReCaptcha v2 for Contact Form 7 plugin, used alongside the Advanced noCaptcha & Invisible Captcha plugin.
You will need to generate a separate site key and secret key for v2. Obtaining these keys has already been covered in the “How to Obtain reCAPTCHA keys from Google” section of this article.
You will need to reenter these on your Advanced noCaptcha & invisible Captcha plugin settings page, as well as change the version to v2, as discussed in the “How to Set Up the Advanced noCaptcha Plugin” section.
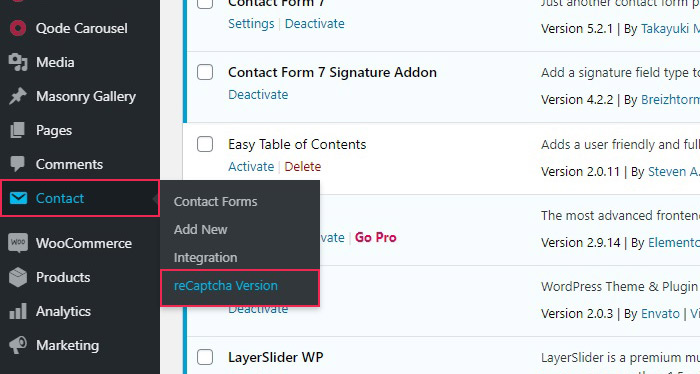
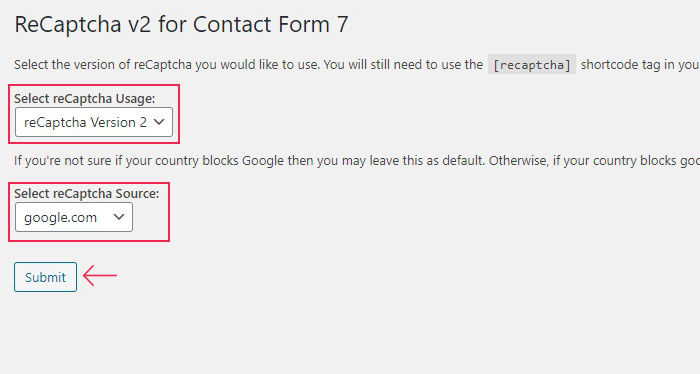
Once you have done all this, it’s time to install the ReCaptcha v2 for Contact Form 7 plugin. Then, use the left-hand side menu to navigate to its settings, located under Contact/reCaptcha Version.
You’ll need to set your reCaptcha Usage to reCaptcha Version 2 and your reCaptcha Source to google.com. When done, click Submit.
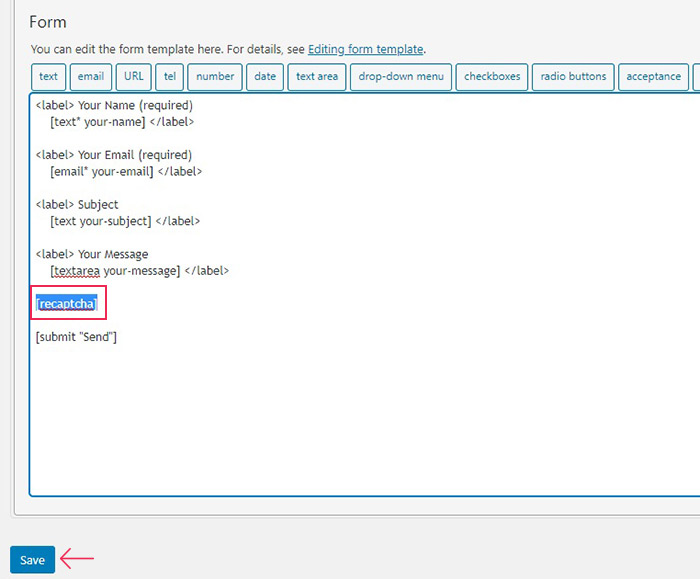
Now all you need to do is copy the [recaptcha] shortcode for use in your Contact Form 7 contact form.
Navigate to Contact/Contact Forms and select the contact form you wish to use v2 CAPTCHA to protect. Then simply paste your shortcode and Save your form.
Your login screen will now sport a v2 reCaptcha…
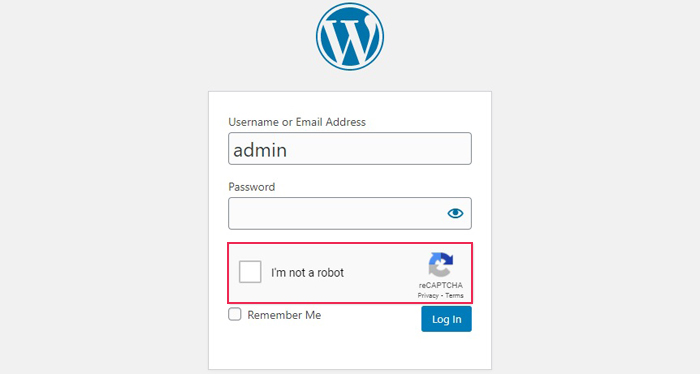
…as will your contact form.

In Conclusion
As you have seen, adding an extra layer of security, this time powered by Google, only takes a couple of minutes, and it helps protect your website from unwanted traffic. In just a few easy clicks, your forms will be safer from bots and you won’t have to spend a lot of time just weeding through spam to get to that one genuine user comment.
