How to Create an Interactive Map in WordPress

Although digital presence has become a must for most businesses, it goes without saying that a map to your brick-and-mortar location is still more than useful. To make the best of it, you can even style your Google map to fit your website’s overall design. With an interactive map, though, you’re going one step further: you allow your users more freedom to discover their own ways of reaching you and planning their trips at their convenience. Not to mention that interaction makes for a more satisfying user experience, drawing your visitors in for longer user sessions. In this article, we will show you two ways of adding an interactive map to your WordPress website – using Google My Maps and using a specialized plugin.
How to Add an Interactive Map in WordPress Using Google My Maps
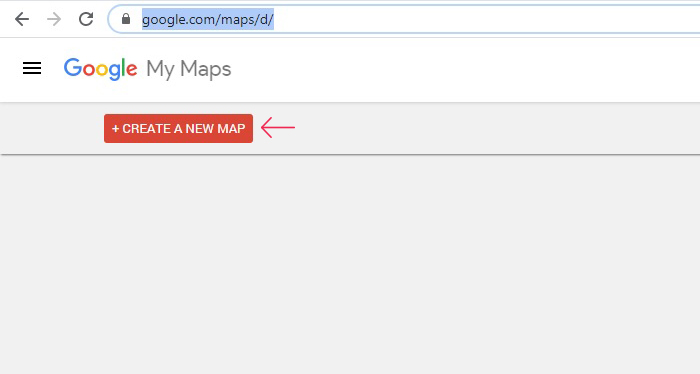
The simplest way to install an interactive map is using Google’s My Maps service. The first thing you need to do is go to Google My Maps and click on the +Create a New Map.
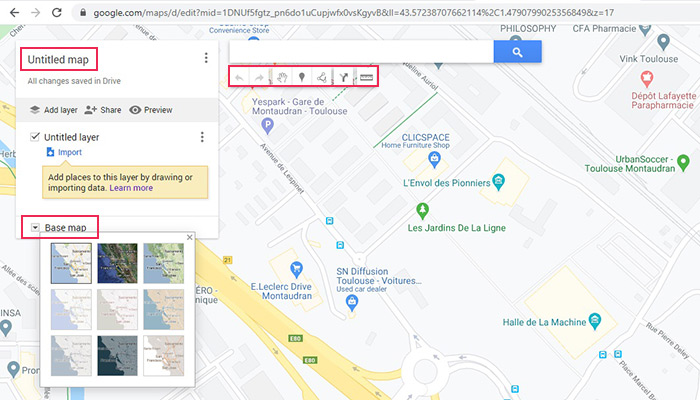
This will take you to the map editor. Using the menu at the top, you can add routes, markers, lines, directions and measure distances. Each map may have up to 10,000 lines, shapes, or places. The main section on the left lets you add layers (with up to 2,000 lines, shapes or places per layer), choose a Base map mode between nine options, and, finally, name your map.
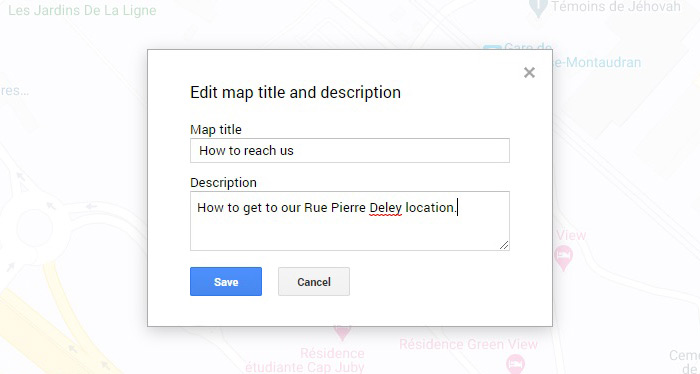
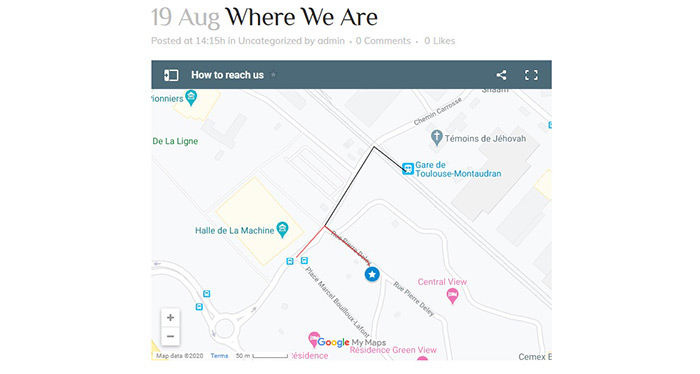
We will name our map “How to reach us” and add a short description, after which we will save our changes.
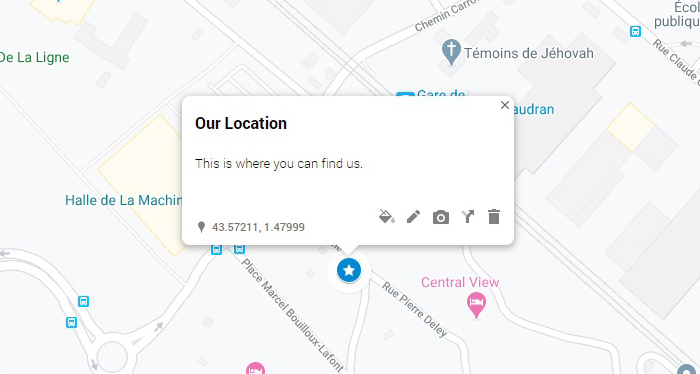
Next, we will stick a pin to mark our location. We will name it “Our location” and add a short description. You can use the menu to change the style of the pin, as we have, into a star, or the colour, which we didn’t. You can also add images or video to your location.
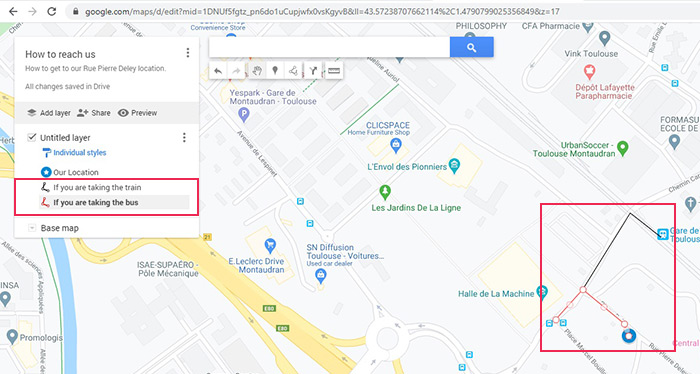
Next, we will draw some lines from the local bus stop and train station, just to show how to get there from the nearest public transport stops, using black for the train and red for the bus stop.
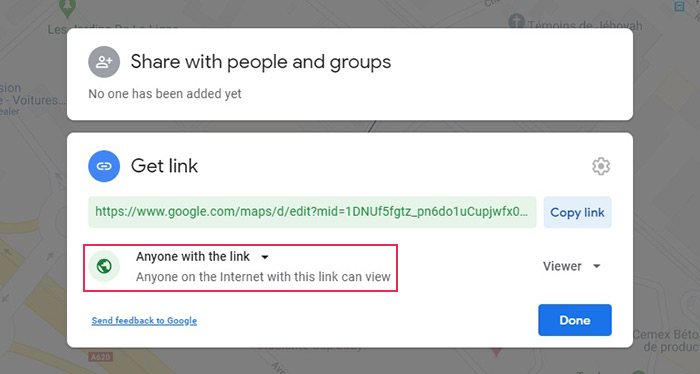
Finally, we need to embed it into our website. For that, we first need to make our map public. Entering the sharing menu from the main command panel, we will set the access control from Restricted to Anyone with the link. This makes the map public.
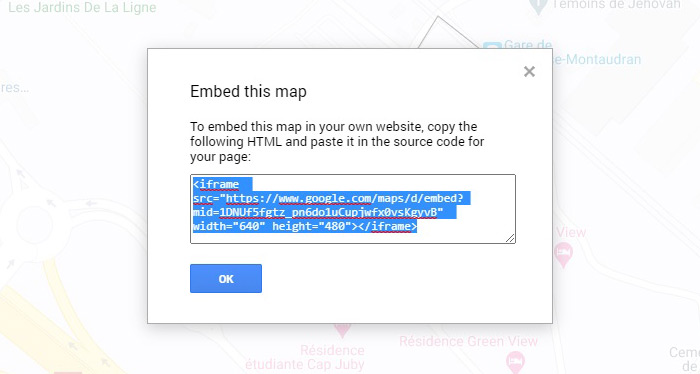
Next, you need to access the embed code from the main editing panel. Click on the three dots next to your map name, select Embed to my website, and copy the HTML you get.
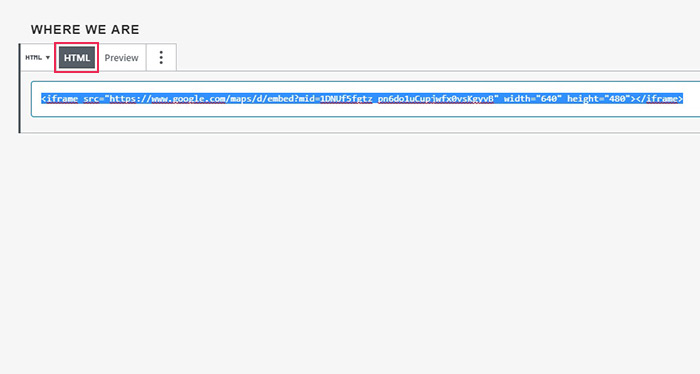
To embed it into your website, if you are using Gutenberg, access the page you want to add the map to (or create a new one), simply click the + sign to add a block, then select the Custom HTML block, and paste the code into the block’s field.
If you are working with Elementor, you need to drag the Custom HTML widget and then paste the code into its field. If you are using the WPBakery Page Builder, you need to use the Raw HTML element and supply it with the code you pasted. For the Classic editor, simply make sure your editor is set on the Text tab and simply paste the code to where you want it.
And your map is ready, just as you have configured it.
How to Add an Interactive Map in WordPress Using a Plugin
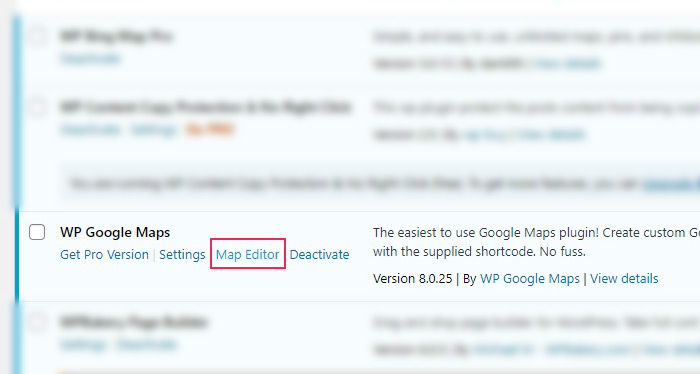
You can also use a plugin to create an interactive map. There are plenty of WordPress plugins with this or similar functionality, many of which we have discussed in our article on best Google Maps plugins. For this demonstration, we’re going to use WP Google Maps, but you can pick any one you like.Once you have installed and activated the plugin, find the plugin settings on your list of Installed Plugins and find the Map Editor to create a map.
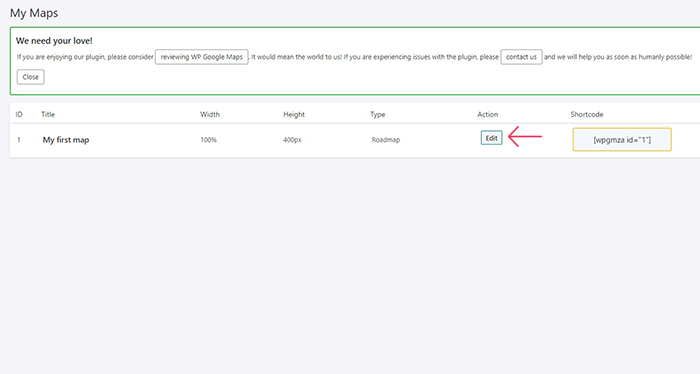
Once there, you will find the single editable map the plugin allows you. You will need to Edit it.
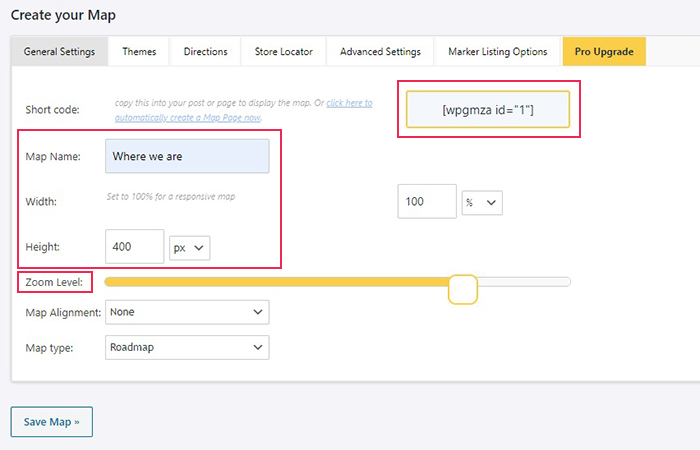
You can change the Map Name, as we have, to Where we are. We will also move the Zoom Level control quite a bit to the right, zooming in to make our map useful for people seeking directions. We will not be using the remainder of the options for the purposes of this demonstration, but we will draw your attention to the Width control. If you want your map to be responsive, you ought to leave it at 100%.
Next, we will scroll down to the Your Markers section and delete the default marker. You can do that by selecting it from the menu and clicking the dustbin icon. Then we will set up our own marker centered on Bridge Street in Saint Matthews, South Carolina by finding the location and right-clicking the map. Finally, we will Save both our Marker and our Map, in that order.
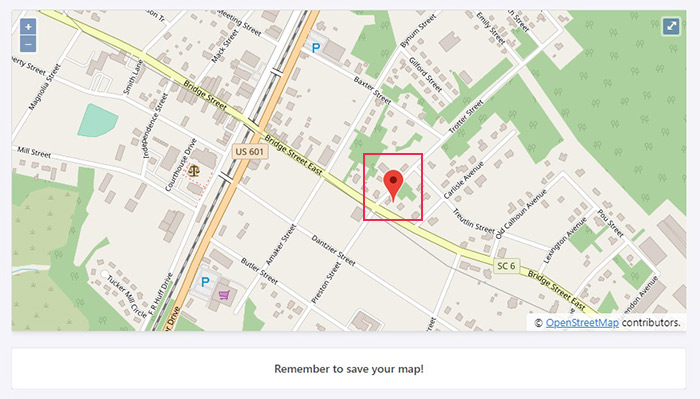
Scrolling back up to the Create your map section again, you will find the shortcode for your map in the General Settings tab. Click to copy it to your clipboard and use it in a post.
Once you have your shortcode ready to paste, open a post or page in which you wish to embed your map. We will show you how to do it in a post, using Gutenberg. First, click the + sign to add a shortcode block, and then paste your map shortcode into the block’s field.
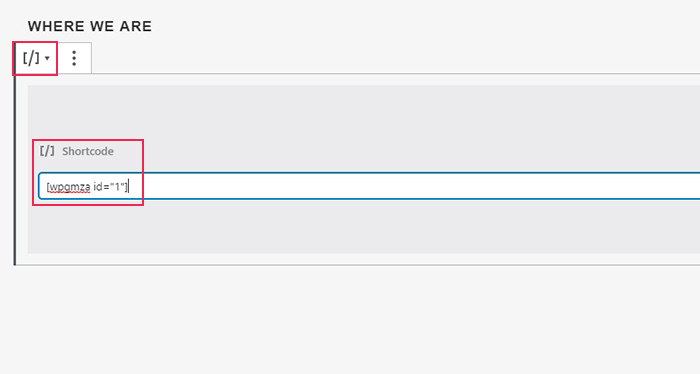
And your map will appear in your post, as configured.
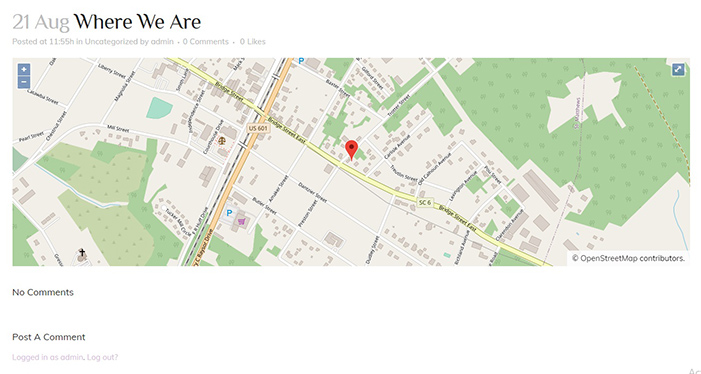
Note that the WP Google Maps plugin has a multitude of options we have barely touched upon in this demonstration, which we encourage you to explore in order to fully customize your map according to your needs. The same, and even more, goes for the Pro version.
In Conclusion
If you want to let your visitors know where you are in the physical world, you can do that easily by adding an interactive map to your website using either of the methods we have demonstrated. An interactive map will let them scroll around and zoom in order to find the best route to reach you, but with just a few clicks, you can make it even easier by pointing them in the right direction. If you have any kind of a brick-and-mortar location, why not make it super easy for your visitors to find it?


