How to Create Printable WordPress Posts

Despite the process of digitalization occurring on a global scale, copious amounts of people still prefer reading on paper. This is also one of the reasons why many internet users end up printing some of the posts they find interesting on the web. For example, if you have a cooking blog, users may find it handy to print out a recipe you shared. They may also be inclined to do the same with various step-to-step guides, help articles, and any other well-written pieces of content so they can preserve them in a physical form. Therefore, regardless of the type of blog you own, there will undoubtedly be those who will want to print certain articles that you post – which is why you might want to consider creating printable WordPress posts on your blog.
Now, WordPress and many of the WordPress themes will allow your visitors to print the entire page as it is – logos, sidebar content and other parts of the site design included. But that’s not what the users want, not to mention it can result needlessly using up the entire printer ink.
To prevent this from happening, you should provide your users with a printer-friendly option. This time around, we’ll show you how to create printable WordPress posts using two different plugins.
Here’s what we’ll cover:
While some WordPress themes do come with a separate CSS stylesheet that users can use for printing your posts, many themes only allow you to print them in their original state. In these cases, a printer-friendly option can definitely come in handy, since it helps users avoid printing unnecessary graphics, text, colors, and navigational elements that may be located in your website’s sidebars. These website elements will only put unnecessary load on their printer device, and can often appear to be too much to look at in a printed format.
To check how your WordPress theme deals with printing, go to any page of your website and simply press CTRL+P. If your browser shows the print preview identical to how your page is shown in your browser, then you might want to look into adding a printer-friendly option to your WordPress site.
Without further ado, we present you two different plugins for adding a printable option to your WordPress posts. The first of the two plugins contains a detailed range of options and allows you to add modern-looking buttons for print, eBook and PDF formats (with each format having its own options). On the other hand, the second plugin comes with a more modest number of print options, allowing the use of a standard print format and letting you choose between two print icons. As such, it’s a lightweight and quick solution for most needs.
Blog & Magazine Themes
View Collection


Print My Blog is a handy WordPress plugin that will help make the printing of your blog easy and impressive for your visitors.
First things first, you should install the plugin and activate it in your WordPress dashboard. Then, go to Print My Blog >> Settings.
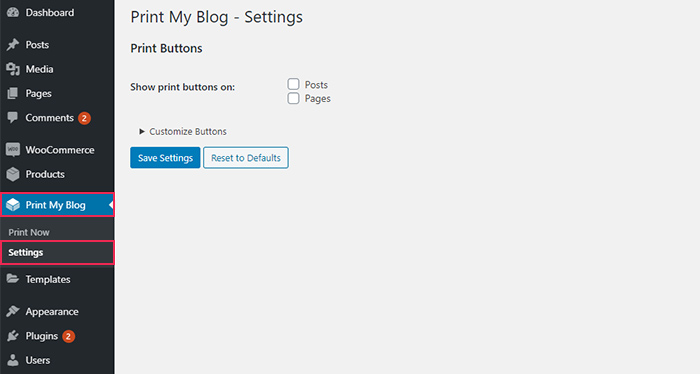
The first two options that will appear allow you to determine whether you want to show print buttons on pages and/or posts.
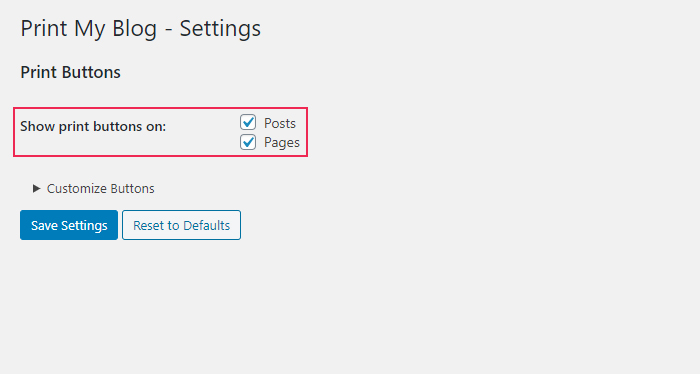
After you determine these options, click on the link called Customize Buttons. This will reveal a new set of options that will allow you to customize different print formats: Print, PDF, and eBook.
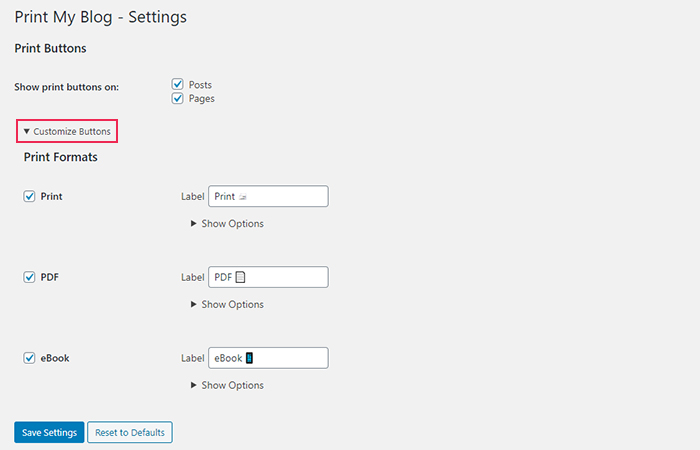
Moreover, there’s a Show Options button available under each format. Clicking on this button opens a dropdown with additional options for each one of these formats.
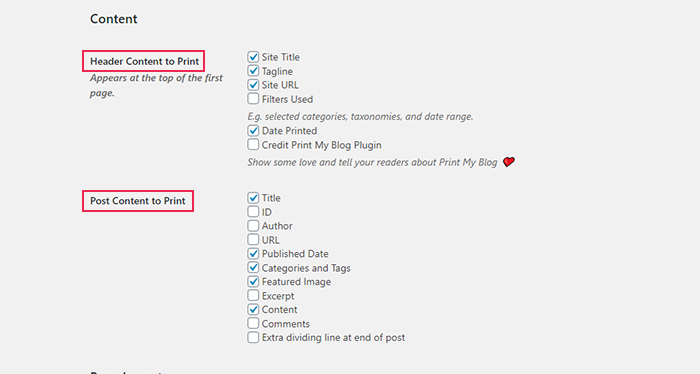
The Content section offers you to choose which header content elements will be printed (Site Title, Tagline, Site URL and so on), and you also get to choose the same for post content elements (i.e. title ID, author, published date, featured image, and so on).
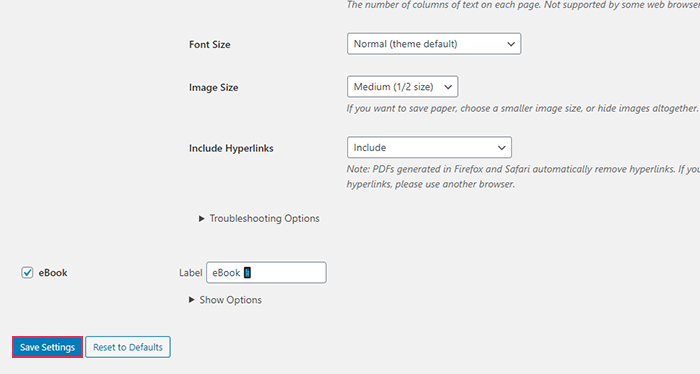
The Page Layout section offers you to choose whether you want each post to start on a new page, set the number of columns of text on each page, determine the font and image size, and more.

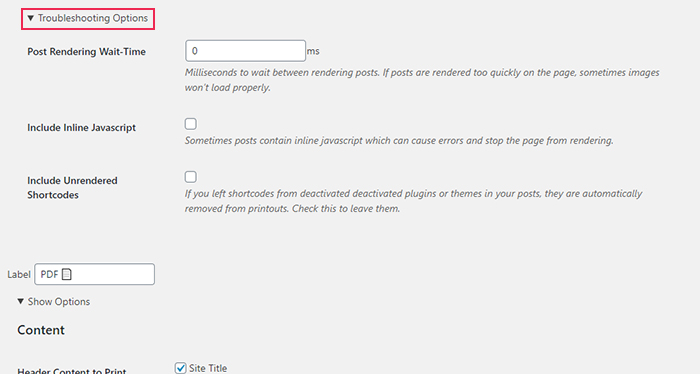
Last but not least, clicking the Troubleshooting Options button reveals one final hidden section. Here, you will see the option that allows you to set post rendering wait time, i.e. the number of milliseconds to wait between rendering posts. This is particularly useful because it can prevent images from not loading properly. Additionally, you can also choose to include (or exclude) inline Javascript and unrendered shortcodes to avoid running into any additional page rendering issues.
Once you’re done, make sure to hit the Save Settings button for the changes to take effect.
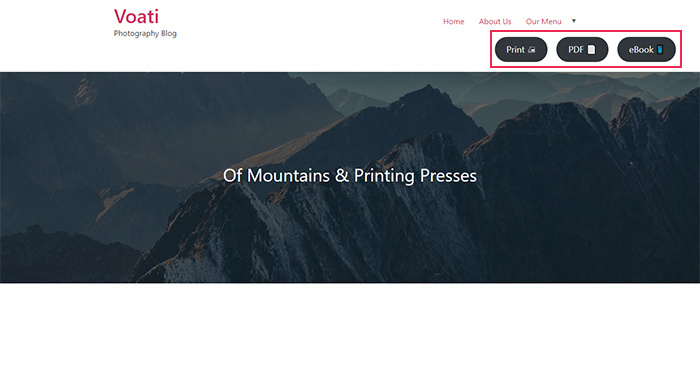
Once you save your settings, the plugin will prompt you to go ahead and preview the changes in your latest post. You will be able to see the printing buttons that you enabled in the settings.
Another way you can add a print option to your WordPress blog is with a WP-Print plugin.

After installing and activating the plugin, go to Settings >> Print. Here, you will get access to the plugin’s settings.
The Print Styles section gives you the ability to specify the name of the print text links for both pages and posts, lets you pick the look of your print icon, and choose the print text link style.
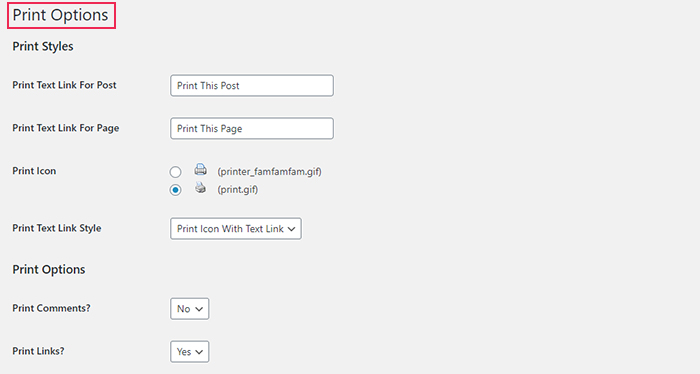
You also get to set specific types of content you wish to print, including comments, links, images, thumbnails, and videos. Plus, you will be able to insert a disclaimer/copyright text (it will display your website’s name by default).
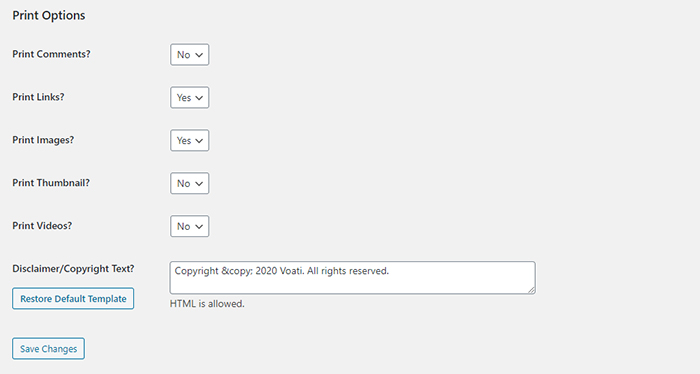
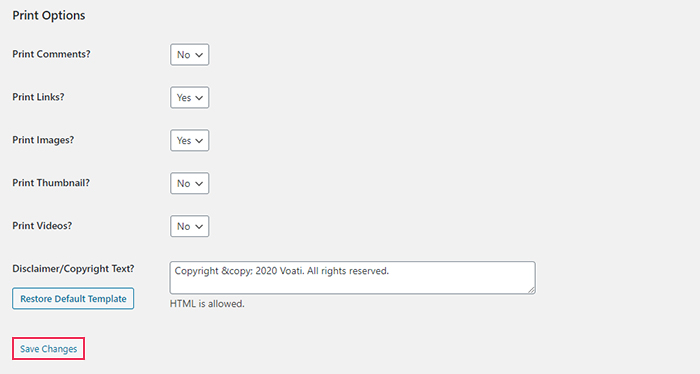
Finally, make sure to save your changes once you’re done with configuring all the settings.
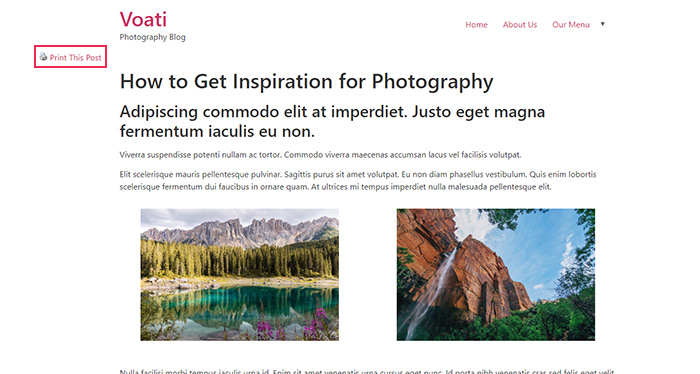
After you’re done, you have to insert a line of code into your WordPress theme files for the plugin to add the print button to your WordPress posts. The place where you will add your code varies from theme to theme. You can access Appearance >> Theme Editor, and then add it into files like page.php, archive.php, single.php, content.php, and so on.
First, you should find the following line in your theme template:
<?php while (have_posts()) : the_post(); ?>
Then, you should enter this code right below:
<?php if(function_exists('wp_print')) { print_link(); } ?>
And you’re all set. All that’s left for you to do is to go ahead and preview the look of your print button on one of your posts.
Conclusion
Regardless of the type of WordPress website or blog that you own, we recommend that you indulge your audience and provide them with the option to print your posts in a printer-friendly format. This subtle, but thoughtful gesture can prove to be extremely convenient to your readers, and it may even encourage them to preserve your articles, no matter if they opt for a physical print, an eBook format, or a downloadable PDF version.
Whether you go for the plugin with more basic printing options or the one that offers a wider range of features, one of them is bound to help you out. Just make sure to take a look at what each of these plugins has to offer before you choose the one that suits your preferences.
