What is an Alert Bar and How to Create One in WordPress

An alert bar is a great way of notifying your visitors of items needing their urgent attention. This could be anything, from breaking news to special offers and promotions. You can find uses for this function regardless of the kind of website you are running or designing, and there is no shortage of solutions.
In this article, we will discuss how to create an alert bar in WordPress, but also in which situations you may find an alert bar useful for yourself and helpful to your users. If you are unsure what a WordPress alert bar is or whether your WordPress website needs it at all, read through the following sections. If you want to get down to the brass tacks, go immediately to our how-to.
Qode Themes: Top Picks
View Collection


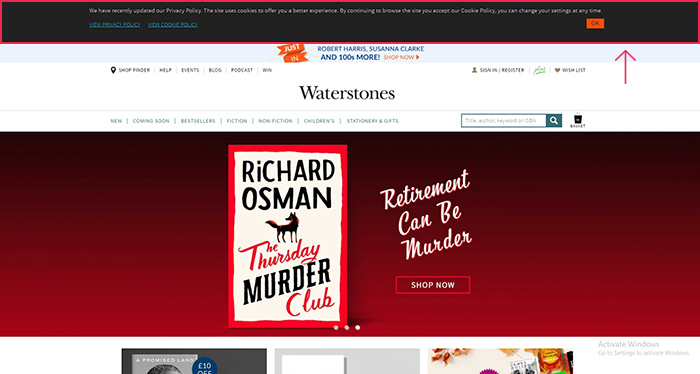
An alert bar is a thin band or banner which stretches across a website without blocking its content. It is typically situated at the top of the page, and might consist of text, hyperlinks, call-to-action buttons, and a hide or close button. On mobile devices, it is most often located at the bottom of the page, within easy reach of the user’s thumb.
It may well be the first thing a visitor sees, and, if used, deserves your special attention.
If you need to let your visitors know about something important, something requiring their undivided attention, an alert bar is a great tool.
For instance, you may have an important update to the way in which you interact with your users every day. You could be introducing a new service, changing your office hours, changing your street address or opening a new brick-and-mortar location. You could also be changing your terms and conditions, in which case you really need to make sure that you have done all you can to notify your visitors in advance. You might be using cookies. An alert bar is a good way of advising your visitors of that.
You want to avoid your visitors being unpleasantly surprised. Of course, you may use it as a greeting to new users, and supply it with a link to your website’s help or FAQ section.
If you are running any kind of a news website, be it general or specialized (for sports, games, or local), chances are a hugely newsworthy event is going to come up at one point or another and your visitors may rush to you for more information. You can deliver them the big news using an alert bar – also useful for important service information and local emergencies (weather warnings, traffic jams and the like). Do you have serialized content on your website, such as video or podcasts? You can use an alert bar to alert your visitors to a new episode.
It is, of course, obvious why a webstore could benefit from advertising time-limited or one-time offers, special discounts, and promotions. There is no reason why you shouldn‘t make use of the alert bar to inform your users of a deal they‘d be sorry to miss, in the same way you use your website‘s e-commerce functionalities to feature a product.
In each and every one of these above cases, you want to be sure you did all you could to alert your visitors of something you really think they shouldn‘t miss. The important thing to have in mind, of course, is not to overuse it. Alerts particularly suffer from the law of diminishing returns. They need to register with your users as unusual, as extraordinary, or they will simply stop working.
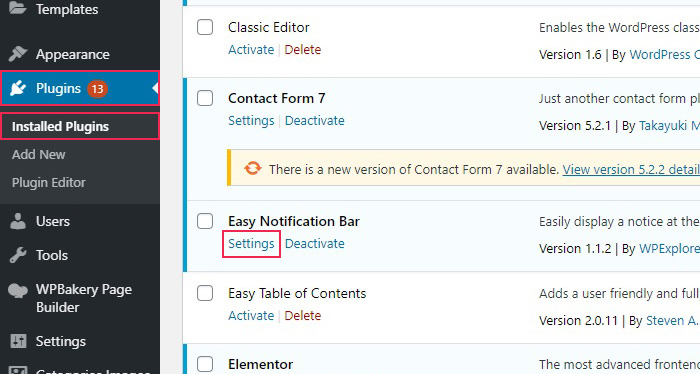
The plugin we will be using is the Easy Notification Bar plugin. Note that this plugin requires WordPress 5.2.0 or newer to work. In any case, we suggest you always use the latest stable version of WordPress and to check regularly whether each plugin you use is compatible with it.
Once you have installed and activated the plugin, you need to find it on your Installed Plugins screen and click on the Settings.
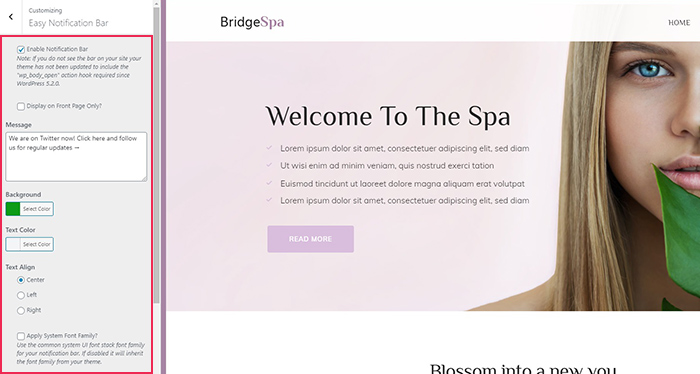
The Easy Notification Bar takes next to no time to configure. You will find all the configuration options on the left-hand side. You can also see the preview on the right.
The first checkbox is used to Enable the Notification Bar and it is left checked by default. The next checkbox enables you to display your alert bar on the Front Page Only. We want our alert bar to be visible from anywhere on the website, but you can check this if you feel the alert bar to be too obtrusive.
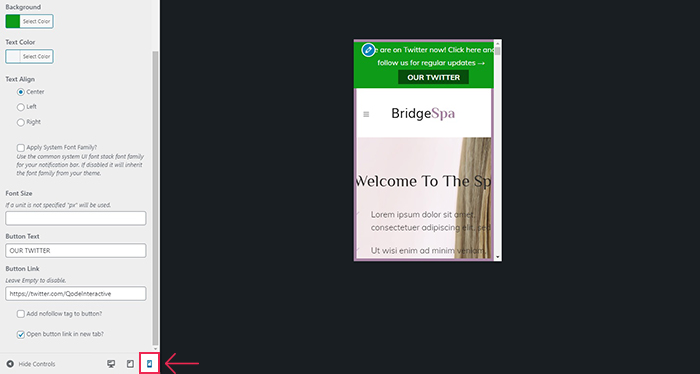
The Message box is where you enter your text. For the sake of this demonstration, we will pretend we have just started a new Twitter account. We will therefore change the default text to: We are on Twitter now! Click here and follow us for regular updates →. The arrow will point to the link to our Twitter account once we‘re done.
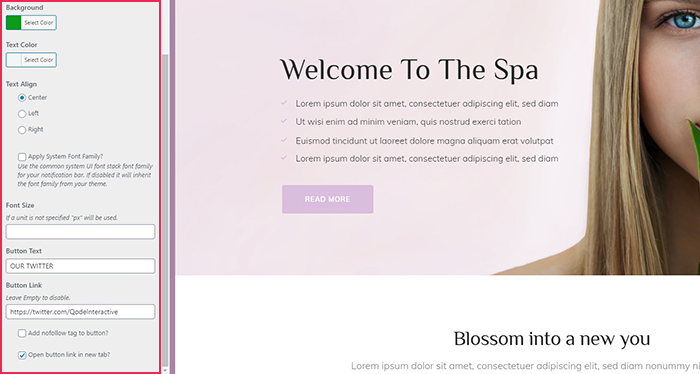
We will also switch up the Background Color the better to stand up against our websites colour scheme. We will use a dark green (#0E9B18). The white text clearly stands out, so we will not be changing the Text Color.
You can choose to Align Text however you like: Center, Left, or Right. We will leave it in the center. The checkbox immediately below concerns the use of the System font family in your alert bar. We will leave it unchecked, as it will then inherit the font from our theme. We want the alert bar to stand out from, but not to clash with the rest of the website.
Scrolling down, we see a Font Size field. We will leave it blank, meaning it will stick to the default values of our text size for the website (we like our theme just the way it is), but you can change it to whatever you feel will look good for your website.
The Button Text is what will appear as the hypertext for your button. Ours will simply read OUR TWITTER. The Button Link field, obviously, is where you paste the link you want, if you are using it. If this field is left blank, your button will not appear – useful if you are only using the alert bar for notifications, rather than to link to somewhere.
Next, the two checkboxes at the bottom are there if you want to Add a nofollow tag to your link (the nofollow tag can be useful for SEO in certain cases, but we will leave it unchecked), and the Open button link in new tab button, which we will check. We would like to gain more Twitter followers, but we don‘t want visitors to navigate away from our website.
Finally, you can use the device controls to see what your alert bar will look like on tablet or mobile.
Once you are satisfied, you need to scroll all the way up to the top of the plugin‘s setting menu and Publish the bar. And, just like that, your WordPress alert bar is ready.
In Conclusion
As you have seen, setting up an alert bar is not difficult, doesn’t take a lot of time, and need not cost any money. If your website’s content or your services could benefit from this added functionality, there’s no reason not to use it. In fact, we have only shown you the very basics. If you want to make your alert bar really pop, we suggest you try a premium plugin with a greater set of configuration options.
Just keep it concise and don’t overuse it – an alert is for the extraordinary, be it your own updates, important news, or special offers. Your visitors will appreciate it if you make this attention-grabbing feature worth their while. If it isn’t they will ignore it at best, or, more likely, find it annoying. And who wants that for their website?
