How to Add Watermark to Images in WordPress

Plagiarism has been a hot issue in our culture for decades now. On the one hand, we know that without “borrowing” or relying heavily on other people’s work we wouldn’t have some of the most exciting forms of human expression of the second half of the twentieth century, including rock and roll music and hip hop.
But on the other hand, we’ve seen blatant theft that’s led to multimillion-dollar lawsuits. We’ve seen people’s work appropriated without as much as a “thank you” — a practice that’s led to an increased interest in ways to watermark images in WordPress.
Because let’s face it, all the time you’ve spent meticulously creating a selection of your photos that works the best with the WordPress photography theme might cease looking like a good investment when you notice that people are just lifting your photos from your website and reusing them in a way you haven’t intended.
In this article, we’ll talk about watermarking images in WordPress, and we’ll explain to you:
When you place a watermark on an image you add a piece of text or image to it showing that the original image is your property, that you’re the person who created it, or that you are the copyright holder to it. Putting this kind of a stamp on your work can serve several purposes, including:
-
Theft prevention, since removing the watermark can be quite difficult and render the image unusable.
-
Promotion of your brand because it clearly shows who the author/owner of the images is.
-
A replacement for your signature — no reason why you couldn’t use a watermark as a signature.
You should note, however, that using watermarks isn’t a guarantee that your photos won’t appear on other websites without your permission. Watermarking might go some way to mitigate the risks of use without your permission, but we’re talking about the internet here. If someone wants to steal your photos, they will find a way.
You should also note that WordPress isn’t the only place where you can apply a watermark to your images — most image editing software will give you the option. However, if you’re not too keen on using image editing software just to add watermarks, if you don’t want to make permanent edits to photos, or if you simply want a way to automate watermarking of your images, the WordPress method we use would be a sound choice.
As usual, when trying to do something in WordPress, you can either use core functionalities or, in lack of those, turn to plugins. When it comes to adding watermarks to your images, you’ll have to rely on a plugin. One of the best ones around is the Easy Watermark WordPress plugin.

You can navigate to it from your website’s dashboard by going to Plugins > Add New and then typing the plugin’s name in the search bar. Install it as you usually install WordPress plugins and activate it. When done, your first step will be to create a watermark you’ll later apply to your images.
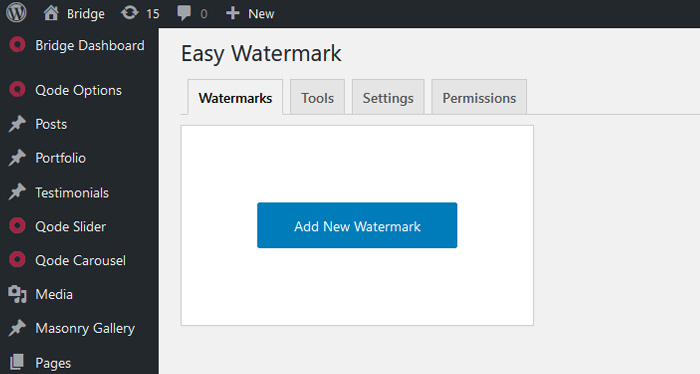
Head over to Tools > Easy Watermark. You’ll automatically navigate to the “Watermarks” tab and you’ll see a big blue button that says “Add New Watermark.” Pressing it is the first step towards creating watermarks you can later add to your photos.
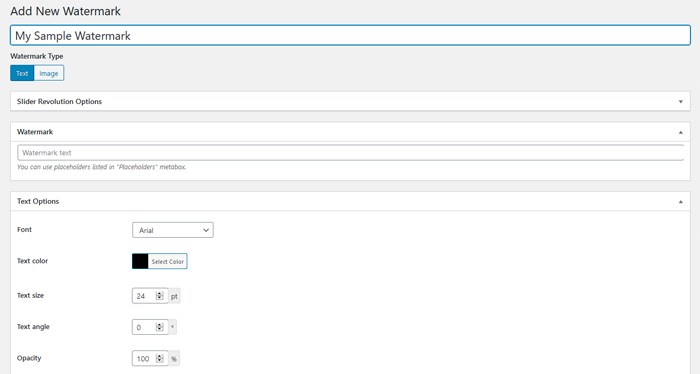
Right off the bat, you’ll get the option to name your watermark and to choose whether you want to use a text watermark or an image watermark. When you choose which type of watermark you want to use, you’ll see all the options and settings you can use to customize it. If you choose “Text,” the first options you’ll see are for adding the text and setting its font, color, size, angle, and most importantly, opacity.
When choosing “Image,” you won’t see the text options — you’ll only get to upload the image and then set its opacity if you use .gif and .jpg images.
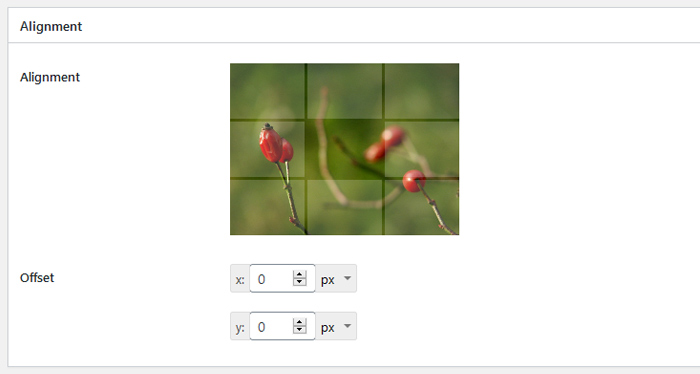
The next batch of settings deal with the alignment — they let you choose which part of your images will contain the watermark. The plugin divides your images into nine sections to help you choose, and you can also offset the text vertically and horizontally.
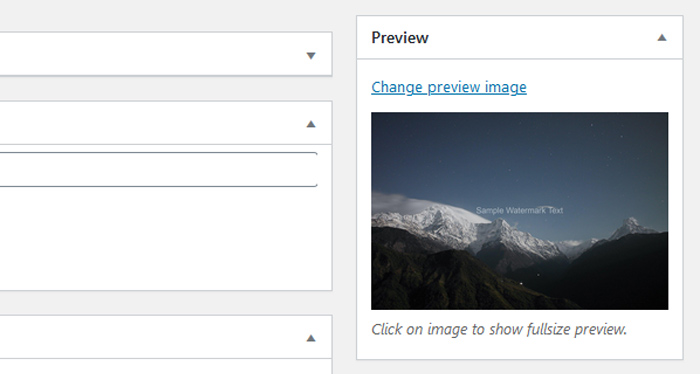
Easy Watermark plugin lets you preview the changes in real-time. On the right-hand side of the screen, you’ll notice a “Preview” tab you can use to set a preview image. When you do, any change you make to the settings will automatically appear on that image.
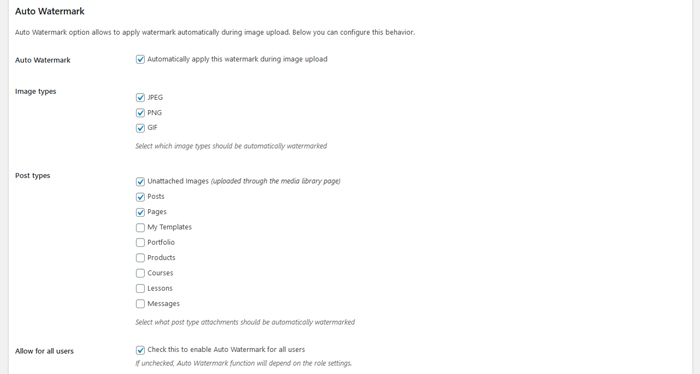
Finally, you’ll have the “Applying Rules” section of the setup. This is where you choose which image sizes you want the watermark to apply to, but also whether you want the watermark to automatically apply to images as you upload them, which image and post types you can to apply the watermark to, and whether you want all users to access to the Auto Watermark feature.
When you’re happy with the watermark and the settings you’ve chosen, you can go ahead and click on the “Save” button in the upper right corner. With that, you’ve created a watermark and you’re ready to apply it to your images. Before you do, however, stop by Tools > Easy Watermarks > Settings, and make sure you have “Backup” enabled. You want to be able to reverse any watermarking changes you create.


With your watermark ready, you have no less than four options to apply it to your images. The first one, automatic application with every new image upload, is something you can set when creating the watermark. It can come in handy if you’re sure you’ll want to use only that one watermark. If not, you can leave that box unchecked and use another method. You’ll also need to rely on those other methods if you want to watermark images that are already in your media library.
Watermark Your Whole Media Library
If you want to use the same watermark on every image you have in your Media Library, the Easy Watermark will let you do it in a few steps. First, you need to head over to Tools > Easy Watermark, and then choose the “Tools” tab.
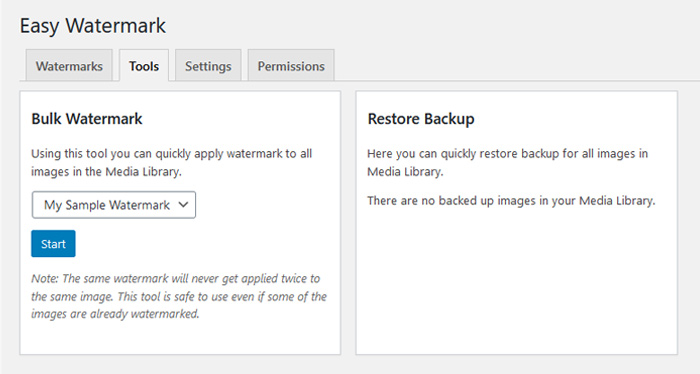
After choosing the watermark you want to use in the Bulk Watermark window, pressing the “Start” button will start applying the watermark to all the images in your library. If you want to restore the changes, you’ll be able to do so via the Restore Backup option — another reason to make sure you’ve enabled backup in the Settings tab of the plugin options.
Watermark Select Files in the Media Library
If you want to apply a watermark selectively to some of the files you have in your Media Library, you should navigate the library and click on the “Bulk Select” button. This will let you select the images you want to watermark, but also bring up the “Watermark Selected” button.
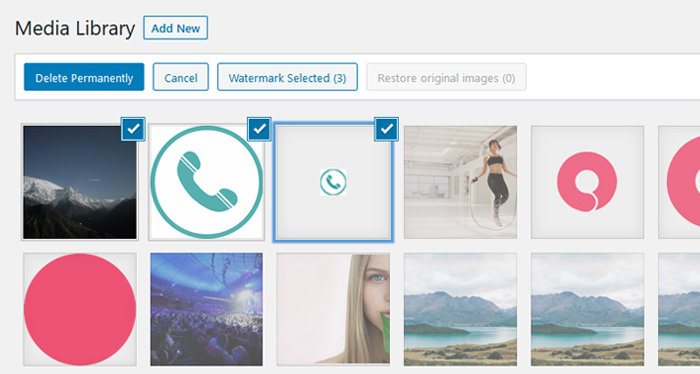
Pressing the button will watermark the files you selected. When you want to remove the watermark from them, simply select them again and press the “Restore original images” button.
Watermark Individual Images
When you want to watermark only one image, you should find it in the media library and click on it to see it in the Attachment Details window. To access the watermarking options, you need to press the “Edit more details” link in the bottom right-hand corner.

Doing so will bring you to the window where you’ll see watermark options on the right-hand side of the screen. You’ll see which watermarks you have at your disposal, and you’ll be able to apply them right then and there.
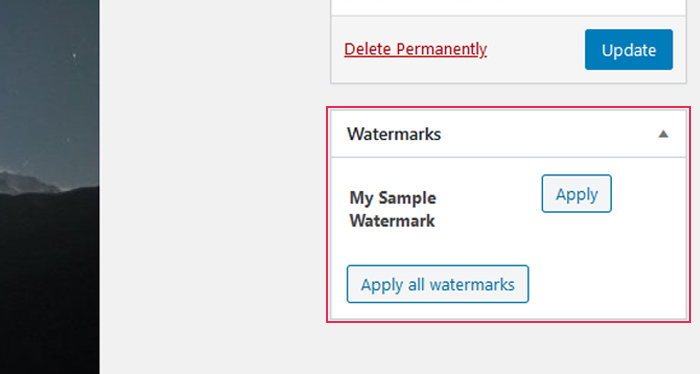
If you choose an image that already has a watermark you applied using the Easy Watermark plugin, the same tab will present you with the option to restore the original image.
Let’s Wrap It Up!
Adding watermarks to your photos is one of the few defenses you have against online image theft. And if you’re on the other side of the aisle and you don’t think that watermarks do that much to prevent people from stealing your photos, you can still use them to add a signature. Watermarks can be versatile, and you can use them as much as you’d want, but always make sure that they don’t end up ruining your photos and making them unenjoyable.
