How to Track Your Website’s Video Views in Google Analytics

Most websites which include video as part of their content host video externally and embed it as part of their post or page content, possibly as a latest YouTube videos feature or in some other way. Similarly, most website operators or admins use analytics tools, including, specifically, Google Analytics, to track user behavior and assess the effectiveness of their efforts. But does Google Analytics track video views automatically? The answer, as you might suspect, is no.
Typically, Google Analytics tracks page views rather than video plays, and that goes for several other user behaviors. In this tutorial, we will be showing you how to use Google Tag Manager to see which of your videos are actually getting played. We won’t be explaining Google Tag Manager in any great detail, though – if you want to know more, do consult the linked article.
We will engage in some discussion on what Google Analytics actually tracks and where you can find this data, as well as briefly mention the prerequisites for setting up Google Analytics to track video views. If you feel you already know the basics, feel free to scroll right down to the main tutorial section. Here’s what we’ll be talking about:
In this article, we will be using some Google products to interact with other Google products. To use them, you need to have a Google account.
This may be obvious to all but the most inexperienced users, the next thing you need to do is set up Google Analytics for your website. Setting up Google Analytics merits its own attention, and we strongly advise consulting the linked article if you haven’t set up Google Analytics already or if you are not sure you’ve set it up well.
Finally, you need to set up Google Tag Manager. We have linked our article on how that’s done in the introduction to this article.
Once you have done all of the above, you may begin tracking video views.
In order to start tracking video views, you need to configure the requisite tracking variables in Google Tag Manager. To do so, select Variables from the left hand-side menu.
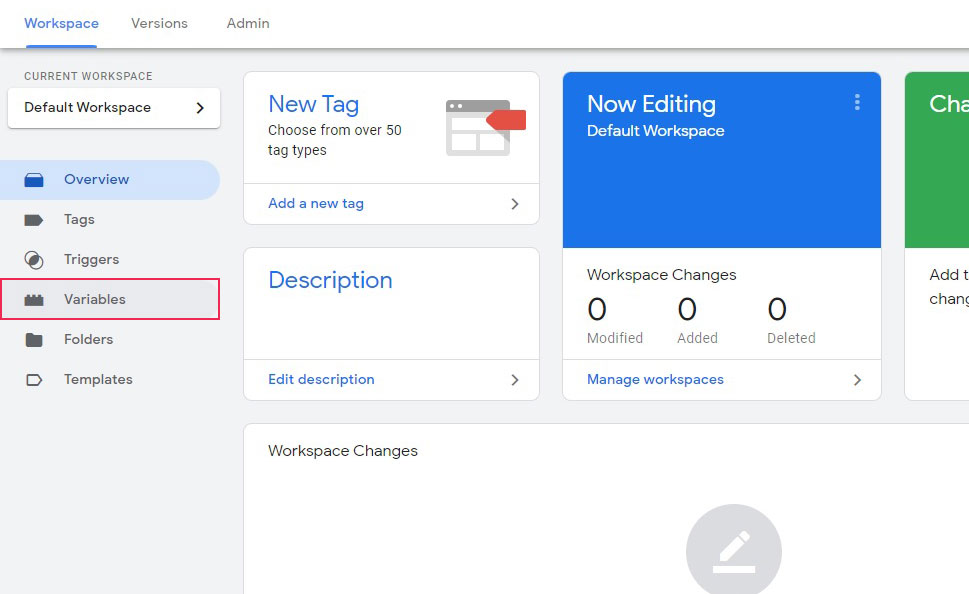
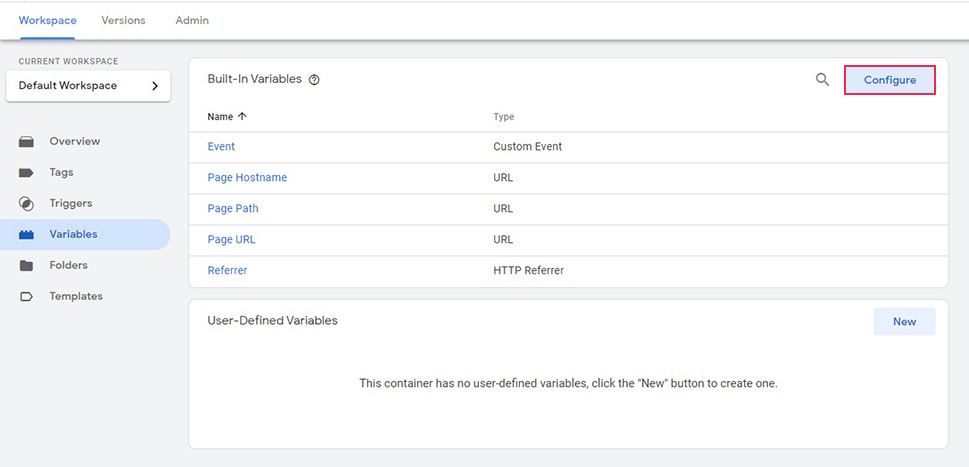
Once there, click the Configure button.
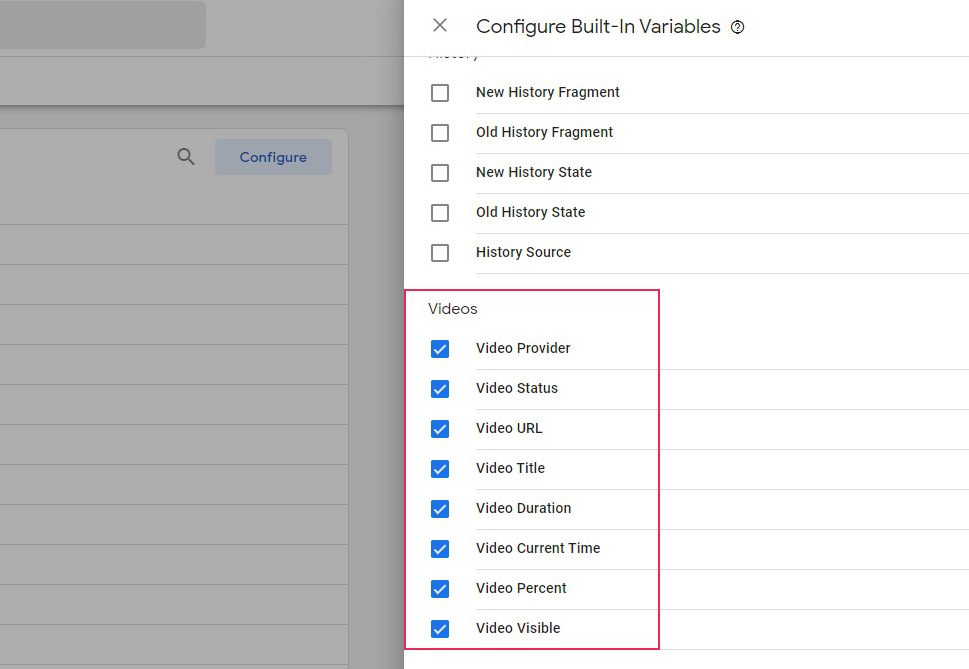
Scroll down the right hand-side menu until you find the Videos section and check all the variables. Google Tag Manager will now let you create the requisite triggers.
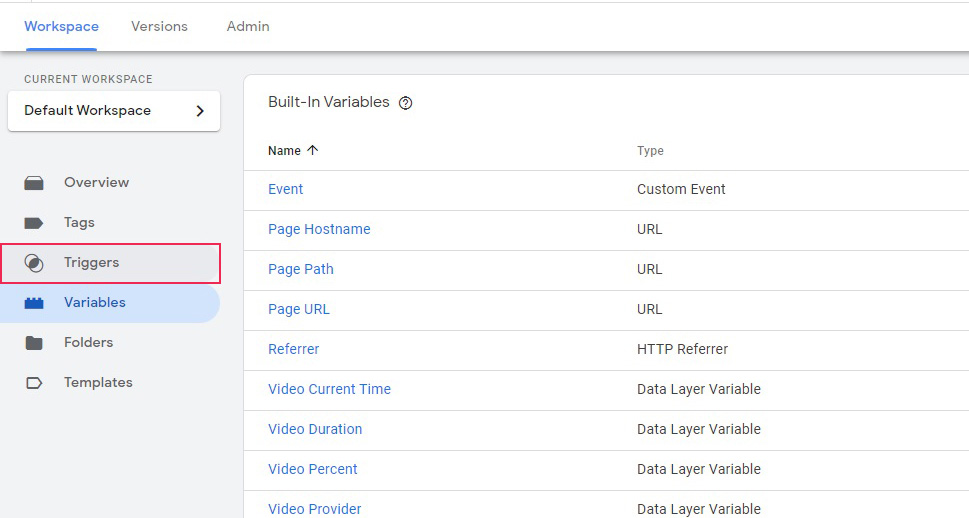
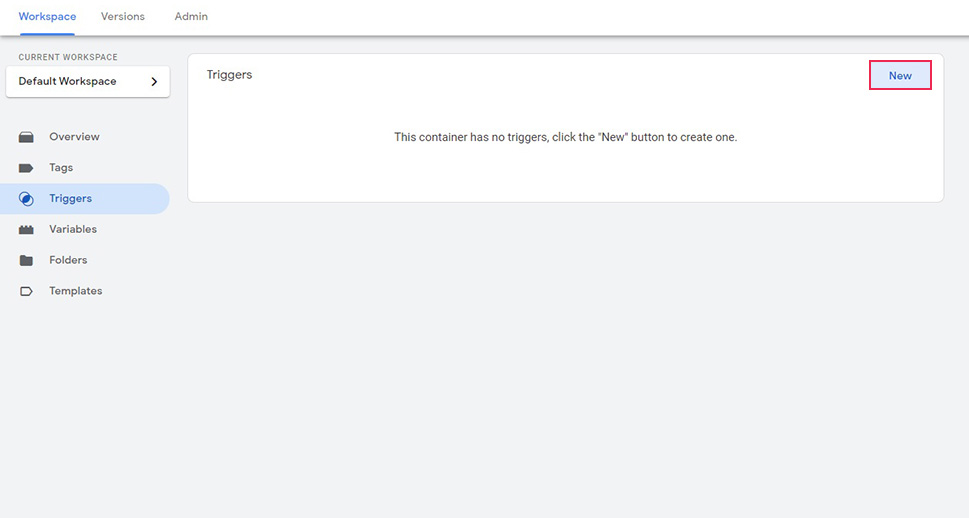
After having enabled the video variables, you need to add a YouTube video trigger to your Google Tag Manager workspace (or main screen). As you might expect, you can do that from the Triggers section of your workspace.
To add a new trigger, click the New button.
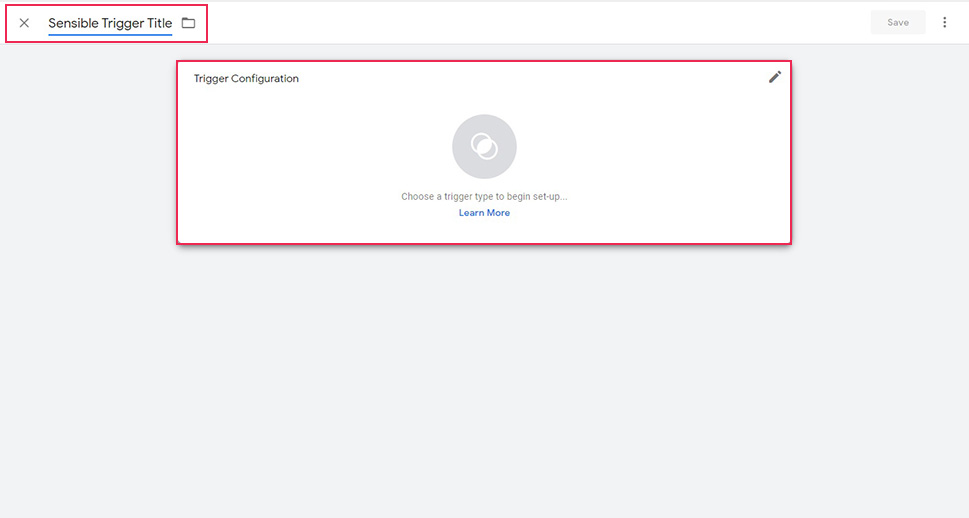
You need to give your trigger a name. Make it make sense to you, as you and your staff will need it in the future. Once you have done that, click the Trigger Configuration box.
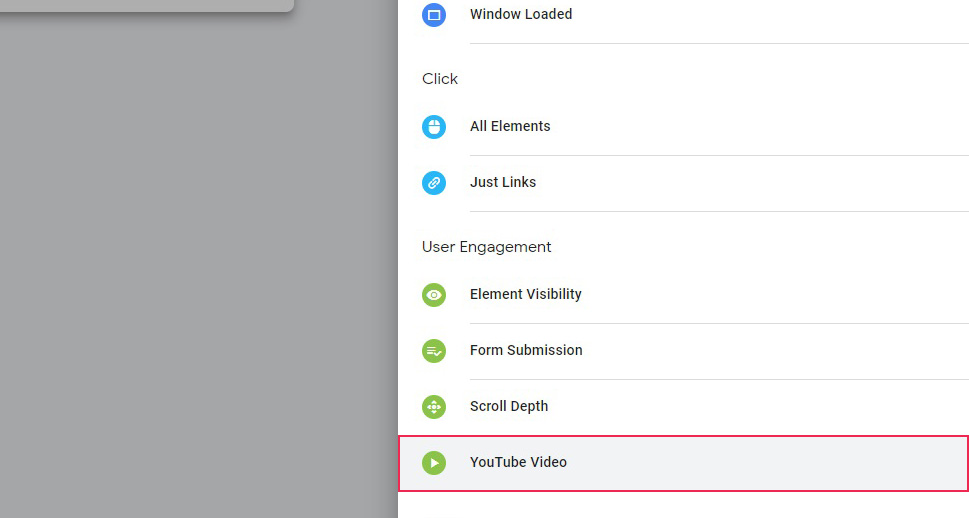
Select the YouTube Video trigger type from the right hand-side menu.
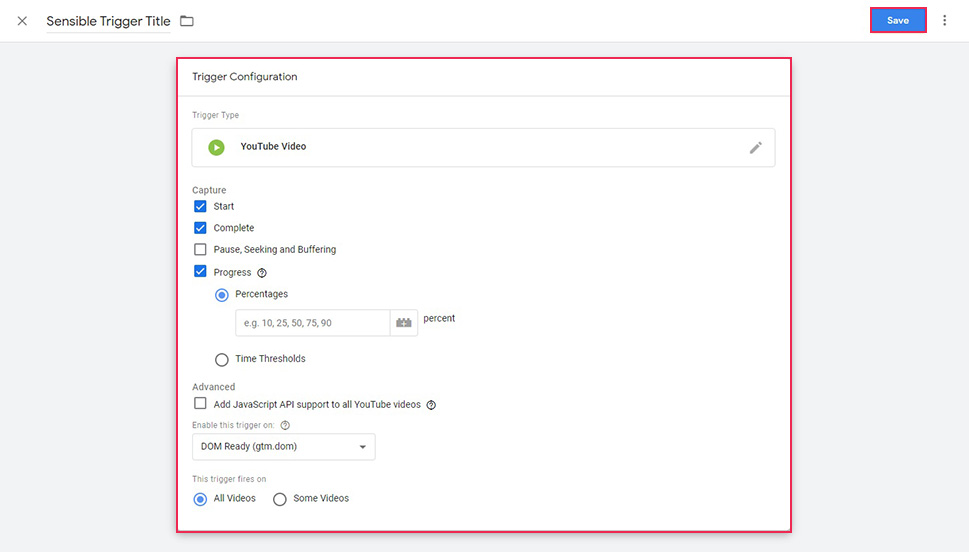
Here, you can configure the trigger to your preference. All these controls are based on various states of the video, and, conversely, various behaviors of the user. You can set the trigger to fire on video Start, once a video is Complete, for each Pause, Seeking and Buffering, as well as various stages of Progress of the video, in a comma separated value format, expressed as percentage milestones or time thresholds.
The single Advanced option is to Add JavaScript API to your YouTube videos, which has to do with how a video is embedded (that is, whether an API is used or not). It is of no consequence for our purposes.
The Enable this trigger on: drop-down menu can be set to Container Load, DOM Ready, and Window Load. This governs when exactly the trigger is fired, in order: once the page is loaded, once the video is parsed, or after all other page content is loaded. We will leave it on its default value: DOM Ready.
Finally, you can set the trigger to fire for All Videos or Some Videos, where the latter option will let you set up multiple other parameters.
Once you are happy with your trigger, you need to click the Save button.
Next, to actually employ the trigger, you need to use it as part of a tag.
Entirely predictably, tags are created in the Tags section of your workspace.
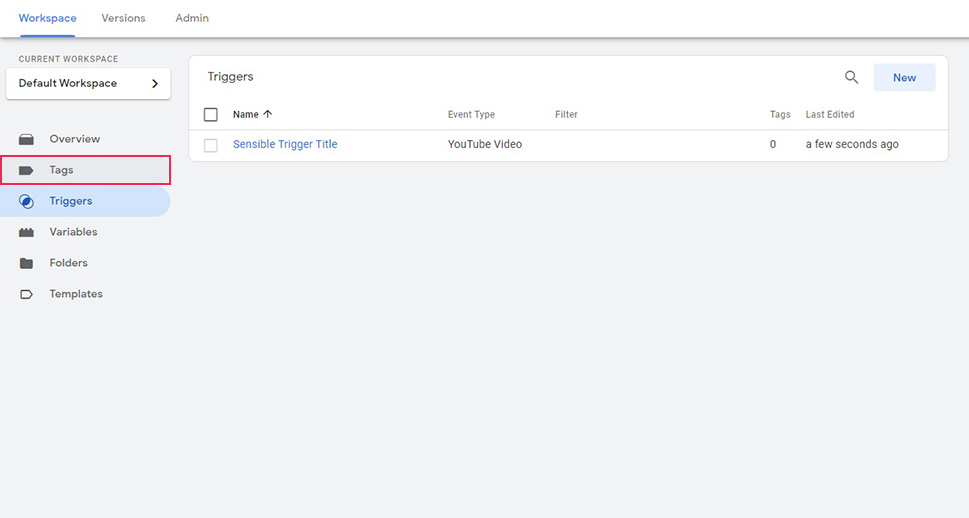
To start creating a new tag, click the New button.
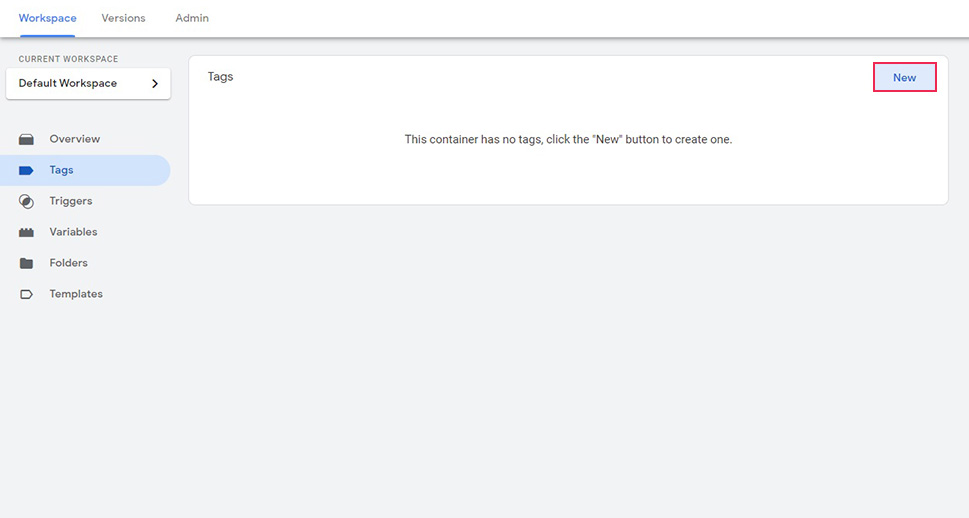
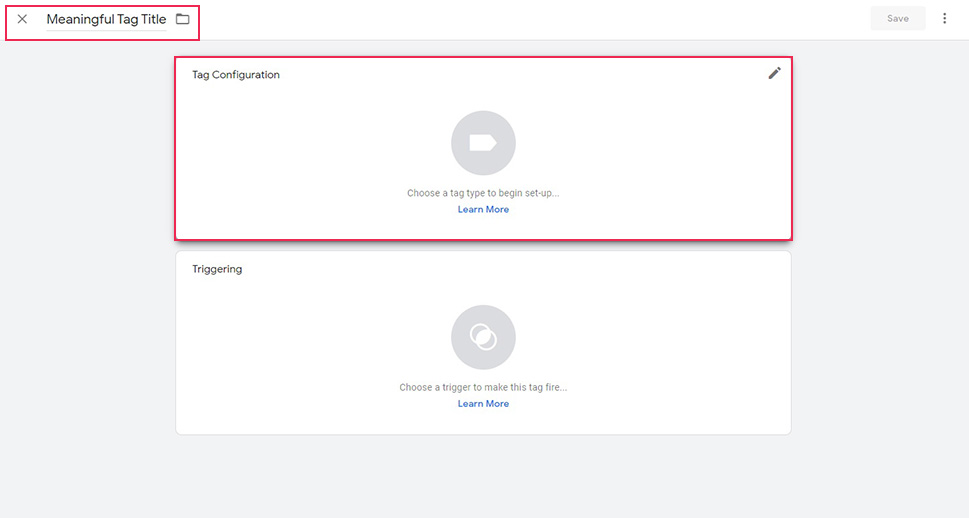
A tag has a title, which, again, should be sensible and meaningful: a person should be able to discern what the tag is for. It also has two parts: the Tag Configuration and Triggering.
To start configuring the tag, click the Tag Configuration box.
Select Google Analytics: Universal Analytics from the right hand-side menu.
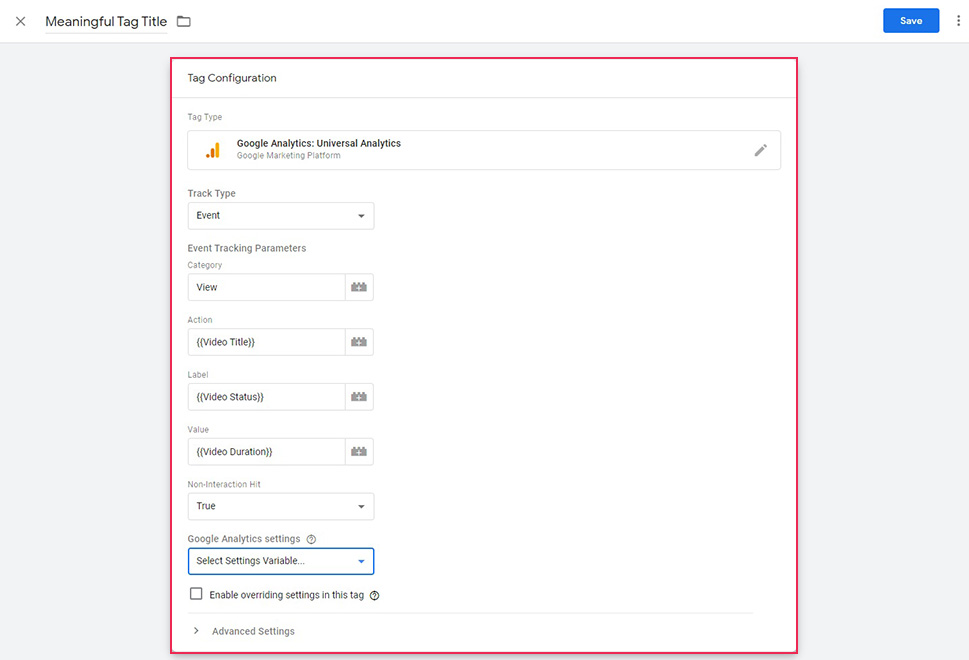
Select Event from the Track Type drop-down menu, and set the parameters. You can give the Category whatever name you like (we went with View, as we want to track views), and you can select the other variables using the block icons. You will note that these correspond to the variables configured in the first section of this tutorial. Of course, you can select which variables of any video you want to track.
We suggest you set the Non-Interaction Hit drop-down menu to True. That way, your video views will not be counted as bounces if the visit does not contain any other interactions.
Finally, you need to check the Enable overriding settings in this tag and add your Tracking ID. If you are not sure how to find your tracking ID, hover over the ? Icon and follow the instructions on the screen.
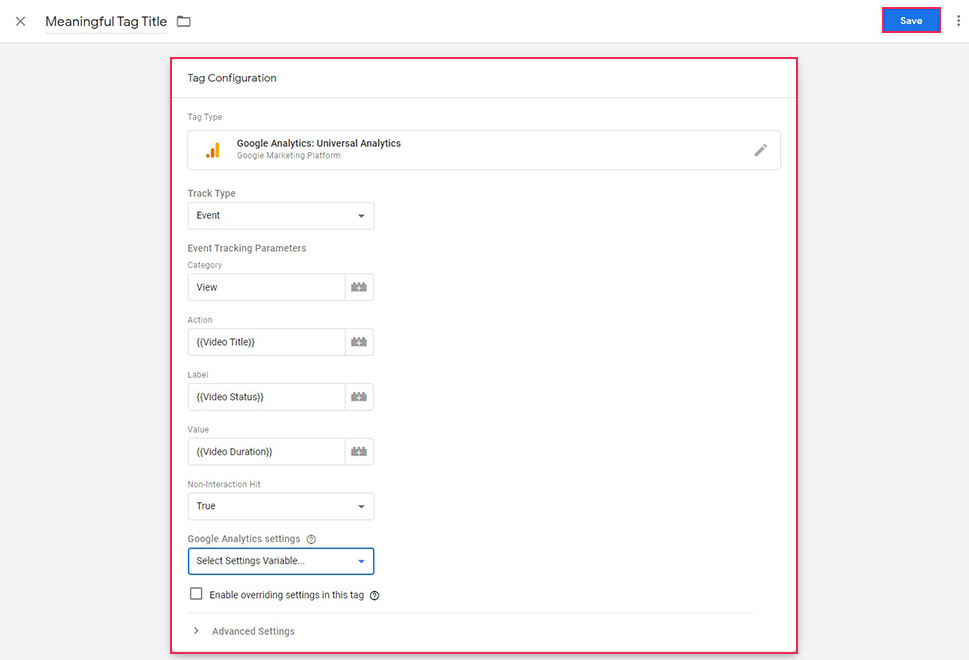
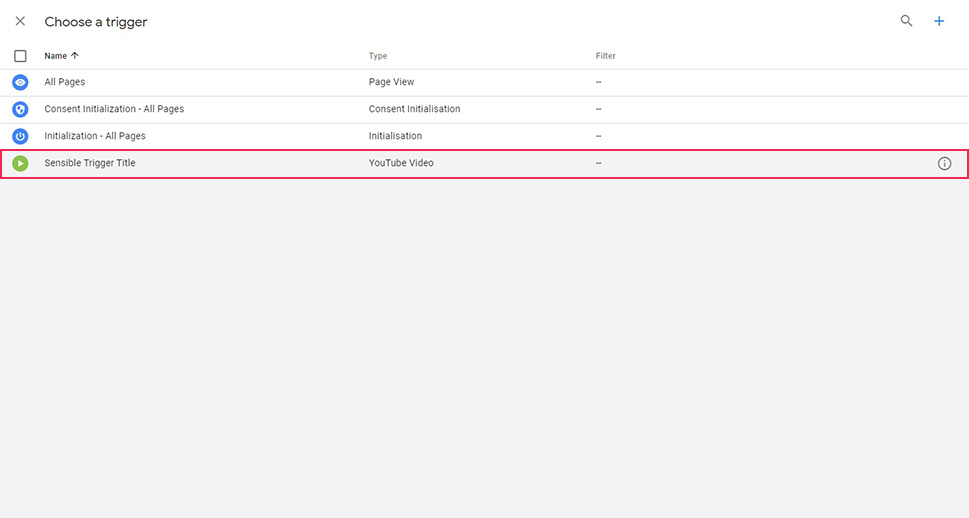
Next, click on the Triggering box to select your trigger. Choose the trigger you created in the previous section. Finally, click the Save button.
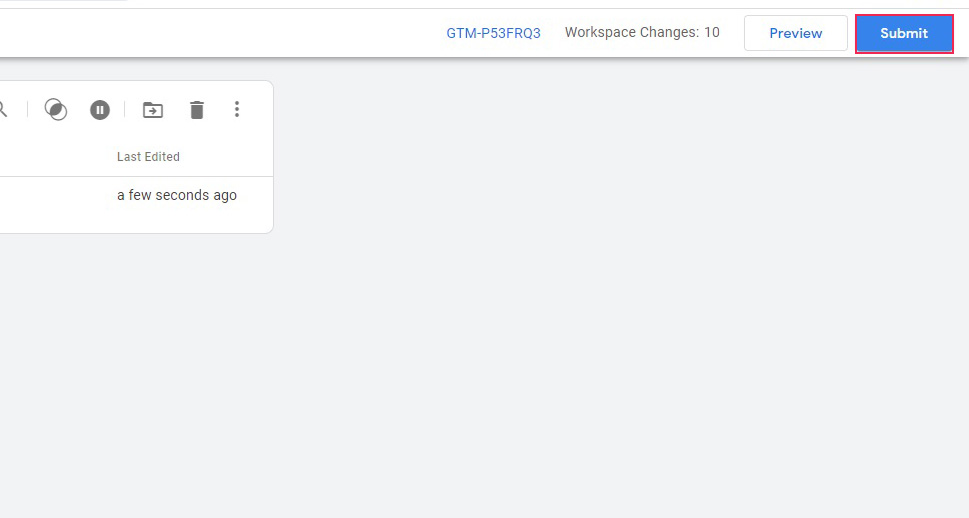
Once you have done that, all you need to do is click the Submit button and data about your video views will start trickling in as configured.
In Conclusion
As you can see, a lot can be inferred from the data volunteered to Google’s services by you and your website visitors. With just a few simple settings, you can track video-related behaviors of your visitors and see how effective they are. How many of your visitors actually play your videos, how many watch them and how much (Halfway? All the way through?), and how many just click away from the page.
Video is expensive to produce. With Google Analytics, you can see whether it pays for you or not.


