How to Replace Image and Media Files in WordPress

The visual quality of a website largely decides its destiny. Whatever the type of website you are running, chances are you will be dealing with lots of images and other media files in WordPress. And keeping your website fresh and relevant implies that you will often have to change and update its content – images and media files.
While WordPress generally is a very user-friendly platform, you may have noticed that replacing images and media files is not as smooth and easy as some other tasks are. Whenever you have to change an image or media file in WordPress, you have to change it on each page/post that contains it – and that may imply a lot of time-consuming work. Otherwise, you will end up with many pages missing the images and that certainly is not a good visual experience.
Luckily, there’s a straightforward solution, an easy-to-use plugin, that saves a lot of time and energy while leaving you more room to be creative and focus on other important aspects of running a website. Before we show you how easy it can be to manage images and media files with the right plugin, let’s just remind you of a few situations when having a plugin for this purpose can be useful.
Qode Themes: Top Picks
View Collection


Why Do I Need Image and Media Files Replacement in WordPress
Let us remind you of some situations in which you may find yourself wishing you had a quicker solution for replacing image and media files.
-
If you are running an online shop, you have to deal with an exceptionally large number of product images and it is essential to be able to manage, replace and update them efficiently.
-
If your website features a lot of images and media files, you often need to change a file’s content while preserving the links and the placement of the file on a page.
-
When you want to change your logo, you want to make sure that it will be changed everywhere on your website.
-
You will need a quick replacement fix in case you are running a marketing campaign that contains flyers with links to media files and want to replace those media files with new ones but don’t want flyers with the links to old media files to break.
All these and many other common situations are easily solved with the right tool like Enable Media Release plugin. Let’s see how to enable this plugin on your website.
How to Enable Media Replace Plugin
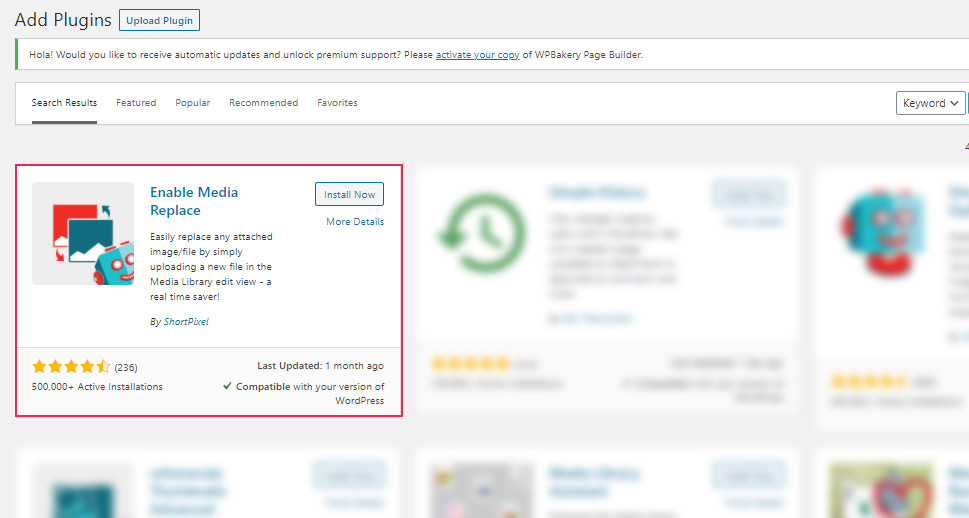
The Enable Media Replace plugin turns the whole process of replacing images and files into a simple procedure that takes just a few clicks of your time. It allows you to simply upload a new file whenever you want to replace an image or media file in your media library. You just need to make sure that the new file is of the same type as the one you are replacing. The plugin automatically updates all the pages that contain this file so you don’t have to worry whether you’ll stumble upon the image you replaced on some other place on your site. The fact that it is used by more than 500,000 active users speaks for itself about the plugin’s reliability.
The installation of the Enable Media Replace plugin follows the typical procedure for installing any WordPress plugin. If you need more guidance regarding the installation, make sure to follow the link above.
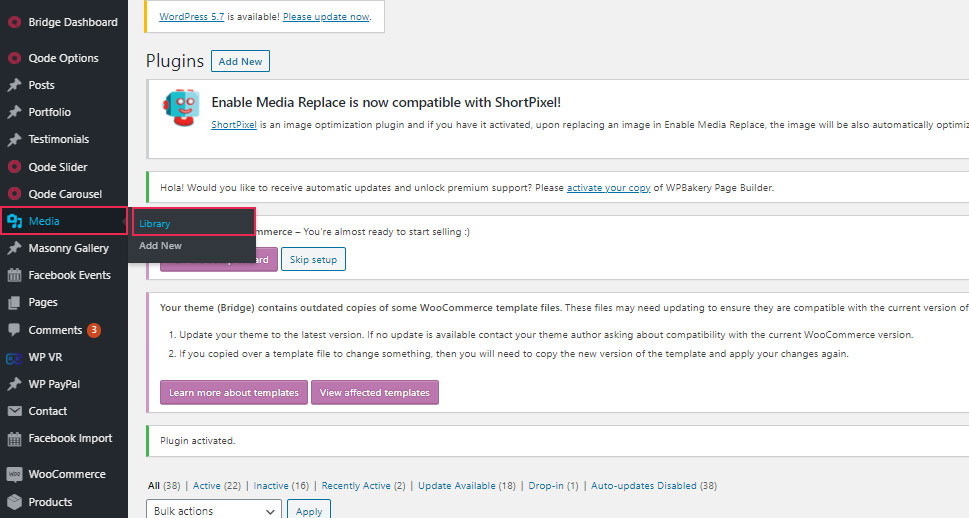
After you have installed and activated the plugin, the first thing you need to do is to access the file, image, or media you want to replace in your Media Library. So, go to Media in your WordPress dashboard menu and choose the Library option.
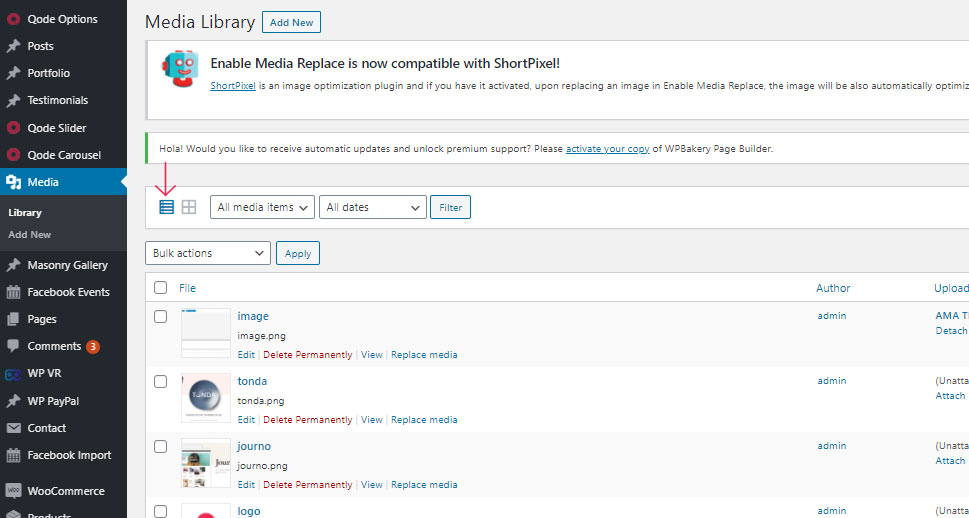
It is not mandatory, but we recommend you opt for the list view of your Media Library, as we found files are easier to manage when displayed this way.
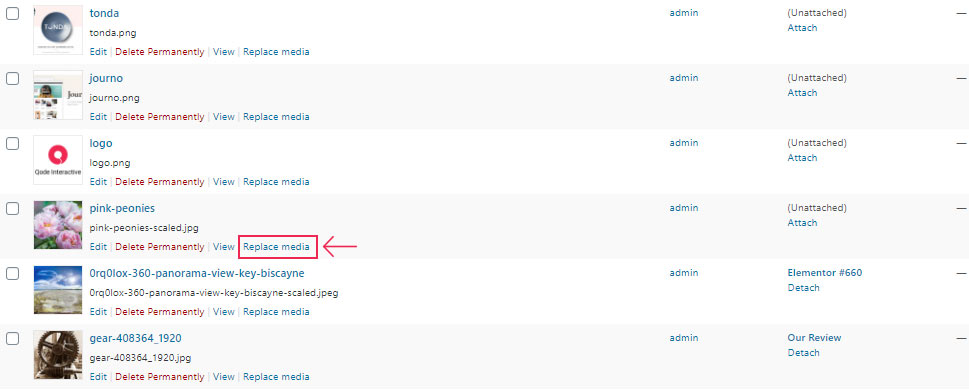
Now, find the file you want to replace and you will see the newly available Replace Media option next to it. Click on it to access further options for replacing media.
The next screen that opens shows you the image/file you want to display, and above you will notice the button for uploading a new file. Click on it and upload the file you want to replace the old file with.
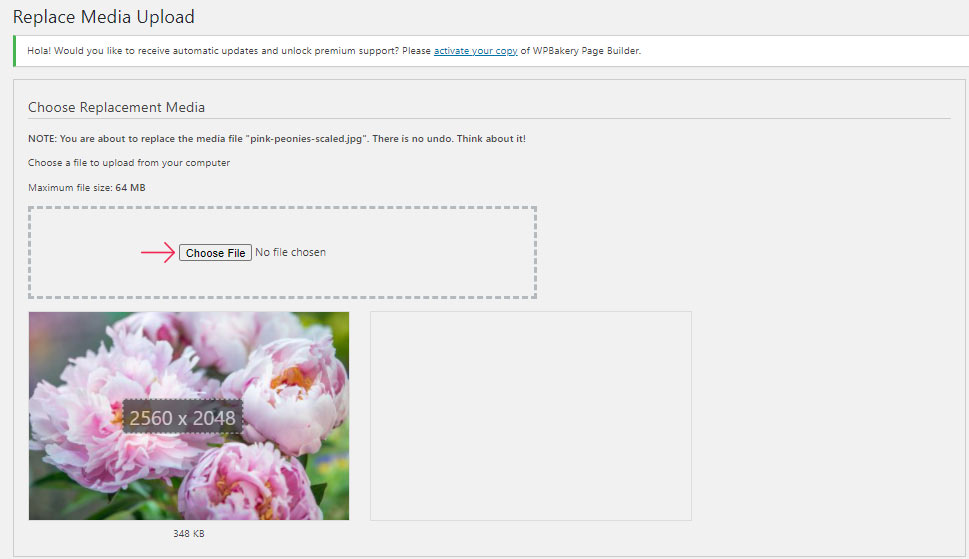
As you scroll down, you will see a few more options to set before you definitely replace the file.
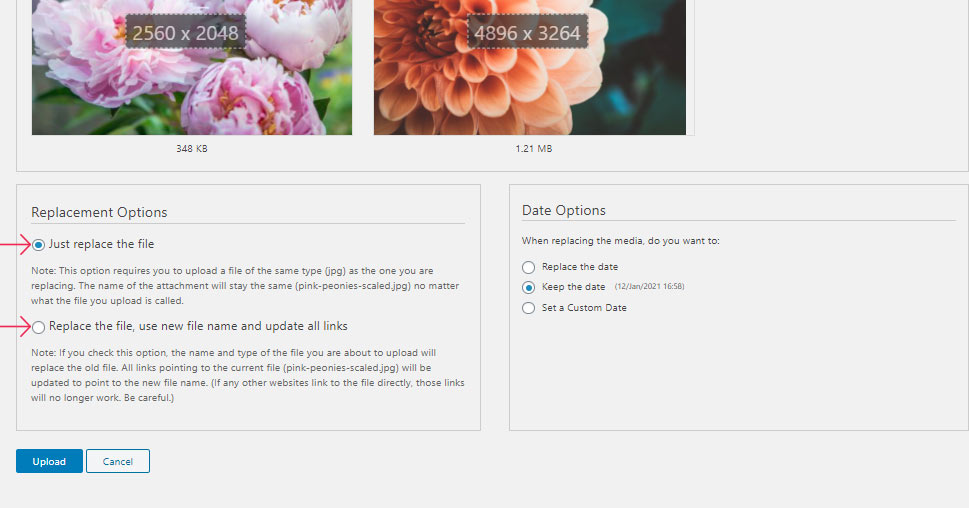
If you choose to just replace the file, the uploaded file has to be of the same type as the one you are replacing. The name of the file remains the same regardless of how the new file is actually called. Note that there is an option to replace the file name and image link as well, however, you may want to keep the original name and link if you want to preserve the already established SEO value of your media files. File names can be used as a search query and search engines index them along with the rest of your page content, so changing them may affect your already established ranking.
The second option allows you to replace the file name and the type of file as well. In this case, all the links that point to the current file will be updated to point to the new file name which means that links from other websites to this file will no longer work.
Unlike changing the name and link, changing the Date options has no effect on the ranking of images. However, you may want to change the date since a new one will signal the search engines that fresh content has been inserted.
After you set the desired options, click on Upload to finalize the procedure.

And just like that, the old file is replaced everywhere it shows up on your website.
What’s also convenient about this plugin is that it is compatible with ShortPixel, an image optimization plugin. If you have it installed and activated on your website, all the images you replace will also be automatically optimized, without requiring any special action from your side.
In Conclusion
Anyone who manages a website knows one can never be sure how many times a specific image or media file is displayed on the website. Instead of searching and manually changing the files, with this plugin you can simply replace one file with another and be sure it will be replaced everywhere it shows up on the website without leaving any empty spaces on your pages. Also, bear in mind that the newly added media files have to be optimized just like the old ones if you want to keep your search ranking, loading speed, and quality user experience.
