How to Add the Title Attribute to Your WordPress Menu

Even though one of WordPress’ stronger selling points is that you can customize it endlessly with plugins and themes, the core product also packs plenty of features and functionalities. So many features and functionalities, in fact, that navigating all of them might be tricky at first. Especially because some of them – the less commonly used ones – can be tucked away somewhere far from the beaten path.
This is the issue you’ll face if you want to add the title attribute to WordPress menu items. So before you start searching for a plugin that enables you to do it, maybe first read this article. We’ll show you:
Qode Themes: Top Picks
View Collection


The title attribute is one of HTML attributes and, as such, it’s used to provide additional information about an element. All attributes consist of names and values – “title” is the name of this attribute. The value you assign to it is the text you add to it. Below is how you’d use it in a line of code – but don’t worry, you won’t have to code to add it to the title menu.
<a href="https://qodeinteractive.com/magazine/" title="Qode Magazine">Click to view more articles.</a>
From a website visitor’s perspective, the title attribute will usually appear as a tooltip when they hover their cursor over an HTML element that has the attribute added to it. That’s not the purpose of this attribute, but it is the most likely way a browser will handle it. If you hover over the linked text below, you should be able to see the tooltip appear.
You can use the title attribute on any HTML element. Generally, however, it’s not a good idea to add anything that’s not needed to your website, so you should only use the title attribute where it makes sense. Usually, this includes links, images, and menu items.

The main reason to add the title attribute to any element on your website is to provide more information about it. Someone might add it to links to help the website’s visitors understand where they’ll land if they click the links. People will also add the title attribute to images when they’re creating portfolio websites to avoid distracting text.
With menu items, adding the title attribute can improve the user experience, allow for more flexibility in menu design, and even expand branding opportunities. Thanks to the additional information packed into a tooltip that will appear on hover – enabled by the title attribute – you will have more freedom with naming the menu items.
For example, you can name the menu items in accordance with the “personality” of a brand and then use the title attribute to show the visitors the real name of the menu item. You can be witty or funny when naming the menu items and use the title attribute to be informative. It works the other way around, too. You might also add a call-to-action in the title attribute to entice the indecisive visitor to browse your website.
There are a couple of things you shouldn’t try to do with the title attribute. The title attribute doesn’t contribute to your website’s search engine optimization. It’s likely not a way to improve your website’s accessibility, either. You shouldn’t rely on it for these purposes, and you also shouldn’t use it to fix serious navigation problems if your website is suffering from them.
Usually, hovering over a menu item on your WordPress website won’t produce a tooltip. Your WordPress theme might enable the title attributes in the menu for you, but you won’t see a tooltip until there’s some text to show within it.

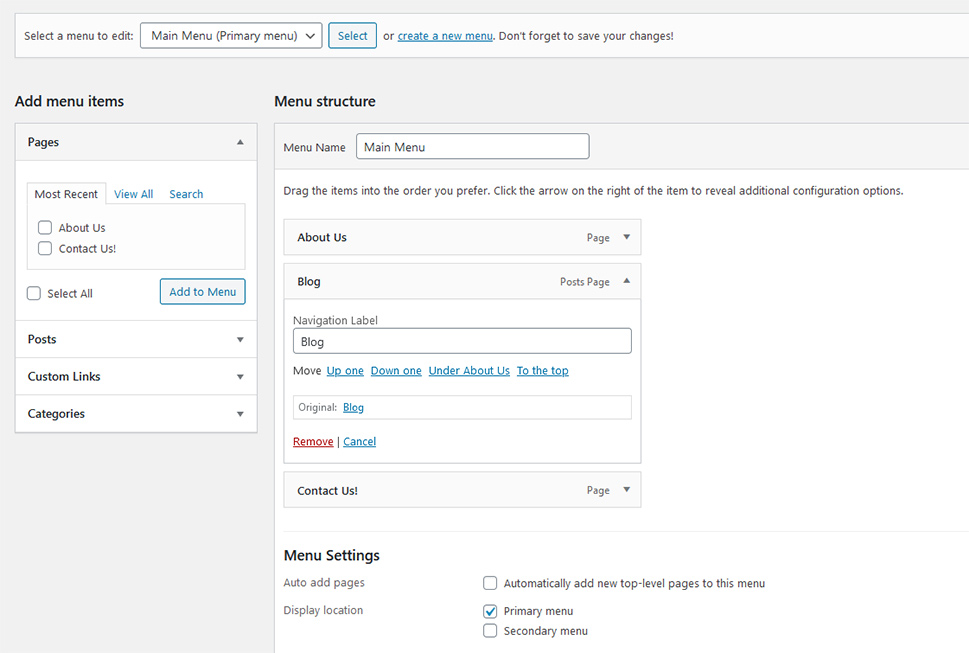
To enable adding title attributes to the menu, you should head over to Appearance > Menus. There, you’ll select the menu you want to edit – you will need to have a menu for this – and expand any of the menu items to reveal its configuration options. With a vanilla WordPress installation, you should see something like this.
To add the title attribute field to the options, you should first enable it. Look to the upper right-hand side corner of the page – you’ll notice a “screen options” button right next to the “help” button. Click on it, and you’ll bring down a menu where you can choose screen elements and advanced menu properties.

We’re interested in the advanced menu properties. Any of the boxes you check will add a configuration option – including the title attribute field. So go ahead and check the title attribute box – the second one from the left – and go back to the configuration options of your menu items. You’ll notice there’s a title attribute field there now.

With the field enabled, you can do ahead and enter the text you want to appear when someone hovers over the menu items. Again, keep in mind that every menu item should be labeled so that it’s clear to the visitor where they’ll go if they click on it. The text you add should contribute to their user experience in another way.
Once you’re done, don’t forget to press the “save menu” button. Checking the title attribute checkbox will produce the corresponding field in every menu item’s configuration options. If you only want to add the attribute to some items, simply add it to them and leave the rest blank. The result will look something like this.

Let’s Wrap It Up!
Title attributes can come in handy in different situations involving different elements. The one thing all of these situations have in common is that they add to the user experience and not to the clutter. While adding the title attribute to your website is as simple as checking a box and writing some words, you should only do it if you’re sure you have a good reason for it. And remember – the title attribute can’t fix bad website navigation.
