How to Set Up and Use the Amelia Booking Plugin for WordPress

The hassle of having to call or show up in person to make appointments is something we’ve left in the 20th century. Now, your doctor’s appointment, a day at the spa, or the yearly tune-up of your car are just a couple of clicks away. The fewer the clicks, the better, as many in the services industry will attest.
If you’ve set up a website for your service-based business, you’re already halfway towards giving your customers the booking experience they’ve grown accustomed to. Now, you just need a great WordPress Booking Plugin to take you the rest of the way. And that’s exactly what Amelia can do for you.
This plugin is designed to make booking or requesting appointments easier for your customers and clients. But it can do a whole lot more — like help you manage the attendance of your events, communicate important information to your customers and clients, and run a transparent, customer-oriented business. As you can see from Amelia’s demos, the plugin looks great, and not just because they’re using the Bridge WordPress theme for the demos — it offers the things business really need.
But that might come at a price, though. You can get a free version of the Amelia plugin that’s perfect for small businesses that don’t have employees and don’t need lots of advanced features. For the rest, however, Amelia is a paid plugin. It’s subscriptions plans start at $59 and vary depending on the subscription you opt for and whether you’d like to get an annual plan or a lifetime subscription. So let’s see exactly what it is that you get for your money.
Here’s what we’ll cover in this guide:
Once you download and install the plugin, the plugin options will appear in the left-side menu:

Now you can start exploring and customizing the Amelia plugin to fit the needs of your organization. You want to start off is by adding employees and services first, and then connecting employees to the respective services — that’s the way to get the plugin to function properly. So let’s dive into users and roles first.
You probably already know that WordPress has different user roles you can assign to people, giving them a variety of publishing and administrator privileges. Amelia has this, too. They’re not exactly the same as with WordPress, but they follow a similar pattern. Let’s take a closer look.
1. Administrator
This is the highest user role there is in Amelia. It’s reserved for the web administrators who are in charge of the website, and by extension the Amelia plugin. An admin can change pretty much anything in the plugin, any options — even the ones set by other users. The admin’s power is so complete that they can change the roles of other users, and can customize the look of the plugin’s front-end.
2. Amelia Manager
You won’t find this role in your basic WordPress installation — it only appears after you install the Amelia plugin. It has similar authorizations as the administrator, with two notable exceptions. The manager can’t customize the look of the front-end of the plugin, and they also can’t delete anything. So if an event gets canceled, for example, the manager can only hide it from appearing — they cannot delete it.
How to Create an Amelia Manager User
To add the Amelia Manager user role, you should do what you’d ordinarily do when creating a regular WordPress user — go to User > Add New and provide the necessary details. The only difference is that you’ll notice new options in the “Role” dropdown after installing the plugin, and you’ll be able to find and choose Amelia Manager among them.

3. Amelia Employee
This one, as its name says, is for employees. The admin or the manager needs to create a user account for each employee, as they can’t do it for themselves. What they can do, after they’ve been awarded an account, is access the list of appointments either through the calendar or through the appointments page, and export it for convenience. Those, at least, are the default authorizations employees get.
Additional Authorizations
Generally, employees cannot change anything in Amelia — all they can do is view when they have appointments. But managers and administrators in Amelia can grant additional powers to employees. The full list of these powers include:
-
Configure their schedule
-
Configure their days off
-
Configure their special days
-
Manage their appointments
-
Manage their events
The options that allow you to give employees these new authorizations are found under Amelia > Settings > Roles Settings (view role settings) > Employees. You can enable every option you want the employees to be able to do on their own.

Creating Employee Users
There are two ways you can add employee users to Amelia. The first is the old fashioned one, where you’d go Users > Add New, provide all the relevant information, and then pick the role as Amelia Employee.
The other way you can do it is by navigating to Amelia > Employees > + Add New Employee.
When you first install the plugin, you won’t find any users here. But there are fields where you can enter some basic info about the employees, as well as their images. You can add their shifts and their days off. Just remember: whatever you set up here only applies to the one user you’re editing at the time. You can’t create company-wide rules while adding new employees.
It’s also important to note that the option “WordPress User” allows us to add an existing website user (one that’s been added through Users > Add New) as an employee, or to create a completely new user.

After the user account is made, the employee will receive an email with a link for logging in and changing their password. That way, the employees will be able to access their own data and the website backend with the provided authorizations.
If you wanted to see a list of all the employees and edit their data, you can do it from Amelie > Employees.

4. Amelia Customer
In Amelia, customers get their own role. Appropriately named “Amelia Customer,” this role allows your clients to have an overview of their own appointments in the backend calendar. They can also access the appointments list and cancel their own appointments on the list. This is what they can do by default, at least.
Additional authorizations
If you want your customers to be able to reschedule their own appointments, you’ll have to give them additional authorizations. You should check the appropriate settings in Amelie > Settings > Roles Settings (view role settings) > Customer. You can also enable the Front-end customer panel and set up a password protected login, or allow customers to delete their own profiles for GDPR compliance.

Creating a Customer User
You can add a Customer user in the same way you’d add a manager or an employee — by navigating to Users > Add New, providing the necessary details, and then choosing Amelie Customer as the role.
Alternatively, you can do it by navigating to Amelia > Customer > +Add Customer. Here, you’ll get the chance to enter some information about the customers you wish to add.
Another useful thing you can do is set up automatic adding of new customers. Navigate to Amelia > Settings> Roles Settings (view role settings) > Customer and just enable the “Automatically create Amelia Customer User” option.
That way, as soon as new customers schedule an appointment on your site they automatically become a Customer User. They’ll receive an email with their username, a link for setting their password, and a link to the booking form.
Amelia comes with a whole lot of customization options that allow you to tweak the plugin to your specific needs. These options are available in Amelia > Settings.

Don’t let the variety of settings you’ll see in this menu scare you off — they are all very intuitive and easy to master.

When you click on the “View Settings” button, a panel will appear on the right-hand side of the screen containing all the options that are under that setting.

That’s where you’ll be able to adjust the plugin to work to your liking. A good place to start with the adjustments and customizations would be the “Company Settings” tab.
Company Settings
This tab allows you to enter the key information about your company. For example, this is where you can add your company name, address, website, phone number, and logo. Basic as it seems, filling out this tab will be indispensable.
Role Settings
As we mentioned earlier, the Administrator and Manager are the only two types of users who have access to role settings. All the additional authorizations Administrators and Managers can give to other types of users are granted in this tab.
Working Hours & Days off Settings
These settings are where you can define your company’s working hours for each day separately — weekends included.

You can also use these options to set days off — whether they are public holidays, vacations, or any other planned or unplanned time off.
General Settings
Even if you decide not to mess with the general settings, you don’t need to worry. Amelia comes loaded with default settings in this section, so you don’t have to dive into it if you don’t want to. But if you do, you’ll find there are lots to set up in the general settings. Here are just some of the highlights:
Default Time Slot Step – this is where you can set the duration of a single appointment. By default, appointments are set at 30 minutes. So when you’re creating an event, you can set its duration to over 30 minutes, but not less than that.
Default Appointment Status – the status of newly made appointments is “approved” by default. You can change the status of newly made appointments to “pending,” in which case an administrator needs to approve the appointment. This could be a great option if you’re working with part-time workers who need to coordinate schedules on several gigs.
Use service duration for booking a time slot – this option, when you enable it, makes the time slot in the schedule the same duration as the service. That way, when people are booking services on the website, the available time slots are perfectly aligned with the ability of employees to meet them.
Minimum time required before booking – this lets you set how much time in advance a customer needs to make a booking. So if you set this to be an hour, no one will be able to book your service if there’s less than an hour until the time-slot begins.
Minimum time required before canceling/rescheduling – here you can set how far in advance a customer has to cancel a service if they don’t want to pay the full-service fee.
Period available for booking in advance – setting this will limit how far in advance a customer can make a booking.
Qode Themes: Top Picks
View Collection


Appointment Settings
There are only two settings here: whether you want to allow booking above maximum capacity, and whether you want to allow it below minimum capacity. Both of the options are enabled by default.
Labels Settings
If you would like to change the default names for employee and service categories, you can do it here. You can set separate labels for the singular and plural grammatical number. So an employee can, for example, become an “instructor,” and services can become “classes.”
Payment Settings
Just like the name says, payment settings are where you choose the format and currency for the price of your services. You also get to pick the payment method and set whether you want to accept coupons or not.
Web Hook Settings
If you plan to use a customer relationship management software with Amelia, the web hook settings are where you go to connect the two. And if there are any other automation tools you’d like to try out with Amelia, go ahead. However, you’ll mostly find explanations about how to use Amelia with Zapier. It is a popular choice, after all.
Notification Settings
In the notifications settings, you can set everything from your email and name as the sender to redirect URLs you wish to use.
Google Calendar Settings
If you find it handy to have your employees’ Google Calendar sync with their working schedule, the Google Calendar settings are where you can go to set this up.
As you’re leaving the settings section of the plugin, it’s important to remember that, even if you didn’t set everything right perfectly the first time, it’s always easy to get back and redo it. You’ll get the hang of it sooner rather than later — these settings might look complicated, but in reality, they’re pretty intuitive and easy to learn after you give them a try.

If you navigate to Amelia > Locations > +Add Location, you can define all the locations where you’re offering services:

It’s very easy and straightforward, just add the address, phone number, and a photo. Later on, when you’re creating Events and Services, you’ll be choosing between the locations you add here for the address.
By now, you’ve mostly been working with general settings that do important things for the overall functioning of the plugin with your website. So people can now see the name of your company, how far ahead they can make an appointment, when they can cancel their scheduled appointments, etc. You’ve also added your employees, and now you’re ready for the next step.

The Amelia admin dashboard is a section that’s only accessible to administrators and managers. It’s where all the good information is gathered for you to review it — appointments, services, revenue, even info about your employees.
You’ll also notice that the dashboard is divided into discrete parts, allowing you to navigate all the information at your disposal with ease. It’s important to know that you can set the time period for which you want to see the statistics. So you can see how many services were booked, what’s the busiest part of the day, and how much money the business has earned segmented by time periods.
It’s also worth noting that the dashboard helps you track employee performance. You can see which among your employees are getting the most appointments, are they attracting regular customers, and which of the services they provide are the most sought-after. All in all, very useful statistics.

The services section is where you create all the services your business has on offer. We’ll be using a spa salon as an example, but the same principles would apply to almost any other service-oriented business.
So let’s say we’re offering three service categories in our salon: massages, hammam baths, and body therapies. Each category has a couple of services we offer within it. The first thing we need to do in Amelia is to create the categories.
To do this, navigate to Amelia > Services > +Add Category.

You can add more categories than just three — this is just the number we’ve used in our example. Pay close attention, though, because even if you’re only offering one service you still have to create a category for that service.
After adding the category, it’s okay to proceed and create a service. You can do this by navigating to Amelia > Service > +Add Service.

The type of information you need to input here is straightforward: the name of the service, its category, the duration and the price, the before and after buffer time, the name of the employee who is providing it, what is the maximum and the minimum capacity for the service, and whether the service is listed on the website. Finally, you get the option to add a service description.
If you’re offering services to groups of people, you’ll see a couple of new options open. You can set rules that allow every individual to apply separately, or let the people who are already coming bring guests. You can also enter the price modifier if you charge based on attendance.

Finally, you can add an image gallery for each service, and list extra services you might offer for an additional fee. This is done through the tabs in the “new service” side panel. The “settings” tab is where you set payment settings. After you have finished setting everything up, don’t forget to click the “save” button.

Once you’ve entered all the services you plan to offer, you’ll see them listed on the “all services” page. You can easily edit or delete them, as well as add new ones.

How Users Will See Your Services
Now that you know how to add categories and services, it’s time to learn how you can use and display them on the website.
Displaying Services in a Catalog
This option allows you to show all the categories of services you have on offer, as well as the services that fall within those categories.

In our example in the image above, there is a total of three categories defined in Amelia. However, since one of them doesn’t have any services in them, it’s not listed in the catalog. Your users will only see the categories for which you’ve added services.
From the catalog, you can click on any service to view it in a separate page, alongside all its relevant information.

The calendar at the bottom of the page is there so that visitors can make appointments. Alternatively, you can add a separate form for making appointments.
Search
This is a very useful feature for visitors who want to use one of your services, but they’re not sure which one, or when there is a free time slot for an appointment. With the search feature, visitors can use certain parameters to narrow down the type of services they want, and the appointment time that works for them.
The search feature allows visitors to list through all of the services you offer, and make a selection based on the date and time, location, and employees.

If you’re not happy with what you’re offering being called “services” on your website, you can change the labeling, as we previously discussed in the section about label settings. The same goes for the term “employees”. You can do all this in Amelia > Setting > Labels Settings.
Book a Service
The catalog and search functionalities will help your visitors find the services they need. But you also have to give them a way to book an appointment, and Amelia lets you do this with a form.
Your website visitors first get to choose the service they’re interested in, as well as the employee who will provide that service if there’s more than one available.

Once they’ve chosen the service and the employee, visitors can pick the date and time.

You might notice that we haven’t actually set available time slots, just the duration of a time slot. But because we’ve set the default time slot step to 30 minutes, the visitor sees possible time slots for appointments starting every half hour. Setting the default time slot step to 1 hour and 30 minutes would give us a different appointment layout, with time slots spread an hour and a half apart:

One of the best things about this plugin is that, once an appointment has been booked, its taken out of the calendar so that new visitors won’t see that time slot as available. So if a customer decides to book an appointment and you’ve set it to be automatically approved, as soon as they’ve booked it, it stops being offered to new customers. It’s also important to note that you can set buffer time before and after an appointment, making sure the employees have enough time to prepare for the next session.
However, if you’ve set the plugin to assign a pending status to all new bookings, the time slots will stay visible while they’re pending. In that case, an administrator will have to decide who gets the slot.
For the final step, the visitors will have to provide their personal information.

The event options are there if you want to add events, conferences, lectures, and other types of services you offer only occasionally.

As opposed to services, you don’t have to enter a category when creating events. Events don’t need them. To create a new event navigate to Amelia > Events > +New Event.

The information you need to include is similar to what you have to enter when creating a service. You’ll have to include the name of the event, when and where it’s taking place, how many people can attend it, etc.You’ll be able to add custom fields to the event later.
Once you’ve created an event, you’ll be able to see a list of all your planned events. In case one event lasts two days, for example, it will appear in the list as two events, one for each day.

How Users Will See Your Events
When you’ve created an event and it goes live on your website, it will appear in the Events List, together will all the event details.

Thanks to this list, your website visitors can easily see all the events you’re organizing and book entry to them. They just need to provide their information, including their full name and contact information.


In Amelia, if you’d like to see every person who’s ever made an appointment for any of your services or events, just navigate to Amelia > Customers.

You can see and change the customers’ information here, although the best use for this section is to mine it for statistics.
This information can be very valuable to you because it could indicate repeating customers, and show you how your loyalty program is working, for example. At the very least, you can use the data to identify customer trends.
Amelia’s calendar is another in the line of great features that will make running your business at least a little bit easier. It has several different viewing options, including a timeline, and it’s very easy to navigate through.

You can use this calendar as your go-to page for managing appointments in Amelia. You’ll not only be able to see all of your booked appointments there, but you’ll also be able to add new appointments or edit existing ones. It doesn’t hurt that you can open and close time slots for services from the calendar, either.
In the appointments section of Amelia, you’ll be able to see all of the appointments you currently have, and you’ll be able to sort them based on the employee performing them, the customer, the service type, or the status of the appointment. You can do all this by navigating to Amelia > Appointments.

For an admin or a manager, this section is very important because it’s the place where they can change the status of an appointment. So if any appointment needs to be approved, canceled, or rejected, this is the place where you can do all of it.
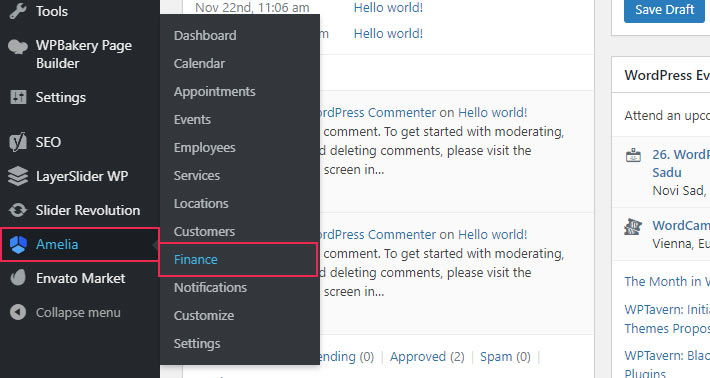
The finance section is the financial heart of the plugin. It’s the place where you can see information about individual payments. You can track payments for appointments but also for events if you’re using version 2.0 of the plugin. To access it, just navigate to Amelia > Finance.
Besides the payments, this section is also where you can track coupons if you’ve enabled them. There are filters that will make it really easy for you to find specific coupons. Both the payments and the coupon tabs allow you to export data to a CSV file.
Amelia really goes out of its way to help you with adding its features to your website, so much so that it’ll give you a couple of options while installing the plugin.
We’re going to show you how to add Amelia features to a website using our Bridge WordPress theme. Since Bridge comes with two page builders (WPBakery and Elementor), we’ll cover both of them, as well as the Classic Editor and Gutenberg.
In WPBakery, you’ll be able to add Amelia’s features via the text block shortcode. Within the shortcode, you’ll see a special icon for the Amelia plugin:

The features you can add to your pages are the ones we already went over when we talked about services and events:

The one option we didn’t discuss is the “preselect booking parameters” options, which is an option that lets us select what we want to show in the “booking” view by setting certain parameters.

While the “booking” view lets you pre-select parameters that include the category, service, employee, and location, the “catalog” view only lets you pre-select employees and locations. The events view, on the other hand, allows for pre-selection based on tags and events.
You can also add Amelia’s features from the classic editor…

…and you’ll see a separate block for each form in Gutenberg:

If we wanted to add any of Amelia’s features to a website while using the Elementor page builder, we’d need to enlist a separate editor to our aid. The Classic editor would do, and so would Gutenberg, or WPBakery. We’ll need these editors to get the shortcode we’ll use in Elementor. Here’s how to do it.
First, you need to create a test page. Feel free to delete the page when you’re done because you won’t need it for anything else. On this page, pick a feature you’d like to use. When you do this, you’ll see the shortcode.

What you need to do next is simply copy the shortcode and paste it into the Text Editor element with the desired placing on the page.

That way you’ll get the feature to appear on your website’s page.
Even with all the default settings, Amelia looks amazing. But if you feel the need to customize it, or if you want to style it to look a bit more in line with your brand or the WordPress theme you’re using and, for example, change the look of your forms, you can do so by navigating to Amelia > Customize.

Here, you can change the color and fonts:

This section is also where you can add custom fields, which can be an invaluable tool if you want, for example, to allow customers to add notes when booking your services. If they have any special needs or medical concerns, for example, they can let you know by adding a note about it. Fields can apply to events and appointments.
You’ll have to define the name of the custom field and which forms it applies to, as well as whether filling it is optional or mandatory. Once you set everything, this is what it’ll look like:

Wrap-Up: Why You Should Use the Amelia WordPress Plugin?
There are a couple of reasons why you should choose Amelia as your main appointment-booking WordPress plugin. As you can see, it has some amazing features that will make doing business easier for you and your clients. Most free plugins usually lack these features, and even some of the other paid versions don’t offer everything Amelia does.
But what it really comes down to is that you always get exactly what you pay for. If you’re not willing to invest in tools that will expand your website’s functionalities and make your services more accessible to your customers, you can try a free plugin instead.
That way, however, you’re likely to end up with a website that doesn’t have some of the features people want to see, features that can be an important part of what makes doing business with you great. With Amelia, you can offer a certain level of convenience to your customers that other plugins can’t match even in their premium versions. And that’s as good of a reason to choose Amelia as you’ll get.
The Amelia booking plugin is compatible with all Qode Interactive themes. So, regardless of the industry or niche you’re in, if you’re in need of a beautiful website and professional booking functionality, make sure to check out our premium WordPress themes and the Amelia plugin.
