A Complete Guide to Starting Your Own YouTube Channel
Few websites in the world are as recognizable and dominating of their niche as YouTube is. YouTube is in the top five websites in the world by almost any metric you can look at. Its status as the internet’s video platform is cemented to the point that YouTube is almost synonymous with “online video.”
YouTube isn’t the only online video platform, and it has competitors that include Vimeo. Still, thanks to the broadest user base, it has become the ubiquitous platform for online video. If you’re even thinking about posting video content online, you should think about starting a YouTube channel.
How do you do it? We’ll show you. We’ll cover everything you need to know about starting your own YouTube channels, including:
Qode Themes: Top Picks
View Collection


First of all, you should understand that creating a YouTube channel is probably the easiest thing you’ll have to do on the platform. Creating content and growing the channel is the hard part. You’ll need to make important decisions, and even though there’s nothing in there you won’t be able to change at a later date, you should make sure you start the right way.
Here are a couple of questions you might ask yourself before you embark on this venture:
-
Why are you starting a YouTube channel? Is it for fun, as a hobby, or do you want to use it for professional purposes, to market your business, or monetize your content?
-
What is your niche? YouTube is very accepting of all kinds of niches, but certain niches work better with certain types of content, so it’s best to plan this.
-
What type of content do you want to create? Different types of content will have different production requirements.
-
How much time, effort, and money are you willing to invest? Will you be able to deliver the type of content your audience expects?
Take your time when answering these questions. Do some research – look up the content creators that you like and try to find out as much as you can about their process. Your goal is to have a realistic picture of what you want from your channel, whether it’s possible to get it, and how.
Not to mention that this process will help you figure out what gear and software you’ll need, whether you’ll need more personnel, maybe even how much time you can expect to sink into creating a video. Again, it’s all about understanding what you’re getting into and planning for it.
To create a YouTube channel, you’ll need to have a Google account. To create an account, you don’t have anything – not even an email address. When you go to YouTube.com and press the sign-in button, it’ll take you to a sign-in page. If you don’t have an account or want to create a new account, press the “Create account” hyperlink, and answer who you’re creating the account for.
This will lead you to a page where you’ll be able to create a Google account and choose whether you’ll want to use an existing address or create a new Gmail address while creating the account.

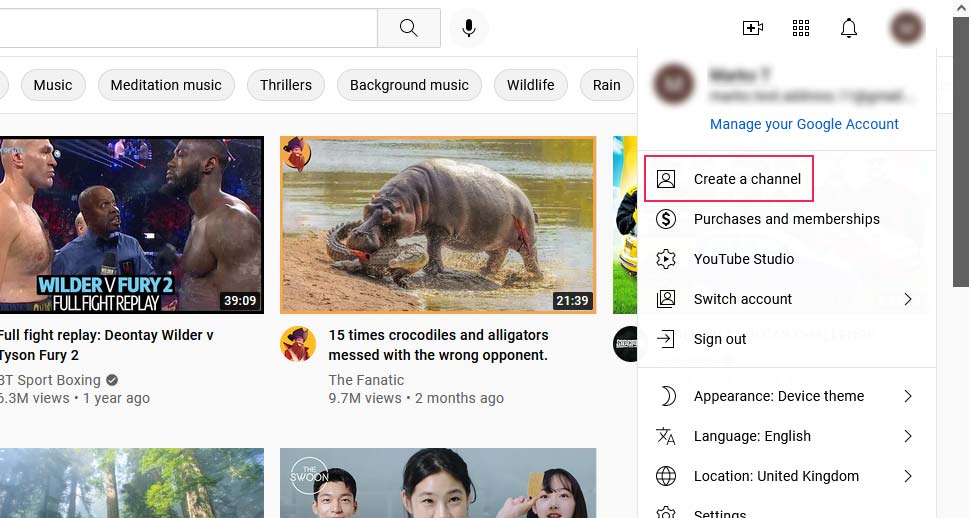
After confirming some information and reading and accepting the Terms and Conditions, you’ll find yourself logged into YouTube. Go straight ahead for the top righthand corner and click on the circle containing either your profile picture or the first letter of your name. You’ll see a menu with the option to create a channel. That’s what you need to click.
You’ll get the option to upload a picture and choose a channel name. You can do it now, but you’ll be able to change it later, too.
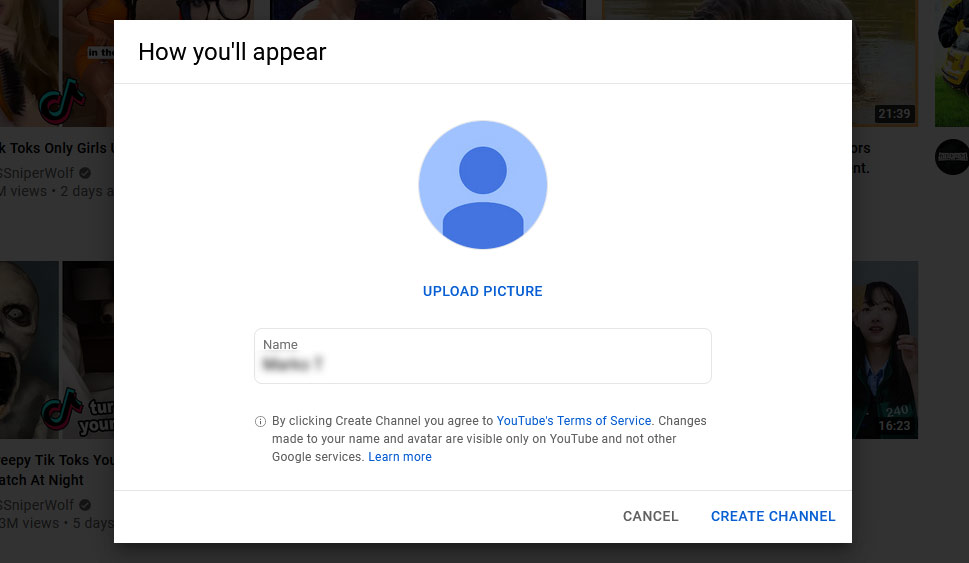
You should probably read YouTube’s Terms of Service before creating the channel, but as soon as you press that button, you’ll be a proud owner of your very own channel. Your channel won’t look like much, though, so the next step would be to customize it a bit.
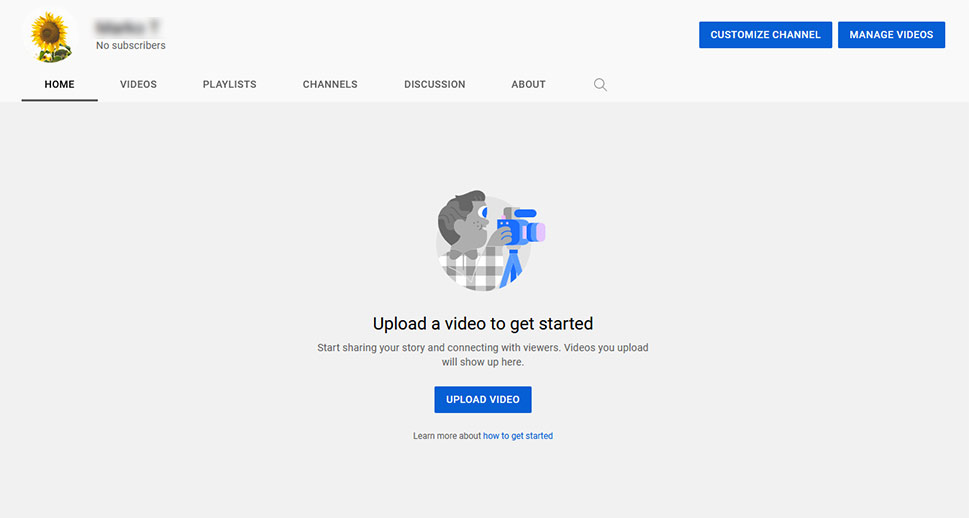
You’ll notice a big blue button that says “Customize Channel” at the top of your channel page and to the right. Click on it to get started with customizing your channel. This will lead you to the YouTube Studio – the YouTube channel equivalent to a WordPress website’s backend. It’s where all the important things with your channel happen, and there’s nothing more important right now than customizing your channel.
Customizing the Layout Options
YouTube has dropped you off at the Channel Customization options. The very first group is Layout options. These options allow you to add a video spotlight – a video that will be at the top of your channel’s homepage. You can add a channel trailer for unsubscribed viewers, and a featured video for returning subscribers.
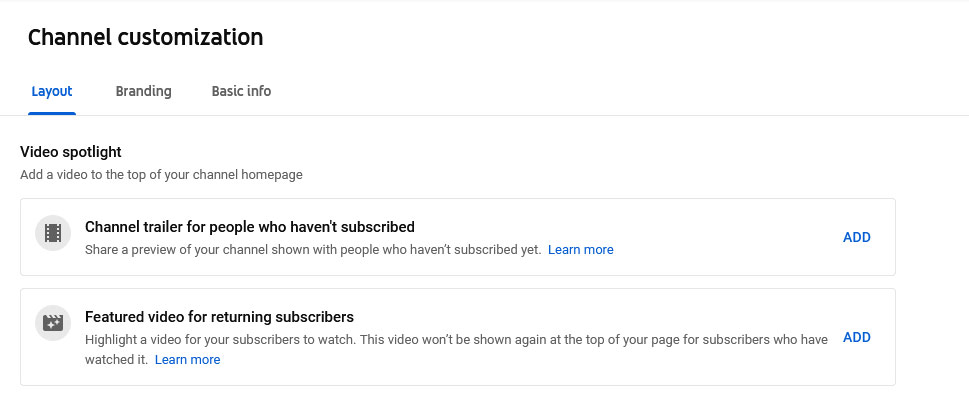
If you have something you could use, navigate to Content and upload it. If you don’t have either, you can return to these options at a later date. The Featured Section options let you customize the layout of your channel homepage by choosing which sections you want to be featured and in which order.
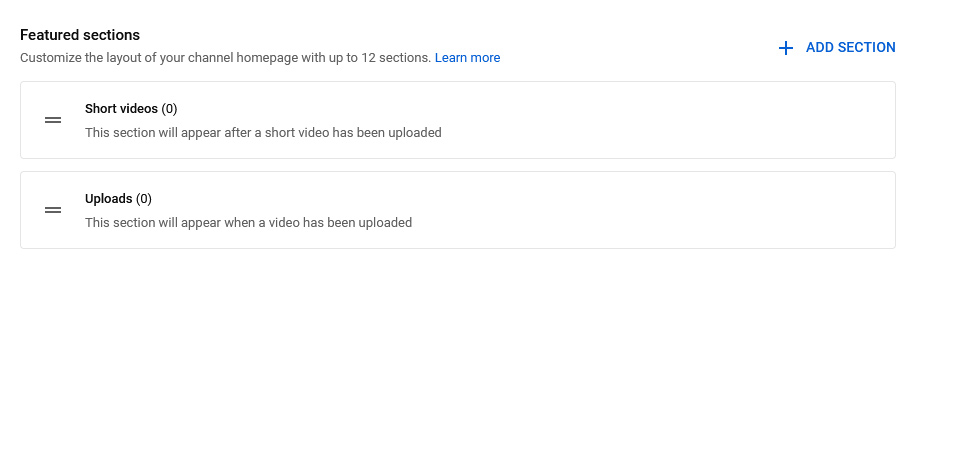
Again, you’ll need to have actual videos uploaded for this option to have sense, but you might check out what sections you could add – it might give you an idea or two about the type of content you can create for your channel.
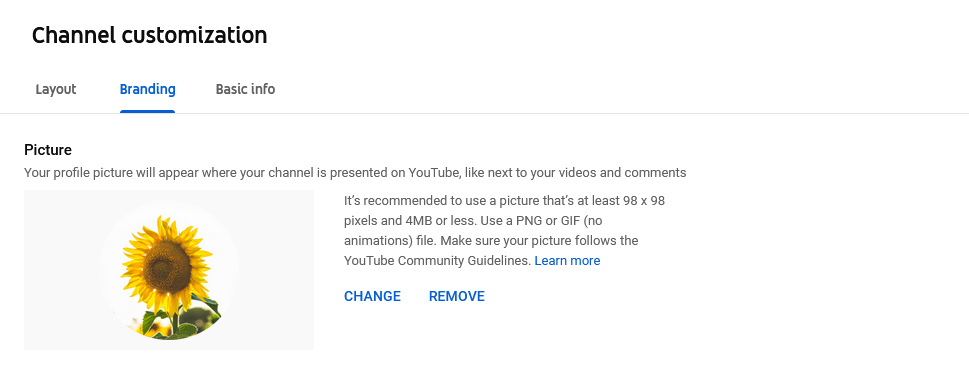
Customizing the Branding Options
There are three different places on your channel and in your videos where you should consider adding branding images or brand names. The channel picture is one of them. The other two are the channel’s banner image and the video watermark. If you haven’t set the picture for your channel, or if you want to change it, this is where you’ll do it.
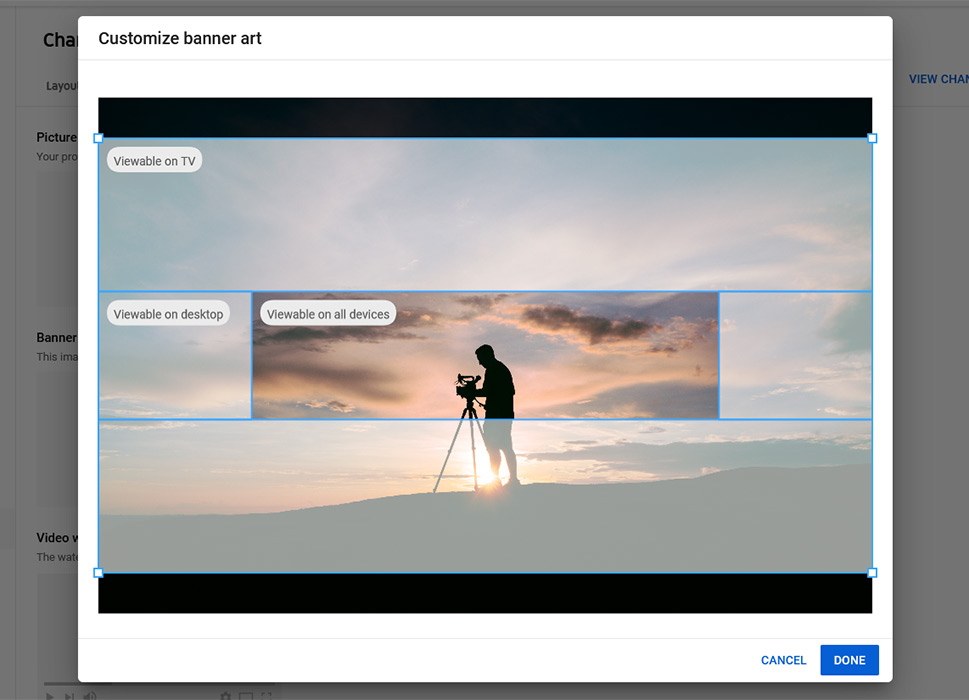
A great thing about these options is that you’ll be able to see recommended image sizes – that can be extremely helpful. The banner image, for example, should be at least 2048 x 1152 pixels, but that’s not all – when you upload a picture YouTube will show you which parts of it will appear on different devices.
The final option, for video watermarks, lets you choose a small picture that appears over your video in the lower righthand corner. After you’ve set it, you can publish the changes you’ve made if you’re happy with them.
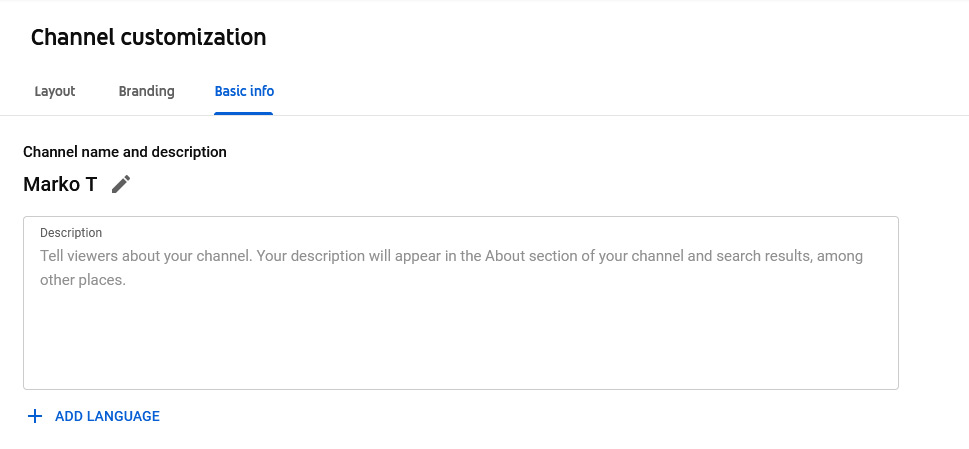
Customizing the Basic Info
The Basic Info you can add for your channel starts with a channel name and a description. If at any point you want to change the name of your channel, this is where you’ll be able to do it. Keep in mind, however, that you shouldn’t do it often – you want to have a recognizable name people will remember.
The description is a great place to tell people what your channel is about. You don’t have to write a lot, just what you think might explain the channel to anyone reading most quickly and effectively. You’ll be able to add the name and the description in different languages.
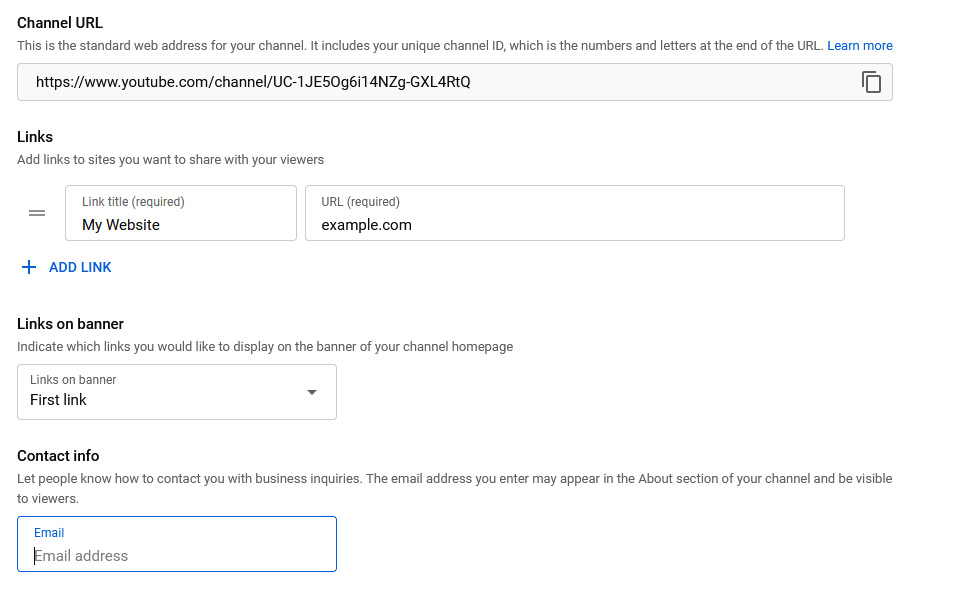
The remaining options on the page are the channel URL, which you can copy and do nothing else with. The Links section is much more interesting, as it allows you to include links to websites on your banner – a great place to link your WordPress website. Finally, you’ll be able to add your email address as contact information.
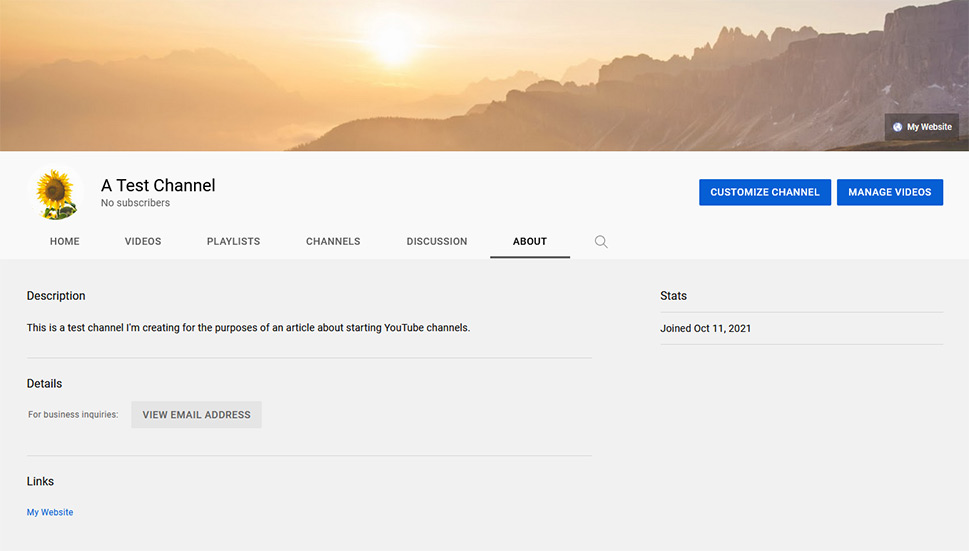
With that, you’ve officially customized your channel, and done pretty much all there is to do before you start adding content to it. This is what an About page for the channel might look like after the customization.
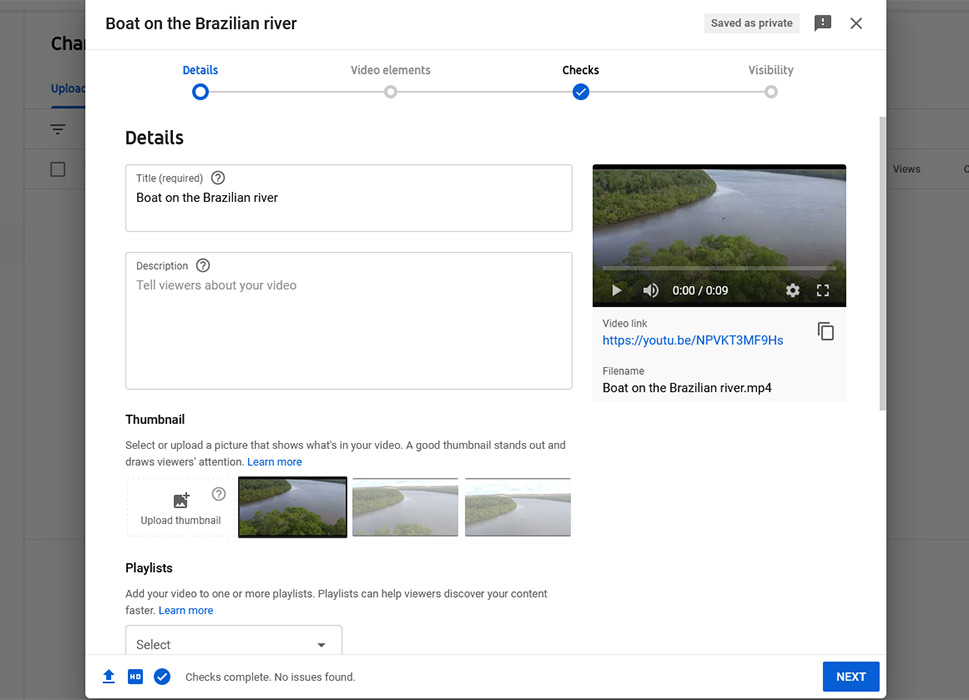
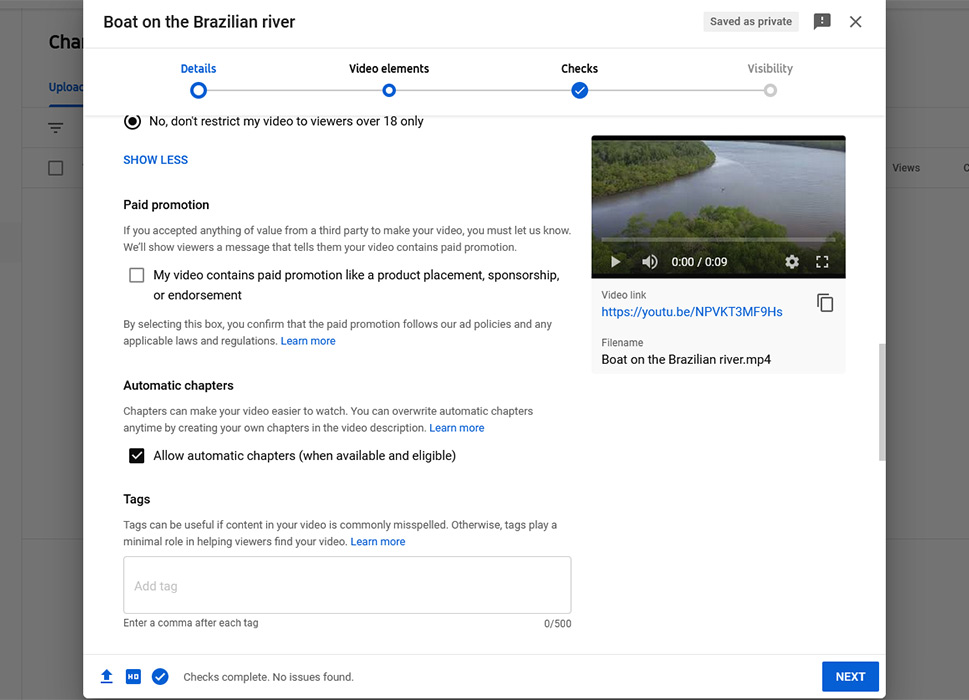
Adding Details – Titles, Description, and Thumbnails
When uploading a video, the Details tab is the first one you’ll see. It’s the place where you can change video title, description, upload a thumbnail, or pick among the ones YouTube provides for you. You can add the video to playlists, if you have any, indicate whether the video was created specifically for kids, and set age restrictions.
When you scroll this window far enough, you’ll see a blue Show More button – clicking on it will open up a wealth of new options. They’ll let you indicate whether your content contains paid promotion and whether you want automatic chapters to be applied. You can also set tags for the video, choose the language, add a recording date, set a license, allow shorts sampling, set a category, choose whether to show comments, as well as likes and dislikes.
Adding Video Elements – Subtitles, End Screens, Cars
In the Video Elements, you’ll be able to add the subtitles, an end screen, and cards. To have subtitles enabled, you need to first select the language of the video in the Details tab. To have access to the end screen, your video needs to be at least 25 seconds long.
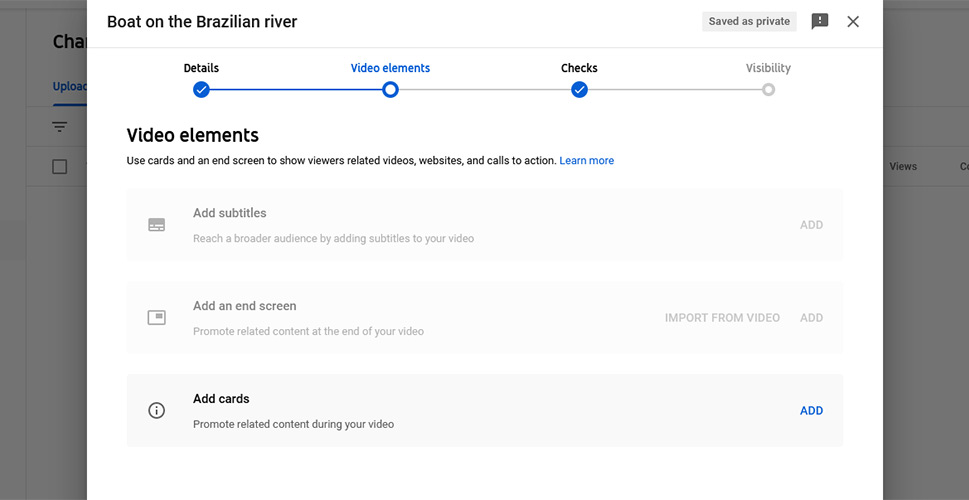
As for the cards, they are a great way to promote related content during your video. The menu lets you link to videos – yours or anyone else’s – playlist, and channels. You can also choose when the card appears.

You can also include links into the cards if you’re a member of the YouTube Partner Program. Until then, you have to be satisfied by placing content from YouTube in these cards.
Copyright Checks
YouTube will automatically check your content for copyright issues as you’re uploading it. The Checks tab will let you see the results of this check.
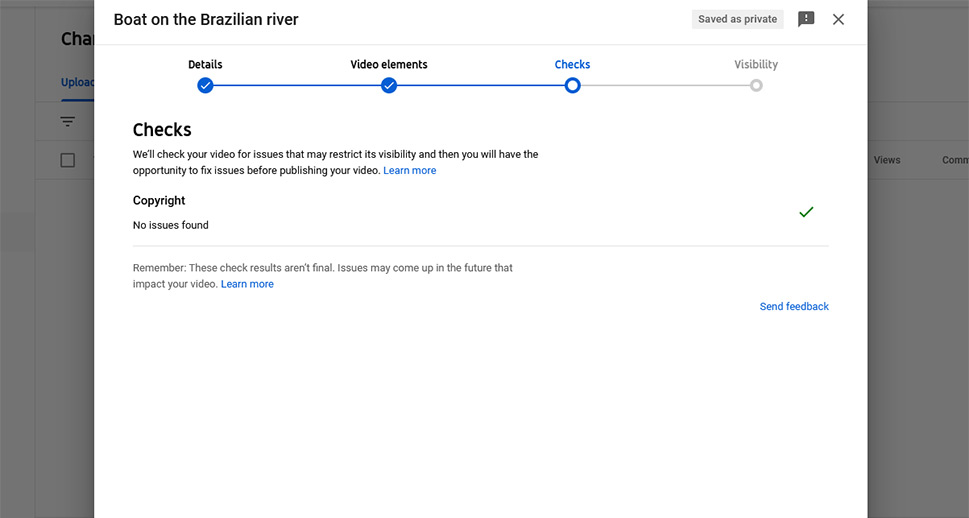
Keep in mind that, even though YouTube’s initial check didn’t notice any copyright issues with your video, this doesn’t mean that none will come up at a later date. At the very least, people will still be able to file a claim against your video.
Setting Publishing and Visibility
In the visibility options, your main concern is with choosing what happens after you’ve published the video. You can choose to make the video private, meaning that you’ll have complete control over who sees it. You can make it unlisted, accessible only via the video link. You can also make it public, accessible via the search.
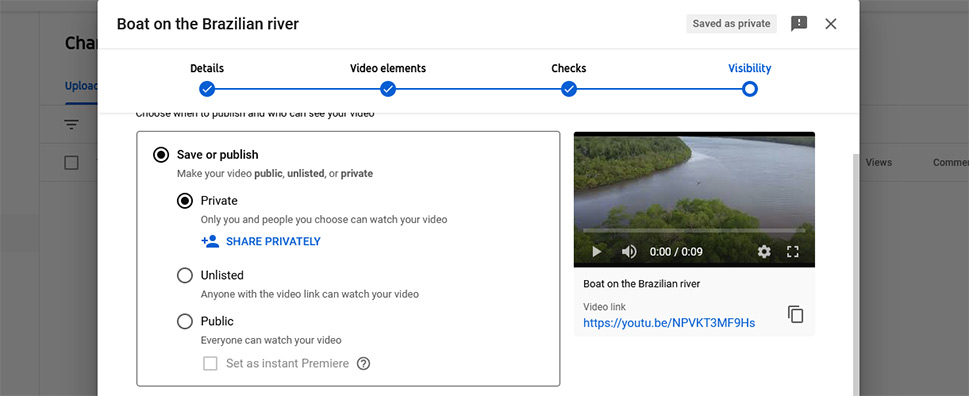
Your final setting will be to schedule the video publishing at a later date. You’ll be able to choose a time and a date, and you can set the publishing to be held as Premiere, a type of live event that’s very useful for building up the hype – if you have the followers for it.
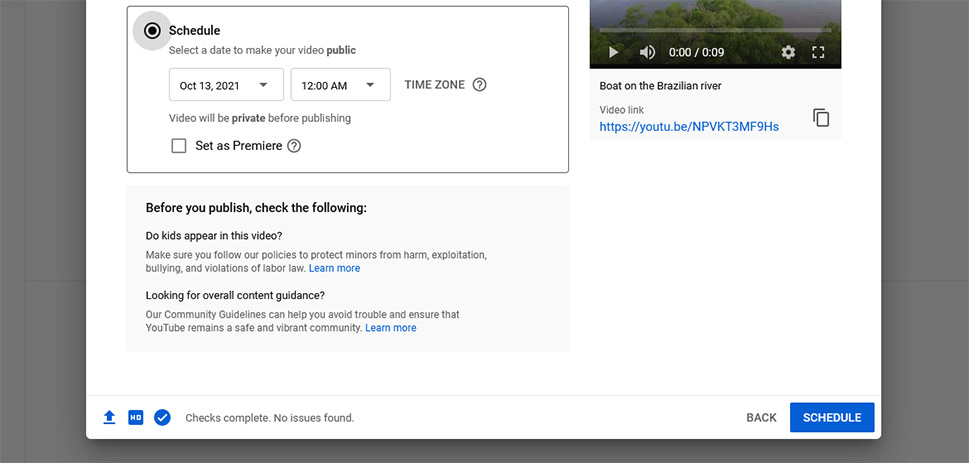
After another warning to check for kids appearing in your video and guidelines compliance, you’ll be able to publish or schedule the publishing of your video.
After you’ve created your YouTube channel and figured out how to upload videos, the real work begins. If you plan to take your channel seriously and grow it, you’ll need to ensure the consistent quality of your content. You’ll need to post regularly, stick to a theme and a look, and constantly look for ways to improve your content.
What you do next will also depend on the reasons you had for starting the channel. If you created the channel simply to have a place to host your video content so that you can embed it on your WordPress website, your steps might focus on promoting your website, adding YouTube plugins to make the website work better with videos.
As a content creator seeking to monetize content on YouTube, you’ll want to start working towards YouTube Partner Program eligibility as soon as possible. You’ll have to turn on two-step verification, ensure guidelines compliance, and amass at least a thousand subscribers and four thousand viable public watch hours before you can apply for the Program. That’s quite a road you have ahead of you, but don’t worry – there’s nothing stopping you from having fun while you travel it.
