How to Change the Title and Tagline of Your WordPress Website

If you were impatient during the WordPress installation process and wanted to get it over with as soon as possible, you might have given your website a placeholder title and tagline. However, your title and tagline are often the first things anyone will see when they stumble upon your page. They are key components of your brand, and instantly let visitors know what to expect from your site. Not to mention that they’re highly important for your website’s SEO.
So, instead of sticking with those placeholders you initially set, you should think about optimizing your title and tagline to best reflect your business and your brand.
Luckily, changing the WordPress title and tagline is not a complicated process at all, and the steps for doing so are the same for both the Classic and Gutenberg editors. Here are simple instructions on how to do it.
1. Login to Your Website
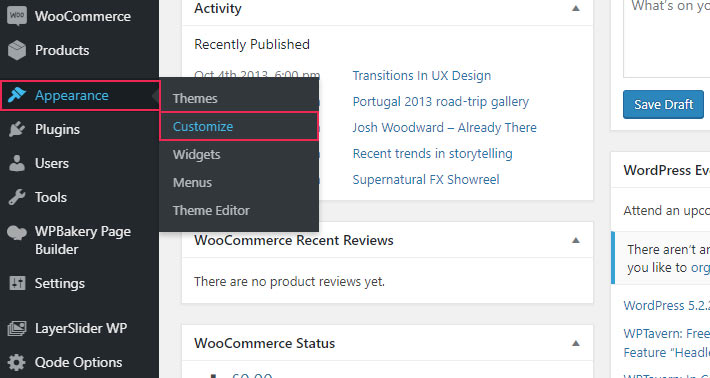
First things first, you need to be logged in to your admin account if you want to make any changes. Once you do so, you need to go to Appearance and then choose the Customize option.

2. Choose Site Identity
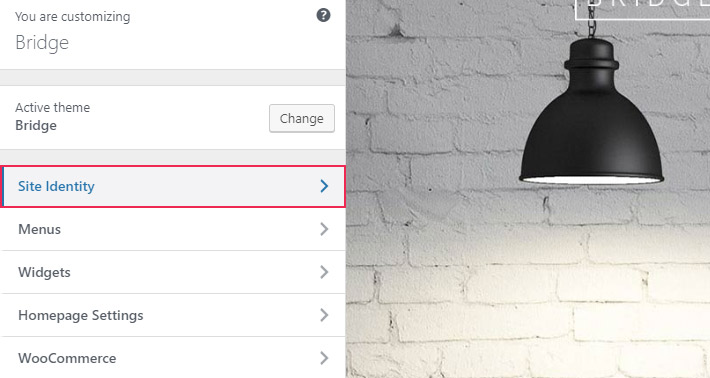
Next, you should click on the Site Identity tab located in the upper left corner of the navigation menu.

3. Change the Website Name
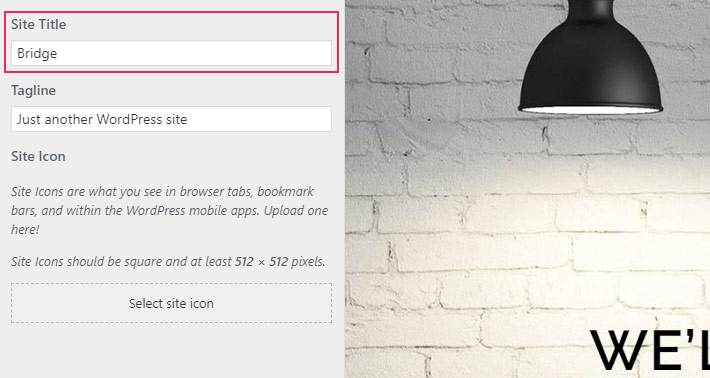
You can change the name of your website in the Site Title field by deleting the previous name and then adding a new one. Don’t forget to click on the Publish button when you’re finished.

4. Change the Tagline
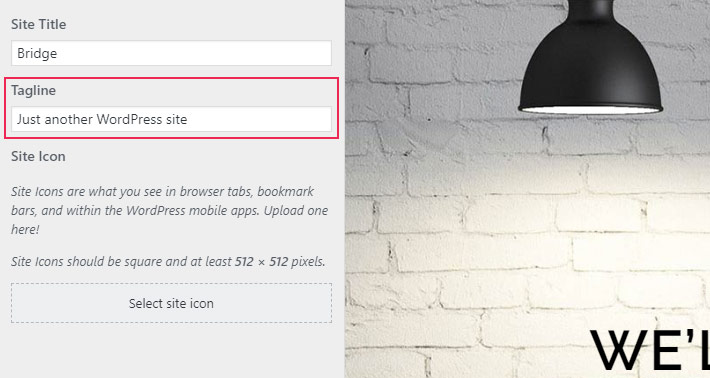
Changing the tagline can be done in the same way. Simply edit the Tagline field by putting in a short but captivating description of your website. Again, you should click on Publish once you’re done.

Conclusion
And that’s all that you need to do to change the title and tagline of your WordPress site. Go ahead and come up with a unique name and description of your brand that’s sure to grab the attention of your target audience!


