How to Display Your Instagram Feed on Your WordPress Website

Did you know that as of 2023 Instagram has over 2.3 billion active users? Regardless of your industry and niche, that is some potential you simply have to tap into. Everyone’s on it these days, even the big corporations, who use it to establish their brand personality and promote their business. But it’s not enough to just “be on Instagram.” To truly thrive on social media, you have to connect all your social profiles into one integral web presence that users can easily navigate between.
One of the best ways to keep your website visitors engaged with your Instagram activity is to add an Instagram feed in WordPress to display it on your website. We’re here today to give you some guidelines about that, but first let’s see what an Instagram feed actually is and how it works. Here’s what we’re going to cover:
Instagram is a feed-based platform in itself, given that it works by displaying updated content in real time. Dynamic by nature, it makes a great addition to WordPress websites that aim to keep their visitors engaged with constantly fresh content.
An Instagram feed on a website means that the content you post on your Instagram profile (photos and videos) gets displayed and updated on your website as well. Not only will your visitors be up to date with your latest posts but you will also increase social engagement and interactions and raise the number of followers on your Instagram account. Plus, the Instagram content makes your website look fresh and dynamic with little or no effort.
The majority of Qode Interactive’s premium WordPress themes come with an Instagram feed already built in. If you have purchased one of our WordPress themes that have Instagram integration, here’s how to activate the feed and start sharing your Instagram posts directly on your website.
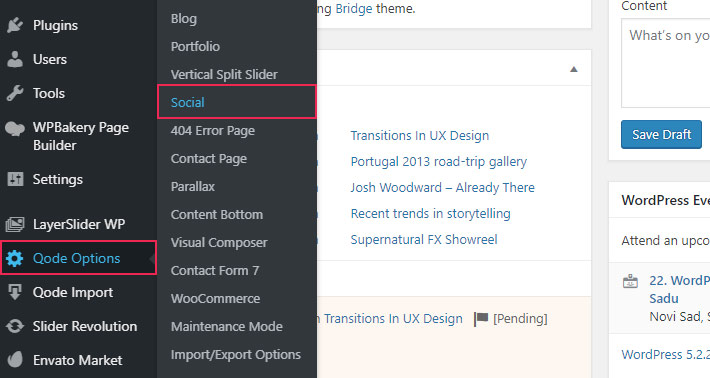
1. The first thing to do is to connect your website with your Instagram account (if you have several Instagram accounts, you will have to pick one to display on your site). In your Dashboard, go to general theme options. In our example, we are using Bridge, so the options are titled Qode Options. In themes made by other authors that are part of Qode Interactive, the name of the theme options will be Select/Edge/Elated/Mikado Options, depending on which theme you’re using.
Now click on Social to connect your account.
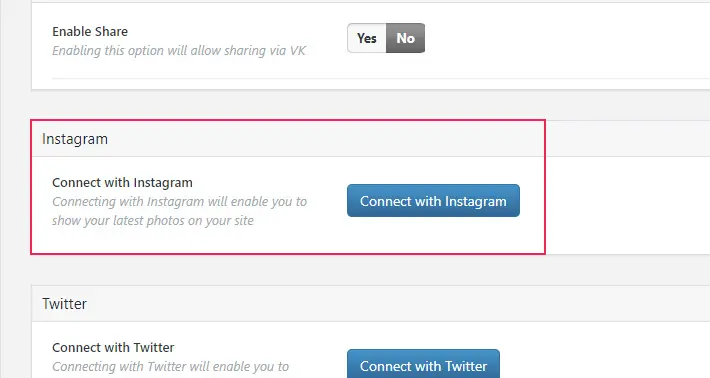
2. Find Instagram among the available social networks and click the button that says Connect with Instagram.
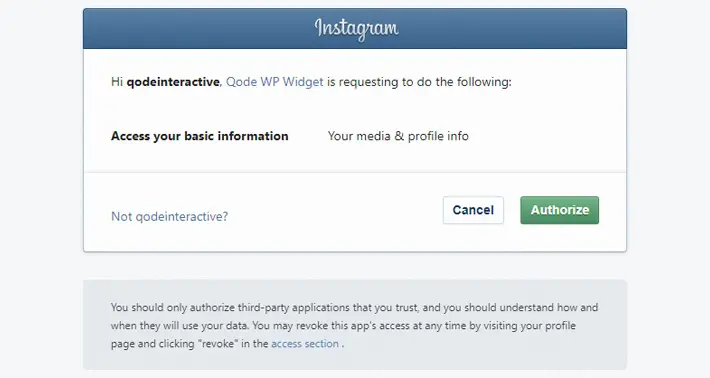
3. You will now be asked to authorize the theme to access your Instagram profile (your basic information, media and profile info). Click on Authorize to complete this step.
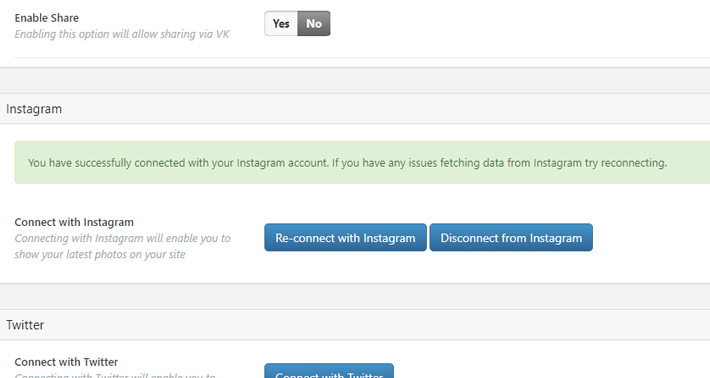
4. Once you have connected your site with Instagram, you will be able to easily disconnect or reconnect by clicking the corresponding buttons.
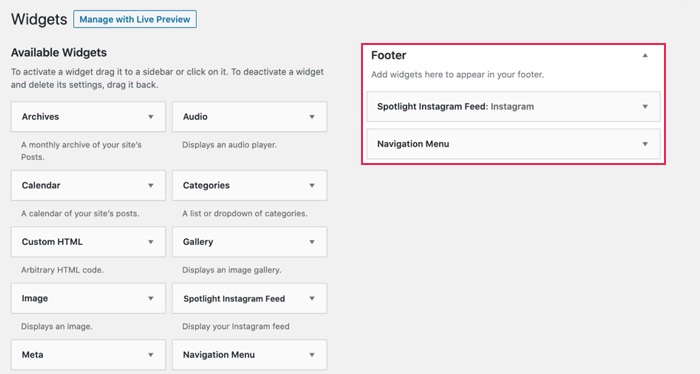
5. After connecting your website with your Instagram account, it’s time to add the feed to your site. This is done using widgets. Go to Appearance > Widgets.
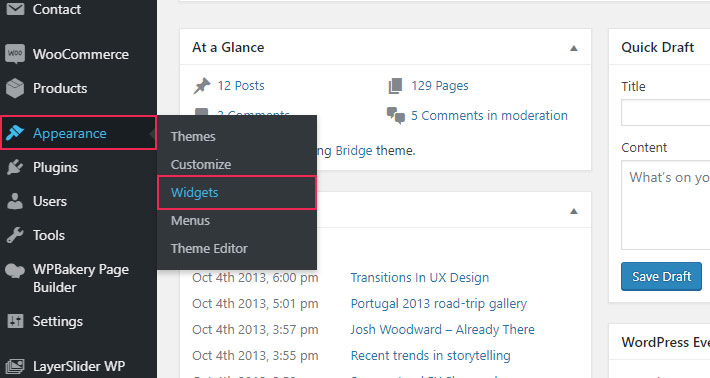
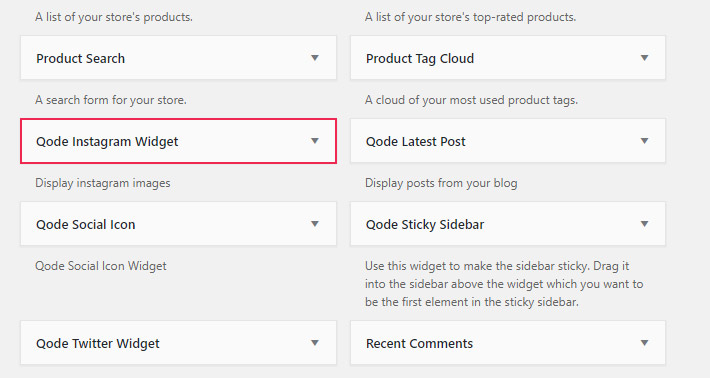
6. Here you’ll notice that there is a custom Qode Instagram Widget created just for this purpose, listed among the other available widgets on the left side of the screen.
7. To add the widget, simply drag and drop it in the desired widget area. After that, you can customize the feed as you like.
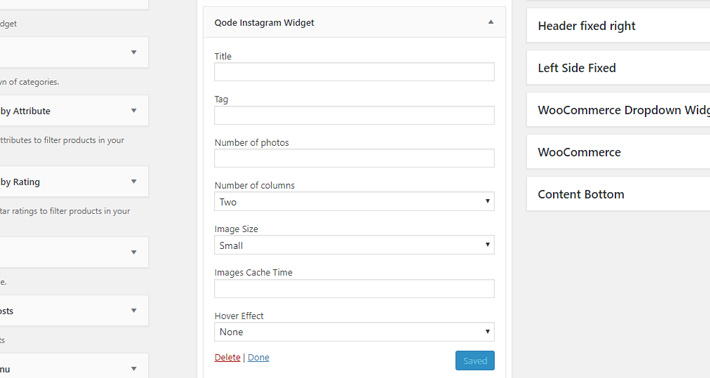
8. Set the title for your Instagram feed, add tags, specify the number of photos you want to display and the number of columns you want to use. You can also set the image size, cache time for images and add a hover effect, if you like.
Click on Done to save the changes.
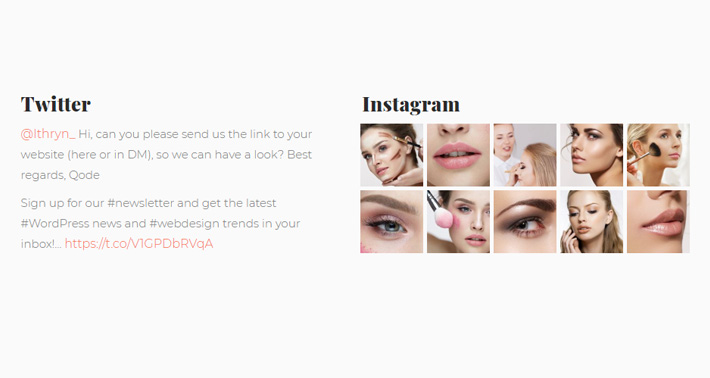
We placed the feed in the footer of our site using the Bridge theme, and here’s what it looks like:
Another excellent solution for your Instagram feed needs is the Smash Balloon Social Photo Feed plugin for WordPress.
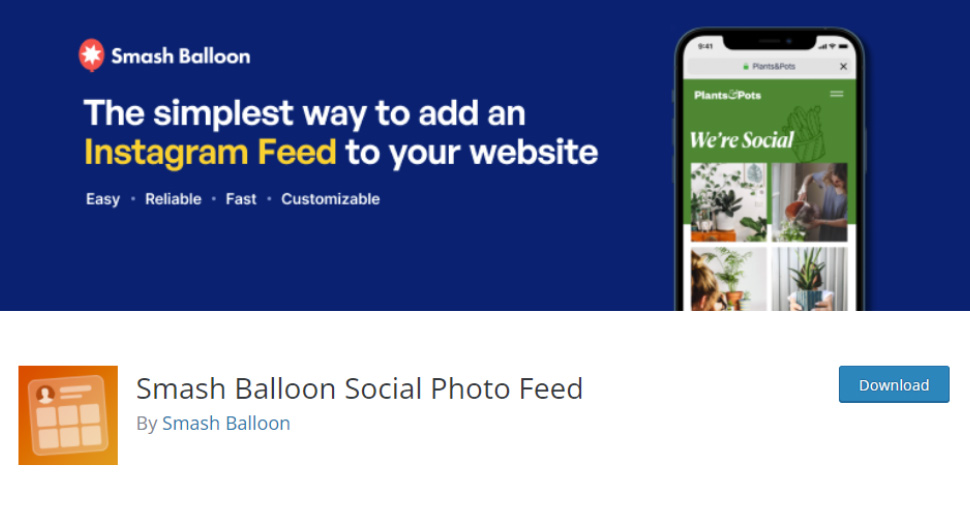
Something of a veteran in its field, with over one million active installations, regular updates and excellent support, this is a plugin that takes care of everything. It connects with your Instagram account (or multiple accounts, if you have them) and displays the feed where you want it. You get to set everything just the way you like it, including where you want to add the feed and how regularly you want it to fetch new content from your profile.
Installing and Configuring the Plugin
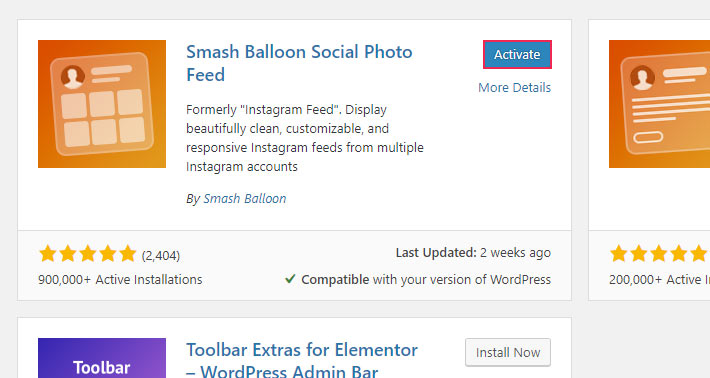
To install the Smash Balloon Social Photo Feed plugin, you need to log into your Dashboard, click on Plugins and then type the name of the plugin in the search bar.
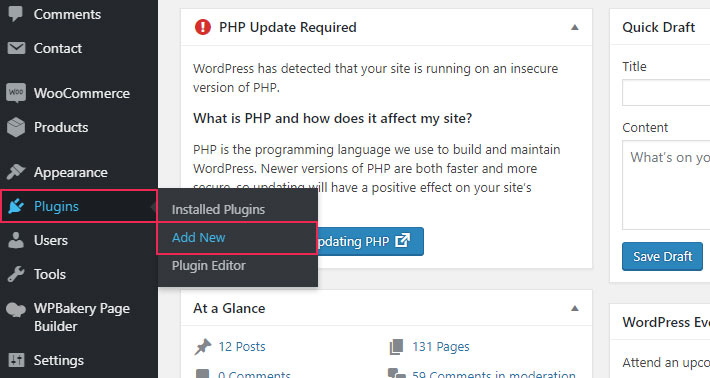
Click on Install Now and then on Activate.
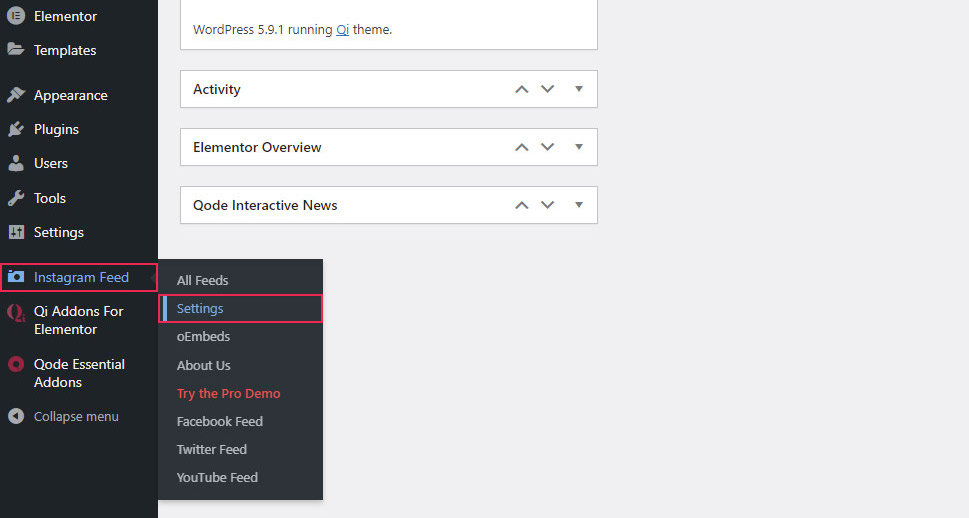
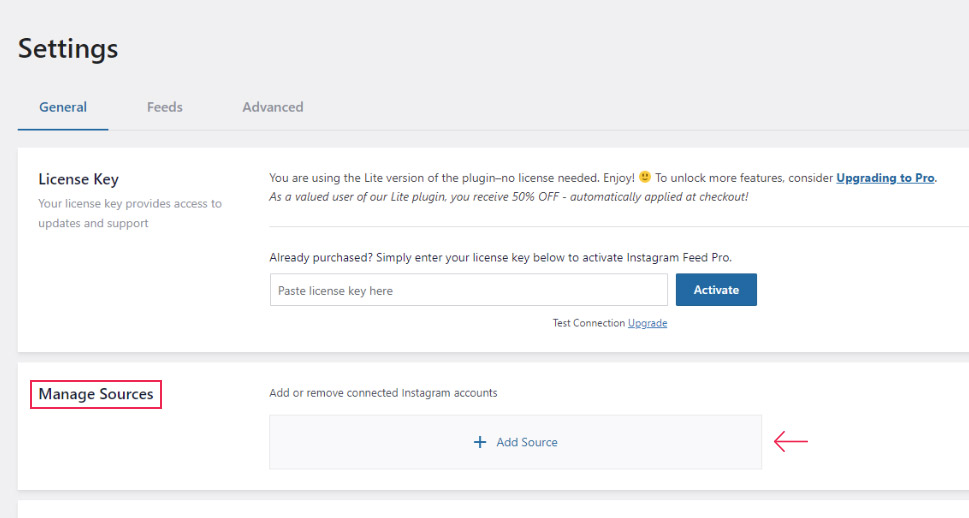
Instagram Feed will appear in your Dashboard menu. To set everything up, navigate to Instagram Feed > Settings.
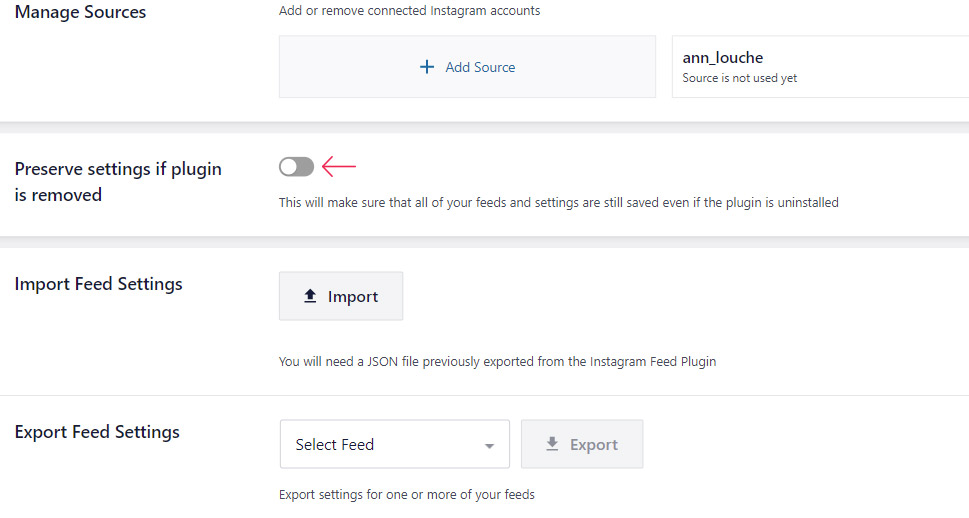
Click on the Add Source button and follow the instructions on the screen to connect your account or accounts.
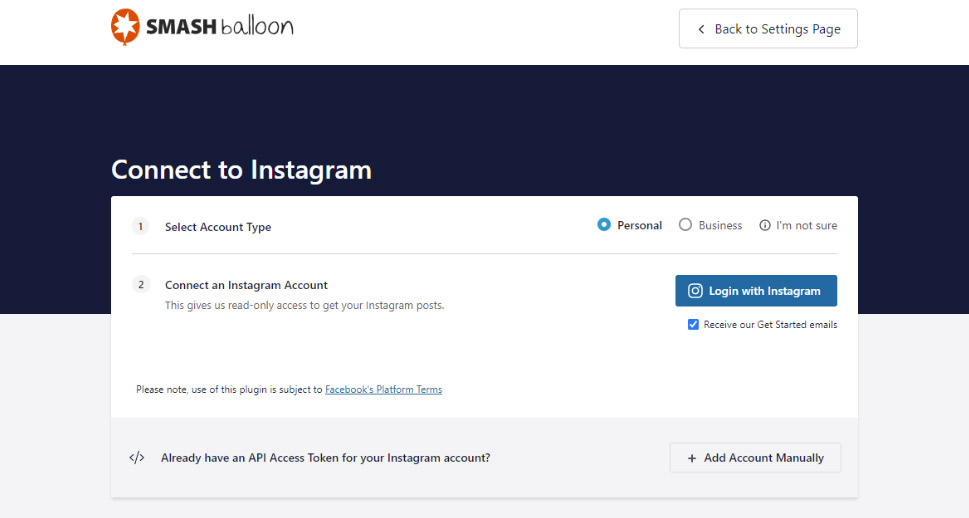
Select the account type using the radio button, and connect your account by clicking on the Login with Instagram button.
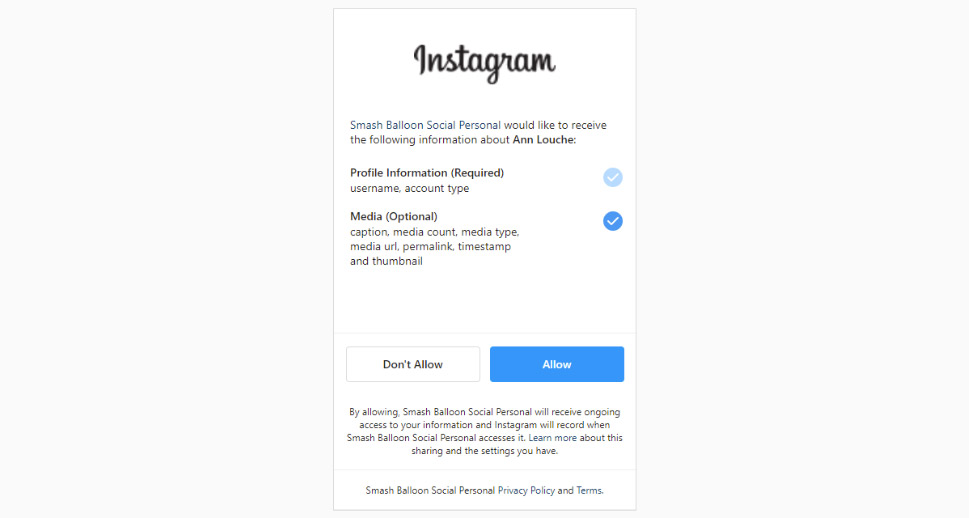
If you are not already logged in, you will need to enter your login credentials and grant Smash Balloon access to your Instagram data. To do so, click the Allow button.
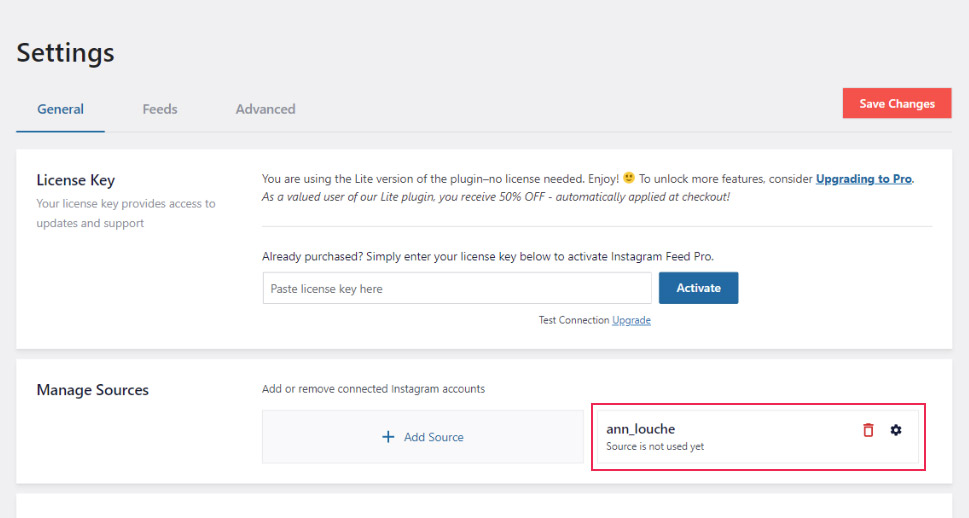
Once your account is connected, it will appear in the General tab of your plugin.
There’s also a box you can check if you want to keep your settings even after the Instagram feed plugin is removed. That way, if you decide to reinstall it, you won’t have to set everything back again to how it was.
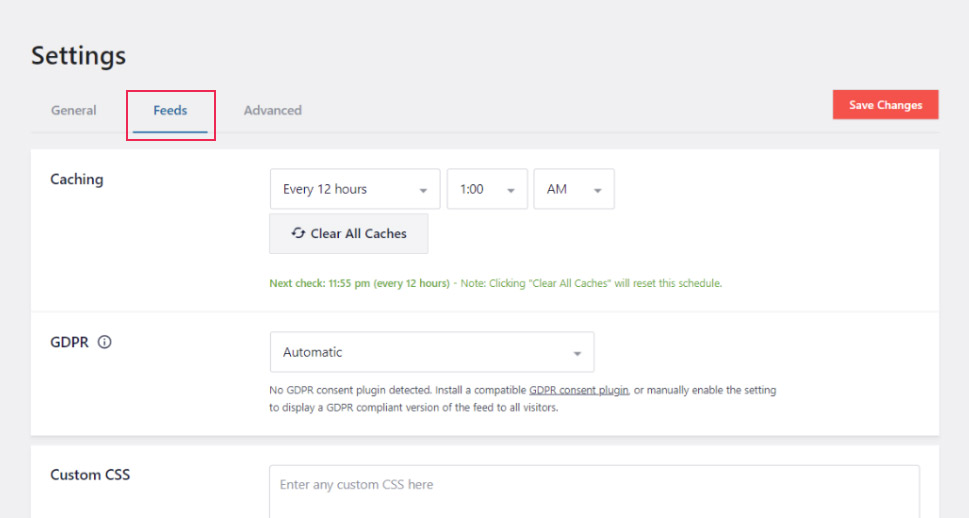
Using the Feeds tab, you can set how often you want the plugin to check for new posts (in minutes, hours or days).
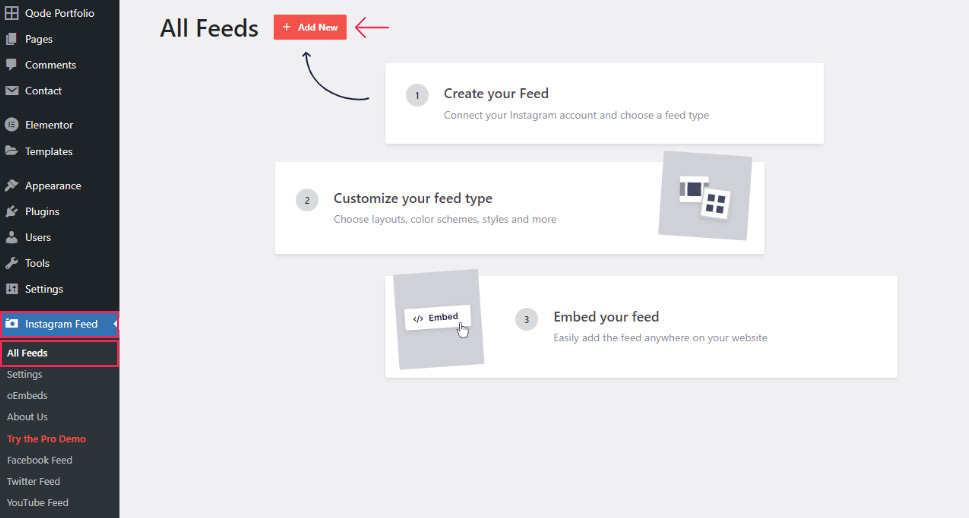
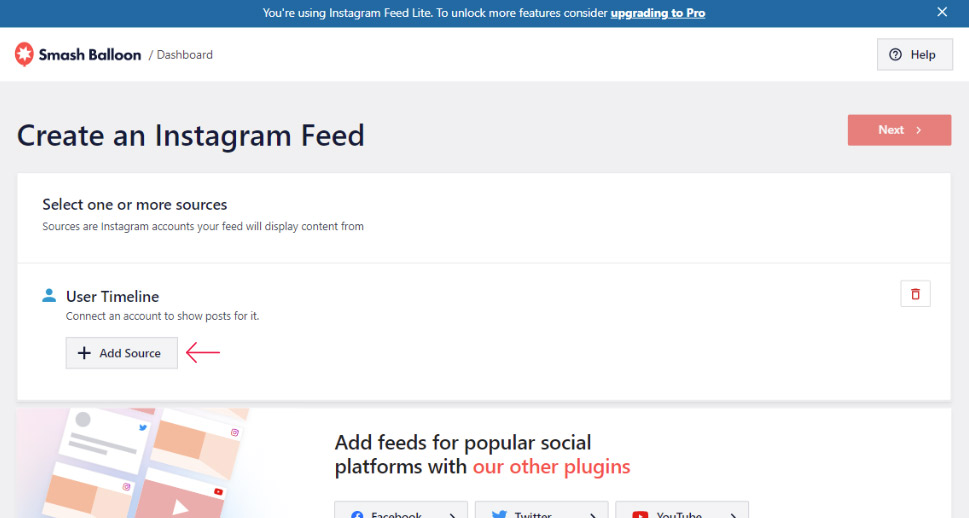
Now that you have connected your Instagram account to your website, you can continue adding your instagram feed. First, navigate to Instagram Feed on your WordPress dashboard and select All Feeds.
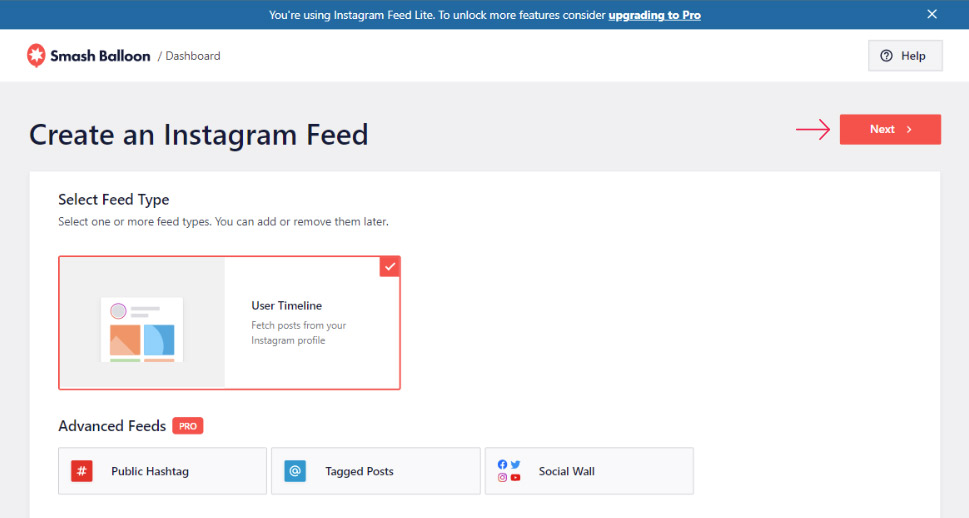
With this free version of the plugin, we only have one type of Instagram feed available: User Timeline. We will select that, and click the Next button in the upper right. Other feeds are enabled for pro users, but we will not be demonstrating them here.
Next, you need to select the source for the user timeline, that is, the account you will be using. Click the Add Source button.
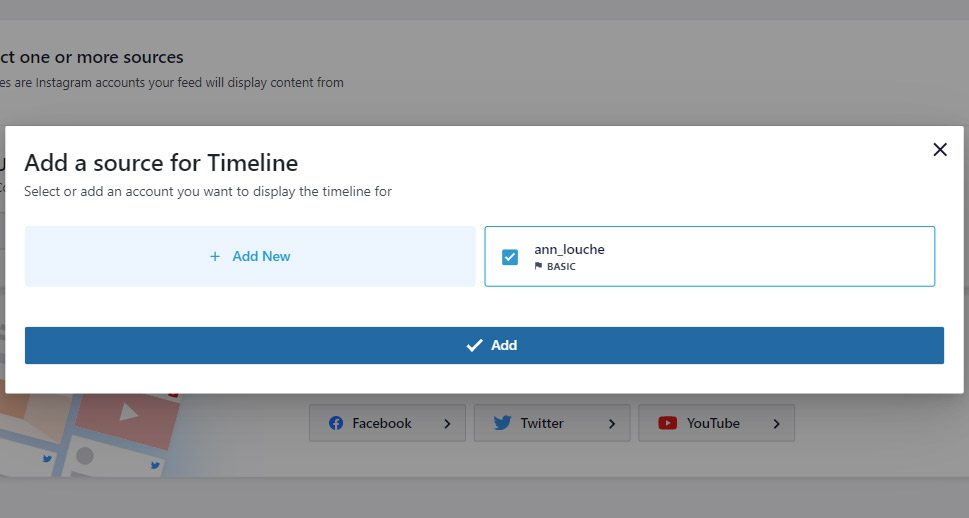
In the pop-up window, select the source for your User timeline. If you don’t have one, you can add one by clicking on the Add New space. Once you have selected one, click the Add button.
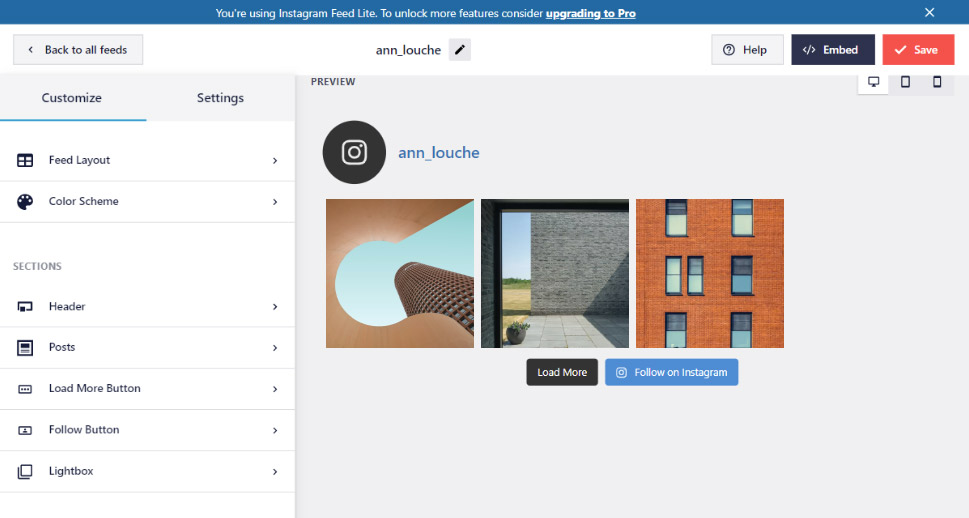
Once you have selected a source, you will be taken to a window where you can customize and style your feed. Here you can:
-
- Set the width, height and background color of the feed
- Set the number of photos to be displayed
- Set the padding and number of columns
- Sort photos (from newest to oldest or random)
- Set image resolution for your Instagram photos
- Show or hide the Follow and Load More buttons
- Enable or disable feed header, set header size and color and add the user bio.
The basic functionalities are there, but many options are limited to pro users.
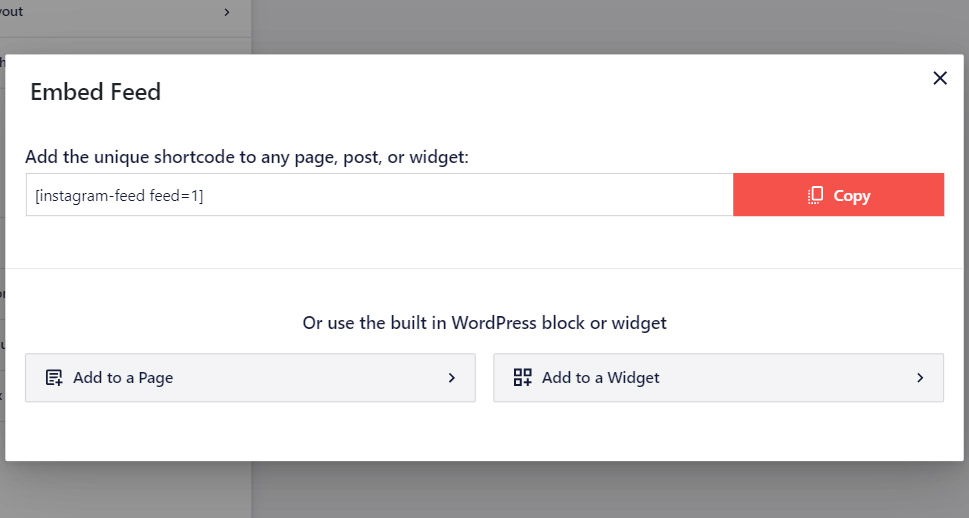
Once you have set up your feed’s style the way you like it, you can embed it into any shortcode-ready area of your website. To get the shortcode, click on the Embed button.
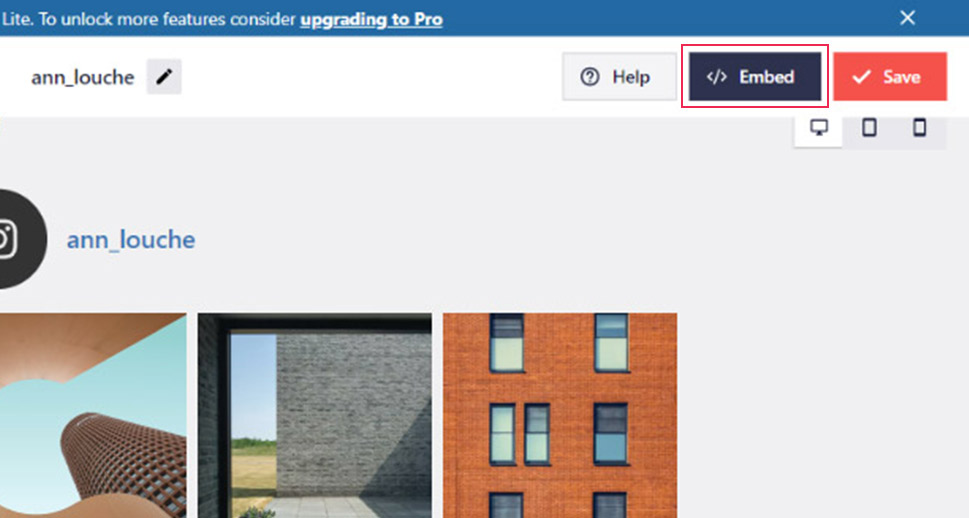
You can now copy the shortcode either by selecting it and copying it as you would any other text, or by clicking on the Copy button. You can then use it as you would any other shortcode: on a page, as part of a post, or in any widget area of your website.
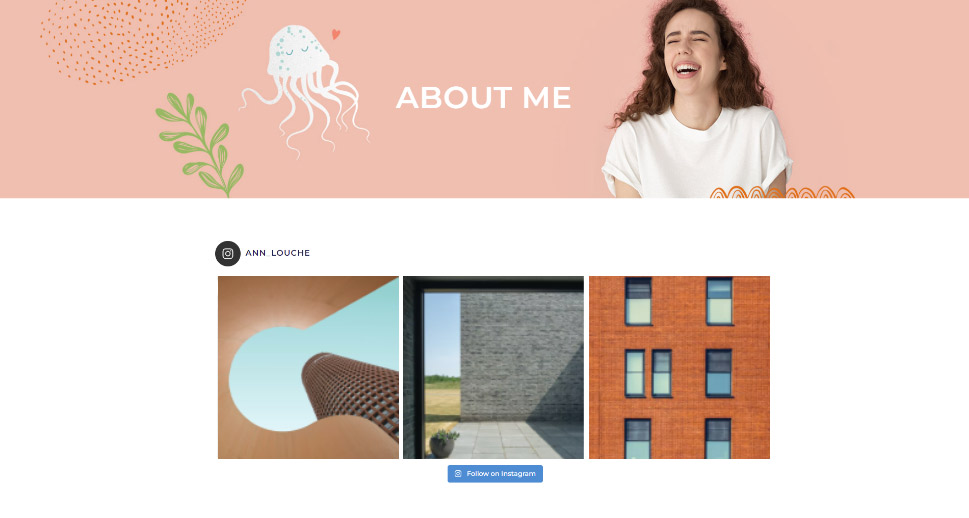
This is what it looks like on the About Me page of our test website.


If you’re using a theme that doesn’t come with our built-in Instagram feed, or if you prefer using plugins, then Spotlight Instagram Feeds is the right solution for you.

This WordPress plugin takes care of all your Instagram needs. You can connect multiple accounts, both Personal or Business, in a matter of seconds and display your feeds anywhere on your website.
Thanks to its live interactive preview, designing the look of your feed has never been easier. No matter your level of WordPress knowledge, you can easily set the number of posts and columns of your feed. The plugin’s intuitive and easy-to-use interface lets you seamlessly integrate your Instagram posts with your website’s theme and styling.
The free Instagram feed plugin offers everything you need to get started. It comes with a beautiful Grid layout that can display your posts in a lightbox (pop-up), is fully responsive and lets you add a “Follow” button to ensure your visitors can be converted into followers.
The paid version offers some more advanced features, such as the ability to display tagged and hashtag posts from all over Instagram, as well as your Instagram Stories. It also allows you to filter and moderate your feed. This ensures that you get to choose exactly what you want your visitors to see.
Additionally, the PRO version comes with stunning Highlight, Masonry and other layouts. It lets you display the number of comments and likes on your Instagram post, as well as display captions.
Most importantly, Spotlight is fast and reliable and won’t impact your website’s loading speed. The plugin also has its own caching system which makes sure that your Instagram feeds are always backed up!
Installing and Configuring the Plugin
1. To install Spotlight, you need to log into your Dashboard, click on Plugins, and type “Spotlight Social Photo Feeds” the name of the plugin in the search bar.
2. Click on Install Now and then on Activate.
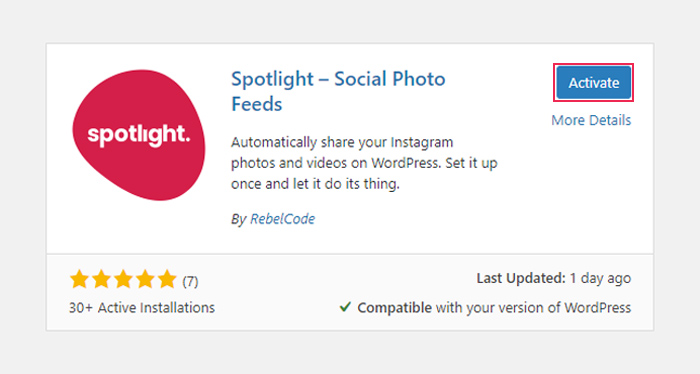
3. Instagram Feeds will appear in your Dashboard menu. Click on it to access the plugin options.

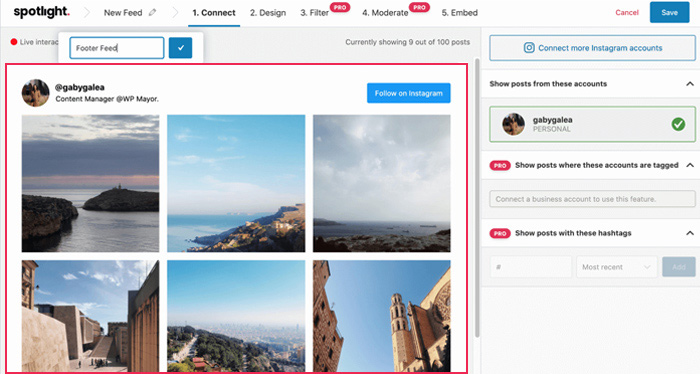
4. Choose between a Personal or Business Instagram account and select the relevant button on the startup page.
In this example, we’ll be using a Personal account.
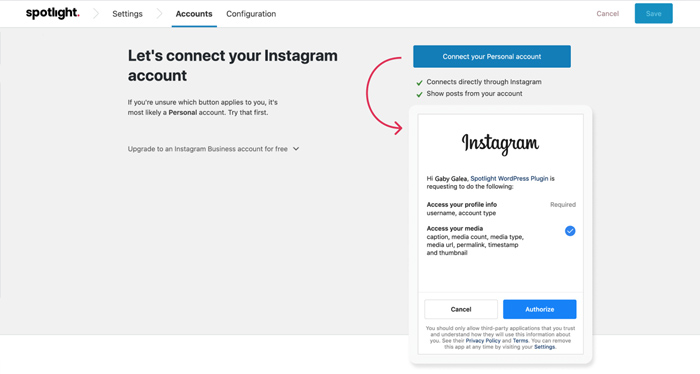
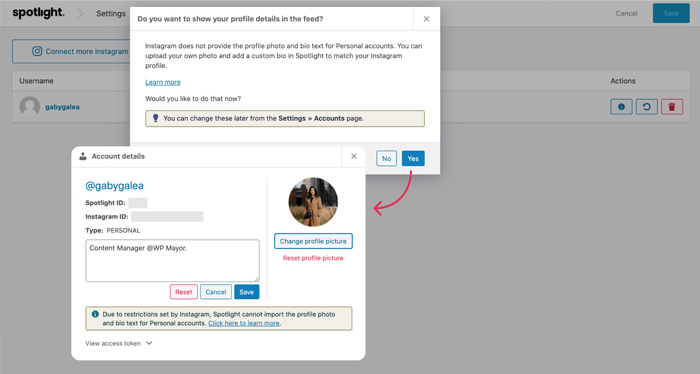
You will need to authorize Spotlight to get access to your Instagram profile info and your media.
Once your account has been connected, you will be asked if you want to add a profile photo and custom bio. In the case of Personal accounts, Instagram doesn’t allow for user bios and profile pictures to be imported so Spotlight addresses this issue with a simple fix.
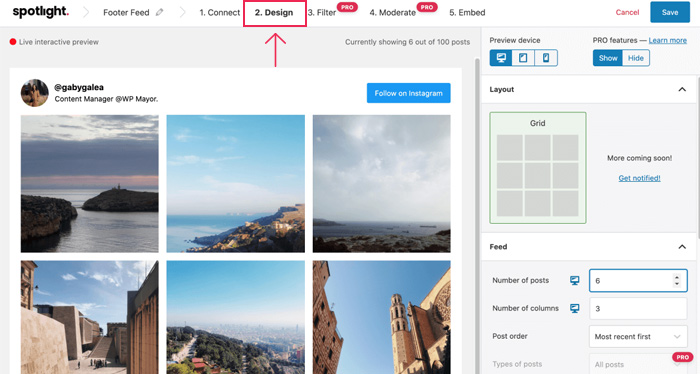
5. Once you’ve got everything set up, your feed will automatically show up in the live interactive preview. Name your feed and head over to the Design tab.
6. Under the Design tab you can:
-
Set the number of posts to be displayed and the number of columns
-
Sort posts (from newest to oldest, popularity or at random)
-
Open posts in lightbox, new or same tab
-
Set the width, height and background color of the feed
-
Set the inside and outside padding and text size
-
Show or hide the Instagram icon on your posts on hover
-
Design your feed according to your device (desktop, tablet and mobile)
-
Enable or disable the feed header, set the background color, text size and text color, and add the bio
-
Set whether the Load More and Follow buttons will be shown or not, their position, background color, button text and text color
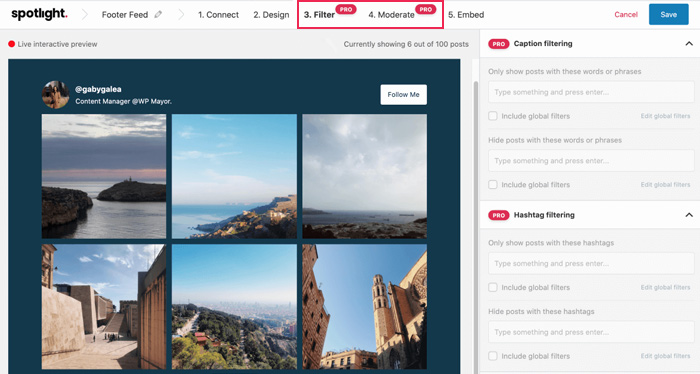
7. In the PRO version, you will now be able to filter and moderate your feed.
8. After customizing the feed, it’s time to embed it. The Embed tab will present you with a shortcode which you can paste in any page, post or widget.
Your Instagram feed will then be displayed according to the settings you’ve set up under the Design tab. You can adjust these settings at any time and your feed will be automatically updated on the front end.
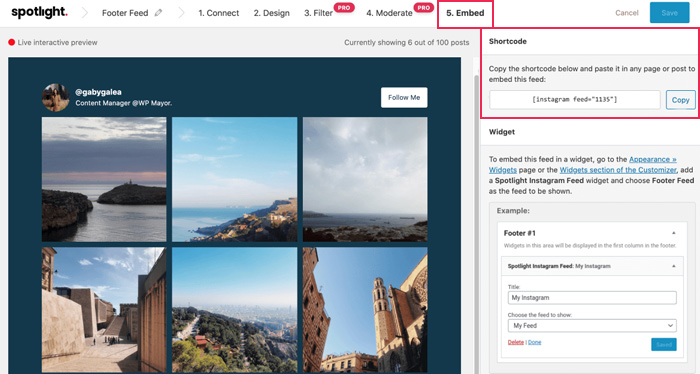
Spotlight also has a dedicated widget which you can use to display your feed.
You have now successfully set up your Instagram feed!
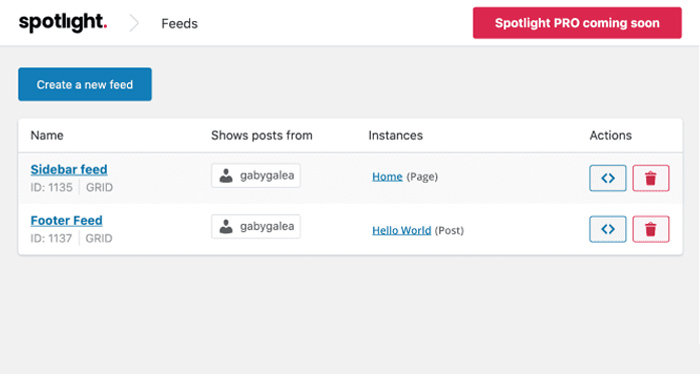
In your dashboard, head over to “Feeds” to access and manage all your feeds. Spotlight lets you know which accounts are being used and where each feed is being shown. It also allows you to delete feeds and copy shortcodes.
Final Thoughts
Considering the enormous popularity of Instagram as a content sharing platform, it’s no wonder we see more and more of these Instagram feeds on websites all over the Internet. If you’re not using one, you risk appearing out of touch, and you probably don’t want that.
Fortunately, connecting your Instagram account with your website is extremely easy to do, especially if you’re using one of Qode Interactive’s themes that come with built-in Instagram feed. Alternatively, you can always use one of the plugins we discussed above.
Either way, it’s time to connect, upload and share!

Ashlea Berkhout
When will the instagram feature be fixed?
Qode Interactive
Hi and thanks for getting in touch. Unfortunately, the issues with the Instagram feature are a result of changes to the Instagram API. Our development team is working hard on a permanent solution and we hope to roll out a fix soon. In the meantime, we recommend using this third-party plugin as a temporary solution: https://wordpress.org/plugins/instagram-feed/
Best Regards,
Qode