How to Fix the “503 Service Temporarily Unavailable” Error in WordPress

WordPress is the most popular CMS (Content Management Software) used today. That is, in large part, due to its straightforwardness and the low level of technical knowledge needed to get a website going. However, despite its user-friendliness, sometimes a WordPress site will encounter an error that can be difficult to solve. This is particularly the case with errors that offer little to no explanation as it makes them daunting for any newer user. The 503 Service Unavailable Error is one of those. It renders both your frontend and backend inaccessible, whilst (as you can see in the screenshot below) offering limited information.
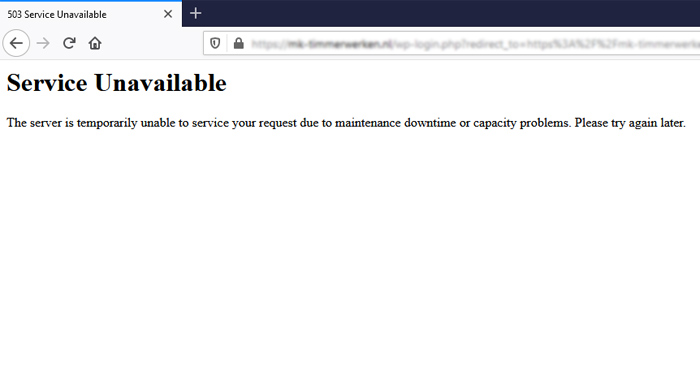
This error can also appear with the following error codes: 503 Error, HTTP 503, HTTP Error 503, HTTP Server Error 503, and HTTP/1.1 Service Unavailable. As all these error codes don’t give any clues regarding the issue, in this article we will show you probable causes and the tried-and-true steps for solving it:
How to Solve the 503 Error
The 503 Service Unavailable Error happens when you try to access a website, but the server hosting it isn’t reachable. That’s due to various reasons which can be loosely grouped into two categories – faulty coding and server issues. The reasons include issues with your plugins and theme, errors due to improper custom scripts, insufficient server resources, or sudden spikes of website traffic. The spike in traffic could be a real issue, caused by an influx of visitors to your website, or a false one, caused by a DDoS attack (Distributed Denial of Service attack). There are several possible approaches to fixing a 503 error. We’ve divided the troubleshooting process into seven steps that will help you pinpoint the exact reason behind the error and solve it as efficiently as possible.
Most frequently, the reason why a 503 error occurs is due to incompatibility issues between the many plugins a typical WordPress site might have. Therefore, the first and easiest step you can take while troubleshooting this issue is to deactivate all plugins. Since you won’t be able to login to your dashboard directly, you would need to connect to the server via FTP.
Connect to your server using your FTP credentials and navigate to the root WordPress directory (often called public_html). Open the wp-content subdirectory, right-click on the plugins folder found within, and click on the Rename option in the dropdown.
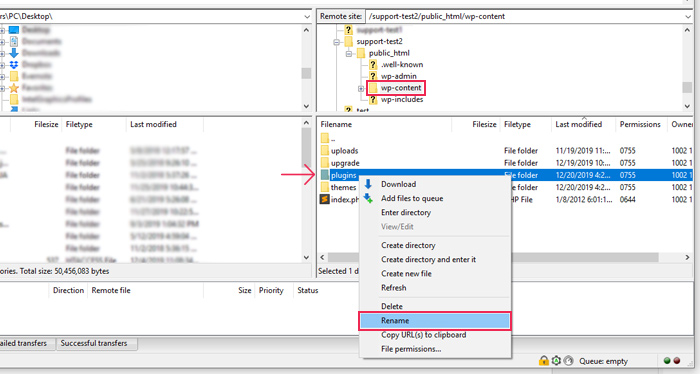
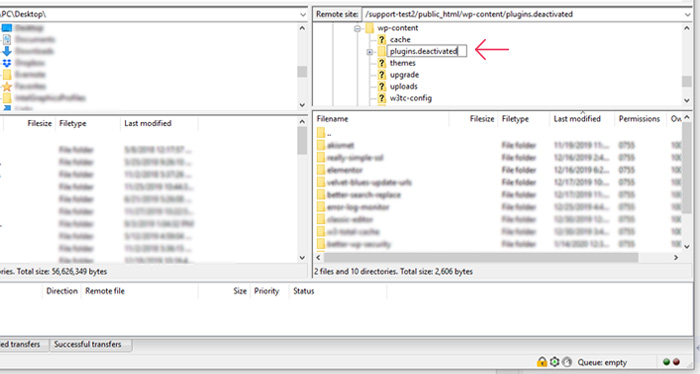
Rename the plugins folder (for example, plugins.old or plugins.deactivated) and check if the 503 Error persists.
Renaming the plugins folder will deactivate all plugins. If the error no longer appears, the issue is caused by a faulty plugin. To pinpoint which one, you need to re-activate them all and then deactivate one by one while checking if the 503 error has gone.
Here are the steps you need to take. First, undo the name change for the plugin subdirectory, i.e. restore it to plugins. This will allow you to activate the plugins manually within your dashboard. To do so, navigate to Plugins > Installed Plugins and activate all your plugins manually. Then, log out of your admin dashboard.
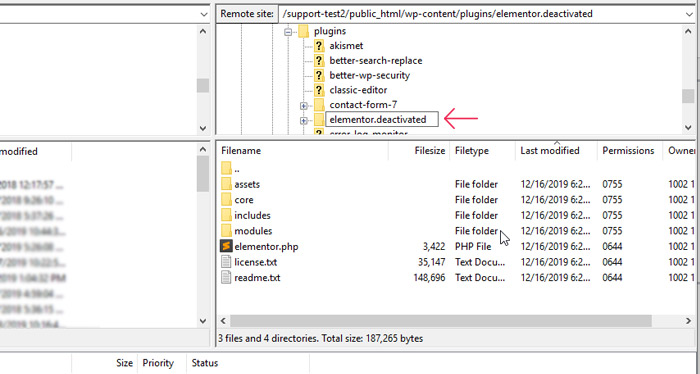
The next step requires you to reconnect to your server using your FTP credentials and navigate to your plugins directory which should be located at your-site/wp-content/plugins/. Select a plugin, right-click on the plugins’ folder followed by clicking on the Rename option.
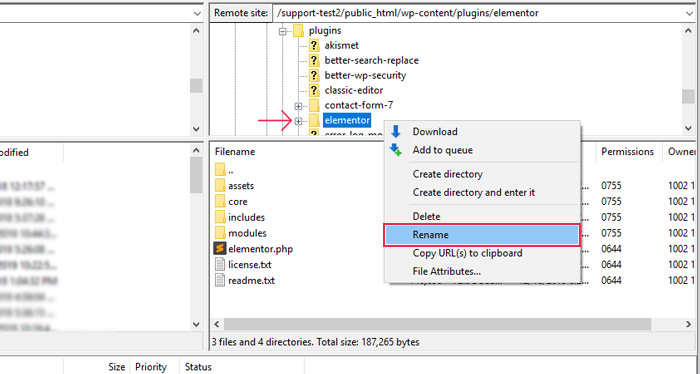
Rename the folder (for example, plugin-name.old or plugin-name.deactivated).
Then try to log in to your dashboard again. If you are able to log in, you have found your culprit—the plugin you previously deactivated by changing its folder name. If you weren’t able to log in, repeat the same process for all plugins, one by one, until you find the faulty one. After establishing which plugin caused the issue, contact its developers for assistance.
Another likely reason for the 503 error is a faulty theme, so the next troubleshooting method is to deactivate it. For users who have multiple themes installed (including a default one like Twenty Twenty), simply deactivate your current theme via FTP. This will activate the default WordPress theme. Then, try to log to your admin dashboard once more. If you are successful, it indicates that the 503 error was caused by the theme you were using.
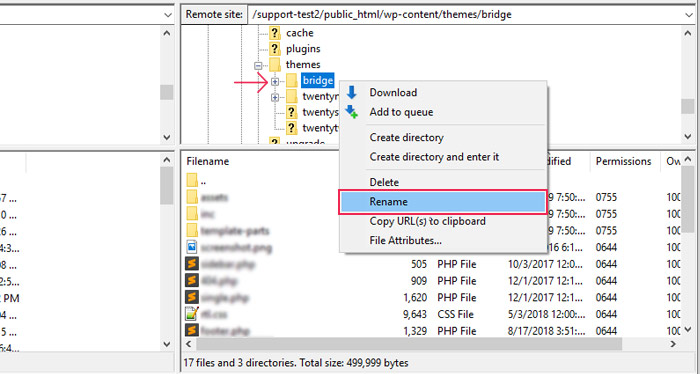
You can deactivate your current theme by connecting to the server using your FTP credentials and locating the root WordPress directory. Navigate to the /wp-content/themes/ directory, right-click your current theme’s directory and select the Rename option.
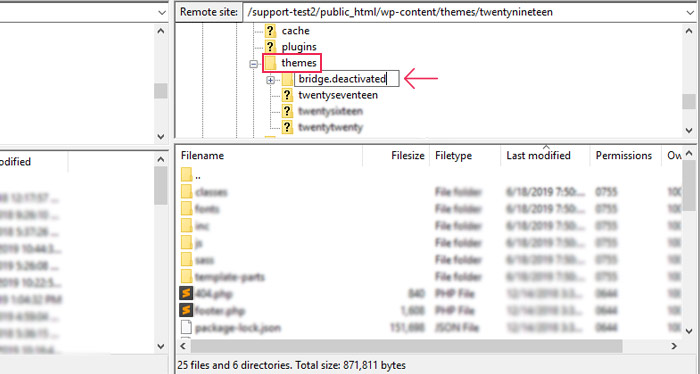
Rename the theme directory and then try to log in to your dashboard.
If you don’t have a default WordPress theme installed, there is an added step. You will have to download one from the WordPress repository first, upload it to your WordPress installation, and then deactivate your current theme.
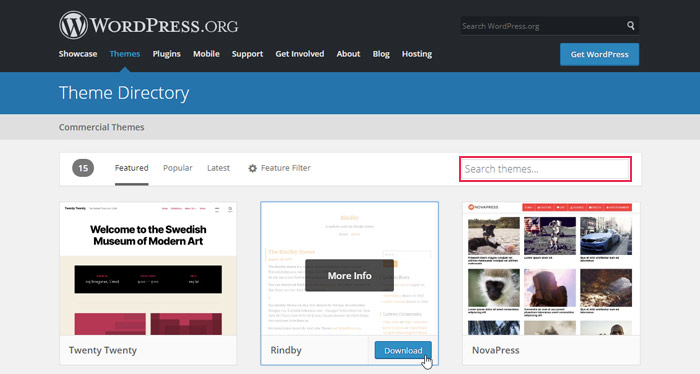
To complete this added step, navigate to the WordPress default theme repository, pick a theme using the search filter, and download it.
Locate the downloaded file—it will be a zipped folder with the name theme-name.zip (theme-name being the actual name of the theme). It will most likely be in your Downloads folder.
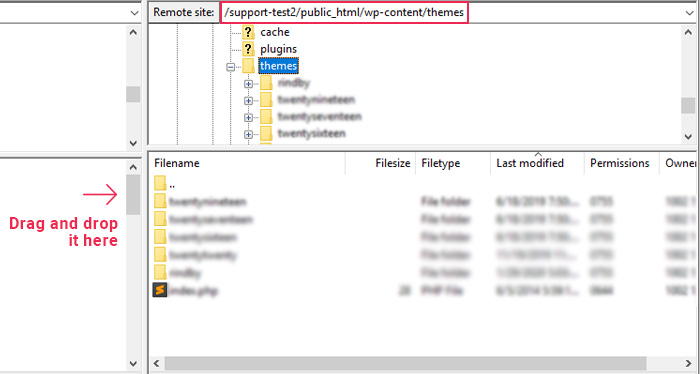
After you locate the .zip file, extract it. Connect to your server using your FTP credentials and navigate to the following path: your-site-url/wp-content/themes/.
Drag and drop the unzipped theme-name folder and wait for it to upload.
Make sure not to put the new theme’s folder inside the folder(s) of another theme!
Then, test if your current theme is the source of the issue, by disabling it as described in the section above. If your site stops showing the 503 error while using a default WordPress theme, then you’ll know your original theme was actually the reason for the issue. In that case, you should contact its developers for assistance.


If you weren’t able to figure out the source of the 503 error by trying the first two suggested solutions, then inspecting any custom PHP code you might have added is your next go-to. However, as it could be quite hard to keep track of all the custom code you added over time, it is always best to turn on debugging and review your error log for clues. Furthermore, both plugins and themes can add a lot of custom scripts to your site, so reviewing your error log can help you pinpoint the exact line of faulty code, regardless of its origin. Reviewing the error log could be a valuable step towards solving the 503 error quickly even if the issue is caused by your current theme or any of the plugins you are using.
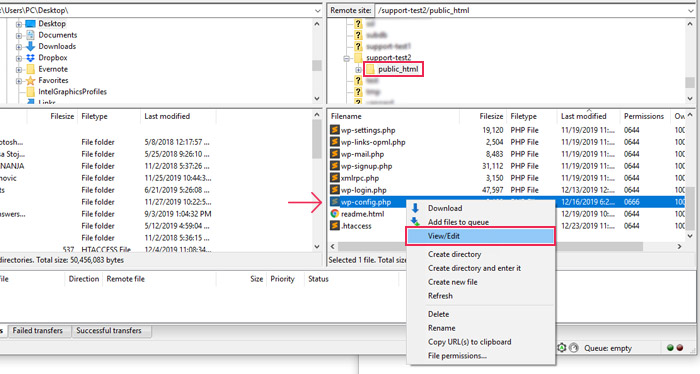
To turn on error logging, connect to your server using your FTP credentials then navigate to the root WordPress directory (often called public_html). Right-click on the wp-config.php file and press the View/Edit option.
Open the file with a text editor and, above the /* That’s all, stop editing! Happy blogging. */ line insert the following code:
define ('WP_DEBUG', true);
define ('WP_DEBUG_LOG', true);
define ('WP_DEBUG_DISPLAY', false);
@ini_set ('display_errors', 0);
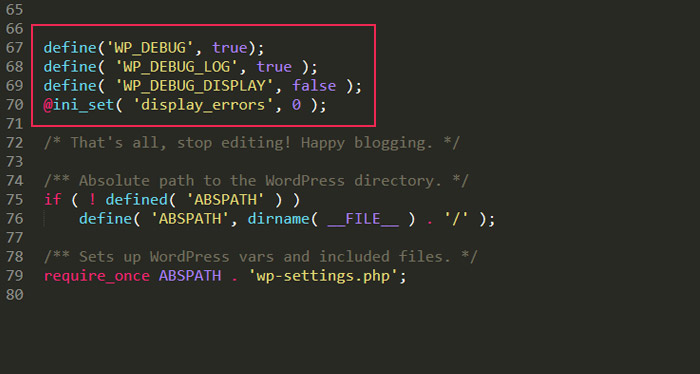
The first two lines of this code enable the debugging mode and the storing of error messages inside a file called debug.log. The path to that file is your-site/wp-content/debug.log. The following two lines of code prevent the showing and printing of error messages on your screen.
*Bonus tip
If you open the wp-config.php file and find the first line of code already present in the form define(‘WP_DEBUG’, false); you can still keep it by changing false into true. Then, add the remaining three lines of code.
Save the changes made and upload the edited file back to your root directory, overriding the wp-config.php file currently on the server.
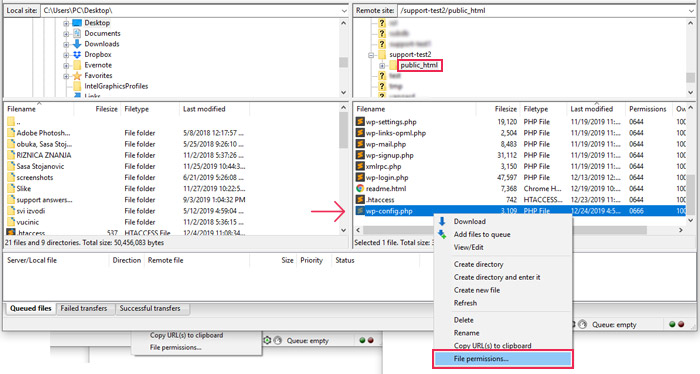
If you are unable to edit the wp-config.php file, you will need to temporarily change its permissions. To do so, locate your wp-config.php file once more, right-click on it and select the File permissions option.
In the field for Numeric value, type in either the number 644 or 666 and press the OK button.
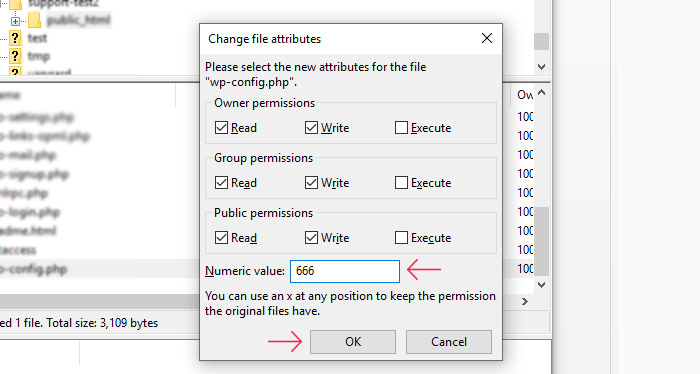
After adjusting the permissions, try inserting the code mentioned above. When you’re done, change the permissions on your wp-config.php file back to either 440 or 400, as those are the suggested permissions on this file.
Upon retrieving the debug.log file, review the error messages within. Please be aware that this could take some time or be quite difficult as the messages won’t directly mention the 503 error. Therefore, you might want to find some additional professional help, such as a developer. Depending on the file paths mentioned in the error messages, contacting the plugin or theme developers, or even your hosting provider, can be beneficial, too.
Heartbeat is a built-in WordPress API, introduced in version 3.6. It has a lot of practical uses—creating periodical autosaves of your posts while you edit them, showing notifications in your admin dashboard, managing real-time sales dates of your e-commerce plugins, and showing the notification that another user is editing the post on sites with multiple authors. However, performing all these functionalities can take its toll on server resources, especially if they aren’t that high to begin with.
The easiest way to check if the Heartbeat API is the reason behind the 503 error is to deactivate it. To achieve this, you need to add a piece of custom code at the end of your theme’s functions.php file.
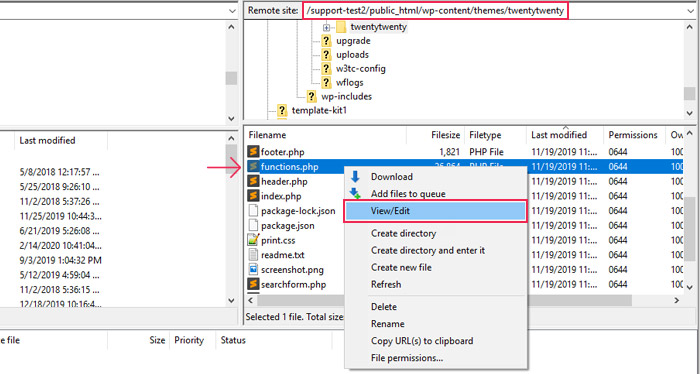
That’s done by connecting to your server using your FTP credentials and going to your root WordPress directory. Navigate to wp-content/themes, locate the directory of your current theme and open it. Find the functions.php file within, right-click on it and select the View/Edit option.
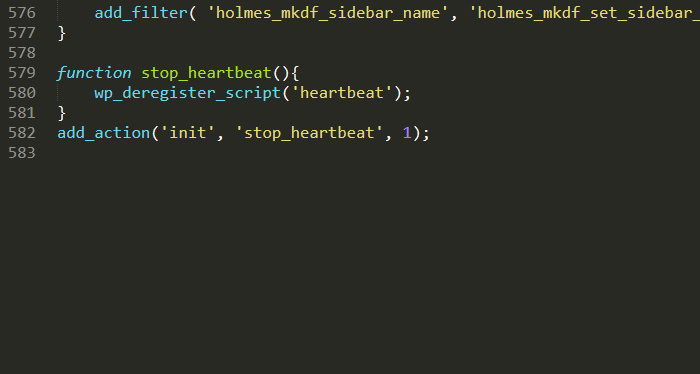
Open the file using a text editor and add this custom code at the end of the file to deregister the heartbeat script.
function stop_heartbeat(){
wp_deregister_script('heartbeat');
}
add_action('init', 'stop_heartbeat', 1);
Save the changes and upload the edited file back to the server to override the existing one. Afterward, try to access your site to see if the 503 error has disappeared. If the 503 error is still present, it means that the Heartbeat API wasn’t the culprit. Accordingly, remove the previously inserted code for Heartbeat API deactivation.
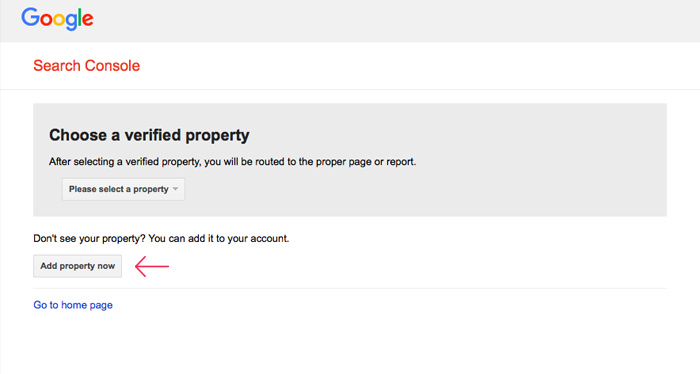
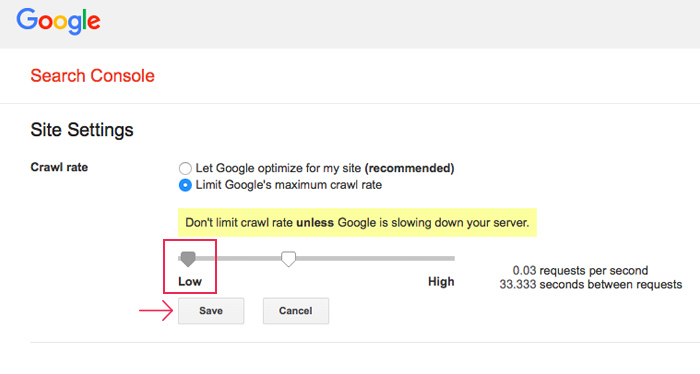
Google’s maximum crawl rate represents the maximum number of requests per second that Googlebot sends to your site for crawling purposes. Usually, Google has an algorithm for establishing the optimal website crawl rate. However, if your website has had a great number of requests in a short period of time, the added requests made by Googlebot can cause server load issues and lead to a 503 error. In those cases, it is best to limit Google’s maximum crawl rate. Unfortunately, in the newer version of Google Search Console, there is no longer an option to limit the maximum crawl rate for your website. However, you can still do it if you follow the link to the legacy version of Google Search Console—Google Webmaster Tools. While there, log in with your Google Search Console credentials and choose a verified property (the one for which you want to change the maximum crawl rate).
Find the Crawl rate option in Site Settings, click on the Limit Google’s maximum crawl rate radio button, drag the slider to the Low setting, and press the Save button afterward.
Then, try to access your site. If you are still unable to do so, then you proceed and try another of the methods suggested in this article. Also, don’t forget to reverse the changes you made to the maximum crawl rate by choosing the Let Google optimize for my site option and pressing the Save button.
CDNs, or Content Delivery Networks, are used for serving static site resources: CSS and JS stylesheets and images. They are an important asset for improving your website’s speed, especially if your site has high traffic rates. However, this means that sometimes the reason behind the 503 error is your CDN and not your server. So, if you are a website owner who uses CDNs, you can temporarily disable the CDN to test if it’s causing the error. As this process varies greatly depending on which CDN you are using, we suggest contacting your provider for details about the procedure. After you disable your CDN, check if you can access your site. If the 503 error is still present, re-enable your CDN, and then try using another of the methods suggested in this article.
If you have exhausted all options and the error persists, we suggest contacting your hosting provider for further assistance. There are many reasons that make this worthwhile. In fact, we already mentioned one earlier—they can help with troubleshooting the error messages from the log. If the 503 errors started happening after a recent update you had (WordPress, theme, or plugin update), you can ask your host provider to restore the pre-update backup of your site.
Additionally, 503 errors can happen because of server downtime, although this is quite rare. Nevertheless, you could inquire with your hosting provider if this was the case and what caused it. If the server experienced downtime because of a DDOS attack, you should discuss the implementation of higher security measures with your hosting provider.
Finally, the reason why you might have 503 errors is due to a legitimate increase in traffic. As sites grow in size and number of visitors, it is important to have a powerful server that can keep up with the daily traffic spikes. As such, you can see about upgrading your current hosting plan. If this is not possible, you should consider switching to a better hosting provider to avoid future 503 errors.
Final Thoughts
We hope that the reasons why a 503 Service Unavailable error in WordPress can happen are much clearer to you now. Fortunately, as you’ve seen, there are many ways you can use to approach troubleshooting this error. We are confident that you will manage to solve the 503 error using the explanations and suggestions given in this guide. Since it may prove helpful in other situations, make sure to bookmark this article and keep it close should you need it again.

Poula
Howdy! I just would like to give a huge thumbs up for the nice information you may have here on this post. I will probably be coming again to your weblog for extra soon.