Why and How to Use WordPress Taxonomies
Taxonomy is not exactly a term we come across on an everyday basis. And yet, in WordPress, taxonomies are a very important and highly useful concept. In fact, if you are a WordPress user, you have probably used them plenty, without knowing what they’re called. If you are planning to start a successful blog or a magazine, it’s high time you learned more about the concept of WordPress taxonomies.
The proper use of taxonomies can greatly improve the impression your website or blog makes on your visitors (by improving their experience), so we decided to clarify the whole thing for our readers, starting from why it is important to apply the best taxonomy practices and how to actually do it.
What Are WordPress Taxonomies
In short, WordPress taxonomies are categories and tags. More precisely, those are the default taxonomies that come out of the box, but you can create a custom taxonomy of your own, too, if you want.
As you probably know, categories and tags serve to group posts together. The purpose of this is to allow your users to quickly find the content they’re looking for.
Let’s say you have a travel blog with posts covering destinations all over the world. If you group them per continent, for example, your visitors will have an easier time finding the relevant content. That way, someone who wants to read about Africa can easily find all the posts that have to do with Africa in one way or another.
By adding more taxonomies in WordPress, specifically – categories and tags, you can group the posts even further, increasing your chance of delivering to your visitors precisely what they’re looking for. For example, you can group all posts about beaches, mountains, urban areas, medieval architecture, local nightlife, and so on. A visitor looking for an article on beaches in Africa or nightlife in Seoul will get to that content in just a few clicks.
When your visitors reach what they’re interested in by simply clicking on a taxonomy, instead of having to search through all the posts on your site, their user intent (what they came to you for) is fulfilled, and that’s essential for retention and loyalty.
Taxonomies are actually more present in our lives than we know, especially in our digital experiences. Think about Netflix, for example. When you’re in the mood for a rom-com, you pick the appropriate category and your guilty pleasure is served to you immediately. These days, users are accustomed to getting what they need right away, with literally zero delay, and no website, platform or service can afford not to use taxonomies.
What Are the Default WordPress Taxonomies
As we mentioned earlier, WordPress uses two kinds of taxonomies by default:
-
Categories
-
Tags
These two taxonomy types are similar enough to cause some confusion as to which one to use, and when. And yet, their actual use is quite different.
First of all, categories are more general while tags are more specific. Think of categories as boxes or folders for classifying your content, and tags as, well, tags or small labels describing the content in more detail.
Next, categories are hierarchical, while tags are not. This means that you can have parent categories and subcategories that fit into each other like Russian dolls. You can’t do this with tags, which are always individual and independent.
One of the biggest differences between categories and tags is that, in WordPress, categories are mandatory while tags are optional. Every WordPress post needs to have a category. If you don’t add one by yourself, WordPress will add the rather pointless “uncategorized” category.
Now, from the technical point of view, a post can fall into several different categories. Adding 2-3 different categories to a post will not cause your blog to break, but it may not be such a good idea. In fact, if you have to assign more than one category to every post you publish, you most likely haven’t set your categories right, meaning they’re too specific or narrow. It would probably be a good idea to rethink your categories and move some of them into subcategories, or even to tags.
As for the tags, they can be as narrow as the needle’s eye and you can have tags that only apply to one single post.
If you look around the web, you will probably notice that most blogs (at least, most successful blogs) only use up to 10 or 15 categories max, but have tags that count in hundreds.
How to Create Categories and Tags and Sort Your WordPress Posts
You can either create your categories and tags right away, before you even start publishing posts, which is recommended as a convenient and time-saving method, or create them subsequently. This latter method is probably more common, since not a lot of bloggers can tell right away which exact topics they will be covering and which categories and tags they will need.
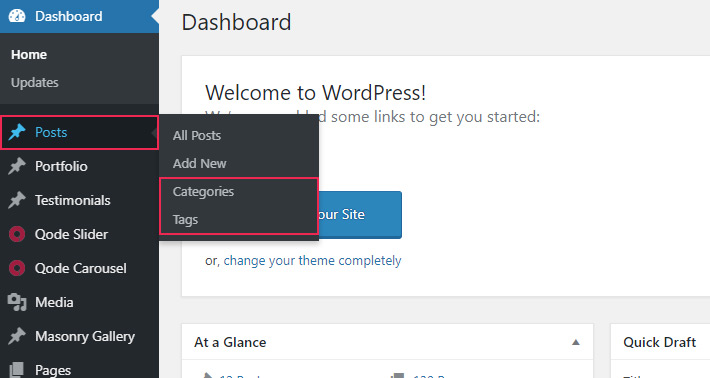
To start, go to Post > Categories or Post > Tags.
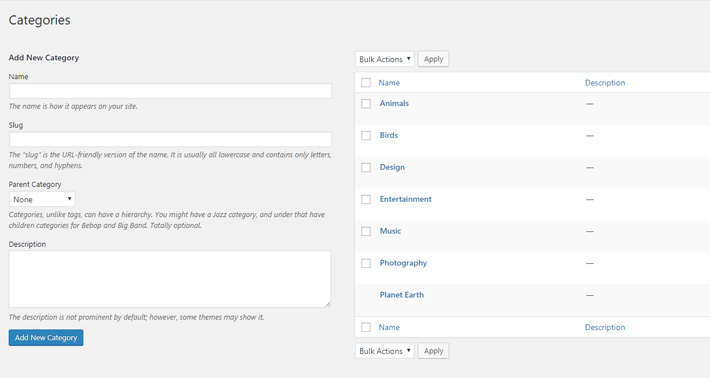
They both have the same fields, except categories also have the Parent Category option. To the left, you will find fields for entering the name, slug, description and parent category (as we mentioned, this last option isn’t available for tags). To the right, you will see a list of all the categories/tags you have created so far.
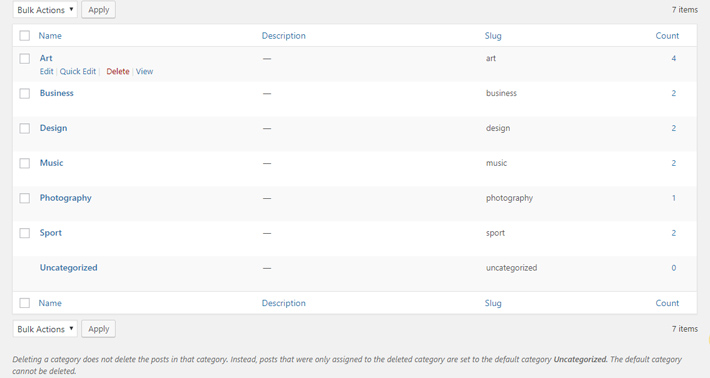
All the categories and tags you have created can subsequently be edited or deleted. In the Count column, you can see how many posts use a particular category or tag.
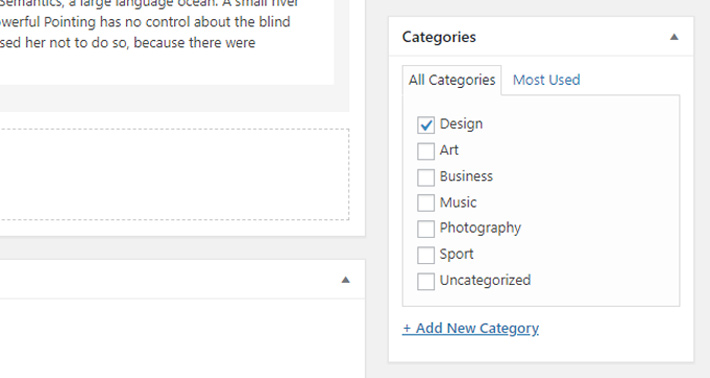
Once you’ve created your categories and tags, adding a post to one (or more) of them is extremely simple. In your Dashboard go to the post you want to categorize and, to the right of the editor, you will see the category field where you can check the category you want to apply to the post.
Here you can also add a new category, however without the option to enter a custom slug.
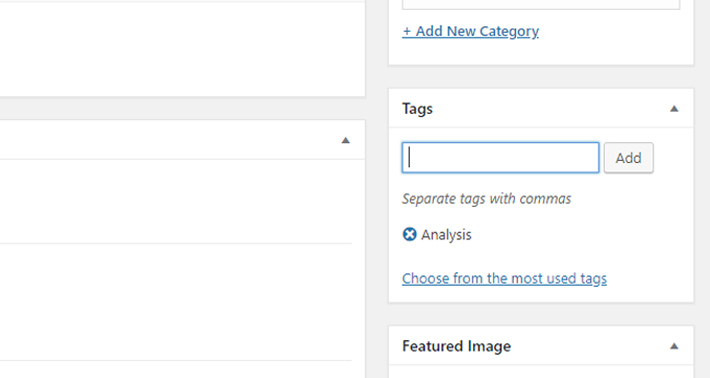
The tag field is located right below the category field. You will notice that it doesn’t have the option for adding a new tag. Also, because a blog can have many, many tags, they are not listed like categories. Instead, to find an existing tag, just start typing its name and it will appear, after which you should press the Add button. Alternatively, if the tag you’re looking for is among the ones you use the most, you can look for it under Choose from the most used tags.
How to Display Categories and Tags in WordPress Widget Areas
The most common place to display your blog categories and tags is the sidebar area, but that doesn’t mean it’s the only place. Using widgets, you can display categories and tags in any widget area you choose.
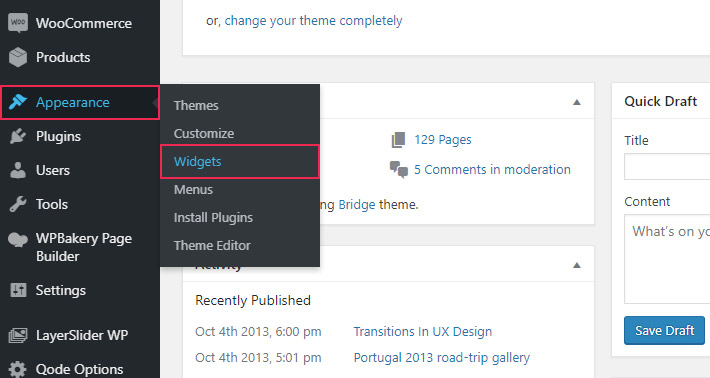
From your Dashboard, navigate to Appearance > Widgets.
The widgets you will need for displaying taxonomies are the Categories and Tag Cloud widgets.
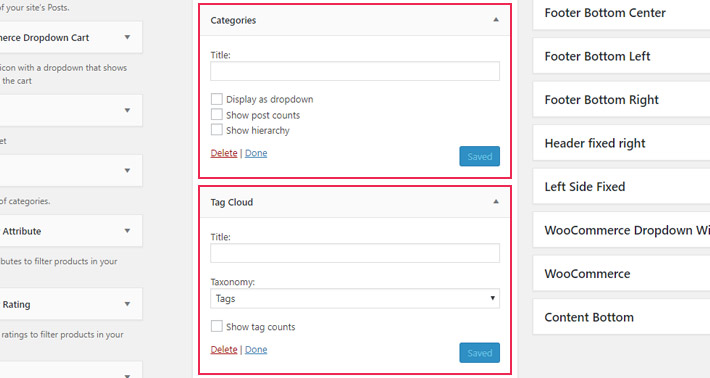
Simply drag and drop the widgets into your desired widget area, add a title, set any additional options you might want, and click save.
How to Create Custom Taxonomies
We said earlier that categories and tags are the default taxonomies that come with every WordPress installation. But we also mentioned that you can create your own custom taxonomies. So now let’s take a look at how you can add your own taxonomies to your WordPress website.
Basically, you can create any sort of taxonomy you want. What’s important is it fits your blog content and context. You can sort the articles per author, for example, or per genre, if you’re posting about fiction.
Your custom taxonomies can be structured as categories (with a hierarchy) or as simple tags. It’s your choice.
There are two ways to create a custom taxonomy:
-
Adding code to the functions.php file
-
Using a plugin
Today, we’re going to show you the easier way, which is via plugin.
There are several plugins on the market that allow users to easily create custom taxonomies. Custom Post Type UI is a plugin that, in addition to taxonomies, also lets you make custom post types for your blog.
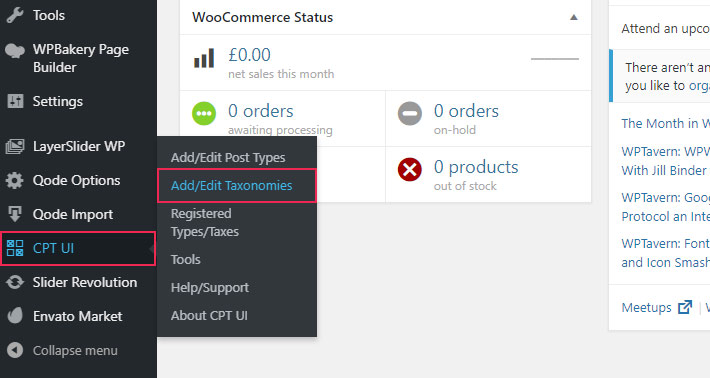
After installing the plugin, you will notice a new option in your admin menu: CPT UI. Click on it, and then on Add/Edit Taxonomies.
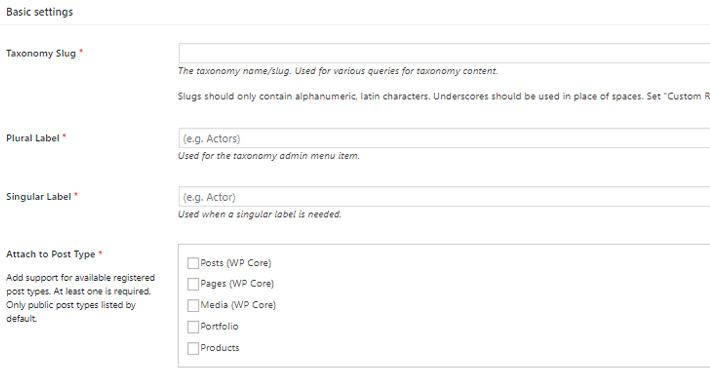
Now fill in the required fields, specifying the taxonomy slug, plural and singular labels, and set the post type to attach the taxonomy to.
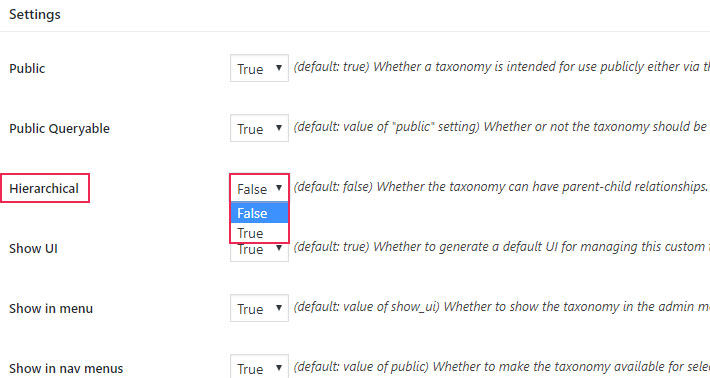
Next, proceed to the Settings below and pay particular attention to the Hierarchical field: if you set it to False, your taxonomy will be a tag (since tags cannot be hierarchical). So, if you want to create a category, set this option to True.
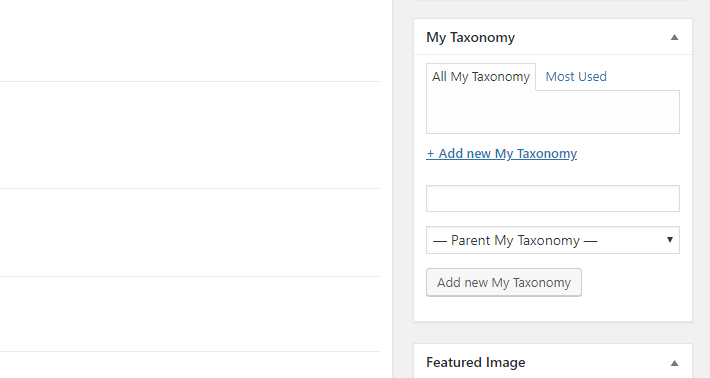
Once you save your settings, your newly created custom taxonomy will appear in the post editor, like this:
Final Thoughts
Taxonomies in WordPress are among the platform’s most useful functionalities and, what’s even better, they’re easy to apply. Their contribution to the overall user experience and, indirectly, to the popularity and ranking of your website is remarkable. So if you have been avoiding using categories and tags to sort your content, you better change that right away. Luckily, you now know why you should use taxonomies and how to do it best.


