How to Use Header Tags to Improve Your SEO
Header tags are important not only because they provide better structure to your content, but also because they have a huge potential to boost your website’s SEO. And since solid search engine optimization is crucial for online visibility and, by extension, the success of any website, it is practically mandatory to use header tags in your content.
Now, we should note that there are different types of header tags. Typically, these tags range from H1 to H6, with each one having its own purpose and a different level of importance. This time around, we are going to talk about some of the most important header tags, discuss why they are important, and present some of the best ways in which you can use them to step up your SEO.
We will cover:
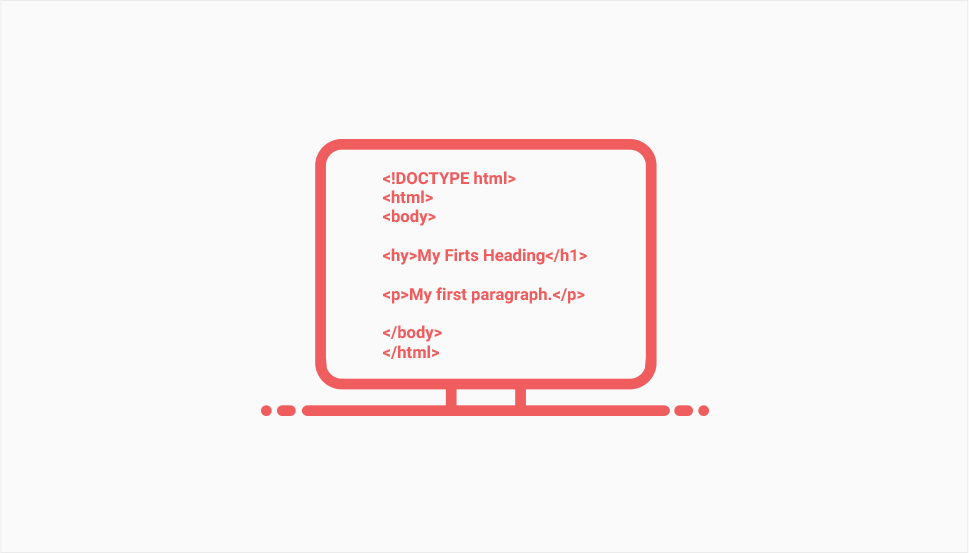
In a nutshell, header tags are HTML tags used to separate different sections on a page or post. An HTML tag is a code snippet indicating different types of headings. This snippet will determine the way your content will be displayed on a page. It usually looks like this:
<h1> This is an h1 tag </h1>
As we already mentioned right at the very beginning, there are six types of header tags. Each one of these tags is used for different things and they rank in order of significance, starting from H1 and ending with H6. In general, all of these tags are used for SEO purposes by informing search engine bots about your headings and subheadings. What’s equally important, they make your content more readable and user-friendly as a whole.
Here is a brief overview of what each header tag represents.
-
H1 – this tag is the most significant header tag of the bunch as it announces what your topic is about and usually contains your most important keywords.
(An example of a H1 tag)
In other words, H1 stands for your page title. This tag is especially important for your website’s SEO since it helps search engine bots determine what your page is about.
-
H2 – this tag essentially describes the main topics of your page or post. You can think of H2 tags as the main chapters of a book. This type of tag is usually used to break content into logical sections meant to make it more readable for users and easier to navigate in general. For example, this entire section has an H2 heading (“What Are H1 and Header Tags”).
-
H3 – this tag is meant to further define your content, allowing you to divide your H2 tag into multiple sub-headings. For example, if your H2 contains a list, this is a perfect opportunity to use an H3 tag and mark the main points of that list.
-
H4 – H6 – everything else is only meant to split your content into readable chunks of text that will further describe it to readers and make it more user-friendly as a whole. For example, if your H3 tag needs more explaining, you may break it down into a few more H4 tags. These would usually be various bulletin or numbered lists (much like the one we used in this section).
As we already established, H1 tags are particularly important for SEO as they help search engine bots learn what your page entails. Still, just adding an H1 tag to your page usually isn’t enough. All the other header tags contribute to your content’s readability and search engine visibility in their own way as well, which is why you should also distribute other types of header tags throughout your content – wherever (and whenever) you deem it appropriate.
By breaking your content into smaller segments using different header tags, you will provide additional context to your visitors. And it’s no secret that many users prefer to scan through different types of content before deciding whether they want to check it out for real. So in this way, you will make it more scannable, more readable, and more user-friendly in general, which is an instant plus when it comes to your content’s ranking on search engines.
Namely, search engines count the scannability and user-friendliness of a page as one of the factors required for better ranking. So, if you don’t add header tags to your page or post, search engine bots may view your page as the one that is not so easy to navigate, which can actually make your page ranking lower in SERPs.
Best Themes for Marketing
View Collection


Now that we’ve explained what header tags are about, it’s time to talk about how you can actually incorporate them into your content. Though this may seem like a complicated task, once you get to doing it, you will realize that adding tags doesn’t require any particularly advanced knowledge. In fact, most people already structure their content in some way. They do this by choosing different font sizes to mark their headings, use different bullet points, numbered lists, etc. The only difference is that they don’t necessarily contain actual HTML code. Luckily, many text editors (like the editor found in Google Docs or Microsoft Word) already come with a choice of header type, which usually makes the entire process even easier. This time around, we will show you a few different ways in which you can add these tags to your WordPress page or post.
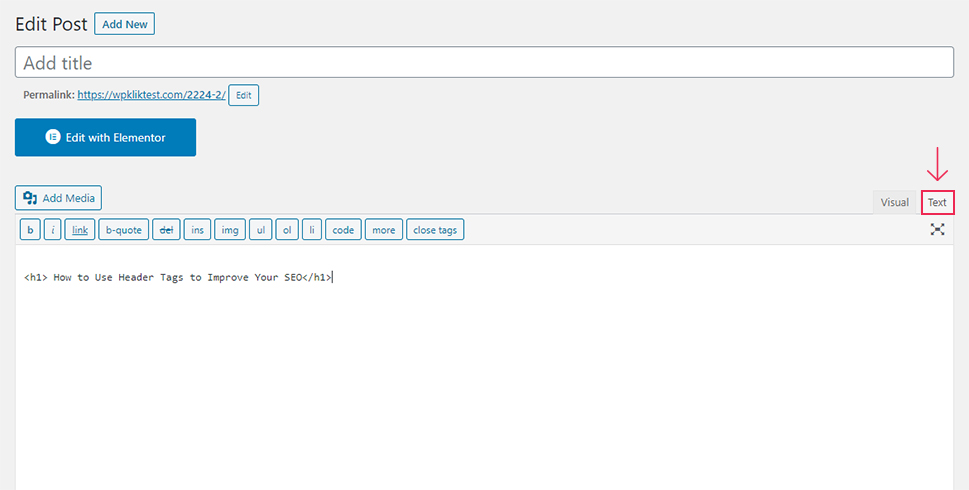
If you wish to insert an H1 tag into your content manually, you simply need to add <h1> and </h1> to your WordPress editor and place the desired text you want to use for your header in between these two tags. For example, if you want your H1 tag to be “How to Use Header Tags to Improve Your SEO”, this is what it should look like:
<h1> How to Use Header Tags to Improve Your SEO</h1>
The same rules apply if you want to add H2, H3 tags, and so on. You just need to change the “h1” part according to the type of header tag you need (i.e. “h2”, “h3”, etc.).
Of course, if you want, you can still use the Text editor (or HTML block if you use Gutenberg) to create your header tags manually:
(Creating a header tag manually in the Classic WordPress editor)
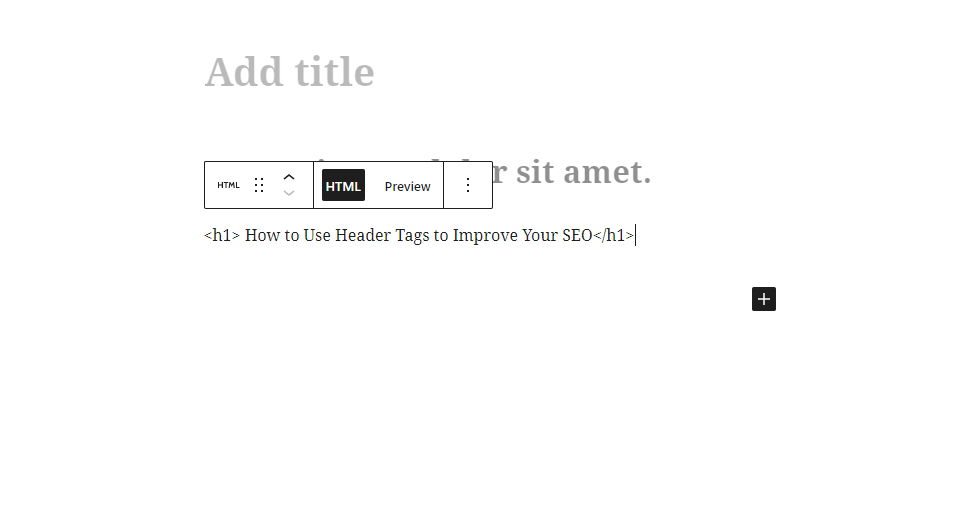
(Creating a header tag manually in the Gutenberg editor)
If you’re working with HTML5 instead of HTML4 or older, then you may need to add a <header> </header> snippet to your tag as well. Like this:
<header> <h1> How to Use Header Tags to Improve Your SEO </h1> </header>
Of course, you should check if your header tags are formatted properly before you add them live.
Now, we’ve already mentioned that the process of adding header tags can be even more simplified if you use a CMS platform like WordPress. So, If you’d rather avoid using the manual method, you can simply mark your pieces of text as header tags using the toolbar located right within the editor.
If you’re using the Classic editor, all you need to do is select the part of the text you wish to assign your header tag to and choose the tag in question:

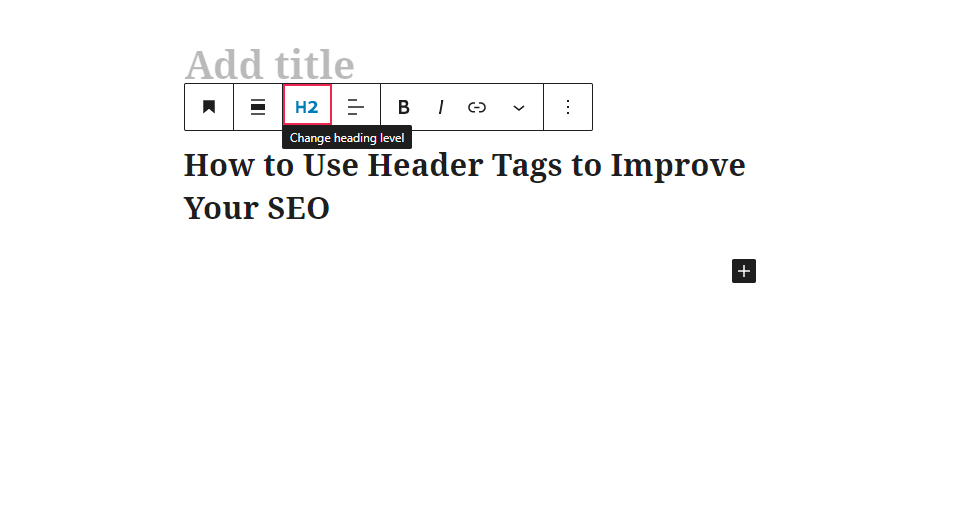
In case you’re using Gutenberg, you can simply use the Heading block and then set your header tag within the block itself:
Use Keywords in Your Header Tags (Whenever You Can)

When Google goes over your content to check for its relevance and overall context, it will also scan your header tags to make better sense of what your content is about. Therefore, this is a perfect opportunity to make your content even more relevant to search engines and include some keywords into your header tags. This means using keyphrases, and/or any relevant synonyms and making them a part of your header tag, whenever possible.
Adding keywords to your H1 tag is especially important, as this tag usually acts as your page or post title. However, it will do you well to also try and incorporate your keywords into your H2 and H3 tags. By properly using this strategy, you will only increase your chances of a better ranking.
That being said, you shouldn’t go overboard and cram your keywords into every header tag either. If it makes sense and it sounds natural to do so, then, by all means, you should add them. Just try to be as sensible about it as possible. And if you need any additional help with implementing your keywords, you can always look into some of the best keywords research tools around, like Ahrefs.
Try Using One H1 Tag Only
While there is no proof that using more than one H1 tag can negatively influence your rankings (in fact, Google says you can use as many as you want), we do suggest that you use your H1 tags wisely. Namely, H1 tags are usually displayed in big letters and, as such, they can look like titles to users. Therefore, if you have too many H1 tags on your page, things can get confusing, and even distracting for them. So, if possible, we suggest that you stick to having one H1 tag per page (or post) only.
Don’t Forget to Optimize Your Content for Featured Snippets
When it comes to header tags, we shouldn’t miss the chance to mention the benefits of optimizing your content for featured snippets. There are two specific ways in which you can optimize your header tags so that they can influence your rankings and help contribute to your content being displayed as a featured snippet. The first one is optimizing your header tags for long-tail keywords, which is a strategy often used when optimizing your site for voice search.
If you add long-tail keywords into your header tag and then give an answer to the user’s search query directly in the paragraph below it, you greatly increase your chances of your content appearing as a featured snippet.
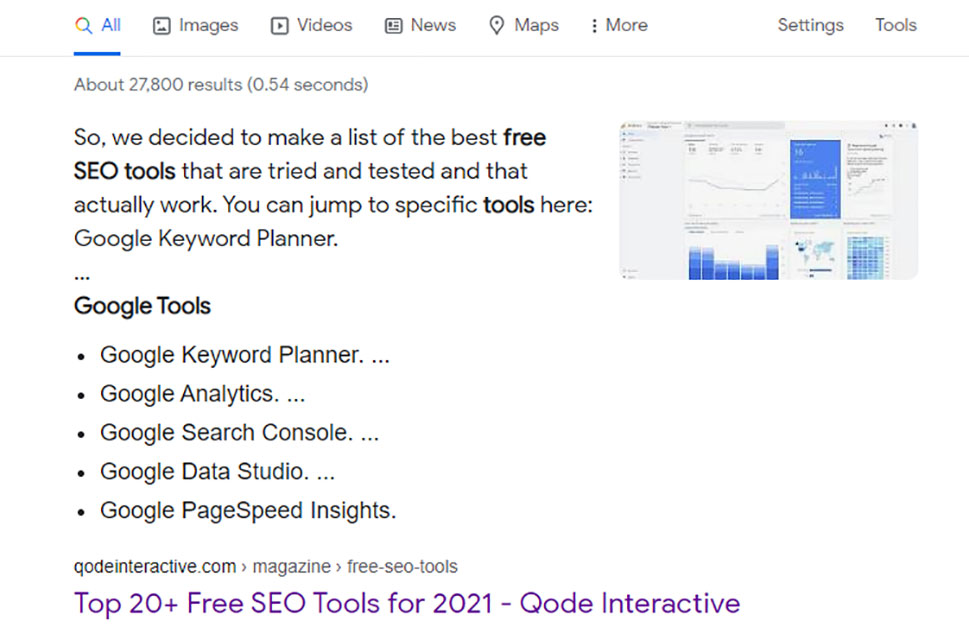
Another way in which you can do this is to incorporate smaller headings into your text. This can signalize to Google to create its own numbered or bulleted list and display it as a featured snippet in search results.
All of these can increase your chances of having an overall better ranking and boost your search engine visibility as a whole. So by all means, you should try applying these strategies when optimizing your header tags as well.
Use Your Headings Hierarchically

This should go without saying, but when it comes to using header tags on your site, your general rule of thumb should be to add them in a hierarchical manner. What we mean by this is that every time you attempt to include these tags into your page or post, you should start from your H1 (your title, or main subject) and continue from there. Then, you should determine what your main points of text (headings) are and mark them as H2. Finally, if you need any additional subheadings, like a list, bullet points, or anything else that will further organize your content and make it more scannable, you can add H3 or go even further.
To demonstrate an example of hierarchically ordered headings, we will list the header tags used in this particular article, starting from the title itself:
-
H1 (Title): How to Use Header Tags to Improve Your SEO
-
H2: What Are H1 and Header Tags
-
H2: The Importance of Header Tags
-
H2: How to Add Header Tags to Your Content
-
H2: How to Use Header Tags: Best Practices
-
H3: Use Keywords in Your Header Tags (Whenever You Can)
-
H3: Don’t Forget to Optimize Your Content for Featured Snippets
-
H3: Use Your Headings Hierarchically…
…and so on. This should give you a good general idea of what your headline hierarchy should look like.
Add a Table of Contents to Your Pages and Posts

If you want to enhance the overall user experience of your visitors even further, you can always add a list of headings with clickable links – otherwise known as the table of contents – to your pages or posts. This will give your visitors a clearer overview of your content’s structure and allow them to get around your page or post more easily. Namely, when they click on a specific link within your table of contents, they will be led to a specific header tag they are interested in.
Aside from improving your website’s UX, this practice can also contribute to your website’s ranking. In fact, adding a table of contents increases the potential of Google adding a so-called “jump to” link in the search result. In short, if the keywords the user has searched for can be found in your table of contents, when clicked on, these jump to links will automatically lead the user to a specific header tag on your page or post.
Luckily, there are many different table of contents plugins you can use that allow you to easily and automatically generate your ToC anywhere you deem fit on your page. What’s also great about these plugins is that most of them actually use your header tag system to automatically create and list table of contents on your page or post. So, the only thing you need to do is define your header tags within your content, and your plugin will do the rest.
Conclusion
Using header tags on your site has the potential to boost your SEO and can enhance the overall readability of your content. Sticking to some of the above-mentioned practices should help you get the general idea of how to properly use these tags, regardless if you plan to use H1 and H2 tags only, or you want to use H3 tags and beyond. Either way, we highly recommend that you incorporate a header tag system into your content to stay on top of your SEO game.
