How to Publish WordPress Posts with Multiple Authors

Authorship was a complicated set of issues well before the invention of the internet and the ushering of the era of widespread borrowing. There were philosophical disputes about the nature of authorship, its role in the society, and in the way we read the very text those authors wrote. Some proclaimed the author was dead. Others believed we only reach heights as authors because we stand on the shoulders of the giants that were before us.
From the practical standpoint of a WordPress administrator who just wants to do justice to a couple of people who worked on a single post, all of the complications pale in comparison with the real problem at hand: how to add multiple authors in WordPress?
Well, we’ll show you how. You’ll see:

Sometimes, you’ll have multiple people working on a single post. It could be that way by design — you can assign two people to work on the same story and have them cover different aspects of it or talk with different sources. For example, one of the authors can be in charge of getting quotes from industry leaders, while the other simply reports from an event.
Adding another author might happen after some time has passed since the original post’s publishing date. An editor, blog administrator, or even yourself, can decide it’s time to revisit the post, update it with new information, maybe give it a lift here, and nip and tuck there, and make it more appealing. In that case, the person doing the editing might merit mention if their impact was significant enough.

Whenever you’re faced with the need to go beyond the regular WordPress’ offer and add some exciting new features to it but you’re not sure if you can code them, you know what you have to do, right? Find the right kind of plugin for them!
It’s the same for adding multiple authors, or coauthors. You’ll have more than a handful of choices, some of which will be worthy of your time. Others will have you meddle with lines of code, which is something we wanted to avoid in the first place, so we’ve settled with the Molongui Authorship plugin for this demonstration. It’s a freemium plugin, but the parts of it that are free will give us exactly what we need.
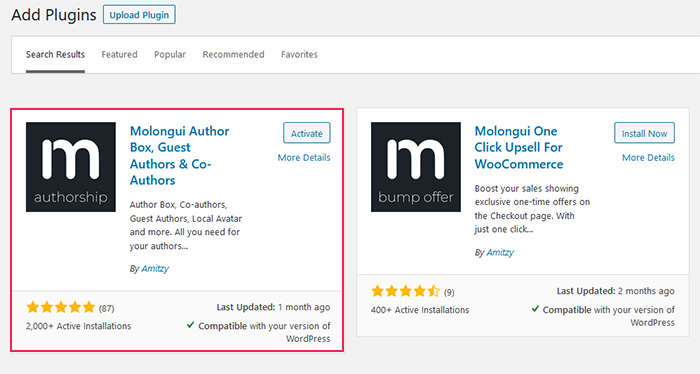
So you know the drill: head over to your website’s dashboard, go to Plugins > Add New, and search for the Molongui plugin. Make sure you install and activate the Author Box plugin, not the One-Click Upsell that will appear next to it in search results.
The rest is simple, as the plugin works right out of the box — if you have already set up multiple authors on your WordPress website. Simply go to a new page, or an existing one, and look in the lower right-hand side corner of the window. You’ll notice a new card that says Authors, and you’ll be able to add as many authors there as you want — both the ones that already have user profiles on your website and the ones you’d like to add as guests.
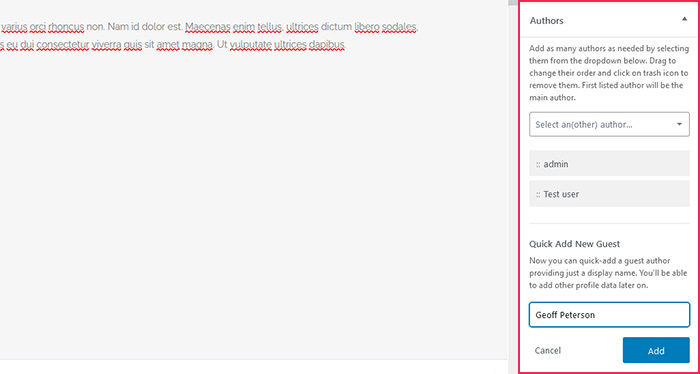
And then when you publish the post and look who are the people responsible for creating it, you’ll see both the user authors and the guest authors you quickly added.

So that’s it — you can use this plugin to add any number of authors to posts on your WordPress website. You don’t even have to add them as users – the quick guest feature lets you add new authors on the go.
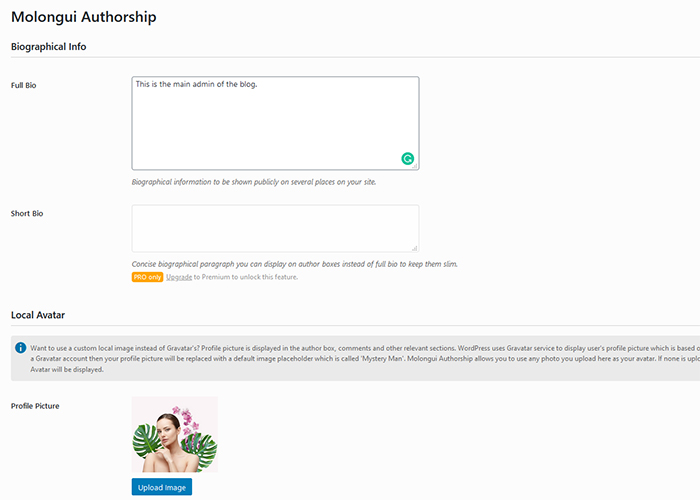
Molongui Authorship doesn’t stop being awesome there – it lets you do some other neat things with your authors. For example, it lets you add an author box that goes right under the article. So if you’d navigate to Users > All Users, chose one user, and scrolled down to the Molongui Authorship options, you’d be amazed at how much you’d be able to do with that author’s box.
At the very least, you’d be able to write a full bio — a short version is available for pro users — and set a local avatar.
Next, you’ll have sections for professional info which include a phone number, job title, company, and a company website.
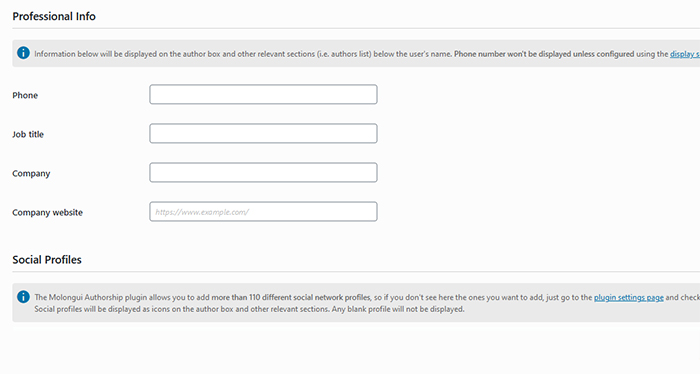
Professional info is followed by a list of social profiles you can add to your author’s box in the free version. All the important social networks are there, including YouTube, Blogger, Instagram, Skype, and Twitter.
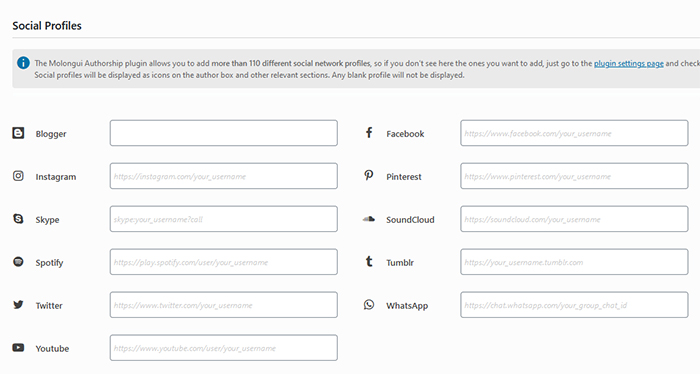
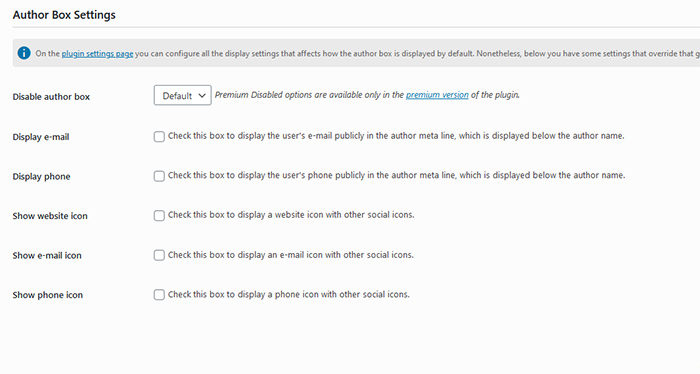
Finally, you’ll be able to access some of the plugin’s settings that relate to the author’s box, including whether to display it and what kind of information to include with it. And let’s not forget that, in the end, the Pro version gives you the option to simply turn an author into a guest.
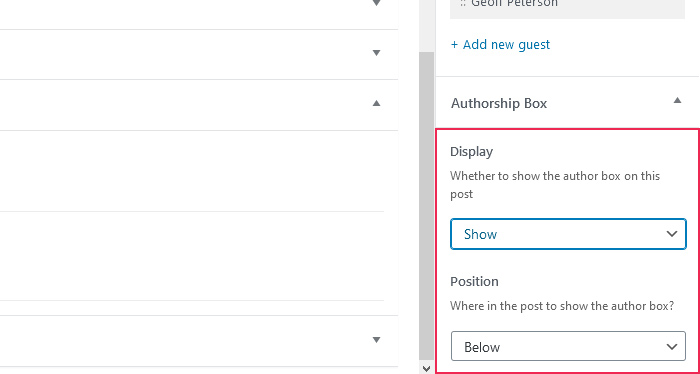
Once you’ve done fine-tuning your author’s box, you can go ahead to that lower right-hand corner of the post editor and find the Authorship Box menu options. You can choose to display or hide them, and also pick their position.
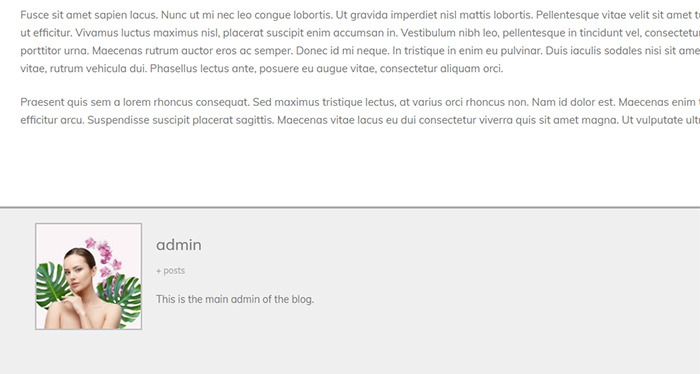
And there you’ll have it – the authors who’ve had some information added to their author’s boxes will be able to display it. The rest will have a large blank space where their image and info could have been.
Let’s Wrap It Up!
For every author, and especially the aspiring ones, every byline they can get is a step forward in a career that can be difficult to crack and tough on those adamant to keep their heads above the water. That’s precisely why a plugin such as Molongui can mean a world of difference to someone who just wants to see their name appear out there.
It gets even better with the author boxes. The bigger their careers get and the more they have to offer, the more important it becomes to display contact information and links to previous works, even if it’s under an article they’re sharing credits for. As long as it helps you stay on top, it’s all good.


