How to Fix the 403 Forbidden Error in WordPress

The infamous 403 Forbidden Error is one of the most perplexing and common errors a WordPress user may experience. It can happen in any of the following situations: when you’re logging to your site, editing or viewing pages and posts, and during WordPress installation or site migration.
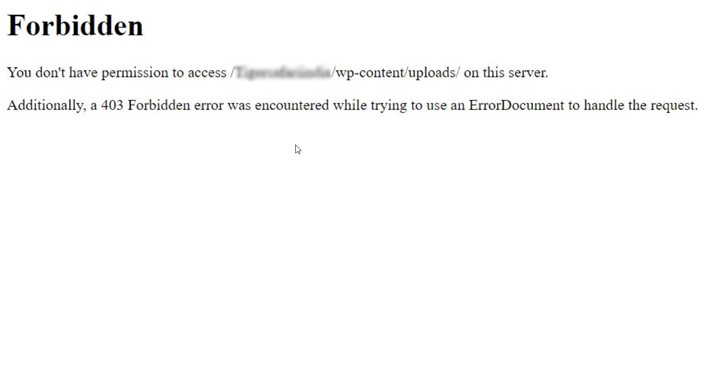
This error can be hard to wrap your head around since it can happen in a bunch of unrelated situations. At the same time, the error message is pretty short on information, plainly stating that ‘’You don’t have permission to access… ’’. Variations include the following phrases: access is denied, forbidden, not allowed to access, not authorized to view, etc.
Here’s an example of one of the many error variations.
Luckily, troubleshooting is far easier than it might seem at first glance. In this tutorial, we will cover all the steps that have been proven to solve the issue. We’ll start with the most common causes and solutions, but we will also deal with some lesser-known cases of the 403 error.
How to Fix 403 Forbidden Error in WordPress
For starters, we strongly recommend that you backup your WordPress site. If you have any questions about this process, contact your hosting provider.
After you backed up your data, you are ready to investigate the possible causes and solutions to the 403 Forbidden Error.
Creating a New .htaccess File
The .htaccess file enables a number of server functionalities, but it can also be a source of issues that cause the 403 Forbidden Error. Fixing this file should solve the issue throughout the entire website.
However, due to the all-encompassing nature of the .htaccess file and its importance to the site, finding the issue can prove to be quite difficult. To avoid the hassle of pinpointing it, the easiest way to get rid of the issue is to delete the current .htaccess file and create a new one.
You can do this using an FTP client such as FileZilla.
The .htaccess file is located in the root WordPress directory. However, it is often hidden, so you’ll have to enable the option(s) for showing hidden files within the chosen FTP client. For the purposes of this tutorial, we used the FileZilla. In this FTP client, you’ll enable access to hidden files by navigating to the Server tab and clicking on “Force showing hidden files”.

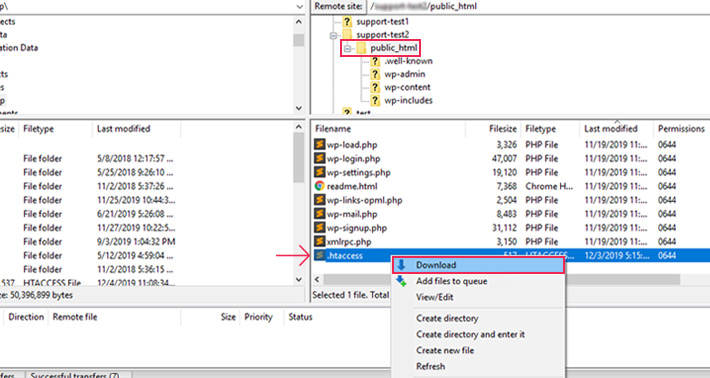
Make sure you download the .htaccess file to a location on your computer. This will allow you to keep any editing work previously done on the file in case you determine it is not the culprit of the 403 Forbidden Error.
Save the file using the right-click and download.
Once you save the file, right-click on it and select “delete”.

At this point, the 403 error should be gone if a faulty .htaccess file is the culprit. Log in to your WordPress site and run the test.
If the issue is still present, restore the backup .htaccess file saved on your computer. Simply upload the file to the same directory where it used to be.
If the error is gone, create a new .htaccess file. Log in to your WordPress site, navigate to Settings > Permalinks, and click on “Save changes,” in the bottom left corner.

After creating the file, re-test the error. The way you’re going to test depends on how the error was manifested. You can refresh the post or page, re-log to your dashboard, view the page or post once more, re-install WordPress, re-access certain folders, etc. The same should be done after each suggested step.
If the error is still present, proceed to the next step.
Fix 403 Error Caused by Incorrect File Permissions
Another common cause for the 403 Forbidden Error is having incorrect permissions on all files and folders that form your WordPress site. Adjusting the permissions to their suggested values should solve it. You can do this manually, following the instructions we’ll provide below. Alternatively, you can ask your hosting provider to do it on your behalf.
Using file permissions, the server determines which users have the ability to read, write or execute. More precisely, file permissions determine the ability to view, edit and run the file as a script. Folder permissions define whether you can view the folder’s content, add or remove the files inside or perform actions on the entire folder.
The suggested permissions are:
-
For folders/directories – 755 or 750
-
For files – 644 or 640
-
For the wp-config.php file – 440 or 400
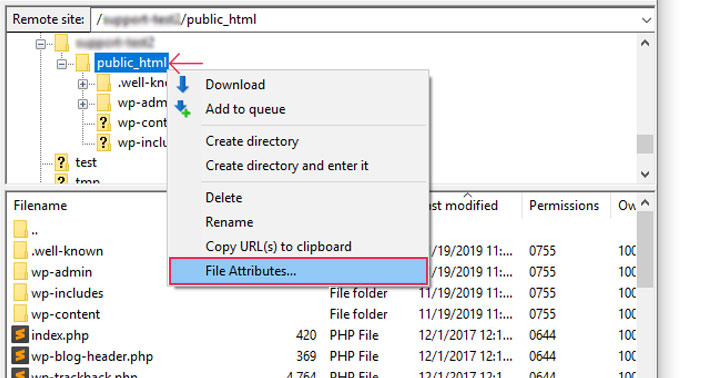
To change the folder permissions, connect to your server using an FTP client. Navigate to the folder containing your website’s files, right-click on it and click on the “File Attributes” option.
In the numeric value box, insert either 755 or 750. Tick off both the “Recurse into subdirectories” and “Apply to directories only” checkboxes.

If you want to change the file permissions, follow a similar line of action. Go to the folder with the files you need, right-click it and select “File Attributes”. Then, insert 644 or 640 in the numeric value box and click on the “Recurse into subdirectories” and “Apply to directories only” checkboxes.

To change the permissions of the wp-config.php file, find the file in the root WordPress directory. In our case, it is called public_html. Right-click on the file and select “File Permissions”.

In the numeric value box, insert 440 or 400.

Now verify if the 403 Forbidden Error is solved.
Fixing 403 Forbidden Error Caused by a WordPress Plugin
If the previous 2 methods haven’t solved the error, it is most likely that some of your WordPress plugins are the culprit. Luckily, it is very easy to test this possibility.
Navigate to Plugins > Installed Plugins and deactivate them one by one. Run a test each time you deactivate a plugin. If the error is gone, you’ll know that the last plugin you deactivated was the issue. If that’s the case, you can either delete it and find another with the same/similar purpose or contact the plugin customer support for help.
Additional Troubleshooting Steps
In most cases, the 403 Forbidden error should be solved using one of the 3 methods we described. In rare instances, however, the error can require additional troubleshooting. Let’s look into these cases and possible solutions.
Removing mod_security
Mod_security is an open-source firewall used by some servers for security purposes. Sometimes, it can cause the 403 Forbidden Error due to a misconfiguration. This issue requires you to remove the mod_security. You can do it yourself following the steps we laid out below, or you can contact your hosting provider for help.
You can remove mod_security by adding the following code to the top of your .htaccess file via an FTP client.
<IfModule mod_security.c>
SecFilterEngine Off
SecFilterScanPOST Off
</IfModule>

If the error isn’t resolved, delete the previously inserted code, as it may cause security issues.
Reconfiguring Hotlink Protection
Hotlink Protection is an option in cPanel which prevents direct linking to your files from other sites. Those files are often images, so the 403 error could be manifested as an inability to view these images. Since this option is used to restrict access, the error is shown when you are unable to access a file (image) which should be accessible.
To solve this issue, (re)configure your Hotlink Protection. Log in to cPanel using your credentials, scroll down to the Security section, and click on Hotlink Protection.

The only thing that remains is to carefully adjust the parameters. This usually means adding more file extensions to the “Block direct access” box and ticking off the “Allow direct requests” checkbox. The file extensions should be separated with a comma. In the “URLs to allow access” section, check the list of sites and add the ones that are missing. Those sites are “white-listed” from the hotlink protection process.

Renaming the File
Uploading files to WordPress is an often overlooked instance when 403 Forbidden error (among others) might happen. To be more precise, this issue happens when you upload files with improper filenames. Quite often, they contain an apostrophe.
To test this, rename the file manually. The filename should only use letters (excluding international language symbols), numbers, and dashes. Upload it and check if the issue is resolved.
Contact Hosting
If you had no luck solving the error with the suggestions we gave you, contact your hosting provider and ask for further assistance.
Qode WordPress Themes: Top Picks
View Collection


Final Thoughts
Chances are you’ve been able to regain access to your site, pages or resources using this tutorial. At the same time, you’ve learned something new about this pesky issue.
Feel free to bookmark this 403 Forbidden Error troubleshooting guide! It’ll surely come in handy whenever you face a similar problem.
