How to Add Testimonials in WordPress
There is an old adage about how good reputations are hard to earn but easy to lose. Whatever kind of goods or services you offer, your success is going to depend on how trusted you are to deliver. Building a brand takes time, but you always want to put your best foot forward. And testimonials are one of the ways to do just that.
In this article, we are going to show you how to add WordPress testimonials to your website. But what are testimonials, exactly, and do you really need them on your website? We will address these questions, too, before we get into the nuts and bolts of the how to. If you are already sure you want testimonials on your website, feel free to skip right down to the instructional section.
Here’s what we’ll be talking about:

Testimonials are customers’ statements about their experience with you, your services, or your brand. They can basically be about anything, and you can and should select from customer feedback the ones which best represent your brand and paint it in a positive light.
They are usually displayed on landing pages and sales pages, informing your website visitors of positive personal impressions their peers have of you, and nudging them towards a more favourable mindset and, ultimately, a purchase. They can also be found on about us and contact pages, exit intent popups, and even underneath blog posts, especially when blog posts discuss a product or service the testimonial is about.
Many people react negatively to overly forward sales tactics. Surely you have sometimes felt you are being shoved down a sales funnel, too. Testimonials are a way of avoiding appearing aggressive, and they achieve this by virtue of not being a virtual sales pitch. They come from customer feedback or expert opinion, rather than being formulated by a copywriter or a sales person. They feel more organic and more genuine. Now, there’s nothing wrong with good copy, but testimonials can add something different to a sales page.
Testimonials feel like they are not coming from you, which makes them seem more honest and heartfelt, even if they are, not unexpectedly, cherry-picked. People are not stupid; they know that you are in control of your website and that you choose which customer impressions or expert opinions to include, and which to exclude from it, but testimonials still add an air of authenticity to your brand in their interplay with your pitches and your copy.
While there are many ways to introduce testimonials to your WordPress website, in this article, we will be demonstrating how to do it using Qi Addons for Elementor. Our very own, completely free Elementor addon collection contains sixty beautiful, professionally designed and practical widgets, and the testimonials widget is just one of them.
This widget will showcase the selected impressions and opinions in a static layout. If you are looking for a more dynamic testimonial option, perhaps the testimonial carousel is the widget you want.
To start working with the testimonial widget, all you need to do is install the latest version of the Elementor visual editor (the free version will do) and then install Qi Addons for Elementor, and you are good to go. Please note that Qi Addons will not work with other website editors. We should also add that, for this demonstration, we will be using our free Qi Theme. Qi Addons will work with any theme, but your results, especially in terms of styling options, may vary.
Once you have installed and activated Qi Addons, you can begin creating WordPress testimonials and other gorgeous features for your website. A testimonials widget only takes a couple of minutes to set up, as you can see from the video below:
But if you prefer your tutorials in text form, we got you. Just keep reading.
We will be showing you how to do this as part of a page, but it works much the same for posts. To start, we have created a page and added a title to it.To add a testimonials widget to a page, locate the Testimonials element in the left hand side menu and drag it to where you want it on the page.
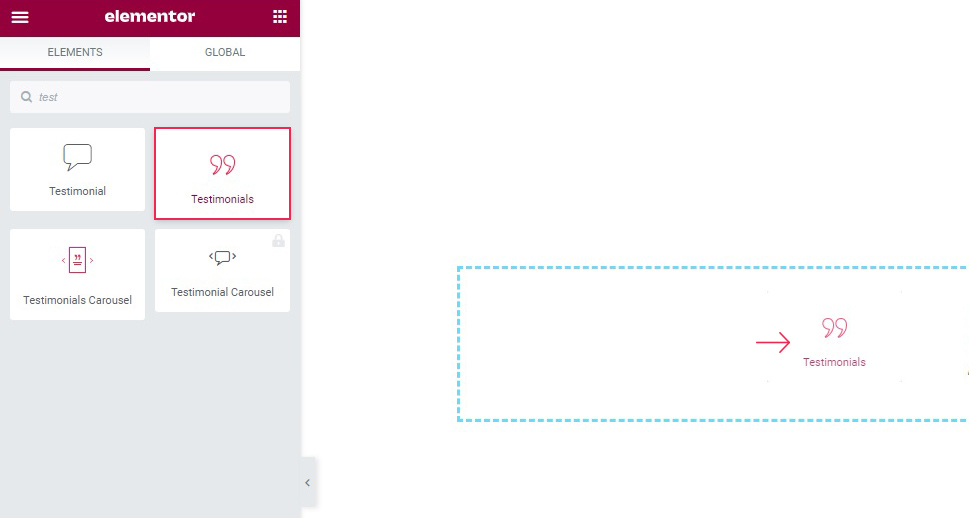
Your element will now be populated with some placeholder text and graphics.
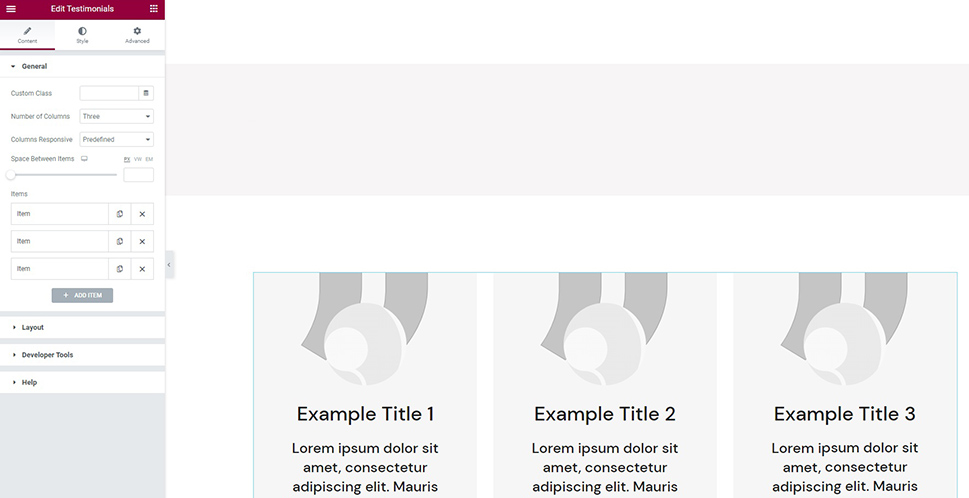
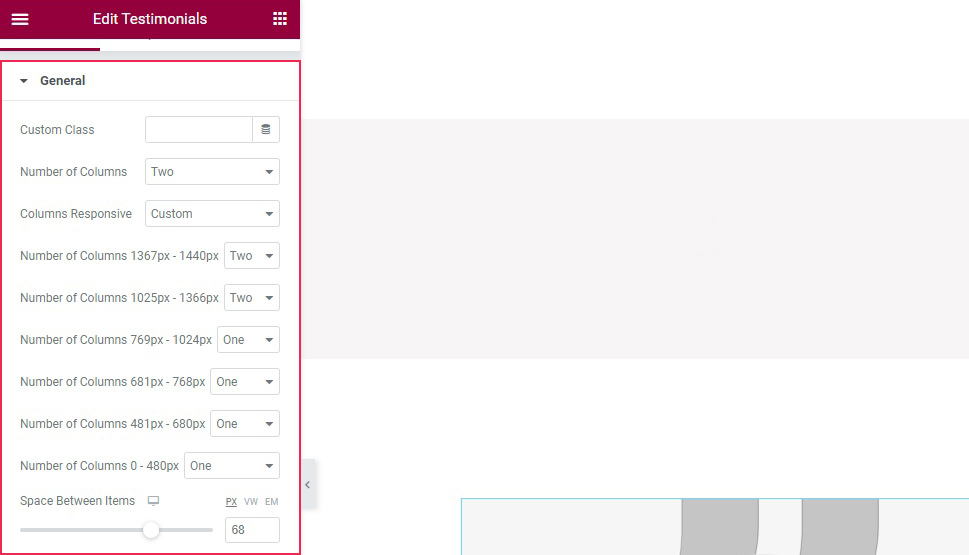
We will customize this layout in the General section of the Content tab. We will not be using the Custom Class option, but we will set the Number of Columns to Two, and the Columns Responsive control to Custom. This will let us create a different version of our testimonials widget for different sizes of devices: Two for the two largest screen sizes, and One for the rest. We will set the Space Between Items slider to 68 pixels.
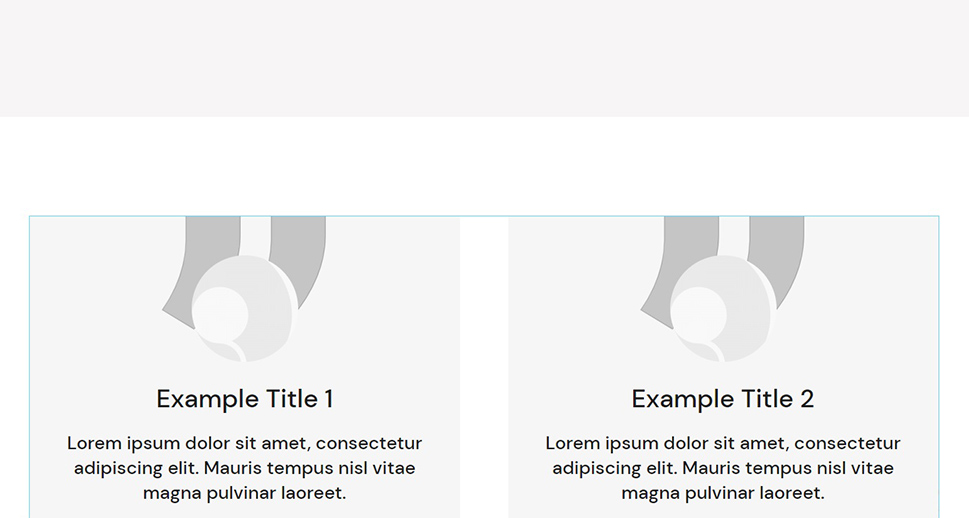
Each testimonial object is called an Item. You can add an Item by clicking the Add Item button below, or expand an Item to edit it by clicking on it. Expanding the Item, you can edit the testimonial’s Title, Text, Author and Author Occupation fields and add an Author Image, all of which we have done using a placeholder image and text. We didn’t use a title for our testimonials. You can also alter the colours of all the text contained in the item individually, as well as alter the Background color. We will not be using any of these options for this demonstration.
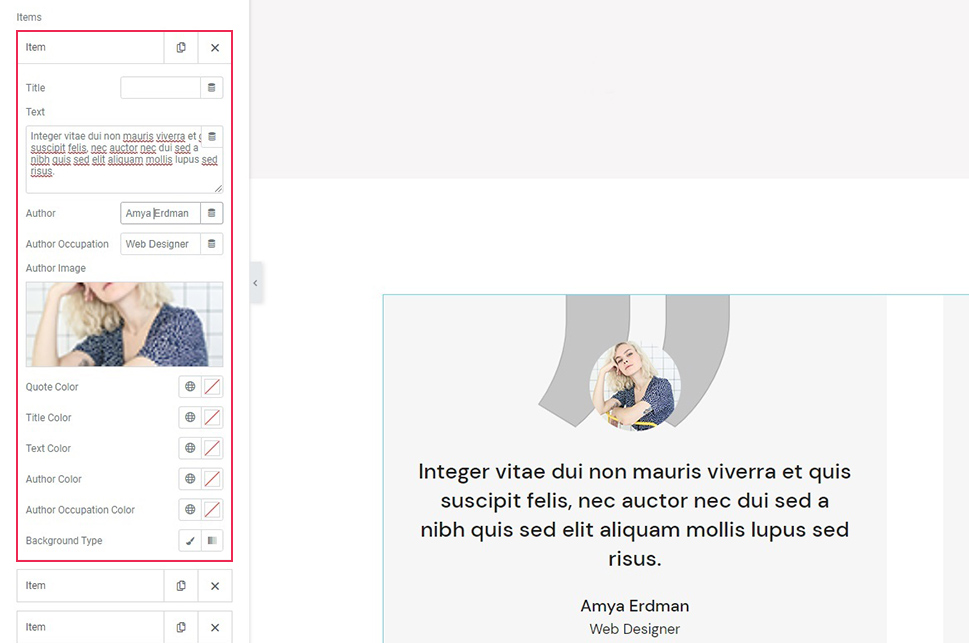
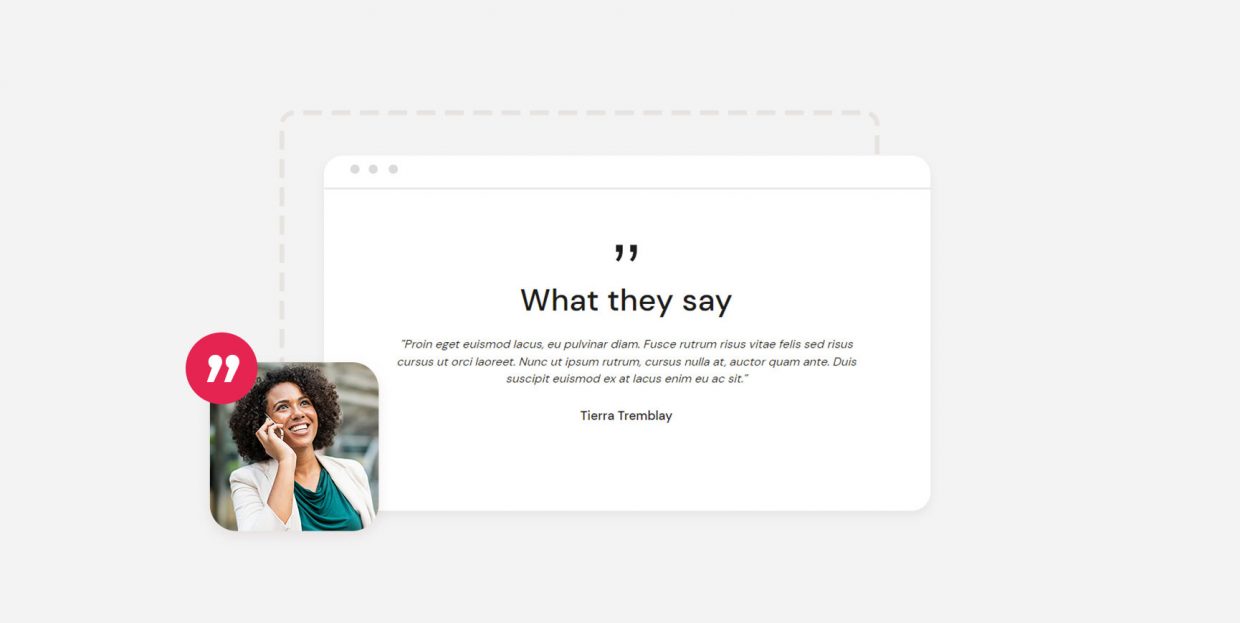
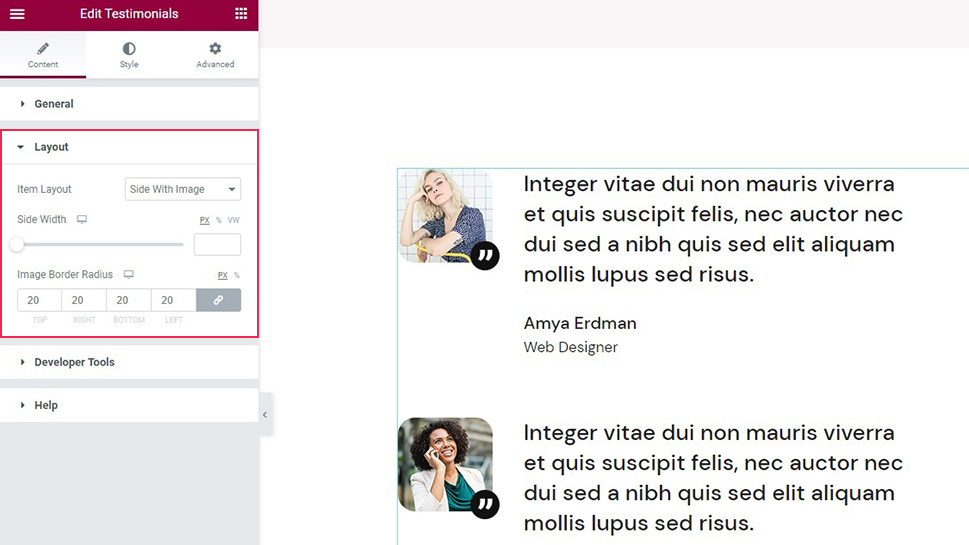
Before moving on to the next section, we have created one additional Item and populated all of our items with images and text. In the Layout section of the Content tab, you will find the Item Layout menu. We have selected Side With Image, but you can choose between four different layouts. We didn’t touch the Side Width slider, which controls the space to the left of the text, but we did edit the Image Border Radius, setting it to 20 pixels on all sides, for a rounder edge.
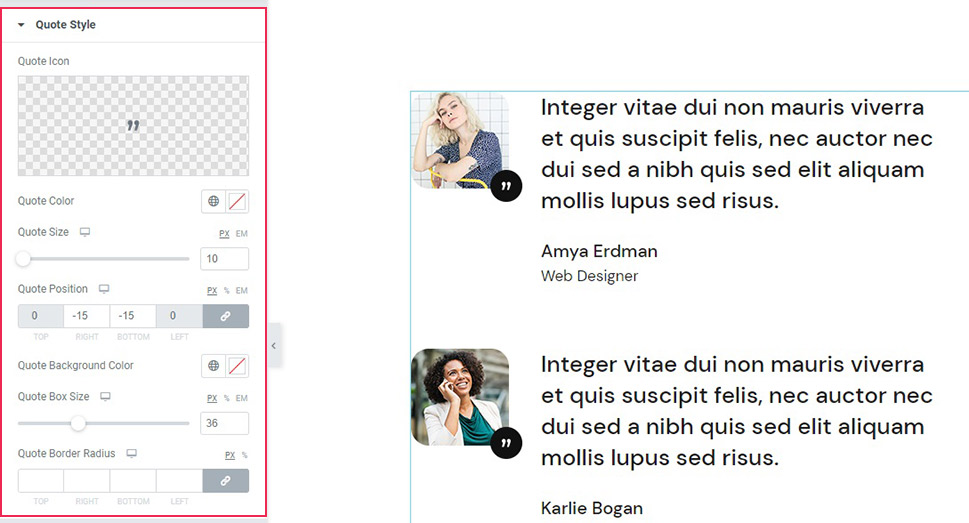
Moving on to the Style tab, you will find the styling options for all the individual elements of the widget. First up, in the Quote Icon section, we find the Quote Icon itself and we want to change that. Hovering on the Quote Icon field, we find that we can either select an icon or upload an SVG image from our media library. We have opted for the latter.
We didn’t change the Quote Color, but we did set the Quote Size to 10 pixels. The Quote Position control only has the Right and Bottom fields, and we have set it to -15 pixels. We didn’t use the Quote Background Color control, leaving it on its default black, but we changed the Quote Box Size to 36 pixels. We also didn’t use the Quote Border Radius control for this demonstration, preferring the circular background of the icon.
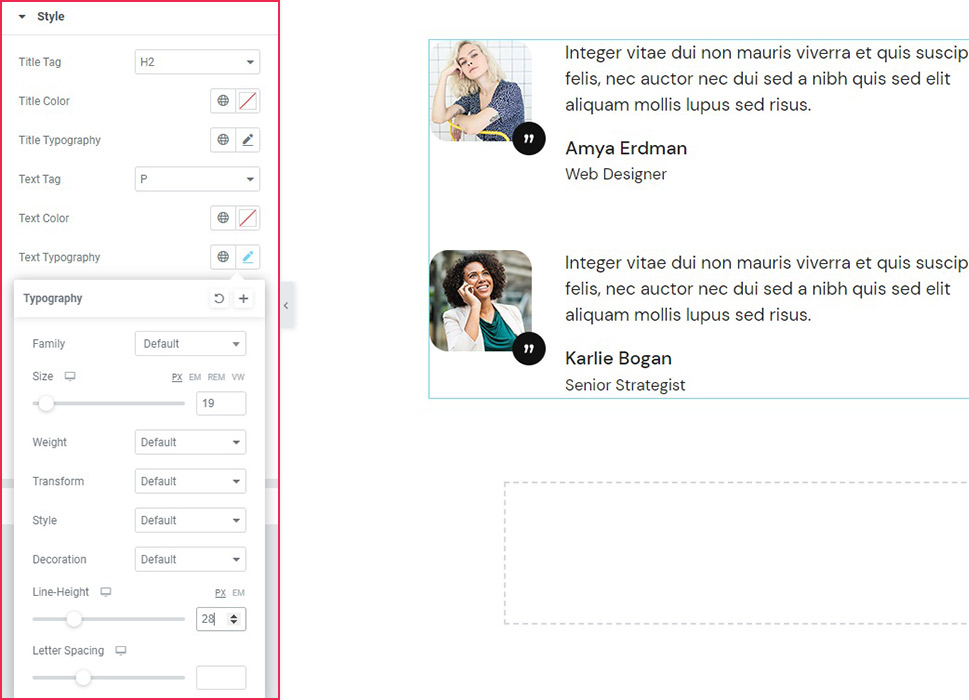
Moving down the tab’s sections, we arrive at Style. This section has mainly to do with the headings tags and typography options of the textual elements of the widget. We are not using titles for this demonstration, so we will not be needing the Title Tag, Title Color, and Title Typography controls.
We have, however, selected P (for Paragraph) for the Text Tag and set some Text Typography options to suit our design. We set the Size to 19 pixels and the Line-Height to 28, but we didn’t use any of the other text options. Of course, you can use whichever options suit your website’s design the best.
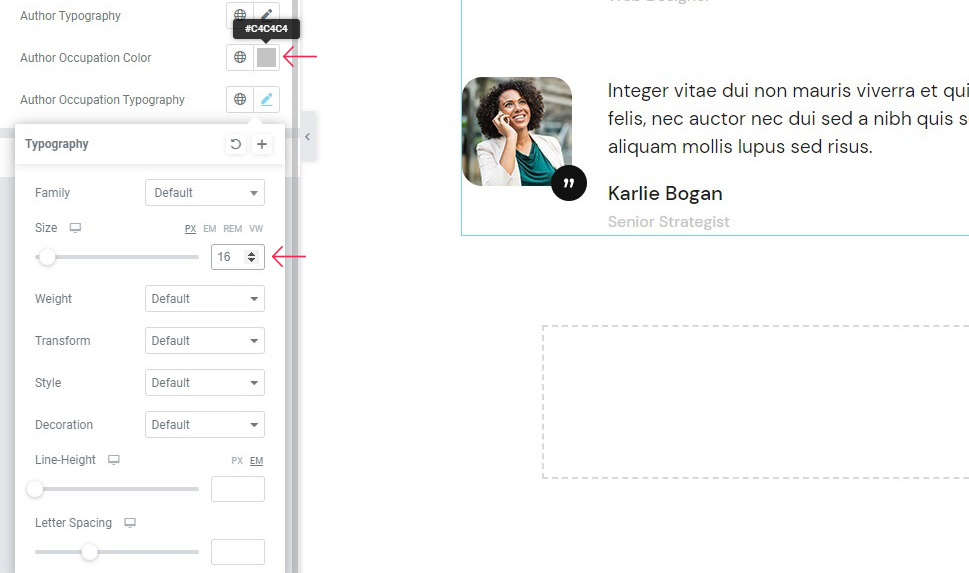
Scrolling further down, we have set the Author Occupation Color to #c4c4c4 – a light gray – and the typography Size to 16 pixels, while leaving all the other controls at their default values.
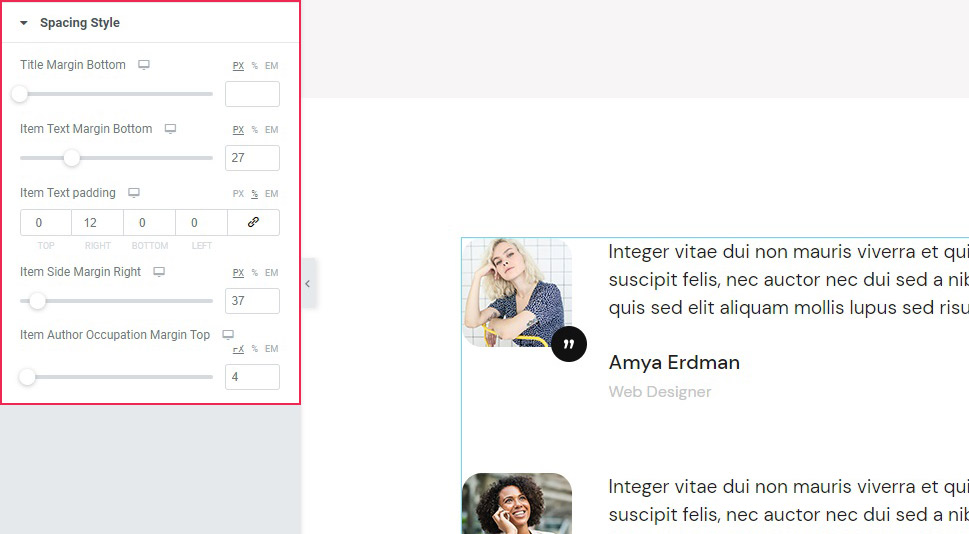
Finally, in the Spacing Style section, we didn’t use the Title Margin Bottom control, but we did set the Item Text Margin Bottom to 27 pixels, the Item Text Padding (right) to 12%, making sure to unlink the Item Text Padding values first, the Item Side Margin Right to 37 pixels, and the Item Author Occupation Margin Top to 4 pixels. This spaces out all our graphics and text in a simple and elegant way.
And there you have it, a crisp and elegant testimonials section, within minutes.
In Conclusion
As you have seen, setting up a testimonials section for your WordPress website using Qi Addons for Elementor is easy and takes mere minutes before a beautiful, elegant solution – just one of a myriad of options, too – graces your website. And the whole thing needn’t cost you a penny.
