How to Add Social Media Icons to Your WordPress Menu
As the old adage goes, a picture is worth a thousand words. We could argue it is actually far fewer, but there is no denying that web icons are powerful and intuitive, especially the social media ones. That cheerful blue bird in flight? The stylized square camera? The round-cornered red rectangle with the play symbol? You know what they stand for without even thinking. Social media logos are some of the most memorable pictures there are.
Adding social media icons to your WordPress menu is easy and takes no time at all. We will show you how. But before we get down to the brass tacks, let us discuss why you want your social media icons in your menu.
Lots of icons may clutter up your interface, especially on mobile devices. By putting them in a menu, you can easily avoid that. Users are used to looking for them in menus, and you can make a menu more elegant and intuitive by adding icons to it.
Similarly, you could create a special social menu with only your social media icons, and embed that menu into any widget-ready area to your visitors reach your social media content with a simple click and without having to navigate away from your website. Your mobile users will be especially appreciative.
Qode Themes: Top Picks
View Collection


If you are using our versatile Bridge theme, adding social icons to your header or footer menu is about as simple as it gets. We even have a dedicated widget for that!
All you really need to install social media icons in your header or footer is this handy video-tutorial:
But if you prefer your tutorials in text form, scroll right down. We’ll take you step by step through all you need to do. We will show you how to do it for your header menu, but the footer areas work just the same in principle.
The widget areas which are available to you will depend on the Bridge demo you are using. The header for the demo we are using does not contain any social icons.

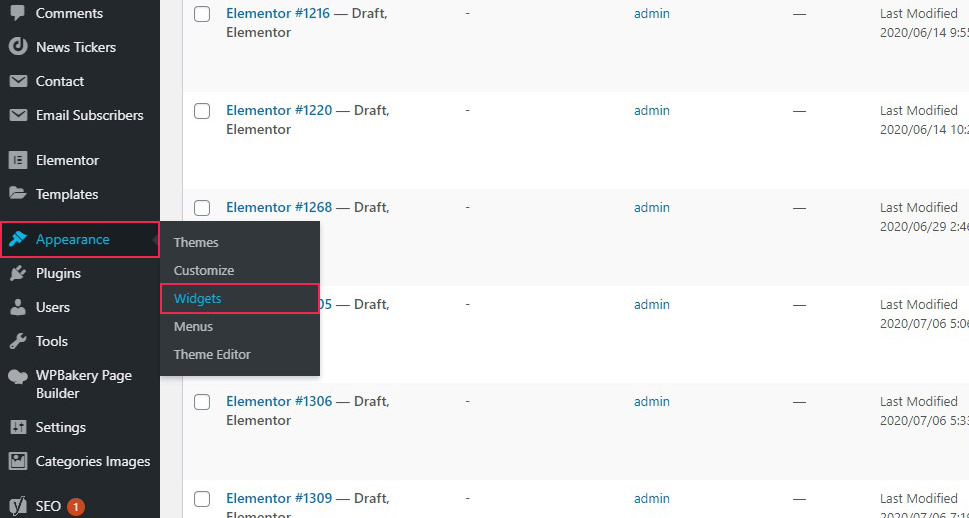
In order to fix that, you need to navigate to Appearance/Widgets through the right-hand side menu on your WordPress dashboard.
Next, you need to find the correct widget area. We want our social icons next to the menu, and, in this Bridge demo, the corresponding area is Header Bottom Right. To place a social icon in any widget area, you need to drag a Qode Social Icon widget to it.
Next, you need to configure this widget. We will select the Circle icon type (you can choose a different type of icon, depending on your website style and appearance), the Font Elegant icon pack (also supported is Font Awesome), and the Facebook icon from the Font Elegant Icon dropdown menu, and enter the Custom Size and Custom Shape Size (10 and 13 pixels for us, respectively, but you can select your own). For the purposes of this demonstration, we will supply the widget with our Facebook page‘s hyperlink (you will, of course, use yours) and change the Target to New Window. The Qode Social Icon widget also contains numerous design settings which we will not go into right now. Suffice it to say that the multitude of size, colour and border settings makes the widget very versatile and adaptable to any style.
You can populate the same area with some more social icons, if you like, as we have done here. The order in which you sort your social icons is the order (left to right) in which the icons will appear in the header. And now your header will contain avenues for your social media accounts.
But what if you want to attach social icons to items in your menu? Bridge can do that, too, and so could other themes which you may be using, but we will demonstrate how to do this with our theme.
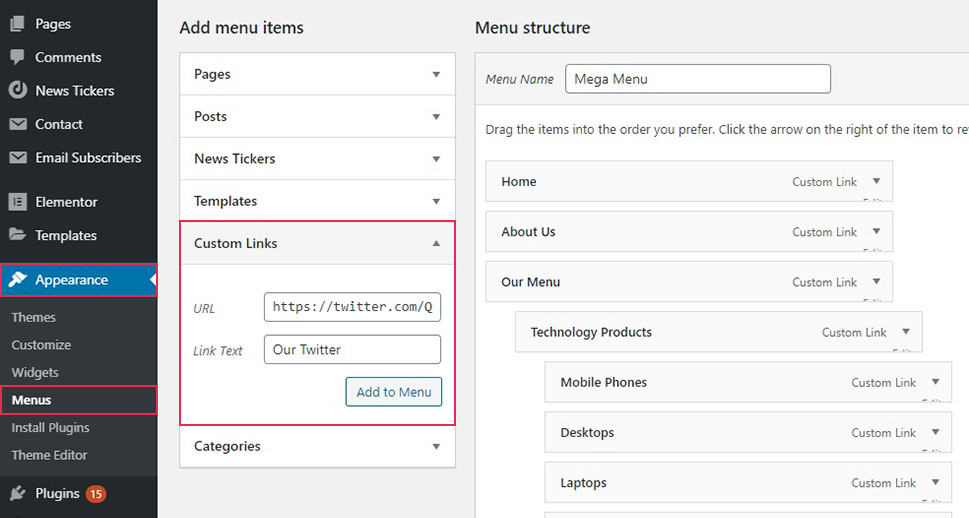
First, you need to navigate to Appearance/Menus and find your top navigation menu. In our case, its name is Mega Menu. Next, you need to add a link to a social media profile, our Twitter profile in our case. In order to do that, you need to add a Custom Link menu item to your menu. Find the Custom Links item in the Add menu items menu and paste your URL into the URL field. For our Twitter, we will simply type Our Twitter into the Link Text field, and click the Add to Menu button.
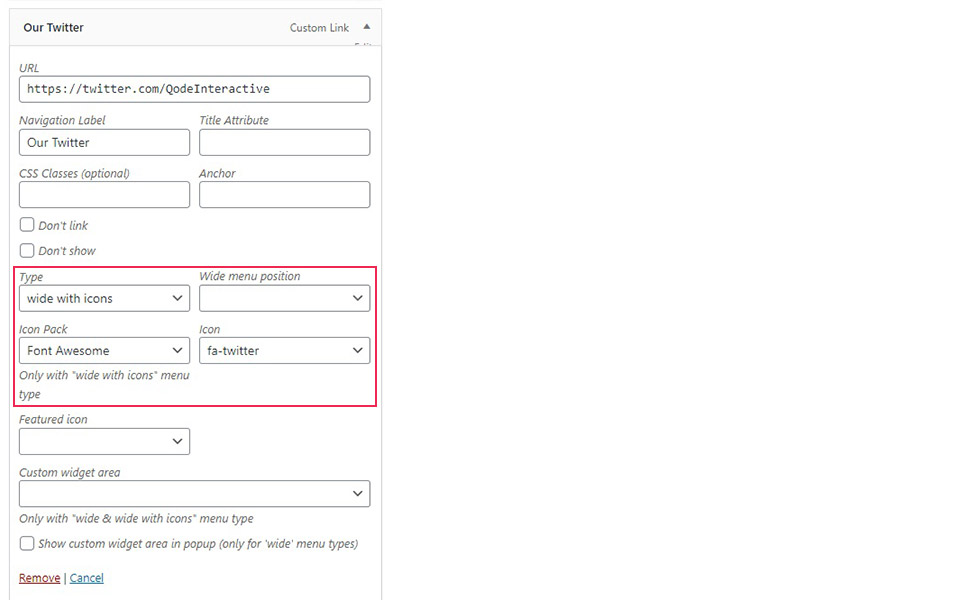
The element is now at the bottom of your Menu structure, meaning it will appear to the far right of the top navigation menu. We like it there, but you can, of course, organize your menus however you like. Expand the element to configure it. For Type, you need to select wide with icons, as this is the only menu item type which will display an icon in Bridge. We will also select the Font Awesome for our Icon Pack, and fa-twitter for our Icon. Of course, you can select the Font Elegant icon pack, and the icon you like for your social profile. Scrolling a little further down, click the Save Menu button.
And now your menu will contain a link with its social icon. You can add as many of these social links as you like, and also assign icons to other menu items, but that goes beyond the scope of this demonstration.
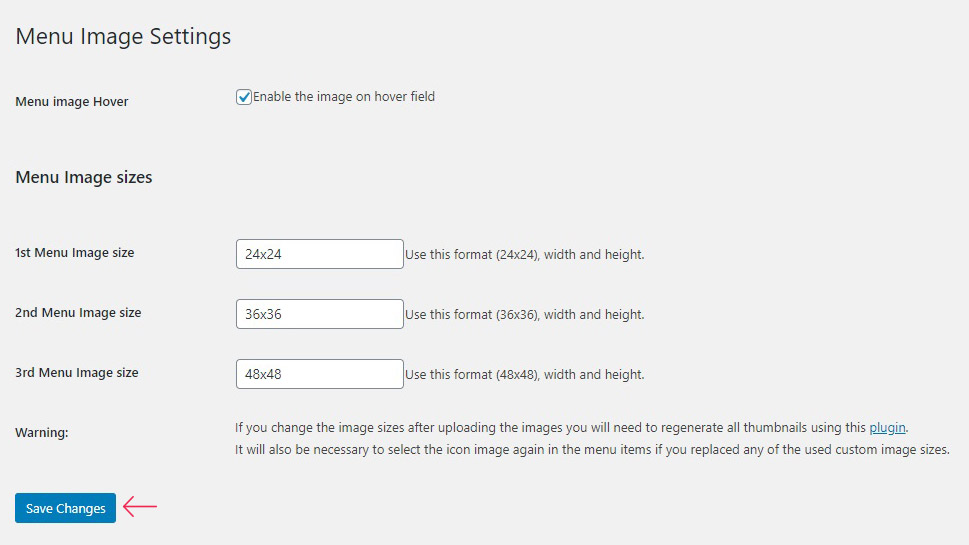
Our first suggestion is always to use a theme‘s in-built functionality for any effect you wish to achieve. If the theme you are using does not have the functionality you want, a plugin often offers a good workaround. The plugin we will be using is Menu Image. After having installed and activated the plugin, you will be first prompted to turn on notifications for this plugin (which we will Skip), and then taken to the Settings screen. Here you may change your icon sizes to suit your website‘s style. We will simply Save Changes and move on.
Next, navigate to Appearance/Menus and find your top navigation menu, the Mega Menu. Select Custom Links from the Add menu items menu on the left-hand side, and configure it. For the purposes of this demonstration, we will paste our Instagram profile‘s URL in the URL field, and caption it with Our Instagram in the Link Text field before clicking the Add to Menu button, while you may choose whichever social profile and icon you like.
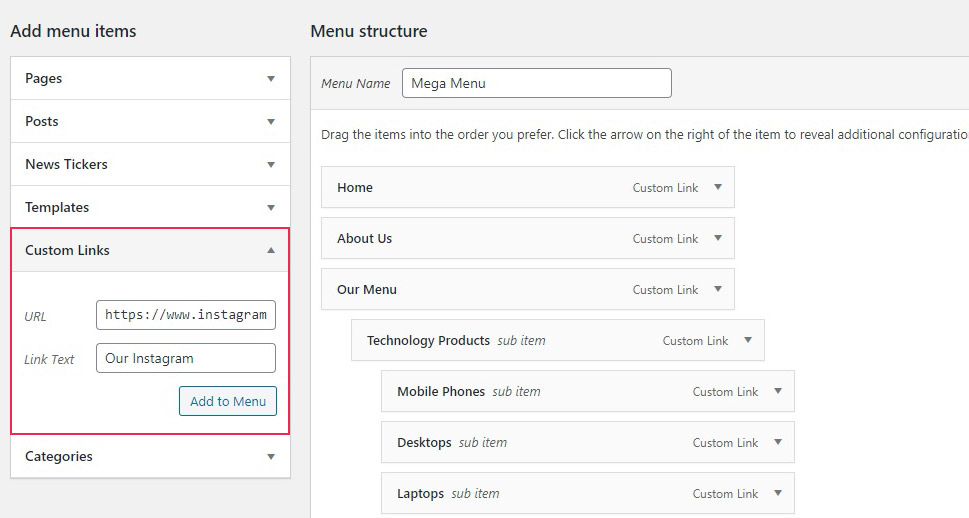
This will place a Custom Links element at the bottom of your Menu structure, meaning it will appear at the far right of your menu. You can arrange your menus however you like, but we will leave it there. You do need to expand the element to configure it. We will set the Title Position to After, meaning that the icon will appear to the left of the Navigation Label, and click Set image to select an image from your Media Library or upload one.
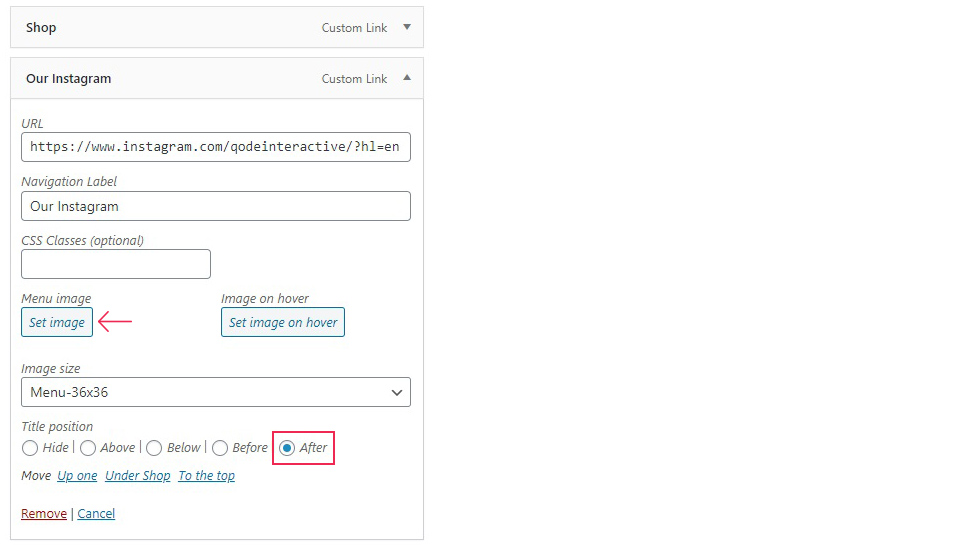
We have supplied our Media Library with a free Instagram icon. You can upload whichever other image you like for each menu item, but we will leave it at that, because we want our social icon to really stand out and be instantly recognizable. You can also select a different version for an on-hover icon, by clicking the Set image on hover icon. Finally, once you’re satisfied with your settings, you need to click the Save Menu button.
And your Instagram profile link will now be the star of our top navigation menu!

In Conclusion
As we have shown, adding icons to your menu items is easy and quick. Whether you use your theme‘s built in options or a plugin, you can make your social media presence known to your website visitors in just a few clicks of the mouse. In this day and age, can you afford not to?
