How to Add Icon Fonts in WordPress
Icon fonts are symbols, rather than letters, that allow you to add vector icons to your website without slowing it down, since you wouldn’t be using large graphics files, but font files. Whether letters or icons, fonts are themselves graphics, and have more uses than just text. In this article, we will discuss how to add icon fonts to your WordPress website. But first, let us discuss the situations in which you might want to use them.
When Can I Use My Icon Fonts?
The obvious advantage of icon fonts over conventional image-based icons is speed: a font symbol, being a vector graphic, loads the same regardless of the size each icon takes up on your screen. Non-vector graphics lose quality when scaled up and become fuzzy. They are also very difficult to manipulate, and may require you to use image editors to create multiple versions of each graphic and then fiddle with your website settings until you have made sure that each device your visitor may be using is shown the optimal version of each graphic.
Conversely, fonts (including icon fonts) are easily scalable without loss in quality, they are literally made to be styled with colours and shadows, if needed, and are generally lightweight, especially in comparison to other graphics.
An icon font typically contains commonly used symbols for various online functionalities, such as folders, chat bubbles, arrows, folders, pins, and similar. They are very often found in navigation menus, but you can use them anywhere you would otherwise use an image to indicate a common function. It will also possibly save you some time and money on icon design – after all, all you need is a comprehensive font.
There are plenty of icon fonts to choose from, but our preferred ones are Font Awesome and Font Elegant. For the purposes of this demonstration, we will mostly be using Font Awesome. Here is what we’ll be covering:
Other than the methods described above, you can add your icon fonts as custom fonts, just as you would any other font. We will not be discussing this method here, because we have already covered adding custom fonts to WordPress in-depth in another article.
Qode Themes: Top Picks
View Collection


If you are a beginner WordPress user and don’t feel comfortable adding new fonts to your theme by modifying the theme files – completely understandably – then a plugin is probably a good option for you. The plugin we will be using is Better Font Awesome. You need to install and activate it from the plugins section of your WordPress dashboard.
And that’s it, your website will now have Font Awesome support.
But in order to use the icons themselves, you need something else: a shortcode. A shortcode is a piece of code with a simple function. In this case, it is to display an icon. To use Font Awesome icons, first you need to know what they are called and what they look like. You can do that easily using this cheat sheet provided by the developers of the font.
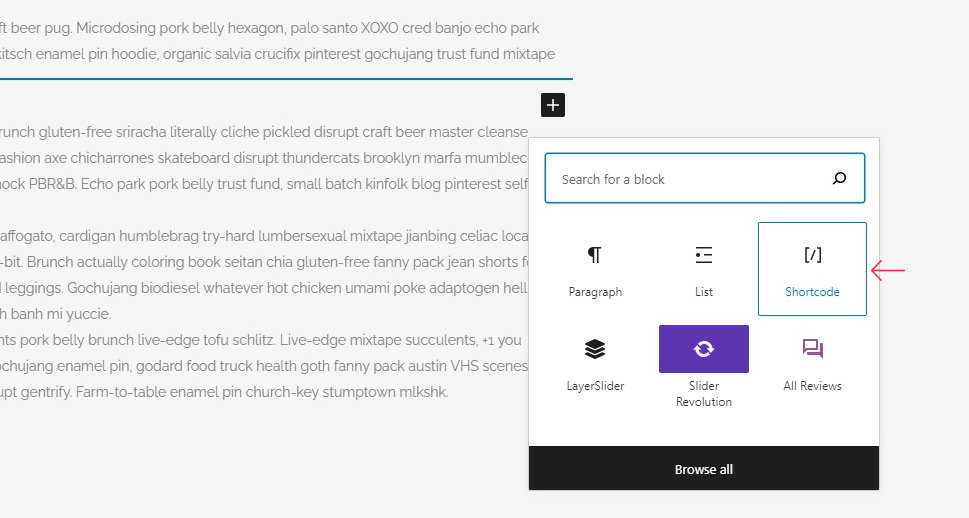
Next, to add your font shortcodes to your website, simply add a shortcode block if using the Gutenberg block editor, a shortcode element if using Elementor, or just type in the shortcode where you need it if using the Classic editor (making sure you’ve switched to the Text editing mode). We will show you how to do it with Gutenberg. We will add the shortcode in a post, but it works just the same for any area of your website which can accept a shortcode.
Clicking on the plus sign, you get the block menu. Search for a shortcode block, and paste in the shortcode you like. You can find an icon’s name on the cheat sheet, and add it to the shortcode: [icon name=”iconname”]
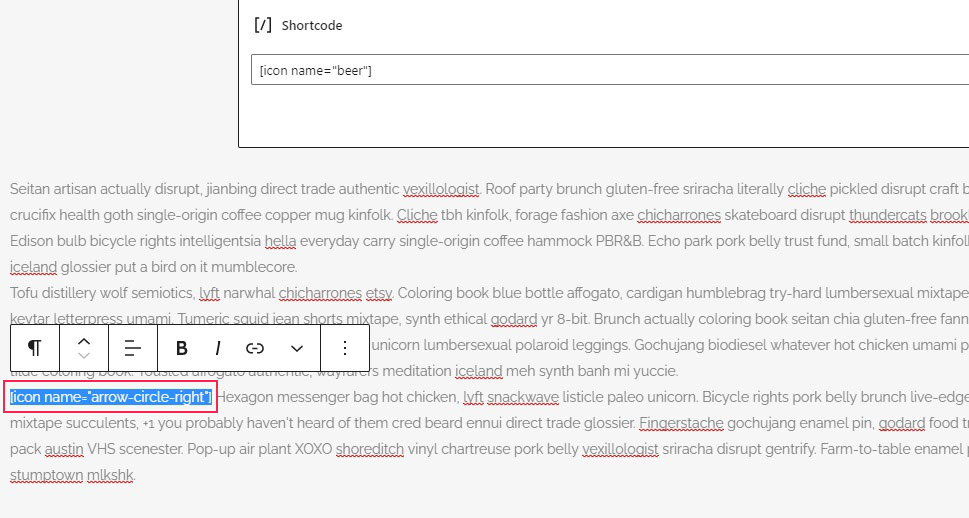
Now, say the randomly generated text we are using is describing a beverage. As a vignette in the text, we will use the [icon name=”beer”] shortcode between two blocks of text.
You can also use these shortcodes within blocks of text, sort of like bullets. For instance, we will preface the final paragraph with another icon, using the shortcode [icon name=”arrow-circle-right”].
And your icons will be visible as part of the text on your page.
Another feature of this plugin is that it automatically updates: if there is a new version of Font Awesome, you will not be left behind! For more on how to update plugins, you can check our handy step-by-step tutorial.
A popular visual editor, Elementor allows you to easily use icon fonts. In fact, Elementor comes with Font Awesome already integrated. To add an icon using Elementor, start editing a post in Elementor, and find the Icon element in the left-hand side menu and drag it to where you want it.
Now we have the default, the placeholder icon. To select another icon, simply click on the icon picture on the left-hand side while your icon element is selected. You can see that it has a blue rim around it.
Select the icon which you like, and click insert to insert it instead of the placeholder. We have selected a bell icon from the Font Awesome – Regular icon set.
In the same tab, you can add a link or change the icon‘s alignment, as we have.
You can change its colour in the Style tab while your icon is selected.
And now you know how to use icons in Elementor. There are plenty of other options for style and functionality of your icons in Elementor, but now you know the basics.
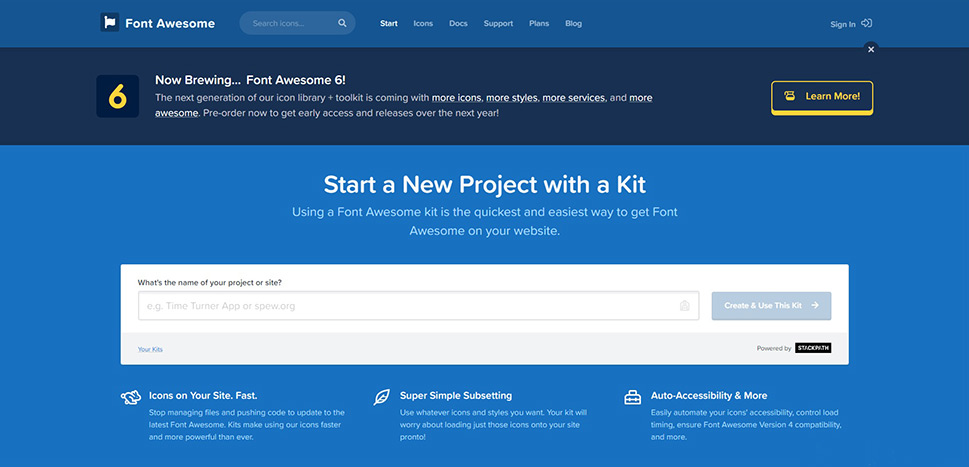
We will show you the easiest method to add Font Awesome icons, a comprehensive and constantly updated icon set, to your WordPress website using code. First, you need to head to the Font Awesome website, and click on the Start for Free button.

Next, you will need to supply Font Awesome with your e-mail address and click Send Kit Code.
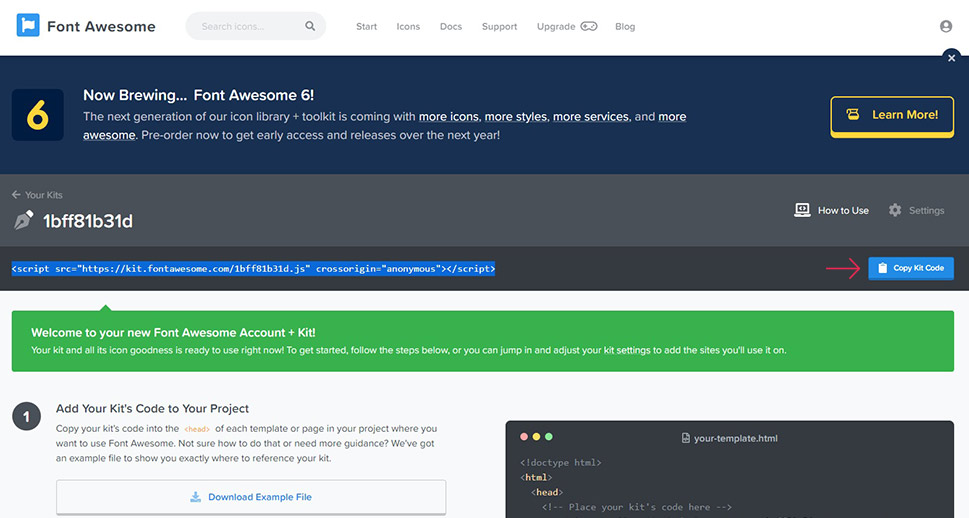
Next, you need to check your e-mail address and configure your account. Simply follow the screen prompts until you reach the screen holding your code. Click Copy Kit Code to copy it.
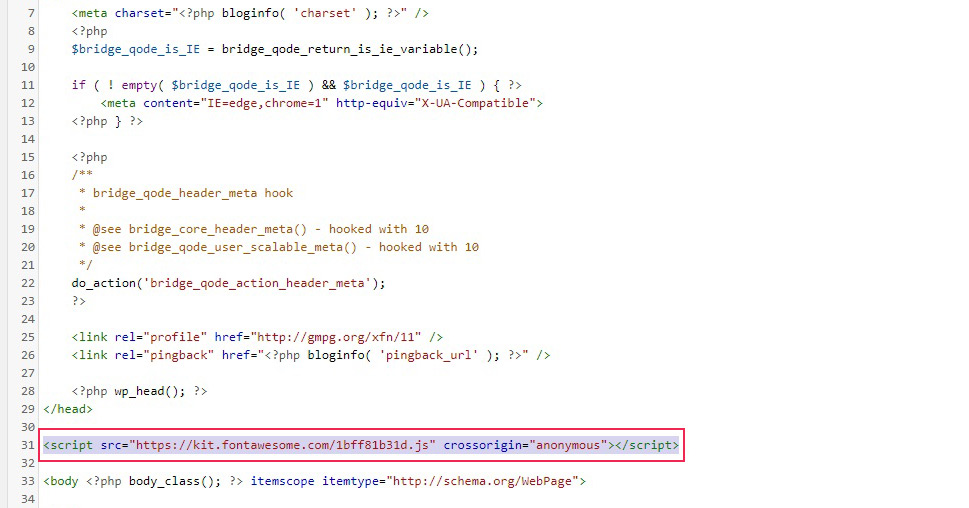
Finally, you need to copy this code to your theme‘s header.php file. You can find it by navigating to Appearance/Theme Editor from your WordPress dashboard. It will be in the menu on the far right.
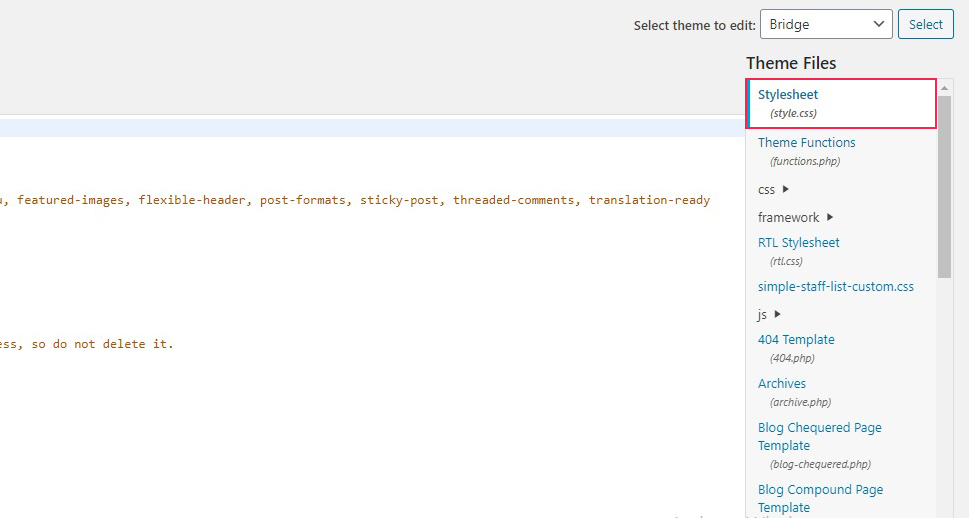
Simply paste the kit code you copied right below the </head> tag, and you are good to go.
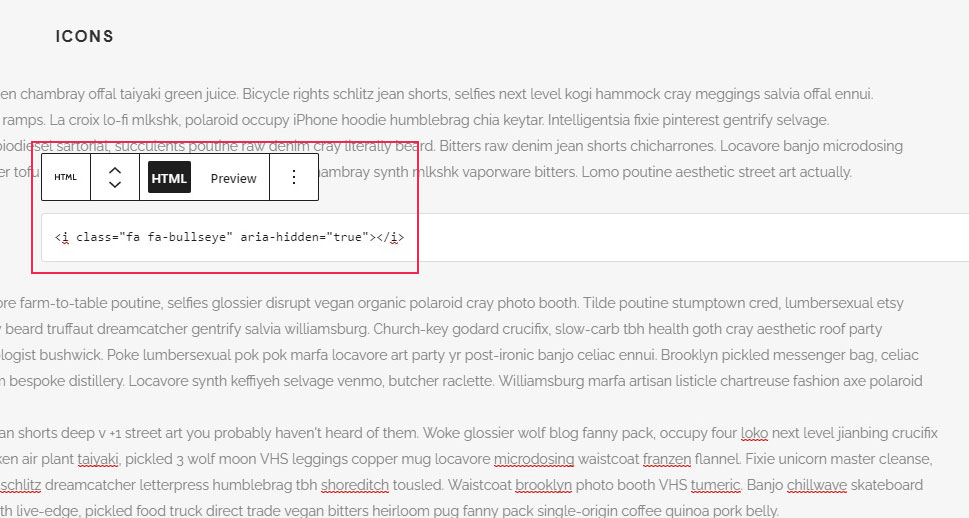
Finally, you can also add Font Awesome icons to your WordPress website individually, directly from the developer’s library. You don’t need a plugin or anything else to do that, you can simply use an icon you like. To do that, simply head to the Font Awesome icons gallery and find an icon you like.
Click on it, and you will find the code you need to embed it.
To add your icon, you need to add it using code. For the Classic editor, it works just by pasting the code where you want it, using the Text mode. In Gutenberg, we use the Custom HTML block. In Elementor, you‘ll need the Custom HTML element, but the principle is the same. Simply paste the code you got from the icon library.
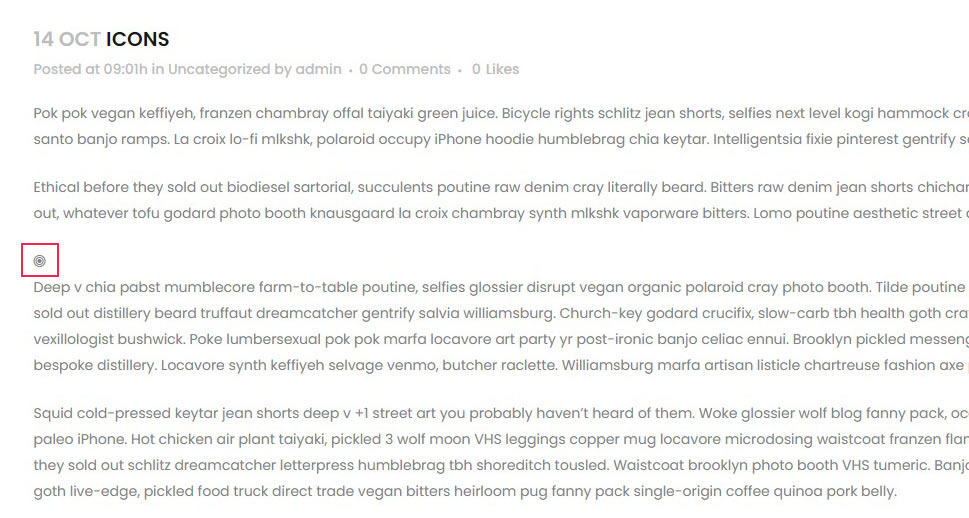
And your icon will be just where you put it!
In Conclusion
As we have shown, it is very easy to install an icon font pack in WordPress. And not only that – it contributes favourably to responsiveness of your website and to loading speeds, making them a great choice if you are catering to users accessing your services on mobiles or with slower connection, but also better overall in terms of user experience. Lightweight, easy to style, and quick to load: what’s not to like about that?
