A Guide to Form Tracking Using Google Tag Manager
Forms might not be the cure-all for the aches and pains you can experience as a website administrator, but you sure can throw them at a whole spectrum of issues. Need to improve your products or services? Deploy a client feedback form and let the people tell you what they think. Looking to generate more leads? Don’t forget to include forms in your lead generation strategy. Want to let people contact you via your WordPress website, but are not willing to commit enough to use live chat? Use one of the many form plugins to add a contact form to your website. Forms are incredibly useful, even if you don’t use techniques such as form track to squeeze out every ounce of value from them.
And, by all means, you should use those techniques to get the most out of your forms. In particular, if you decide to track forms on your website, you can get a wealth of data that could help you, for example, create better forms in the future. Thanks to the Google Tag Manager, you can set up form tracking in no time, or as close to it as possible.
In this article, we’ll discuss form tracking with Google Tag Manager. The topics we’ll cover include:
Best Themes for Marketing
View Collection


At the very basic level, having the ability to track the forms on your website is what enables you to know how well your form is working. The very basic form tracking, the type that tracks submissions, can be used to figure out the form’s conversion rate – how many of the people who land on the page containing the form go through with filling it out and submitting it.
Of course, if you have different form pages for different sources of traffic, you can see which source brings you the audience most willing to fill out the form. Submissions can also be used when calculating lead metrics, such as cost-per-lead, for example. The point is that, even at the very basic tracking level where you only track how many people have submitted the form, you’re getting a metric that’s very valuable for calculating all kinds of performance indicators.
That’s just the basic type of form tracking. Things get even more exciting and useful when you decide to track specific fields. If you phrase the questions correctly, you can gather valuable information about the people who use your forms, such as their business size or role in the company. You can also use form field tracking to figure out where people give up on filling out your forms, helping you make them even more effective.
Say what you will about Google, but there’s no denying that the company makes some incredibly useful tools. Google Tag Manager is one of them. It allows you to easily use third-party software on your website without actually having to install it. You connect it to your website via tags – snippets of code – that you manage through the appropriately named Tag Manager.
Tag Manager isn’t the only thing you can use to track forms. In some cases, the best way to set up form submission tracking would have you skip using tags altogether. However, Tag Manager does give you access to a couple of methods that have proven to be fairly popular and relatively easy to set up.
Before we start explaining how to track forms with the Google Tag Manager, you might want to check out our article on setting up Google Tag Manager in WordPress. It will show you how to create a container and add it to your website the proper way. With that done, you can start working on setting up form tracking.
There are a couple of scenarios you might face when setting up form tracking on your website. The best one is that your form generates a submit event and that it generates it only after successful submission. That’s when you can rely on Google Tag Manager’s pre-built form submission trigger to take care of everything. If you’re not sure which technology is used to transmit submission data on your form, trying this one first is always a safe bet.
Enable Form Variables
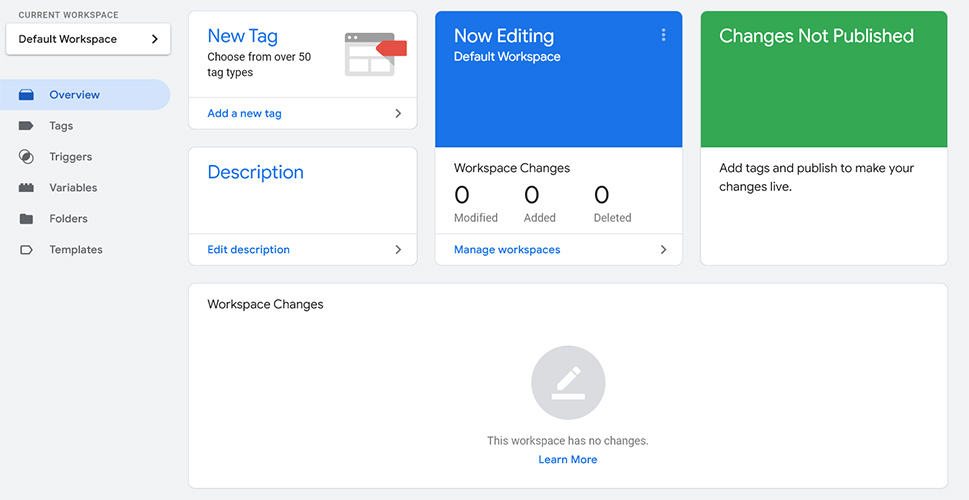
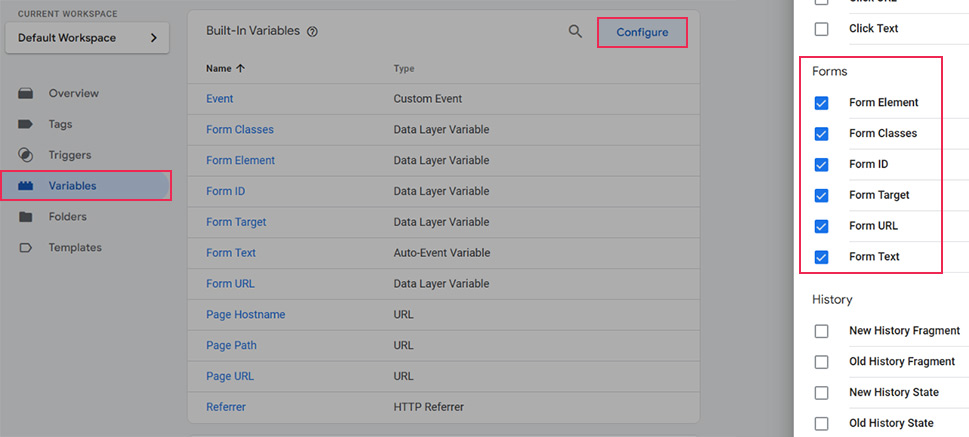
The first step is to enable form variables. Head over to the Tag Manager, choose Variables and then click on the Configure button. In the list of Built-in Variables that appear, find the ones listed under Forms and enable all of them.
With that done, you can go ahead and navigate up to Triggers, and choose to create a new one.
Set Up the Trigger
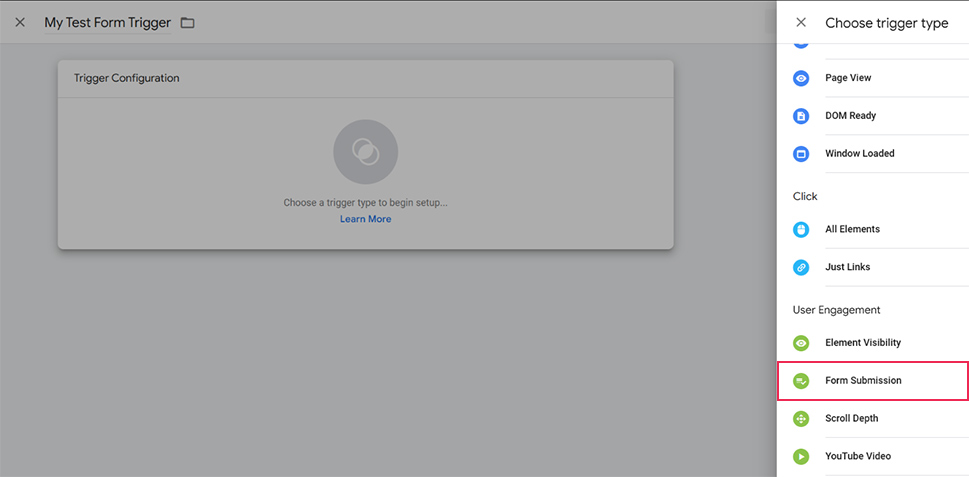
When creating a new trigger, it’s a good idea to give it a descriptive name. The first step in the trigger configuration is choosing the trigger type. The one we need is called Form Submission, and it’s located under User Engagement.
Trigger configuration is your next step. The first thing you need to decide is whether to enable Wait for Tags and Check Validation. Wait for Tags gives the slower tags enough time to fire before the submission is done, while Check Validations improves the accuracy of the count by excluding invalid submissions from it.
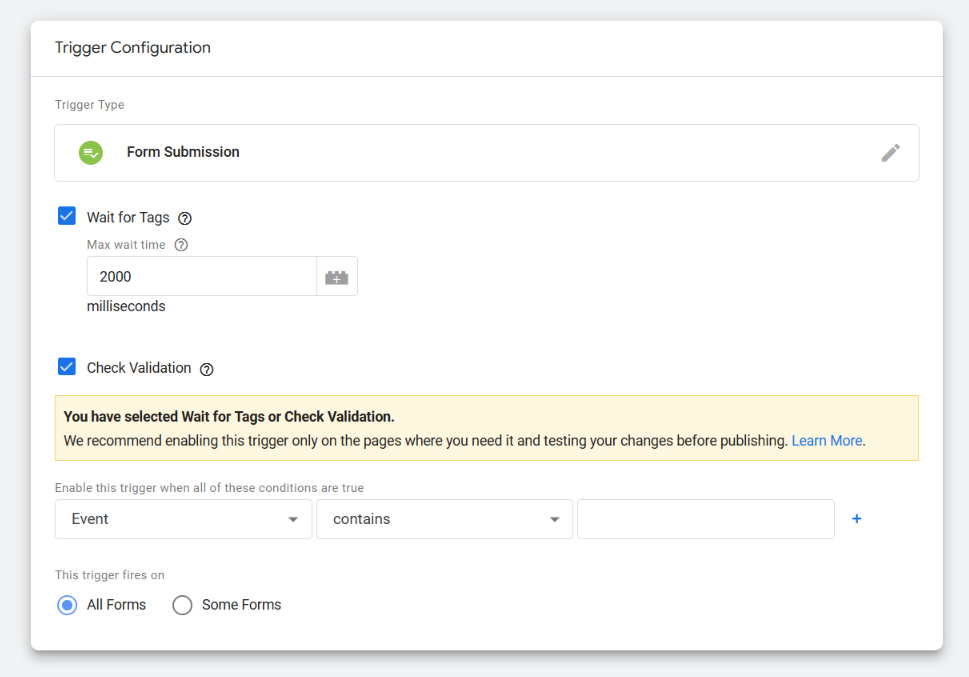
Checking the box next to any of the two options will give you access to another one, which lets you set the condition when the trigger is enabled. You’ll also get to choose whether the trigger fires on all forms, and if not, on which forms it fires.
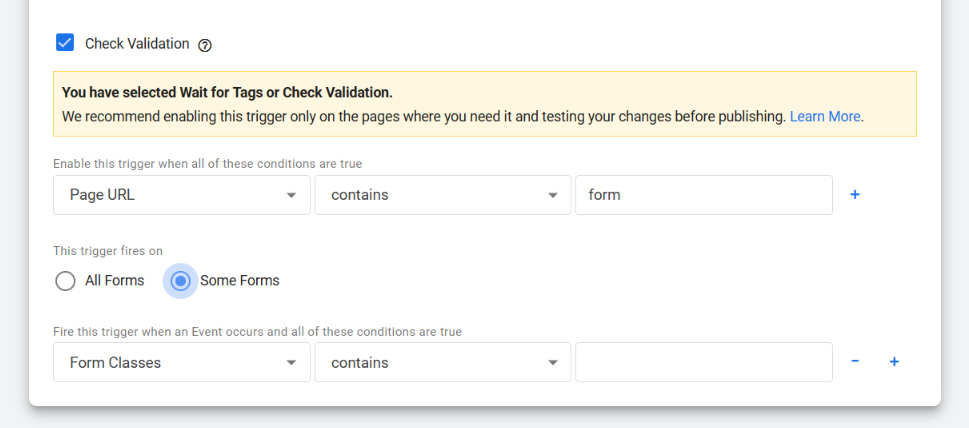
Using these options, you can easily set the trigger to only work on a single form even if you have more of them. The variables you can use to set the conditions are the ones you’ve enabled earlier.
When you create the trigger, and before you move on to creating the tag, you should first check whether the trigger would work for your form at all. In the top right-hand-side corner you’ll see the Preview button. Press it, and you’ll open up the tag assistant.
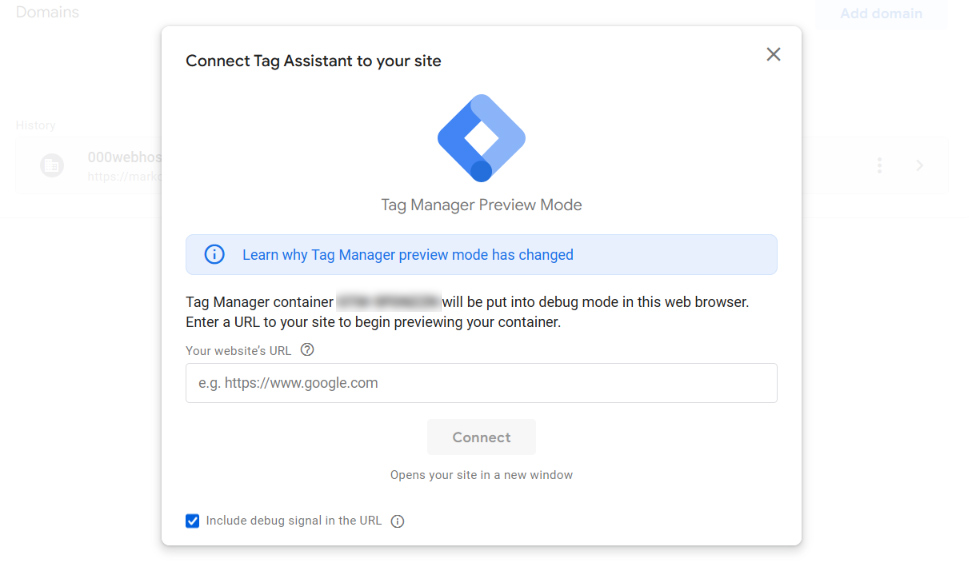
The assistant will connect to your website and open it in debug mode, allowing you to try out the triggering event – in this case, it’s the form submission. If all goes well, you can go ahead and create a tag. If not, you’ll need to use an alternative method of tracking forms.
Create a Tag
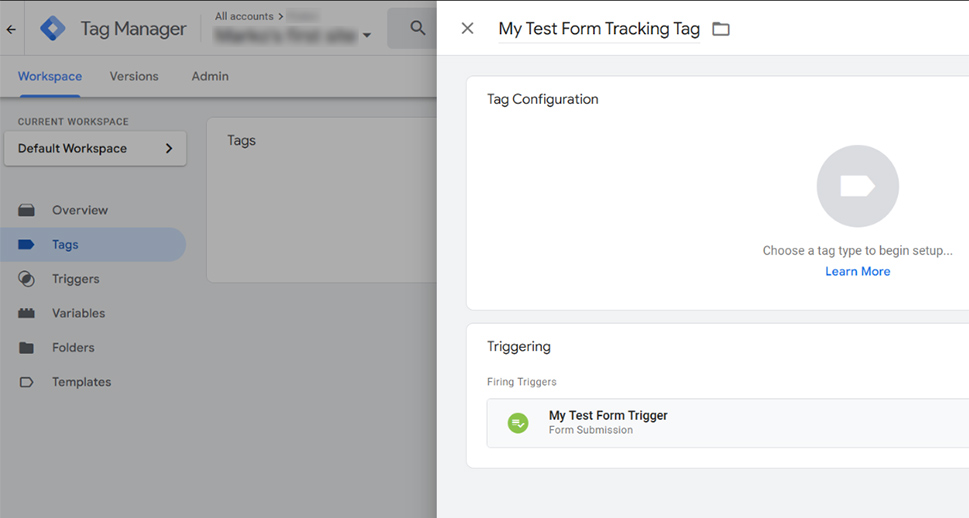
When the trigger is working as intended, you can move on to creating a tag. Navigate to Tags > New. Name the tag, add your trigger straight away, and then move on to choosing the type of tag you want to use.
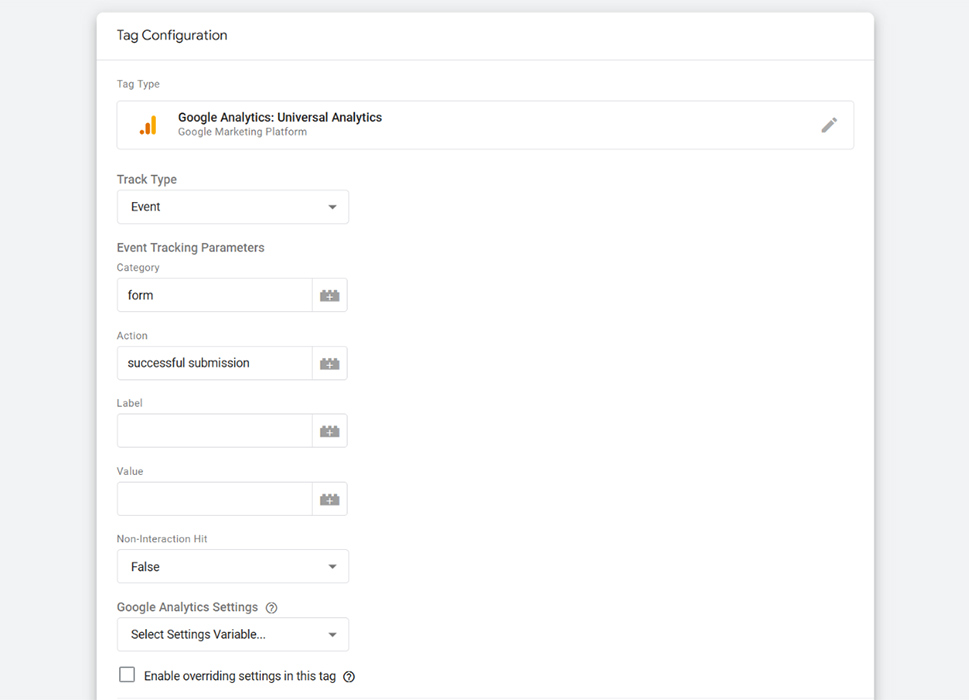
Choosing Universal Analytics, you’ll have to choose the track type you want for the tag. Category, Action, Label, and Value are handy descriptors – you can fill those fields in any way that makes sense to you. You can use existing Analytics Settings or create new ones – it’s up to you.
With that, you’ve done most of the work. Your final step would be to go to Google Analytics and create a new Goal using the same information you entered when you created the tag.
If everything goes well, the standard Form Tracking method will be all you need to start tracking your forms using Google Tag Manager. However, things don’t always go well. This method doesn’t have to work for you, and if it doesn’t, you better be ready to employ another one in its place.
There are quite a few ways you can use Google Tag Manager to track forms, and some of them are technically complicated. There are also ways to do it without having to rely on the Tag Manager at all. We’ll briefly mention one of each.
Tracking Using the Element Visibility Trigger
When the submit button firing doesn’t cut it, and your form displays a message when submitted successfully, you can use that message as a trigger for a tag. The setup is similar to that of the regular form submit trigger – both belong to the engagement type. You’ll need to find the element’s ID or CSS selector though, but that shouldn’t be too difficult if you know how to inspect the page.
You’ll have options to fill out, too, including when the trigger fires and how much of the element needs to be visible. When done, your analytics tool of choice will count those congrats messages as successful submissions.
Form Tracking Using a Thank-You Page
In case you have the option to funnel the people submitting your form to a separate thank-you page, you can do away with the Tag Manager altogether, and simply count the visits to that page. You’ll have to make sure that people have a hard time accessing it any other way than through form submission, though.
Let’s Wrap It Up!
Forms are incredible tools that can help your website achieve many different goals for you. To make the most out of them, however, you need to ensure you have a way to gauge their effectiveness. That’s exactly what form tracking is for – however, you decide to do it, it can yield you lots of useful information.
