How to Disable Google AMP in WordPress (And Why)

Usually, jumping on a bandwagon that was started by Google is one of the most reasonable choices you can make. Google had its fair share of mistakes — Google Plus is one of many that comes to mind — but as a website owner or administrator you should usually do well for your website if you followed Google’s lead. Google is, after all, the biggest search engine in the world, a company that knows what it’s doing, and above all — a company in a position to dictate trends.
Some bandwagons, however, might not take you where you needed to be. Google’s Accelerated Mobile Pages (AMP) project is a perfect example of a trend that seemed appealing to all but only benefited some. If you’re looking for a way to disable Google AMP on your WordPress website, we’ll show you the right way to do it.
In this article, you’ll learn:
The mobile web has always had a steep hill to climb when it comes to delivering good user experience. The internet speeds are slower, the screens are smaller, the navigation is more difficult, and it joined the game at the point when the whole of the internet was pretty much set up for the big-screened, desktop-processor-powered, fixed-line broadband-enabled experience.
But here’s the kicker: people still wanted to browse the web on their mobile devices. In their infinite wisdom, Google decided to take steps to improve the mobile browsing experience by helping mobile pages load quicker with AMP — a project that created simplified, mobile-friendly versions of web pages and occasionally stored them on Google’s servers for quick fetching.
While this might work well for some kinds of publishers, many can see no benefit from using it. There are no lowered bounce rates, no page loading boosts, or any other change for the better. But the real problem is that for some types of websites, Google AMP has actually done the opposite of what it promised.
Because it serves a stripped-down, simplified version of a page, Google AMP makes navigating your website more difficult. This could lead to a decrease in page views, conversion rates, and lower engagement rates. So AMP really only works on pages that have the most basic elements. Add a pop-up or a form, and you might be better served by employing mobile-friendly web design and doing other things to provide a better mobile experience. Choosing a responsive premium multipurpose WordPress theme and optimizing images would serve you better than using AMP.

Since you’ve probably enabled Google AMP on your website using either the official plugin or its better-graded competitor, at one point you’ll need to uninstall the plugin to disable AMP on your website. You shouldn’t rush with it, however — disabling Google AMP requires a more methodical approach.
Google advises that you start the process by removing the rel=”amphtml” link from your non-AMP page’s HTML. Why should you do it? Because this little piece of code tells Googlebot that the page it’s visiting has an AMP version of it. That’s not something you want going on, so you need a way to stop it.
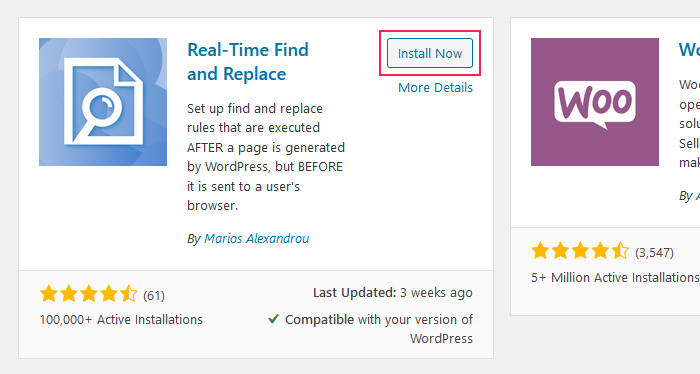
Unless you’re a developer, you’ll need a good plugin to help you remove all of those links while Google re-indexes your website. That’s exactly what the Real-Time Find and Replace can help you with. So go ahead and install it, and activate it.
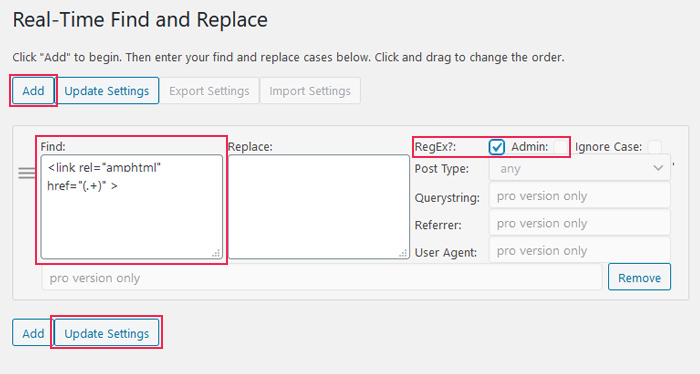
Once you’ve installed and activated it, you find the plugin settings under Tools > Real-Time Find and Replace. After clicking the “Add” button, you’ll see two fields followed by some options. Enter this code into the “Find” field:
<link rel="amphtml" href="(.+)" >
Leave the “Replace” field empty, and make sure you check the box next to RegEx. When done, click on the “Update Settings” button.
With that, you’ve stopped telling Googlebot about the AMP versions of your pages. It would also be a good idea to tell Google to stop crawling your AMP pages. If you’re using the AMP for WP plugin, it’s as simple as adding <meta name=”robots” content=”noindex,follow”/> as an additional tag for the head section under SEO. Otherwise, you’ll have to learn a bit about search engine indexing and add the tags manually.


Google might take some time to notice what you did there, so while you’re waiting for the AMP pages to phase away from search results, you might as well set up a couple of redirects to ensure the viewers reach for non-AMP content. There are two ways you can set up 301 redirects in WordPress, and both might come in handy.
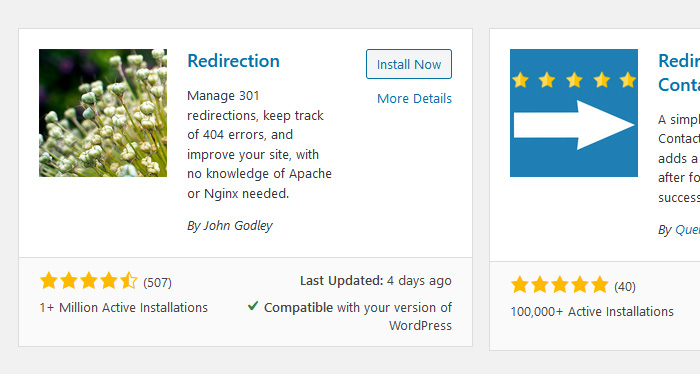
First, let’s see how you should set everything up using the Redirection plugin. Find it, install it, and activate it.
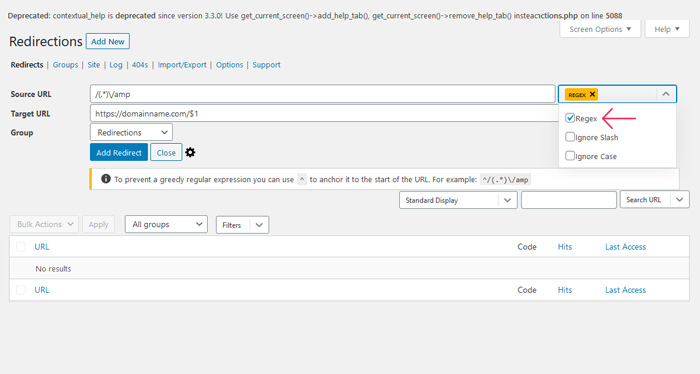
After setting up the plugin, you can find it under Tools > Redirection. Click on the “Add New” button, and enter the following code into the Source URL field:
/(.*)\/amp
Make sure you check the “Regex” box in the dropdown menu to the right of the Source URL field. In the Target URL field, enter:
https://domainname.com/$1
You should replace the “domainname” part with the actual name of your domain. Press the Add Redirect button when done.
That should do it, at least if you’re done setting up the redirects using the plugin. If you’re adventurous and you understand what FTP is and how to use it, you can try adding the following code at the end of your .htaccess file:
# Redirect from AMP to non-AMP path
RewriteEngine On
RewriteCond %{REQUEST_URI} (.+)/amp(.*)$
RewriteRule ^ %1/ [R=301,L]
And when all of that is done, you can go ahead and disable the plugin. If you still notice that Google is serving your AMP pages, your next step would be to reach out to the plugin developers or your host.
Let’s Wrap It Up!
Installing Google AMP is an easy mistake to make if you’re not sure whether you really need it or not. But while it would certainly be best to avoid making such a mistake, it’s important to know that you can, with a little work, rectify it. You should manage to disable Google AMP with nothing more than a couple of plugins and some code, even though it’s not as easy as pie.
